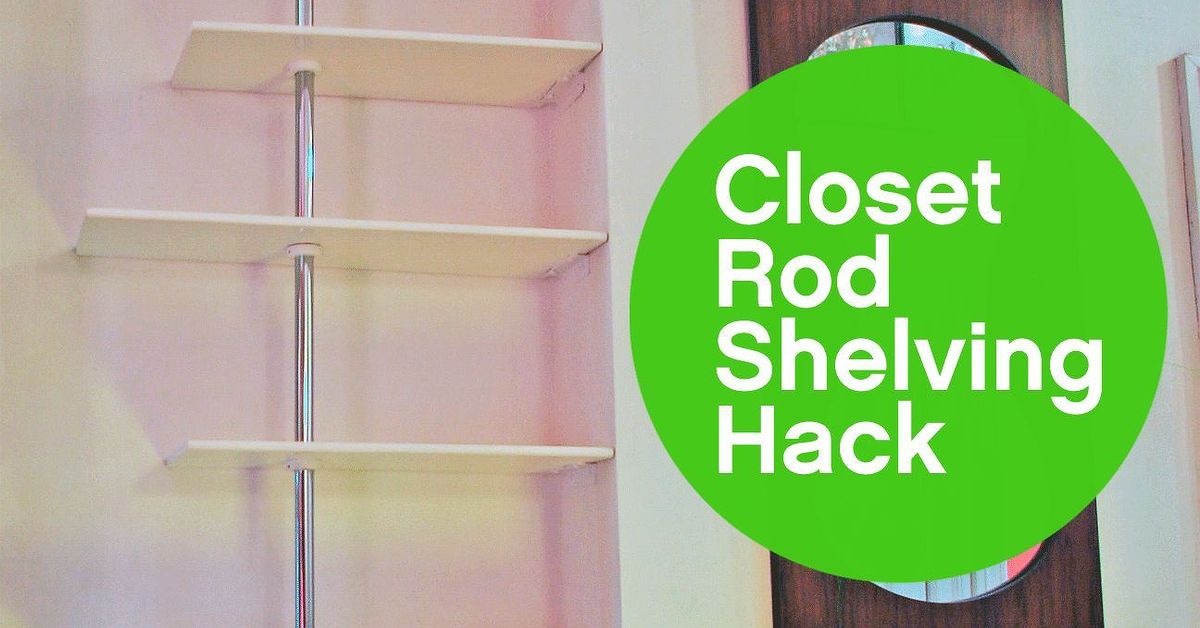
A closet rod may look like the quiet, hardworking sidekick of home storage, but give it a little creative promotion and suddenly it becomes the star of a custom shelving unit. Yes, the same rod that normally holds shirts, coats, and that one mystery hanger from 2014 can help you build a flexible, good-looking, made-to-fit storage system for closets, laundry rooms, pantries, craft corners, entryways, and even small home offices.
The beauty of using closet rods to create a custom fit shelving unit is simple: rods are affordable, easy to cut or adjust, widely available, and designed to support weight when installed correctly. Pair them with shelves, brackets, cleats, wall standards, or rod sockets, and you can create a storage setup that feels custom without requiring a custom-cabinet budget. In other words, your closet gets a boutique makeover while your wallet stays calm.
This guide walks through the planning, materials, measurements, installation ideas, safety considerations, and real-life experience behind building a custom shelving unit with closet rods. Whether you are organizing folded clothes, baskets, shoes, craft supplies, cleaning products, or seasonal chaos, this project can help you squeeze more function out of awkward space.
Why Closet Rods Work So Well for Custom Shelving
Closet rods are built for structure. They are made to span a space, carry weight, and fit into brackets or sockets. That makes them surprisingly useful beyond basic hanging storage. When used thoughtfully, closet rods can become support rails, dividers, lower hanging bars, shelf stabilizers, or part of a modular framework.
Traditional shelving often relies on fixed boards and brackets. That works beautifully, but not every space is a perfect rectangle. Closets have odd corners, baseboards, sloped ceilings, shallow depths, and walls that appear straight only until you bring out a tape measure. Closet rods give you flexibility. Adjustable rods can expand or shrink to fit a specific width, while wooden rods can be cut precisely for tight spaces.
The Main Benefits
Using closet rods in a shelving project gives you several practical advantages. First, they are easy to source from hardware stores and home improvement centers. Second, they work with a wide range of closet rod supports, shelf-and-rod brackets, pole sockets, and adjustable systems. Third, they allow you to create mixed storage: shelves above, hanging space below, and open zones for bins or baskets.
Most importantly, closet rods help you design around what you actually own. A custom fit shelving unit should not force your home to obey a showroom layout. It should solve your real-life mess. If you need a tall section for boots, a narrow shelf for folded sweaters, and a lower rod for children’s jackets, closet rods make that kind of layout much easier to build.
Best Places to Use a Closet Rod Shelving Unit
This project is most commonly used inside closets, but it is not limited to bedroom storage. A closet rod shelving unit can work anywhere you need vertical organization and adjustable support.
Bedroom Closets
In a bedroom closet, closet rods can help create zones for short-hanging clothes, long garments, folded items, shoes, and accessories. A shelf above a rod is ideal for sweaters, bags, storage boxes, or off-season clothing. A second lower rod can double hanging space for shirts, skirts, or children’s clothes.
Laundry Rooms
In a laundry area, a closet rod can support hang-dry clothing while shelves above hold detergent, dryer balls, stain removers, and folded towels. This setup is especially useful in narrow laundry closets where every inch needs a job description.
Pantries and Utility Closets
Closet rods can also support custom storage in utility closets. Use rods as rails for hanging spray bottles, small baskets, or cleaning tools. Add shelves above for paper products, backup supplies, and labeled bins. Just remember: pantry and utility storage can get heavy, so strong brackets and proper wall anchoring are non-negotiable.
Craft Rooms and Home Offices
For craft supplies, rods can hold ribbon spools, wrapping paper rolls, hanging cups, or small tool baskets. Combined with shelves, they create a compact workstation that keeps supplies visible instead of buried in a drawer where glue sticks go to retire.
Materials You Will Need
The exact shopping list depends on your space and design, but most closet rod shelving units use a combination of rods, shelves, supports, fasteners, and finishing pieces.
Basic Materials
- Closet rods, either wood, steel, or adjustable metal
- Shelf boards, plywood, melamine, wire shelving, or laminated boards
- Closet rod sockets or flanges
- Shelf-and-rod brackets or separate shelf brackets
- Wall cleats, usually made from 1×2, 1×3, or 1×4 lumber
- Stud screws, wall anchors, or toggle bolts where appropriate
- Wood screws for fastening shelves to brackets
- End caps, paint, stain, or edge banding for a finished look
Helpful Tools
- Tape measure
- Stud finder
- Level
- Pencil
- Drill and driver bits
- Saw or pipe cutter, depending on rod material
- Sandpaper
- Safety glasses
A level deserves special respect here. Shelves that are slightly tilted will not just look odd; they will slowly encourage baskets, shoes, and folded jeans to migrate toward the floor. Gravity is patient. Do not negotiate with it.
How to Plan Your Custom Fit Shelving Unit
Before you cut anything, measure everything. The best custom shelving projects begin with a realistic inventory and a careful layout. Start by removing items from the closet or storage area. Sort them into groups: hanging clothes, folded clothes, shoes, bins, cleaning supplies, accessories, seasonal items, or anything else you plan to store.
Measure the Space
Measure the width, height, and depth of the area. Take measurements at the top, middle, and bottom because walls are not always perfectly square. If the numbers are slightly different, use the smallest measurement when cutting shelves or rods. It is much easier to fill a tiny gap than to convince a shelf to fit through drywall by sheer optimism.
Choose Shelf Depth
Common closet shelf depths range from about 11 to 16 inches, depending on the system and the items being stored. Shallow shelves are good for shoes, folded shirts, small bins, and daily-use items. Deeper shelves work better for blankets, large baskets, luggage, or bulkier supplies. Avoid making shelves so deep that items disappear into the back like socks in a laundry portal.
Plan Rod Placement
Closet rods are usually placed far enough from the back wall to let hangers move freely. If you are installing a rod under a shelf, leave enough clearance between the rod and the shelf for hangers to lift on and off easily. For double-hanging sections, place the upper rod high enough for shirts and jackets, and the lower rod low enough to keep clothing off the floor.
Design Ideas for Using Closet Rods with Shelves
There are several smart ways to combine closet rods and shelves. The right design depends on whether you want mostly folded storage, mostly hanging storage, or a balanced system.
1. Shelf Above Rod
This is the classic closet setup: a shelf on top with a rod underneath. It works because it uses vertical space efficiently. The shelf stores folded items, bins, hats, or bags, while the rod handles hanging clothes. Use shelf-and-rod brackets for an integrated installation, or use separate shelf brackets and rod sockets for a more customized layout.
2. Rods as Side-to-Side Support Rails
In some small shelving units, closet rods can act as horizontal rails between side panels or wall cleats. A sturdy shelf board can sit above or between structural supports, while the rods provide additional stability or hanging function. This approach is especially useful in narrow spaces where bulky brackets would take up too much room.
3. Double-Rod Storage Tower
Install a vertical shelving tower in the center of a closet, then add rods on both sides. This creates a boutique-style closet layout with shelves for folded clothes or baskets and rods for hanging garments. It is a strong choice for shared closets because each person can get a side, reducing the ancient household conflict known as “your hoodie is on my side.”
4. Adjustable Rod and Shelf System
Adjustable closet systems use wall tracks, standards, brackets, rods, and shelves that can be moved over time. This is ideal for kids’ rooms, rental homes, or anyone whose storage needs change. Today the space holds baby clothes; next year it holds backpacks, sports gear, and a suspicious number of mismatched sneakers.
5. Rods for Hanging Baskets or Accessories
A closet rod does not have to hold clothes. Add S-hooks, hanging baskets, fabric organizers, or clips, and the rod becomes a flexible storage rail. This works well under a shelf in a craft room, laundry room, mudroom, or utility closet.
Step-by-Step: Building a Custom Closet Rod Shelving Unit
Here is a practical installation approach for a simple shelf-and-rod unit. Adjust the dimensions and materials to fit your space.
Step 1: Empty and Inspect the Area
Remove everything from the closet or wall area. Check for damage, loose drywall, old anchors, uneven baseboards, or obstacles such as outlets and vents. Patch holes and paint before installing the shelving unit if you want a cleaner finish.
Step 2: Locate the Studs
Use a stud finder to locate wall studs. Mark them lightly with a pencil. Whenever possible, fasten brackets, cleats, and rod supports directly into studs. A closet rod loaded with winter coats can become surprisingly heavy, and drywall alone is not a structural superhero.
Step 3: Mark Shelf Height
Use a level to draw a straight guideline where the shelf will sit. Think about what you need to store below the shelf. If the rod will hold shirts, jackets, or coats, measure the length of those garments before choosing the final height.
Step 4: Install Cleats or Brackets
For a wood shelf, you can install side cleats and back cleats to support the board, then add brackets for extra strength. For a shelf-and-rod bracket system, align each bracket carefully and drive screws into studs or appropriate heavy-duty anchors. Use all recommended screw holes whenever possible.
Step 5: Cut and Fit the Shelf
Cut your shelf board to fit the measured width. Dry-fit it before fastening. If your walls are slightly out of square, you may need to trim a small amount from one end. Sand any rough edges, then paint, stain, or apply edge banding before final installation.
Step 6: Install Closet Rod Supports
Install rod sockets, flanges, or integrated rod hooks at the correct height and depth. Keep them level from side to side. For long rods, add center support brackets to prevent sagging. The longer the span and the heavier the load, the more important support spacing becomes.
Step 7: Cut or Adjust the Rod
If using a wood rod, cut it to length and sand the ends. If using a metal rod, follow the manufacturer’s cutting instructions or use an adjustable rod. Make sure the rod fits securely into sockets or brackets without wobbling.
Step 8: Secure and Test
Fasten the shelf to brackets if the hardware allows it. Gently test the rod and shelf with light pressure before loading items. Then add weight gradually. Start with lighter items, check for movement, and make adjustments before storing heavy bins or dense stacks of clothing.
Safety and Load-Bearing Tips
A custom fit shelving unit should be attractive, but it also needs to stay on the wall. Strength depends on the materials, bracket rating, fasteners, wall type, rod span, and installation quality. Do not rely on guesswork when heavy storage is involved.
Fasten Into Studs Whenever Possible
Stud mounting provides the strongest connection for brackets and rod supports. If you cannot hit a stud, use the correct anchor for the wall type and expected load. Toggle bolts may be appropriate for certain hollow-wall applications, but always follow hardware instructions.
Add Center Supports for Long Rods
Long closet rods can sag over time, especially when loaded with coats or heavy garments. Center supports reduce the span and help distribute weight. For very long closets, multiple supports may be needed.
Match Hardware to the Shelf Depth
Use brackets designed for your shelf depth. A bracket that is too short may not support the shelf properly, while a mismatched rod hook can place the rod too far forward or too close to the wall. Good hardware alignment makes the entire system safer and smoother to use.
Avoid Overloading the Unit
Even strong brackets have limits. Heavy boxes, stacks of books, tools, and bulk supplies can exceed what a closet-style shelving unit is designed to hold. Keep the heaviest items low, spread weight across the shelf, and avoid concentrating heavy loads in one spot.
Design Tips for a More Polished Look
Function comes first, but style does not have to sit outside in the hallway. A closet rod shelving unit can look intentional and polished with a few simple upgrades.
Paint Rods and Shelves the Same Color
Matching the rod, shelf, cleats, and brackets creates a built-in appearance. White is popular because it brightens closets and makes items easier to see. Black hardware can look modern and bold. Natural wood adds warmth.
Use Baskets and Bins Consistently
Open shelving can quickly look messy if every item is loose. Use matching bins, baskets, or clear containers to group small items. Labels help everyone in the house understand where things belong, which improves the odds that the system survives longer than one enthusiastic weekend.
Leave Breathing Room
Do not fill every shelf to maximum capacity. A little empty space makes storage easier to maintain. It also keeps the unit from looking crowded and gives future items a place to land.
Common Mistakes to Avoid
The most common mistake is skipping the planning stage. A shelving unit that looks great online may not work for your actual closet. Measure your belongings, not just the wall.
Another mistake is installing rods too close to shelves or back walls. Hangers need clearance. If the rod is too high, too low, or too shallow, using the closet becomes annoying every single day. Small measurement errors can create long-term irritation.
Finally, avoid using weak anchors for heavy loads. Closet rods and shelves may seem simple, but once loaded with clothes, bins, bags, and shoes, the weight adds up quickly. Strong fasteners and proper support spacing are what separate a successful project from a dramatic midnight crash.
Budget-Friendly Ways to Customize the Project
You do not need expensive custom cabinetry to make this project look high-end. Start with basic rods and shelves, then spend your money where it matters most: strong brackets, proper fasteners, and durable shelf boards.
For a budget build, use painted pine boards or plywood with finished edges. Reuse existing closet rods if they are straight and sturdy. Add affordable rod sockets, simple cleats, and a fresh coat of paint. For a more upgraded look, choose metal rods, decorative brackets, thicker shelves, and matching hardware.
If you rent, consider adjustable systems that require fewer permanent changes, but always get permission before drilling into walls. Freestanding shelving paired with tension-style rods may work for very light storage, but it should not be treated as a heavy-duty solution.
Real-Life Experience: What I Learned Using Closet Rods for a Custom Fit Shelving Unit
The first thing I learned from building a closet rod shelving unit is that closets are excellent liars. From the doorway, a closet looks like a simple box. Then you measure it and discover the back wall is slightly narrower than the front, one corner has a mysterious bump, and the old rod was installed at an angle that can only be described as “close enough, probably.” This is why measuring in several places matters so much.
In one small bedroom closet, the goal was to create more storage without making the space feel cramped. The original setup had one long rod and one high shelf. It technically worked, but it wasted almost all the lower space. Short shirts hung above a pile of shoes, bags, and storage boxes that had formed a small civilization on the floor.
The solution was to divide the closet into zones. On one side, a lower closet rod created double-hanging space for shirts and jackets. On the other side, shelves held folded jeans, sweaters, and baskets. A rod beneath one shelf became a place for hanging belts and small accessories with S-hooks. The transformation felt surprisingly dramatic. Nothing magical happened, unless you count being able to find a black T-shirt in under three minutes, which I absolutely do.
The biggest practical lesson was to install supports before getting excited about styling. Baskets and labels are fun. Studs and screws are less glamorous, but they are the reason the whole project stays attached to the wall. A rod loaded with clothes needs firm support, especially near the center. Adding one extra support bracket may not look exciting on installation day, but six months later, when the rod is still straight, you will be grateful.
Another lesson was that adjustable rods are convenient, but cut-to-fit rods often look cleaner. Adjustable rods are great when you want flexibility or do not have cutting tools. However, a properly cut wood or metal rod can feel more solid and polished. If appearance matters, paint or finish the rod before installation. It is much easier than trying to paint inside a closet while holding a brush at the angle of a confused flamingo.
I also found that shelf depth changes everything. Deep shelves seem useful, but they can become clutter caves. For everyday items, moderate-depth shelves are easier to maintain. Bins should slide in and out easily, and folded clothes should be visible without needing an archaeological dig. For top shelves, larger bins are fine, but they should be labeled clearly so you do not pull down holiday decorations while searching for extra pillowcases.
The best part of using closet rods is how adaptable the system becomes. A rod can hold clothes today, baskets tomorrow, or hooks next month. Shelves can store sweaters in winter and beach towels in summer. In a child’s closet, a lower rod can be moved or removed as clothing gets longer. In a laundry room, the rod can shift from drying shirts to holding hangers. That flexibility is what makes the project feel truly custom.
My final experience-based advice is to build for the life you actually live. If you hate folding clothes, do not design a closet with twelve tiny folding shelves. If you own more bags than shoes, give bags the better zone. If your family will not use hidden bins, choose open baskets. A custom fit shelving unit should not be a punishment disguised as organization. It should make daily routines easier, faster, and slightly less chaotic.
Closet rods may not be fancy, but they are incredibly useful. With careful measuring, strong hardware, and a layout based on real storage needs, they can help turn a frustrating closet or awkward wall into a practical custom shelving unit. The project is approachable, affordable, and flexible enough for almost any room. Best of all, it gives you the deeply satisfying feeling of opening a closet and not being attacked by falling scarves. That, friends, is home improvement victory.
Conclusion
Using closet rods to create a custom fit shelving unit is one of those DIY ideas that makes you wonder why you did not try it sooner. Closet rods are affordable, adaptable, and available in materials and styles that work with many storage layouts. When paired with sturdy shelves, proper brackets, wall cleats, and secure fasteners, they can transform wasted vertical space into organized, everyday function.
The key is to plan around your actual belongings, measure carefully, support the system properly, and leave room for change. Whether you are upgrading a bedroom closet, improving a laundry nook, organizing a pantry, or building a compact craft station, closet rods can do far more than hold hangers. They can help create a flexible shelving unit that fits your space, your stuff, and your budget.