Installing a Kwikset handleset is one of those home projects that looks fancy from the street but is surprisingly friendly once you understand the parts. Think of it as giving your front door a small promotion: yesterday it was just “the door,” and today it is “the entrance.” A new handleset can improve curb appeal, make daily entry smoother, and add a fresh layer of security without turning your Saturday into a full-blown construction documentary.
The good news: most Kwikset handlesets are designed for standard residential door preparation. If your door already has common boreholes for a deadbolt and latch, this project is usually a straightforward replacement. If your door is new, unbored, or has an unusual layout, you may need to measure, mark, and drill carefully. Either way, patience beats muscle. A door lock is not a jar of pickles; forcing it usually makes things worse.
This guide explains how to install a Kwikset handleset step by step, including tools, door measurements, latch orientation, exterior handle placement, interior lever installation, strike plate adjustment, SmartKey rekeying, troubleshooting, and practical experience-based tips that can save you from common DIY headaches.
What Is a Kwikset Handleset?
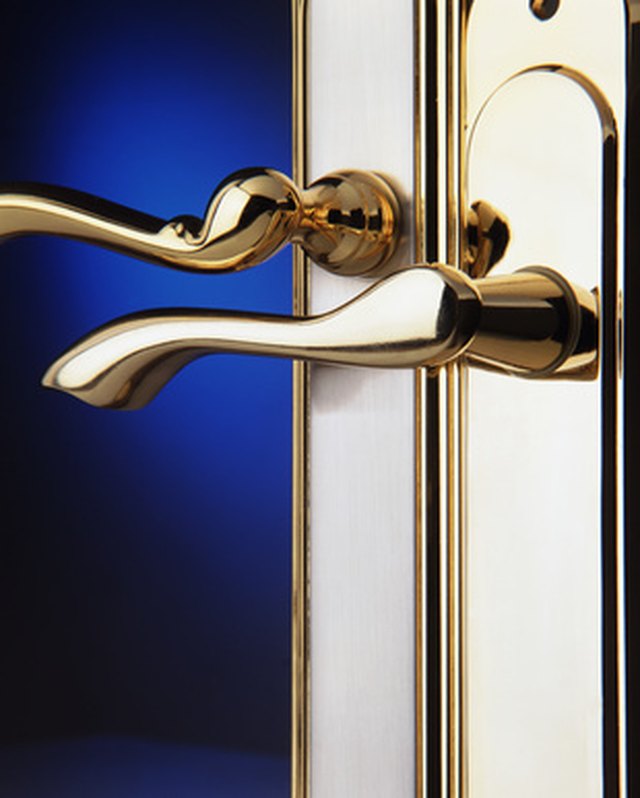
A Kwikset handleset is an exterior door hardware set that typically includes a decorative outside grip handle, an inside knob or lever, a latch, a deadbolt, strike plates, mounting screws, and sometimes SmartKey Security for easy rekeying. Unlike a basic knob-and-deadbolt combo, a handleset adds a taller exterior pull, giving the front door a more finished, traditional, modern, or craftsman-style look depending on the model.
Many Kwikset handlesets are sold as single-cylinder sets, meaning the deadbolt is keyed on the outside and operated by a thumb turn on the inside. Some models pair with smart locks, keypads, or modern square trims. The installation process varies slightly by model, but the main principles are the same: prepare the door, orient the latches correctly, align the spindle, secure the interior hardware, install the deadbolt, and test everything before calling the project complete.
Tools and Materials You Will Need
Before removing anything, gather your tools. You do not want to discover halfway through the project that your only screwdriver is hiding in the junk drawer under takeout menus from 2018.
Basic tools
- Phillips screwdriver
- Flathead screwdriver
- Tape measure
- Pencil
- Drill and drill bits, if new holes are needed
- 7/16-inch drill bit for some lower handle posts, depending on model
- 1-inch spade bit or hole saw for latch bores, if preparing a new door
- 2-1/8-inch hole saw for standard lock boreholes, if needed
- Chisel and utility knife for mortising faceplates or strike plates
- Painter’s tape
- Wood shims or a door wedge
- Safety glasses
Helpful extras
- A small level for checking handle alignment
- Wood filler for old screw holes
- Longer strike plate screws for added reinforcement, if compatible
- Touch-up paint or stain for exposed marks from old hardware
- Kwikset installation template for your exact model
Before You Start: Check Door Compatibility
Proper installation begins before the first screw comes out. Kwikset handlesets are made to fit common exterior doors, but “common” is not the same as “guaranteed.” Measure first and celebrate later.
Check door thickness
Most residential entry doors are either 1-3/8 inches or 1-3/4 inches thick. Many Kwikset handlesets fit within this range, though some thick doors may require a separate thick-door kit or additional spindle parts. If your door is unusually thick, do not improvise with random screws from the garage. Use the correct Kwikset-compatible hardware so the lock operates safely.
Measure the backset
The backset is the distance from the edge of the door to the center of the borehole. Standard backsets are usually 2-3/8 inches or 2-3/4 inches. Many Kwikset latches are adjustable, but you still need to set them correctly before installation. If the backset is wrong, the latch may not meet the strike plate properly, and your door may close with the grace of a shopping cart with one bad wheel.
Confirm borehole spacing
Many front doors with separate deadbolt and handle holes use two standard 2-1/8-inch boreholes. The deadbolt is usually above the latch. The lower grip handle may also need a smaller bottom hole for the mounting post. If you are replacing an old handleset, compare the new exterior handle length and bottom post location with the existing hole. If the lower post does not line up, you may need to drill a new hole using the Kwikset template.
Look at the door swing
Stand outside and observe whether your door is right-handed or left-handed. Some levers are reversible, but they still need to point in the proper direction. On the interior side, the lever should typically point away from the door jamb so it feels natural in the hand.
Step-by-Step Guide: How to Install a Kwikset Handleset
Step 1: Open the box and identify every part
Lay the Kwikset handleset parts on a soft towel or cardboard. Separate the exterior handle, interior knob or lever, deadbolt cylinder, thumb-turn assembly, latch bolts, strike plates, screws, SmartKey tool, keys, and any adapters. Compare the parts with the printed guide for your exact model. This simple habit prevents the classic DIY mystery: one tiny screw left over and a growing sense of doom.
Step 2: Remove the old handleset
Open the door and secure it with a wedge or shim. Remove the interior knob, lever, thumb turn, mounting screws, exterior handle, deadbolt cylinder, latch, and strike plates. Work from the inside first because most mounting screws are accessible there. If paint has sealed hardware to the door, gently score around the plate with a utility knife before prying. This keeps old paint from peeling off in dramatic, potato-chip-sized flakes.
Once the old hardware is off, clean the surface. Remove dust, chipped paint, loose wood fibers, and old caulk. If the old handle left exposed screw holes, fill them with wood filler and let it cure before painting or installing the new hardware.
Step 3: Test-fit before tightening
Hold the new Kwikset exterior handleset against the door. Check whether the deadbolt borehole, latch borehole, and lower handle post align with your door. Do not fully tighten anything yet. Handlesets need a little wiggle room during alignment. If you tighten the first screw like you are securing a bridge cable, the rest of the parts may fight you all the way to dinner.
Step 4: Adjust and install the latch for the handle
Insert the handle latch into the lower edge bore. Make sure the beveled side faces the door jamb so the latch can slide smoothly when the door closes. If your latch has an adjustable backset, set it to match your door: either 2-3/8 inches or 2-3/4 inches. Some latches use a round drive-in collar, while others use a rectangular faceplate. Use the style that matches your door preparation.
If the latch faceplate does not sit flush, trace around it with a pencil, score the outline with a utility knife, and carefully chisel a shallow recess. The goal is a flush fit, not a crater. A latch plate that sits proud of the door edge can rub the jamb and make the door feel sticky.
Step 5: Install the deadbolt latch
Insert the deadbolt latch into the upper edge bore. Many deadbolt latches are marked to show the top side or correct orientation. Keep the latch centered and secure it with screws. Before moving on, extend and retract the bolt with a screwdriver to make sure it moves freely. If the bolt binds now, it will not magically become smoother after the decorative trim is installed.
Step 6: Mount the exterior handleset
From the outside of the door, position the Kwikset handleset so the spindle passes through the lower latch mechanism. On Kwikset handlesets, spindle orientation matters. The rounded edge of the spindle should face the door edge. If the spindle does not pass through the latch opening, remove it, rotate it as directed by the model instructions, press the latch bolt, and try again.
Guide the lower mounting post through the bottom hole. If your door does not already have this hole, use the Kwikset template and drill carefully from the correct side. Painter’s tape can help reduce splintering, and drilling straight is more important than drilling fast.
Step 7: Attach the interior knob or lever
On the inside of the door, line up the interior knob or lever with the spindle and mounting posts from the exterior handle. Insert the screws by hand first, then tighten them evenly. If using a lever, confirm it points away from the jamb. Operate the thumb latch outside and the lever inside several times. The latch should retract smoothly without rubbing, grinding, or needing a motivational speech.
Step 8: Install the deadbolt cylinder and thumb turn
Place the keyed cylinder on the exterior side of the door. The tailpiece should pass through the deadbolt latch. On the inside, position the thumb-turn assembly so it aligns with the tailpiece. Insert the mounting screws and tighten gradually. Test the deadbolt with the door open. The key should extend and retract the bolt smoothly, and the interior thumb turn should move without forcing.
For many single-cylinder deadbolts, the thumb turn sits vertically when unlocked and turns toward the jamb when locked. Your exact model may vary, so follow the included guide if the orientation differs.
Step 9: Install the strike plates
Close the door gently and mark where the latch and deadbolt meet the jamb. Install the latch strike plate first, then the deadbolt strike plate. The latch should click into the strike without lifting, pushing, or hip-checking the door like you are entering a stubborn garden shed.
The deadbolt hole in the frame must be deep enough for the bolt to extend fully. If the bolt only goes halfway, deepen the hole carefully with the right bit or chisel. A deadbolt that does not fully extend is not doing its full job. When possible, longer screws in the deadbolt strike plate can help anchor the strike more securely into the framing behind the jamb.
Step 10: Test everything with the door open and closed
Test in this order: handle latch with door open, handle latch with door closed, deadbolt with door open, deadbolt with door closed, key from outside, thumb turn from inside. If everything works with the door open but binds when closed, the issue is usually strike plate alignment, not the lock itself.
Look for rub marks on the latch, bolt, or strike plate. Small adjustments can make a big difference. Loosen the strike plate and move it slightly, enlarge the strike opening, or deepen the bolt pocket as needed. Avoid using the key to force the deadbolt. Keys are for turning locks, not for arm wrestling metal.
How to Rekey a Kwikset Handleset with SmartKey
If your Kwikset handleset includes SmartKey Security, you can rekey the lock without removing the cylinder. This is especially helpful after moving into a new home, replacing a lost key, or matching your front door to another Kwikset key in the house.
SmartKey rekeying steps
- Insert the current working key.
- Rotate the key 90 degrees clockwise.
- Insert the SmartKey tool firmly into the SmartKey slot, then remove the tool.
- Remove the current key without turning the cylinder back.
- Insert the new key fully.
- Rotate the new key as directed by the official Kwikset instructions.
- Return the key to the starting position and remove it.
- Test the new key several times with the door open.
Never test a freshly rekeyed lock with the door closed until you are certain the new key works. Locking yourself out during a DIY victory lap is a humbling experience, and your neighbors do not need that entertainment.
Common Kwikset Handleset Installation Problems
The spindle will not go through the latch
Check spindle orientation. On many Kwikset handlesets, the rounded side of the spindle needs to face the door edge. If it is backward, pull and rotate it according to the model instructions, press the latch bolt, and reinsert it.
The latch does not retract smoothly
Loosen the interior screws slightly and test again. Over-tightening can pinch the mechanism. Also confirm that the latch is not installed backward and that the faceplate sits flush with the door edge.
The deadbolt works when open but not when closed
This almost always points to strike plate alignment or bolt-hole depth. Mark the bolt with pencil or lipstick, close the door, turn the deadbolt gently, and see where it contacts the strike. Adjust the strike plate or deepen the pocket until the bolt extends fully.
The lower handle post does not line up
Different handlesets have different grip lengths. If the old lower hole is in the wrong place, use the Kwikset template for your new model and drill a new hole. Fill and touch up the unused hole if it is visible.
The key feels rough
Make sure the deadbolt is not under pressure from a misaligned strike. If the lock is new and properly aligned, avoid oil-based household lubricants unless the manufacturer recommends them. Dirt and oil can create a sticky paste inside lock cylinders.
Security and Curb Appeal Tips
A handleset is both a working security device and a design feature. Choose a finish that complements your door, hinges, house numbers, porch light, and mailbox. Matte black, satin nickel, polished brass, Venetian bronze, and chrome can each look excellent in the right setting. The trick is coordination, not hardware chaos.
For security, pay attention to the deadbolt, strike plate, screw length, and frame condition. Even a strong lock can underperform if the jamb is cracked, soft, or poorly reinforced. ANSI/BHMA grading can also help shoppers understand performance levels, with Grade 1 generally representing the highest category, followed by Grade 2 and Grade 3. For many homes, a quality residential deadbolt with proper strike installation is a practical upgrade.
Maintenance After Installation
Once your Kwikset handleset is installed, keep it working well with light maintenance. Tighten loose screws when needed, clean exterior hardware with a soft damp cloth, and avoid harsh chemicals that may damage the finish. Check the door seasonally because humidity, temperature changes, settling, and weatherstripping can shift alignment over time.
If the latch starts rubbing months later, do not assume the handleset has failed. The door may have sagged slightly or the weatherstrip may be pressing too hard. Adjust hinges, strike plates, or weatherstripping before replacing hardware unnecessarily.
Experience-Based Tips for Installing a Kwikset Handleset
After handling a few front door hardware projects, one lesson becomes clear: the installation is rarely difficult because of the lock itself. The drama usually comes from the door. Old doors have stories. Some have layers of paint thick enough to qualify as historical records. Some have screw holes from three previous handlesets. Some are slightly warped, slightly sagging, or slightly determined to make you question your life choices.
The first practical experience tip is to slow down during removal. Many people attack the old hardware with a drill immediately, but a hand screwdriver gives better control, especially on painted or stripped screws. If a screw head is packed with paint, clean the slot first. If the plate is stuck to the door, score the edges with a utility knife. This prevents the old finish from tearing away and leaving a visible scar around the new trim. A beautiful new handleset can cover many sins, but not all of them.
The second tip is to dry-fit the exterior handle before drilling anything. Hold the handleset in place and step back. Does it sit straight? Does the bottom post land where you expected? Will the trim cover the marks from the old hardware? This small pause can prevent a crooked handle, which is one of those things you may not notice at first but will see every single day afterward. Once you notice it, congratulations: your front door has become a tiny museum of regret.
The third tip is to tighten screws in stages. Start all screws by hand, then snug them gradually. Handlesets need alignment between the outside grip, inside lever, latch, and deadbolt. If you fully tighten one side too early, the mechanism can bind. When the thumb latch feels stiff, many beginners assume the product is defective. Often, the screws are simply too tight or the spindle is slightly misaligned. Loosen, reposition, and test again.
The fourth tip is to treat the strike plate as part of the lock, not an afterthought. A door can have a perfectly installed Kwikset handleset and still feel wrong if the latch or deadbolt does not enter the strike cleanly. With the door open, the hardware may work like a dream. With the door closed, it may suddenly act like it has joined a labor union. That difference usually means the bolt is hitting the strike plate, the pocket is too shallow, or the door is being pushed by weatherstripping. Adjust the strike until the latch clicks and the deadbolt extends without pressure.
The fifth tip is to check the door hinges before blaming the lock. If the reveal around the door is uneven, or if the latch side has dropped, tighten the hinge screws. Sometimes replacing one short hinge screw with a longer screw into the framing can pull the door back into better alignment. This can make the handleset operate more smoothly without touching the lock at all.
The sixth tip is to test SmartKey rekeying with the door open and your phone nearby. SmartKey is convenient, but the steps must be followed exactly. Fully insert the key, keep the cylinder in the correct position, and do not rush the rotation sequence. After rekeying, test the new key several times before closing the door. It is a small ritual that prevents a big inconvenience.
Finally, expect the project to feel more satisfying than complicated. A new Kwikset handleset changes the way the door looks and feels every time you come home. The handle should feel solid, the latch should click cleanly, and the deadbolt should turn without a fight. When all three happen, the project is done correctly. You get better curb appeal, smoother entry, and the quiet pleasure of knowing you installed it yourself without turning the front porch into a crime scene of sawdust and missing screws.
Conclusion
Learning how to install a Kwikset handleset is a practical DIY skill that combines careful measuring, patient alignment, and a little respect for the humble door jamb. Start by confirming door thickness, backset, borehole spacing, and handle post location. Install the latches in the correct direction, mount the exterior handle with the spindle properly oriented, attach the interior lever or knob, secure the deadbolt, and adjust the strike plates until the latch and bolt move smoothly.
The most important rule is simple: test before you tighten, and test again before you close the door. A handleset should not require force. If something binds, the solution is usually alignment, screw tension, latch orientation, or strike plate adjustment. With the right approach, a Kwikset handleset installation can be a weekend project that makes your entryway look sharper and work better for years.
Note: Always follow the installation sheet included with your exact Kwikset model. Handleset designs vary, and the model-specific guide should be treated as the final authority for drilling templates, screw selection, spindle orientation, and SmartKey rekeying steps.