Note: This guide is written for players who want every shovel in Animal Crossing: New Horizons, from the humble Flimsy Shovel to the fancy shop variants and the patience-testing Golden Shovel. No fossil left behind. No suspicious crack in the ground ignored.
Introduction: Why Shovels Matter More Than They Look
In Animal Crossing: New Horizons, the shovel is not just a tool. It is your ticket to fossils, Bells, rock materials, tree relocation, flower gardening, gyroids, buried treasure, Bunny Day eggs, and the occasional “Oops, I smashed my island’s rock because I ate fruit first” life lesson. The shovel may look simple, but it quietly carries half your island routine on its tiny metal back.
If you are new to the game, you may notice something odd: you do not start with a shovel. You get a tent, a phone, some charming debt, and enough island optimism to make Tom Nook smile, but no shovel. That is because Animal Crossing: New Horizons slowly unlocks essential tools as you progress through the early story. The game wants you to earn your digging privileges. Very dramatic. Very Nook.
This complete guide explains how to get all shovels in Animal Crossing: New Horizons, including the Flimsy Shovel, regular Shovel, Colorful Shovel, Outdoorsy Shovel, Printed-Design Shovel, Dream Shovel, and Golden Shovel. You will also learn how shovel durability works, how to use shovels efficiently, and how to avoid common mistakes that make beginners accidentally destroy rocks like tiny island bulldozers.
All Shovels in Animal Crossing: New Horizons
There are several shovel types in Animal Crossing: New Horizons. Some are crafted, some are bought, one is earned through a long special-character milestone, and one is connected to dream-related gameplay. Here is the full shovel family tree, minus the awkward holiday dinner conversation.
| Shovel Type | How to Get It | Durability | Best For |
|---|---|---|---|
| Flimsy Shovel | Recipe from Blathers, buy after unlocking, or buy from Wilbur/Kapp’n during tours | Low | Early game digging and crafting upgrades |
| Shovel | Craft with Pretty Good Tools Recipes | Medium | Daily island chores |
| Colorful Shovel | Buy from upgraded Nook’s Cranny | Medium | Style and everyday digging |
| Outdoorsy Shovel | Buy from upgraded Nook’s Cranny | Medium | Natural island themes |
| Printed-Design Shovel | Buy from upgraded Nook’s Cranny | Medium | Decorative tool collections |
| Dream Shovel | Obtained in dream-related gameplay | Unlimited in its context | Dream island interactions |
| Golden Shovel | Help Gulliver 30 times, then craft it | High | Collectors and long-term players |
How to Get the Flimsy Shovel
The Flimsy Shovel is your first real shovel in Animal Crossing: New Horizons. It is not glamorous. It is not powerful. It has the emotional stability of a wet cardboard spoon. But it gets the job done, and every serious island representative starts here.
Step 1: Complete Tom Nook’s Early Tasks
At the beginning of the game, follow Tom Nook’s basic tutorial tasks. You will learn how to craft, gather materials, and generally survive island life without immediately turning your tent into a storage disaster. After completing the early DIY workshop, Tom Nook will begin accepting fish and bugs from you.
Step 2: Donate Five Fish or Bugs to Tom Nook
Catch five unique critters, which can be fish or bugs, and give them to Tom Nook. Once you do this, he contacts Blathers, the museum-loving owl who has never met a fossil he did not want to talk about for slightly too long. Tom Nook will then ask you to place Blathers’ tent somewhere on your island.
Step 3: Wait for Blathers to Arrive
After you place the tent, Blathers arrives the next day. Speak to him inside the tent. During this conversation, he gives you the DIY recipe for the Flimsy Shovel, along with the Vaulting Pole recipe. That means you can finally dig up fossils and cross rivers. Congratulations: your island just became much larger and much more full of holes.
Flimsy Shovel Crafting Recipe
To craft a Flimsy Shovel, you need:
- 5 hardwood
You can get hardwood by hitting trees with an axe. Use a Flimsy Axe or Stone Axe if you want wood without chopping down the tree. Hardwood is the darker wood type, so if you get regular wood or softwood first, keep swinging. Trees are basically wooden vending machines, except sometimes they drop wasps because nature has jokes.
How to Buy a Flimsy Shovel
Once the shovel has been unlocked through story progression, you can buy a Flimsy Shovel from Nook’s Cranny. This is useful when you do not feel like crafting or when your shovel breaks right before you were about to dig up a fossil. The game has a gift for timing tool breakage at the most dramatic possible moment.
You can also buy a Flimsy Shovel from Wilbur on mystery islands and from Kapp’n during boat tours. This is especially helpful if you arrive on a resource island and realize you forgot to pack a shovel. Wilbur will not judge you. Probably.
How to Get the Regular Shovel
The regular Shovel is the dependable upgrade you will use for most of your island life. It lasts longer than the Flimsy Shovel and can be customized, making it both practical and fashionable. Finally, a tool that says, “I dig fossils, but I also care about matching my outfit.”
Step 1: Unlock the Nook Stop
The Nook Stop terminal is located inside Resident Services. Early in the game, it offers useful rewards and upgrades in exchange for Nook Miles. You will want to earn Nook Miles by catching bugs, fishing, talking to villagers, selling weeds, crafting tools, and completing Nook Miles+ tasks once those become available.
Step 2: Buy Pretty Good Tools Recipes
To craft the regular Shovel, buy the Pretty Good Tools Recipes from the Nook Stop. This recipe pack costs 3,000 Nook Miles and unlocks upgraded versions of several tools. It is one of the best early purchases in the game because it makes your daily chores much less fragile.
Regular Shovel Crafting Recipe
To craft a regular Shovel, you need:
- 1 Flimsy Shovel
- 1 Iron Nugget
Iron Nuggets come from hitting rocks with a shovel or axe. To get the most materials from rocks, stand beside the rock, dig two holes behind yourself to prevent knockback, and hit the rock repeatedly. If you do it correctly, you can get up to eight items from one rock. If you do it incorrectly, your character slides backward like they are auditioning for an island ice-skating show.
How to Get the Colorful Shovel
The Colorful Shovel is a stylish shop version of the standard shovel. It functions like a regular shovel but comes with brighter visual flair. If your island design includes playful paths, bright flowers, or a neighborhood that looks like a box of crayons had a very productive afternoon, this shovel fits right in.
To get the Colorful Shovel, you need to upgrade Nook’s Cranny. After the shop upgrade, Timmy and Tommy will sell expanded tool options, including decorative tools that rotate through their cabinet stock. Check the cabinet inside Nook’s Cranny regularly. The Colorful Shovel may not appear every day, so patience is required. Animal Crossing is many things, but it is not a game that fears making you wait.
How to Get the Outdoorsy Shovel
The Outdoorsy Shovel is another upgraded-shop tool. It has the same general usefulness as the standard shovel, but its design looks rugged and natural. It is a great match for forestcore, cottagecore, national park, hiking trail, or “I definitely know what I am doing with terraforming” island themes.
Like the Colorful Shovel, the Outdoorsy Shovel becomes available from the cabinet in upgraded Nook’s Cranny. Visit the shop daily and check the tool selection. If you are collecting every shovel, buy it when you see it. The cabinet rotation can be unpredictable, and nothing hurts quite like skipping an item and then waiting days for it to come back while Timmy and Tommy offer you everything except the thing you actually want.
How to Get the Printed-Design Shovel
The Printed-Design Shovel is the decorative cousin in the shovel lineup. It is perfect for players who enjoy matching tools to outfits, photo shoots, themed builds, or just having options. In Animal Crossing: New Horizons, style matters. You might be digging up a fossilized dinosaur tail, but you can still look fabulous doing it.
To get the Printed-Design Shovel, upgrade Nook’s Cranny and check the cabinet. It appears as part of the rotating tool stock. Like the other shop shovels, it is purchased with Bells and can be used for regular digging, rock hitting, and island chores.
How to Get the Dream Shovel
The Dream Shovel is different from normal tools. It is associated with dream-related gameplay rather than your regular island inventory loop. Dream islands let players visit saved versions of other islands without permanently changing them. Because dream visits are separate from normal multiplayer visits, tools in that setting do not behave exactly like your everyday gear.
For completion-minded players, the Dream Shovel counts as part of the broader shovel lineup, but it is not something you craft for normal island chores. Think of it as a special-context shovel. It is useful in the dream setting, but it is not the tool you will bring home to rearrange your orchard or mine Iron Nuggets for that bridge you promised yourself you would finish three days ago.
How to Get the Golden Shovel
The Golden Shovel is the big prize for patient players. It is shiny, prestigious, and still breakable, because apparently even gold cannot escape the laws of Animal Crossing tool durability. Still, it lasts much longer than normal shovels and is an important milestone for collectors.
Step 1: Find Gulliver on Your Beach
Gulliver is the sailor bird who occasionally washes up on your beach. He is usually face-down in the sand, which is not ideal for him but very convenient for your long-term shovel goals. Talk to him repeatedly until he wakes up and asks for help finding his communicator parts.
Step 2: Dig Up Communicator Parts
Gulliver’s communicator parts are buried in the sand. Walk along the beach and look for small squirts of water coming from the ground, similar to manila clam spots. Use your shovel to dig those spots. You need to find five communicator parts and return them to Gulliver.
Step 3: Help Gulliver 30 Times
To unlock the Golden Shovel DIY recipe, you must help Gulliver 30 times. This is not something most players finish quickly unless they time travel. Gulliver appears randomly, so this milestone can take a long time during normal play. When you finally reach the requirement, the DIY recipe for the Golden Shovel arrives as a reward.
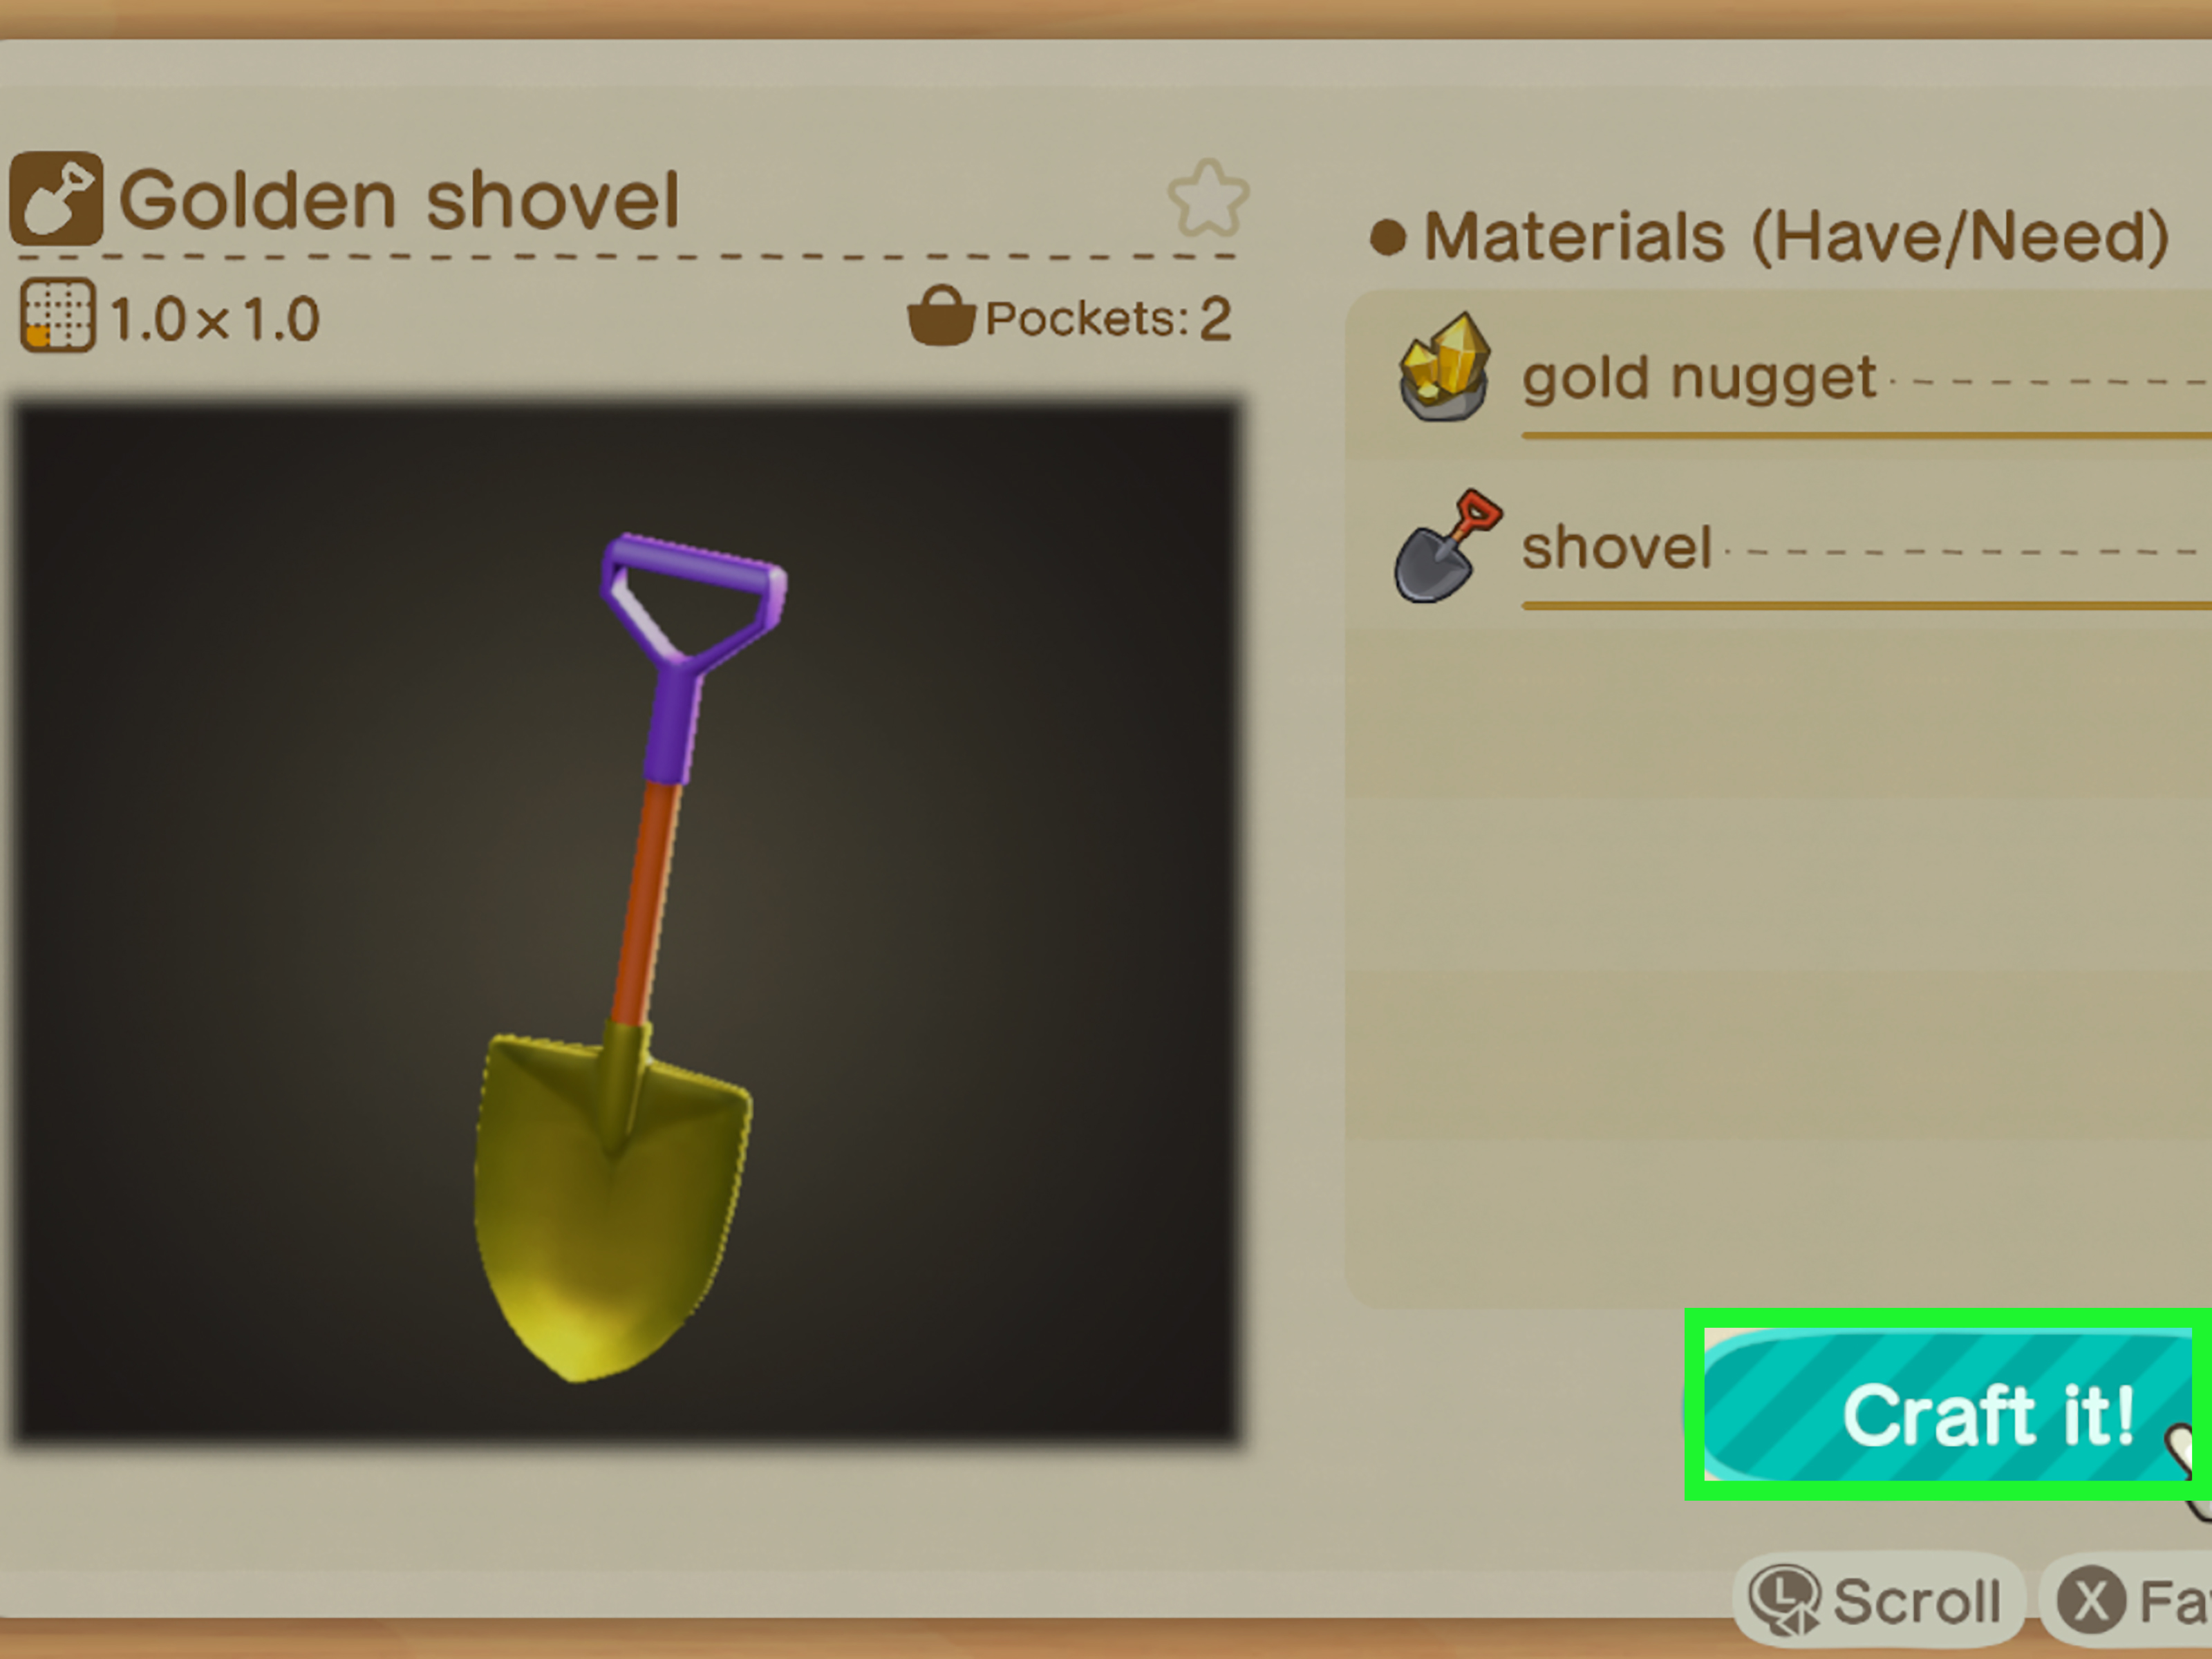
Golden Shovel Crafting Recipe
To craft the Golden Shovel, you need:
- 1 Shovel
- 1 Gold Nugget
Gold Nuggets are rare materials from rocks. You may get one while hitting rocks for stone, clay, and Iron Nuggets. Because Gold Nuggets are valuable and not common, do not spend them carelessly if your goal is to craft every golden tool. The Golden Shovel is worth crafting for completion, but it is not required for basic gameplay.
What Can You Do With a Shovel?
Shovels are among the most versatile tools in Animal Crossing: New Horizons. Once you have one, your island opens up in several important ways.
Dig Up Fossils
Each day, fossil spots appear on your island as star-shaped cracks in the ground. Dig them up, take them to Blathers for assessment, and either donate them to the museum or sell duplicates for Bells. Fossil hunting is one of the easiest daily routines for new players because assessed fossils can sell for a solid amount of money.
Hit Rocks for Materials
Use a shovel to hit rocks and collect stone, clay, Iron Nuggets, Gold Nuggets, and sometimes Bells. This is essential for crafting furniture, tools, bridges, inclines, and early-game buildings. The shovel is especially popular for rock farming because it helps you stand in place when combined with the two-hole trick.
Plant and Move Trees
If you eat fruit, you gain fruit power. With fruit power active, you can use a shovel to dig up an entire tree and move it somewhere else. This is excellent for orchard planning, island design, and last-minute landscaping decisions made at 2:00 a.m. because your pear trees were “slightly too pear-ish” near the plaza.
Plant Money Trees
Every day, you can find a glowing spot on your island. Dig it up to receive Bells, then bury Bells in the glowing hole to grow a money tree. Many players bury 10,000 Bells because it offers a reliable return. Money trees are one of the most beloved shovel-related features because nothing says island capitalism like harvesting cash from a tree.
Move Flowers and Shrubs
Shovels let you dig up flowers and shrubs, making them essential for landscaping. Whether you are breeding hybrid flowers, building a garden, or moving one stubborn tulip that is ruining your path symmetry, the shovel is your best friend.
Shovel Durability: How Long Do Shovels Last?
In Animal Crossing: New Horizons, most shovels break after repeated use. The Flimsy Shovel has the lowest durability, regular and shop shovels last longer, and the Golden Shovel lasts the longest. Digging up fossils, hitting rocks, digging up plants, and uprooting trees all reduce durability. Simply filling holes does not cost durability, so kick dirt over holes whenever you can. It is free, fast, and oddly satisfying.
One useful trick is customization. Standard and decorative shovels can be customized, and customization refreshes their durability. If your shovel has been used heavily, customizing it before a big island project can save you from an inconvenient break. This does not work for every shovel type, but it is a helpful strategy for regular tools.
Common Mistakes When Getting Shovels
Not Donating Critters Early
Many beginners wonder why they cannot get a shovel on day one. The answer is usually simple: they have not donated enough fish or bugs to Tom Nook. If you want the shovel quickly, focus on catching five unique critters as soon as possible.
Eating Fruit Before Hitting Rocks
Fruit power lets you break rocks. That sounds exciting until you accidentally destroy a rock on your own island and have to wait for it to respawn somewhere random the next day. If you are farming rocks for materials, do not eat fruit first. Save fruit power for moving trees or intentionally clearing rocks.
Ignoring Gulliver
If you want the Golden Shovel, help Gulliver every time he appears. Thirty rescues is a lot, and skipping him only stretches out the grind. Yes, he talks a lot. Yes, he is dramatic. Yes, he somehow keeps losing communicator parts. Help him anyway.
Forgetting to Check Nook’s Cranny
The Colorful Shovel, Outdoorsy Shovel, and Printed-Design Shovel depend on shop rotation. If you want all shovel variants, make a habit of checking the cabinet in upgraded Nook’s Cranny every day. It takes only a few seconds, and it prevents future regret.
Best Strategy to Collect Every Shovel
The fastest natural path is simple. First, donate five bugs or fish to Tom Nook and unlock Blathers. Second, get the Flimsy Shovel recipe and craft your first shovel. Third, earn 3,000 Nook Miles and buy Pretty Good Tools Recipes to craft the regular Shovel. Fourth, upgrade Nook’s Cranny and buy decorative shovels as they appear. Fifth, help Gulliver every time he washes up so you eventually unlock the Golden Shovel DIY recipe.
For daily use, carry a regular Shovel or a shop shovel. Keep a Flimsy Shovel only if you need it for crafting another regular Shovel. Save Gold Nuggets until you are ready to craft golden tools. And if you are doing a huge terraforming or flower-moving project, bring backup shovels. Nothing ruins a landscaping mood faster than a tool snapping while you are surrounded by 47 misplaced roses.
Extra Experience: What I Learned While Collecting Shovels in Animal Crossing: New Horizons
Collecting every shovel in Animal Crossing: New Horizons sounds easy at first. It is just shovels, right? How complicated can one digging stick be? Then the game politely reminds you that it runs on real-time progression, rotating shop stock, random visitors, material scarcity, and your personal ability to remember whether you already checked the beach today. In other words, the shovel journey is not hard, but it rewards routine.
The first important lesson is that the Flimsy Shovel is not useless. Many players rush to replace it, and that makes sense because it breaks quickly. However, the Flimsy Shovel remains important because it is part of the regular Shovel recipe. Keeping hardwood in storage is a smart habit. If your shovel breaks, you can quickly craft a Flimsy Shovel and upgrade it with an Iron Nugget instead of running to the shop like your island is experiencing a tool emergency.
The second lesson is that upgraded Nook’s Cranny is a collector’s best friend. Decorative shovels are not just cosmetic clutter. They make the game feel more personal. A Colorful Shovel looks great on playful islands, while an Outdoorsy Shovel fits natural builds. The Printed-Design Shovel is perfect for players who like their tools to look like part of an outfit. Animal Crossing is a cozy game, but it is also secretly a fashion simulator with mortgages.
The third lesson is to respect rocks. Rocks are easy to take for granted until you accidentally smash one after eating fruit. Early in the game, Iron Nuggets are extremely valuable, especially when you need them for Nook’s Cranny and tool upgrades. Before hitting rocks, check your fruit counter. If there is a number in the corner, use a toilet item to remove fruit power or spend the charge intentionally by moving a tree. Yes, in this game, sitting on a toilet is a valid resource-management strategy. Video games are art.
The fourth lesson is that Gulliver requires patience. Helping him 30 times can feel slow because he does not appear every day. The best approach is to make beach patrol part of your daily routine. Run along the shore, look for message bottles, shells, communicator-part spots, and Gulliver. If he is there, wake him up and finish the task immediately. Do not leave it for later unless you enjoy forgetting things and then blaming past-you for being unreliable.
The fifth lesson is to carry backups during big projects. If you are redesigning an orchard, moving flowers, clearing space for a neighborhood, or building a rock garden, one shovel may not be enough. Bring two or three. Better yet, place a DIY workbench near your project area and keep materials in storage. A little planning turns a frustrating tool-break moment into a tiny pause instead of a full island commute.
Finally, the best shovel experience comes from treating the tool as part of your island rhythm. Dig fossils in the morning. Check glowing money spots. Hit rocks before eating fruit. Help Gulliver when he appears. Buy decorative tools when they rotate in. Over time, you will naturally collect every shovel without turning the game into a spreadsheet job. Unless you enjoy spreadsheets, in which case Tom Nook would probably like to discuss a business opportunity with you.
Conclusion
Getting all shovels in Animal Crossing: New Horizons is a mix of story progress, crafting, shopping, and long-term dedication. The Flimsy Shovel begins with Blathers, the regular Shovel comes from Pretty Good Tools Recipes, decorative shovels appear in upgraded Nook’s Cranny, the Dream Shovel belongs to dream-related gameplay, and the Golden Shovel rewards players who help Gulliver 30 times.
The shovel may not be the flashiest tool in the game, but it is one of the most important. It helps you build wealth, complete the museum, design your island, gather resources, and create the paradise you imagined when you first stepped off the seaplane. Just remember: check your fruit counter before hitting rocks. Your future self will thank you.