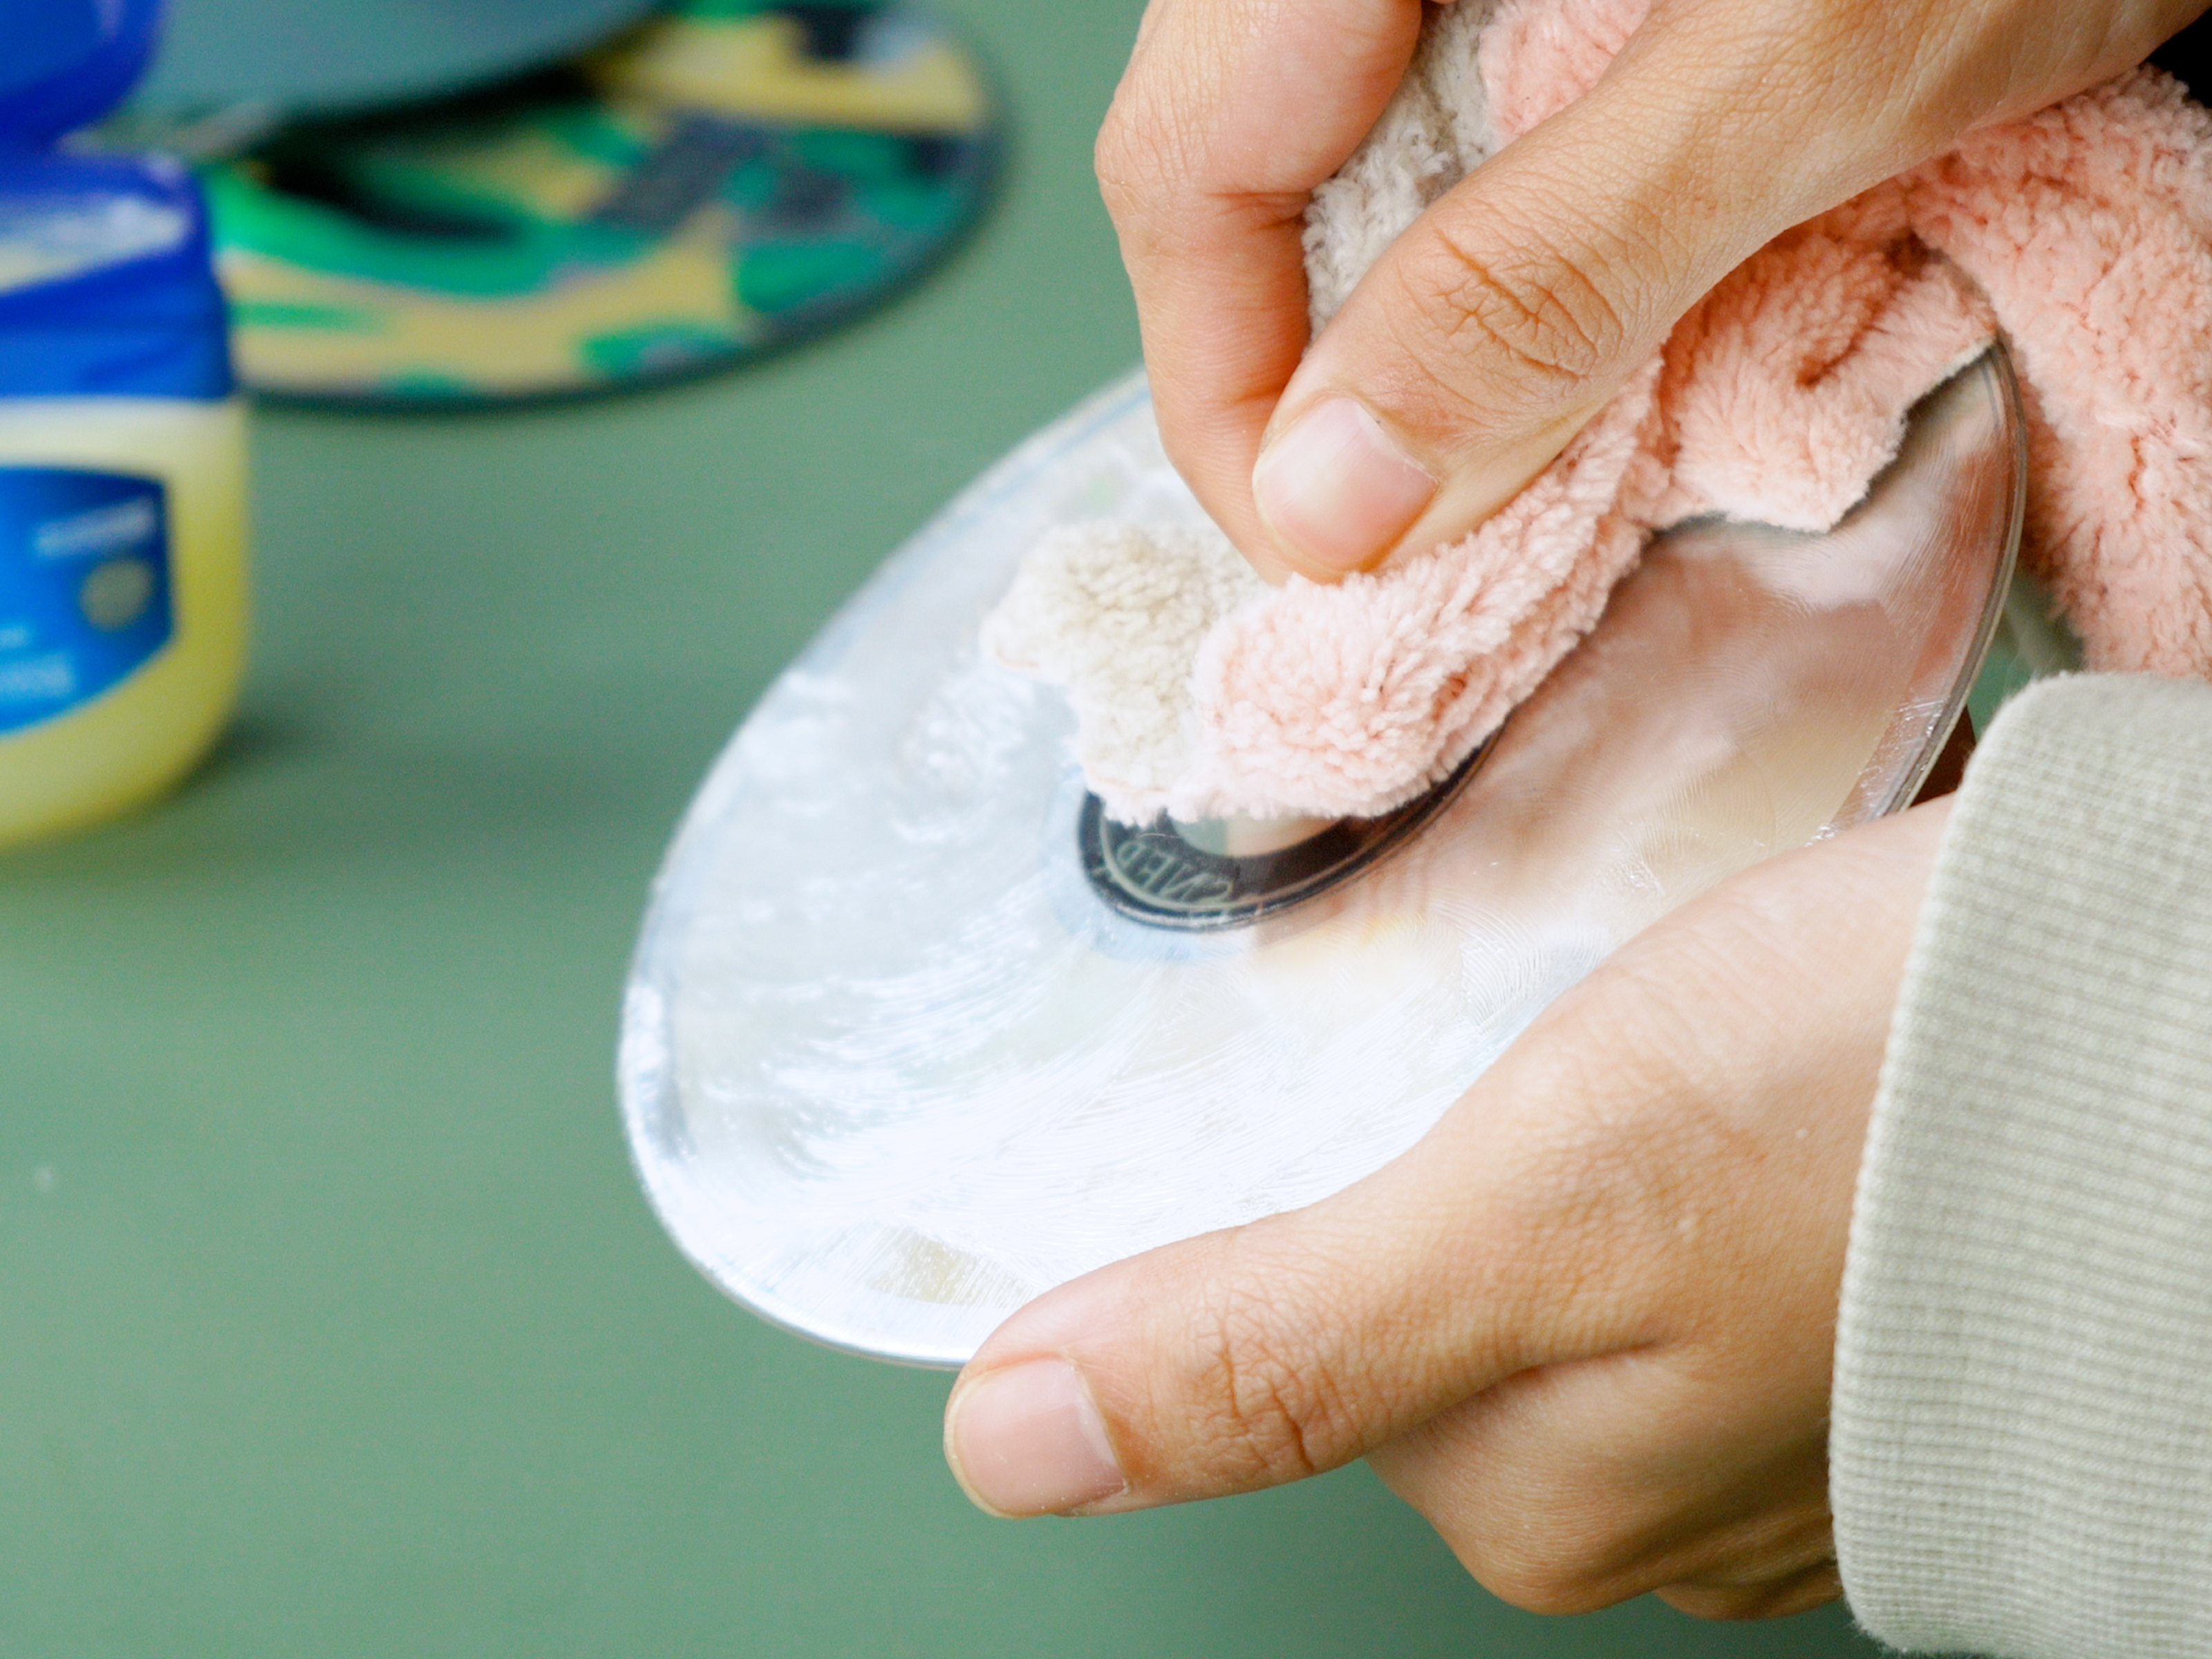
Few household tragedies feel as oddly dramatic as pulling out a favorite DVD, pressing play, and watching the screen freeze right before the good part. Maybe it is a family wedding video, a workout disc you swear you will use again, a movie from your childhood, or a game disc that has survived three consoles and one suspiciously sticky coffee table. The good news: many scratched DVDs can be cleaned, polished, copied, or professionally resurfaced before they are declared officially toast.
The not-so-good news: not every scratch is fixable. A DVD works because a laser reads data through the clear polycarbonate layer. Light scratches, dust, fingerprints, and smudges can interfere with that laser, causing skipping, freezing, pixelation, or “disc unreadable” errors. Deep gouges, cracks, warping, heat damage, disc rot, or damage near the label layer may be permanent. In other words, this guide can help a scratched DVD recover from a rough afternoon, but it cannot resurrect a disc that looks like it fought a lawn mower.
Below is a practical, safe, step-by-step guide to fixing a scratched DVD at home, plus advice on when to stop before you accidentally turn “slightly scratched” into “modern art.”
Before You Begin: What You Need
Gather a few gentle supplies before touching the disc. You will need a clean microfiber cloth or soft lint-free cotton cloth, distilled water, mild dish soap, a clean towel, and a well-lit surface. Optional tools include isopropyl alcohol for stubborn grime, a DVD cleaning kit, non-gel white toothpaste, plastic polish, a disc repair kit, and access to a computer DVD drive if you want to copy files before the disc gets worse.
Avoid harsh solvents such as benzine, paint thinner, abrasive cleaners, rough paper towels, window cleaner, and anti-static sprays made for vinyl records. Also avoid circular scrubbing. DVDs store data in circular tracks, so wiping around the disc can create scratches that follow the data path and cause more playback trouble. The safest cleaning motion is straight from the center hole outward to the edge.
How to Fix a Scratched DVD: 13 Steps
1. Confirm the DVD Is the Real Problem
Before blaming the DVD, test it in another player or computer drive. Sometimes the “scratched DVD” is actually a dusty lens, outdated player, region-code issue, weak drive motor, or a console having a dramatic little moment. If the disc fails in multiple devices, the disc is likely the problem. If it plays fine elsewhere, clean the player, update firmware if possible, or try a lens cleaner designed for optical drives.
2. Inspect the Disc Under Bright Light
Hold the DVD by the edges and center hole. Tilt it under bright light and look at the shiny reading side. Fingerprints and cloudy smudges are often easier to fix than scratches. Light hairline scratches may cause skipping but can often be improved. Deep scratches that catch your fingernail, cracks, peeling layers, bubbling, discoloration, or pinholes are warning signs. If the disc is cracked, do not put it in a player; a spinning cracked disc can break apart and damage the drive.
3. Identify the Scratch Direction
Scratch direction matters. A straight scratch running from the center toward the outer edge is usually less harmful than a circular scratch that follows the disc’s data track. Circular scratches are nastier because the laser may lose its place while reading. If you see circular rings, especially rings caused by a malfunctioning player or console, stop using that device until you know it is not scratching discs.
4. Remove Loose Dust First
Dust may look harmless, but tiny particles can act like sandpaper. Blow gently across the disc or use a camera-style air blower. Do not use canned air too close to the disc because propellant can leave residue. Never rub a dusty DVD immediately. That is how one tiny speck becomes the villain of the entire movie night.
5. Wipe From the Center Outward
Use a clean microfiber or lint-free cloth. Wipe in straight lines from the center hole to the outside edge. Do not wipe in circles. Use light pressure. Think “polishing eyeglasses,” not “scrubbing a grill grate after a barbecue.” After wiping, check the disc again. If the problem was dust or a fingerprint, this simple step may fix playback instantly.
6. Clean Smudges With Distilled Water
If dry wiping does not work, lightly dampen part of the cloth with distilled water. Wipe from the center outward, then use a dry part of the cloth to remove moisture. Distilled water is better than tap water because it is less likely to leave mineral spots. Let the DVD air-dry completely before testing it. A wet disc and a DVD player should not become roommates.
7. Use Mild Soap for Greasy Fingerprints
For sticky residue, food smears, or fingerprints that look like someone ate fries during the director’s commentary, mix a drop of mild dish soap with lukewarm water. Dampen the cloth, gently clean from center to edge, then rinse with a cloth dampened only with distilled water. Dry with a clean lint-free cloth. Make sure no soap film remains, because residue can scatter the laser and cause more playback errors.
8. Try Isopropyl Alcohol for Stubborn Grime
If the DVD still has sticky spots, use a small amount of isopropyl alcohol on a cloth, not directly poured onto the disc. Wipe gently from the center outward. This is best for grime, oils, and marker-like residue on the reading side. Do not soak the disc, and do not use alcohol on discs with damaged, peeling, or questionable labels. When in doubt, use less liquid and more patience.
9. Test the DVD After Cleaning
Once the disc is dry, test it in a reliable player. If it plays, celebrate modestly and consider copying important personal files or making a backup where legally allowed. If it still skips in the same spot, the issue is probably a scratch rather than dirt. Make a note of where the playback fails. If the freeze always happens at the same scene or file, the damaged area is likely affecting readable data.
10. Polish Light Scratches With Non-Gel Toothpaste
Toothpaste is the classic household trick, but use it carefully. It works only because some plain white toothpaste contains mild abrasives that can polish the plastic surface. Do not use gel toothpaste, whitening toothpaste, charcoal toothpaste, or formulas with gritty beads. Apply a tiny amount to the scratch area and rub gently in straight lines from the center outward. Keep your pressure light and even.
After polishing for about 30 seconds, rinse the disc with lukewarm water, wipe away all toothpaste residue, and dry with a lint-free cloth. Test the DVD again. Repeat only once if necessary. More polishing is not always better. At a certain point, you are not repairing the disc; you are slowly turning it into a minty frisbee.
11. Use Plastic Polish or a DVD Repair Kit
If toothpaste feels too risky or messy, use a product designed for plastic polishing or optical disc repair. Follow the instructions exactly. Most kits use a mild abrasive or polishing compound to smooth the clear surface so the laser can focus again. The goal is not to “fill” the scratch magically; it is to reduce the optical distortion caused by the scratch. Always polish from the center outward unless the product instructions say otherwise.
12. Copy Important Data as Soon as the DVD Plays
If the DVD contains personal files, photos, home videos, or documents, try copying the content to a computer immediately after it becomes readable. A disc that works today may fail tomorrow, especially if the scratch is deep or the disc is aging. Use a reliable DVD drive and copy the files slowly. If normal copying fails, disc recovery software may help read around damaged sectors. For commercial movie DVDs, respect copyright laws and local rules before making any copy.
13. Consider Professional Resurfacing
If home cleaning and light polishing do not work, professional resurfacing may be the best option. Libraries, used game stores, media shops, and some electronics repair services use disc resurfacing machines that carefully remove a thin layer of plastic and polish the disc evenly. This can restore many scratched DVDs, especially discs with widespread light scratches. However, resurfacing cannot fix cracks, warped discs, disc rot, or damage that reaches the data layer. If the DVD is rare or sentimental, professional help is safer than aggressive home experiments.
What Not to Do When Repairing a Scratched DVD
Do not use rough towels, napkins, paper towels, kitchen scrubbers, baking soda paste, metal polish, car wax with harsh solvents, or random “life hacks” involving peanut butter. Peanut butter belongs on toast, not your extended edition movie collection. Do not bend the DVD while removing it from a tight case. Do not stack discs without cases. Do not write on the reading surface. Do not leave DVDs in hot cars, sunny windows, damp basements, or places where children, pets, or snack dust can join forces.
Why Some Scratches Cause Skipping and Others Do Not
A DVD player has built-in error correction, which means it can often read through small imperfections. That is why one ugly-looking disc may play perfectly, while another disc with one tiny-looking ring scratch freezes every five minutes. The depth, width, location, direction, and density of scratches all matter. Dirt and fingerprints can also mimic scratch problems by scattering light and preventing the laser from focusing accurately.
The reading side is usually the focus of repair, but the label side should also be treated carefully. While DVDs are generally more protected than CDs because their data layer is sandwiched between plastic layers, label-side damage can still be serious, especially on certain disc types. If you see peeling, bubbling, or separation between layers, polishing the bottom will not solve the real problem.
How to Prevent Future DVD Scratches
The easiest scratched DVD repair is the one you never need to do. Store DVDs vertically in their cases. Handle them only by the edges and center hole. Keep them away from heat, humidity, direct sunlight, and dust. Return each disc to its case immediately after use. If a case grips the disc too tightly, press the center hub before lifting the DVD instead of flexing the disc. Flexing can stress the layers and shorten the disc’s life.
For valuable home movies or archived files, do not rely on one DVD forever. Make digital backups on a hard drive, cloud storage, or another reliable medium. Optical discs can last a long time when stored well, but they are not immortal. They are more like vampires with storage requirements: cool, dark, dry, and handled with respect.
Real-World Experiences: Lessons From Fixing Scratched DVDs
In real life, fixing a scratched DVD is less like performing surgery and more like being a patient detective with a microfiber cloth. The biggest lesson is that cleaning should always come before polishing. Many people see a disc skip and instantly reach for toothpaste, but a surprising number of “scratched” DVDs are simply dirty. Fingerprints, cooking oil, dried soda, dust, and mysterious living-room goo can all make a disc unreadable. A careful center-out wipe with distilled water often solves the issue without removing any plastic at all.
Another useful experience: do not judge a DVD only by how scary it looks. I have seen discs with dozens of faint hairline marks play beautifully, while a nearly perfect-looking disc froze because of one circular scratch. Circular scratches are especially frustrating because they can interrupt the laser’s path over a longer section of data. If a DVD freezes at the exact same timestamp every time, that is usually a sign of physical damage rather than a random player hiccup.
Toothpaste can work, but it should be treated as a last-resort household method, not a miracle spa day for discs. The best results usually come from a tiny amount of plain white non-gel toothpaste, gentle pressure, and straight center-to-edge motion. The worst results come from aggressive rubbing, gritty toothpaste, or repeating the process until the disc looks cloudy. If the disc becomes hazier after polishing, playback can get worse. Gentle technique matters more than enthusiasm. DVDs do not reward elbow grease; they reward restraint.
Professional resurfacing is often worth it for rare movies, out-of-print discs, old game discs, or personal recordings. A resurfacing machine can polish evenly in a way most people cannot do by hand. The difference is consistency. Hand polishing can create uneven patches, but a good machine removes a controlled amount of plastic and buffs the surface smoothly. That said, resurfacing is not magic. If the disc has cracks, warping, layer separation, or data-layer damage, even the best machine may not save it.
The most practical habit is to copy important data the moment a repaired disc becomes readable. Do not play the victory music and put the disc back in the drawer for another five years. If it contains home videos, photos, old school projects, tax files, or once-in-a-lifetime memories, transfer them immediately. A repaired DVD is giving you a second chance, not signing a lifetime service contract.
Finally, prevention beats repair every time. Most DVD damage comes from everyday carelessness: sliding discs across tables, leaving them shiny-side down, stacking them, using paper sleeves, or forcing them out of stubborn cases. Treat DVDs like optical media instead of drink coasters, and they will usually behave. And if a disc does skip, start simple: inspect, dust, wipe, wash, dry, test, then polish only if necessary. That calm order saves more discs than any dramatic internet trick.
Conclusion
Learning how to fix a scratched DVD is mostly about knowing when to clean, when to polish, when to copy, and when to call in professional resurfacing. Start with the safest steps: inspect the disc, remove dust, wipe from the center outward, and clean smudges with distilled water or mild soap. Move to toothpaste or a repair kit only for light scratches that still cause playback problems. If the DVD is valuable, rare, or sentimental, do not gamble with aggressive DIY methods. Professional resurfacing may be cheaper than replacing the disc, and it is certainly cheaper than losing irreplaceable home videos.
Note: This article synthesizes practical guidance from disc preservation, electronics support, library media care, and consumer repair references. It is written for general informational use; badly cracked, warped, peeling, or chemically damaged discs may be beyond home repair.