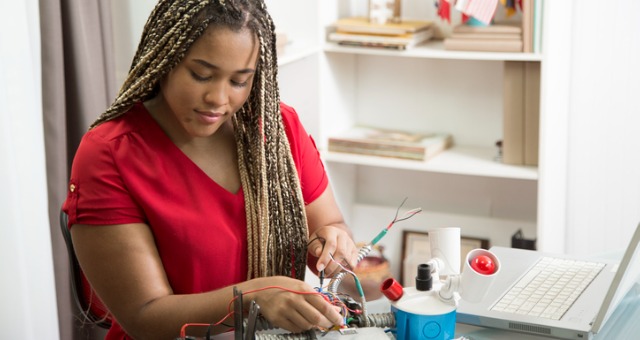
Designing a hands-on STEM activity used to sound simple: gather materials, give students a challenge, watch the classroom turn into a delightful storm of cardboard, wires, rulers, spilled water, and suspiciously sticky tape. But today, “hands-on” does not always mean “only hands.” A strong STEM experience may include physical tools, digital simulations, video prompts, interactive notebooks, sensors, collaborative documents, augmented reality, 3D models, printed worksheets, or a teacher’s carefully timed question that saves a bridge from collapsing into a dramatic pile of popsicle sticks.
That is where media affordances come in. A media affordance is what a tool or medium makes easier, clearer, faster, safer, more visible, or more meaningful. A microscope affords close observation. A simulation affords rapid testing of variables. A slow-motion video affords careful analysis of motion. A physical prototype affords tactile feedback, failure, repair, and the priceless sound of a student saying, “Wait, I think I know why it broke.”
When educators design STEM hands-on activities, the smartest question is not, “Should this be digital or physical?” The better question is, “What does each medium help students do that another medium cannot do as well?” Great STEM learning happens when media choices serve the learning goal, not when technology is sprinkled on top like glitter on a science fair volcano.
What Media Affordances Mean in STEM Learning
In STEM education, media affordances refer to the strengths and limits of different learning materials, platforms, and formats. A printed diagram, a short video, a physical model, a virtual lab, a spreadsheet, a robot kit, and a class discussion all communicate differently. Each medium invites certain actions while making other actions harder.
For example, a paper circuit activity lets students feel the frustration of loose connections and the joy of making an LED glow. A digital circuit simulator lets them test many circuit designs quickly without burning through batteries or accidentally creating a tiny classroom smoke signal. Both are valuable, but they are not interchangeable. The physical version teaches material behavior, troubleshooting, and fine motor problem-solving. The digital version supports rapid iteration, visualization, and low-risk experimentation.
Considering media affordances means designing with intention. Instead of choosing tools because they are shiny, familiar, trendy, or already sitting in the supply closet, teachers match media to the thinking students need to do. Are students observing, measuring, modeling, building, comparing, predicting, coding, explaining, or revising? The answer should guide the medium.
Why Hands-on STEM Still Matters
Hands-on STEM activities remain powerful because students do not simply receive information; they interact with a problem. They ask questions, make predictions, test ideas, collect evidence, revise designs, and communicate results. That rhythm aligns with modern science education goals, including science and engineering practices such as planning investigations, analyzing data, constructing explanations, designing solutions, and arguing from evidence.
Hands-on work also gives students memorable anchors. A lesson about force becomes clearer when a rubber-band car veers left because one wheel is crooked. A lesson about density becomes funnier when a student insists their aluminum foil boat is “basically unsinkable” six seconds before it becomes very sinkable. These moments are not distractions; they are learning events. The medium gives the concept a body.
However, hands-on does not automatically mean minds-on. Students can build a bridge without understanding load distribution. They can follow a lab recipe without grasping the concept behind the steps. They can complete a worksheet while their brains quietly move to another ZIP code. Media affordances help teachers avoid this trap by choosing tools that make thinking visible, not just activity visible.
The Three-Part Design: Pre-Lab, Experiment, and Post-Lab
One practical way to design STEM hands-on activities is to divide the experience into three parts: pre-lab, experiment, and post-lab. Each stage benefits from different media choices.
Pre-Lab: Build Curiosity and Reduce Confusion
The pre-lab stage prepares students before they touch the materials. This is where teachers activate prior knowledge, introduce vocabulary, clarify safety rules, and help students understand the purpose of the activity. Good pre-lab media can prevent the classic classroom moment when half the groups start building while the other half stare at the materials as if the cardboard personally betrayed them.
Short videos, interactive slides, concept cartoons, prediction polls, annotated diagrams, and quick simulations work well here. A video can show a phenomenon that is too fast, too small, too dangerous, or too expensive to demonstrate live. A simulation can let students explore variables before they run a real experiment. A diagram can label parts of a system so students know what to watch for during the activity.
For example, before students build a wind turbine blade, a pre-lab simulation can show how blade angle affects rotation. A short video can show real turbines in different environments. A discussion prompt can ask: “What trade-offs might engineers face when designing blades for speed, durability, and cost?” By the time students handle cardboard or plastic blades, they are not just making shapes. They are making design decisions.
Experiment: Let the Medium Support Real Investigation
The experiment stage is where students manipulate materials, test ideas, gather data, and respond to failure. This is the messy middle, also known as the part where someone asks for more tape every 42 seconds.
Physical materials afford tactile feedback, authentic constraints, teamwork, and real-world unpredictability. Digital tools afford data capture, visualization, precision, and repeated trials. The strongest activities often combine both. Students might build a paper roller coaster, record a marble’s motion with a phone camera, calculate speed in a spreadsheet, and then revise the track design based on evidence.
When choosing media for the experiment, teachers should ask: What must students experience physically? What can be represented digitally? What data should be collected? What will help students notice patterns? What tool will reduce unnecessary frustration without removing productive struggle?
Productive struggle is important. If the medium makes the task too easy, students may miss the concept. If it makes the task too hard, they may learn only that science is chaos wearing safety goggles. The goal is balance.
Post-Lab: Turn Activity Into Understanding
The post-lab stage helps students reflect, explain, compare results, and transfer learning to new situations. This is where the experience becomes knowledge. Without a post-lab, a STEM activity can feel exciting but intellectually unfinished, like watching a movie and leaving before the ending explains why the robot was sad.
Post-lab media may include collaborative documents, discussion boards, digital portfolios, student-created videos, graphs, lab reports, claim-evidence-reasoning templates, or gallery walks. Different media support different kinds of expression. Some students explain best through writing, while others shine through diagrams, oral explanations, code, models, or recorded demonstrations.
A good post-lab asks students to make their thinking visible. What changed between the first design and the final design? What evidence supports their conclusion? What would they test next? Which variable mattered most? What surprised them? These questions move students from “we made a thing” to “we understand why the thing behaved that way.”
Matching Media to STEM Learning Goals
Every STEM hands-on activity should begin with a learning goal. Once the goal is clear, the media choice becomes easier. If students need to understand a hidden process, such as molecular motion or electric fields, simulations and animations may be useful. If they need to understand structure, balance, friction, or material strength, physical prototypes are hard to beat. If they need to analyze patterns, spreadsheets and graphing tools can make relationships visible.
Here are several common STEM goals and the media affordances that support them:
Observation and Measurement
For observation, physical tools such as magnifiers, microscopes, thermometers, rulers, sensors, and balances are essential. Digital tools can extend observation by recording, slowing down, zooming in, or organizing data. A student observing plant growth may use a ruler and notebook, but time-lapse photography can reveal patterns that daily observation misses.
Modeling Invisible Systems
Many STEM concepts are invisible or abstract. Students cannot see electrons flowing through a wire, molecules spreading through a room, or gravitational fields bending paths. Digital simulations, animations, augmented reality, and physical analog models can help students build mental models. The teacher’s job is to remind students that models are useful simplifications, not perfect copies of reality.
Engineering Design and Iteration
Engineering activities need media that support testing and revision. Physical materials are excellent because they force students to confront constraints. A bridge made from straws does not care how confident the design looked in a sketch. It either holds weight or becomes modern art. Digital design tools, however, can help students plan, simulate, document, and compare versions before or after building.
Collaboration and Communication
STEM is social. Scientists and engineers communicate ideas, critique evidence, and improve designs together. Shared whiteboards, collaborative documents, discussion tools, posters, and presentation slides all afford communication. The key is to assign roles and expectations so collaboration does not become one student working while three others conduct advanced research into snack availability.
Digital Media: Powerful, but Not Magical
Digital media can transform STEM learning when used well. Interactive simulations allow students to manipulate variables quickly. Virtual labs can provide access when equipment is limited or safety risks are high. Videos can show phenomena that are remote, microscopic, enormous, or too slow to observe in real time. Data tools can help students graph results and identify patterns faster than hand calculations alone.
But digital tools are not magic wands. A simulation without a guiding question can become random clicking. A video without a pause-and-predict moment can become passive watching. A virtual lab without reflection can become a game of “finish the steps.” Media affordances matter because they remind educators that the tool does not teach by itself. The design teaches.
For example, an interactive physics simulation can help students explore projectile motion by changing angle, speed, mass, and gravity. That is a strong affordance. But students still need prompts: What do you predict will happen? Which variable changed the range most? How does your graph support your claim? What would happen on the Moon? Without these questions, students may learn that launching virtual objects is fun, which is true, but not the full learning target.
Physical Media: Where Reality Pushes Back
Physical materials are irreplaceable because reality has opinions. Cardboard bends. Water leaks. Wheels wobble. Magnets attract things you did not expect. Soil samples vary. A sensor may give strange readings because the setup is flawed. These complications are not always problems; often, they are the lesson.
Physical media afford embodied learning. Students use their hands, eyes, ears, and spatial reasoning. They learn that measurements require care, that materials behave differently under stress, and that designs must work outside the imagination. This is especially important in engineering design, where constraints are not decorations. They are the plot.
Still, physical media also have limitations. Materials cost money. Labs take time to set up. Some experiments are unsafe, inaccessible, or difficult to repeat. Results can be noisy. Students may focus more on construction than explanation. That is why physical media often work best when paired with digital supports, structured reflection, and clear evidence requirements.
Accessibility and Universal Design in STEM Activities
Considering media affordances also means considering who can access the activity. A STEM task should not quietly assume that every student sees, hears, moves, reads, processes, communicates, or collaborates in the same way. Universal Design for Learning encourages educators to provide multiple ways for students to engage with content, represent ideas, and express understanding.
In practice, this could mean offering captions on videos, readable instructions, visual diagrams, audio explanations, flexible roles, tactile models, keyboard-friendly digital tools, and alternatives for students who cannot safely or comfortably complete a specific physical action. Accessibility is not a bonus feature. It is part of good design.
For instance, in a robotics activity, one student might assemble components, another might write code, another might analyze sensor data, and another might document design changes. All roles should involve meaningful STEM thinking. The goal is not to give some students the “real” work and others the “helper” work. The goal is to design a learning environment where multiple strengths can enter the problem.
Assessment: Choose Media That Reveal Thinking
Assessment should match the activity’s purpose. If students are learning to design solutions, a multiple-choice quiz alone may not capture their reasoning. If students are learning to analyze data, a beautiful prototype may not prove they understood the pattern. Media affordances help teachers collect better evidence of learning.
Useful assessment artifacts may include design journals, sketches, photos of prototypes, data tables, graphs, reflection videos, peer feedback, code snippets, oral explanations, or final reports. Each artifact reveals something different. A graph shows pattern recognition. A design journal shows iteration. A video explanation shows reasoning. A prototype shows application. Together, they create a richer picture.
A simple but effective structure is claim, evidence, and reasoning. Students make a claim about what happened, support it with evidence from their experiment, and explain the science or math behind it. This structure works across many media: written reports, slides, posters, short videos, or live presentations.
Common Mistakes When Choosing Media for STEM Activities
The first mistake is using technology because it looks impressive. A virtual reality activity may wow students, but if the learning goal could be met better with a flashlight, a ruler, and a cardboard box, choose the cardboard box. Cardboard has never needed a software update.
The second mistake is treating hands-on work as automatically rigorous. Building is not enough. Students need to connect actions to concepts. A tower challenge becomes STEM learning when students measure height, analyze stability, test variables, and explain design decisions.
The third mistake is overloading students with too many media at once. A lesson that includes a video, app, worksheet, simulation, physical build, spreadsheet, quiz, and discussion may sound rich, but it can become cognitive soup. Use enough media to support the goal, not enough to make the lesson look like it swallowed the entire internet.
The fourth mistake is forgetting time. Every medium has a setup cost. Logging into a platform, distributing materials, calibrating sensors, charging tablets, or cleaning up glue can consume precious minutes. Good design includes the unglamorous details because the unglamorous details are often where lessons go to trip over a backpack.
Specific Classroom Examples
Example 1: Designing a Water Filter
Students design a simple water filter using gravel, sand, cotton, coffee filters, and plastic bottles. Physical media afford material testing and visible comparison. Digital media can support the activity through a pre-lab video about water treatment, a shared spreadsheet for turbidity ratings, and a post-lab reflection where students explain trade-offs between speed, clarity, cost, and sustainability.
Example 2: Exploring Sound With DIY Instruments
Students create instruments from rubber bands, cups, bottles, cardboard tubes, and string. Physical materials help students feel vibration and hear pitch changes. A slow-motion video can help them see movement that is too fast for the eye. A frequency analyzer app can connect sound to data. The affordance blend turns “that sounds higher” into measurable evidence.
Example 3: Modeling Ecosystems
Students build a physical food web with cards and string, then use a digital simulation to test what happens when one population changes. The physical model supports spatial understanding and discussion. The simulation supports dynamic cause-and-effect reasoning. A written or recorded explanation helps students connect the model to ecological stability.
Example 4: Building and Testing Paper Towers
Students construct towers from paper and tape, then test them with weight. The physical build reveals compression, tension, balance, and geometry. Photos allow students to document design versions. A graphing tool helps compare tower height, material use, and load capacity. The post-lab discussion focuses on trade-offs: strongest, tallest, cheapest, or most efficient?
A Practical Checklist for Media Affordance Design
Before launching a STEM hands-on activity, teachers can use a short checklist:
- What is the main learning goal?
- What should students physically experience?
- What should students visualize, simulate, or model digitally?
- What data will students collect, and how will they analyze it?
- How will students show their reasoning?
- What accessibility supports are needed?
- What media might distract from the goal?
- How will students reflect after the activity?
This checklist keeps the activity focused. It also helps teachers avoid the “activity first, learning later” problem. The best STEM lessons are not random fun with a science label. They are carefully designed experiences where students investigate meaningful questions.
Experience-Based Reflections on Designing With Media Affordances
In real classrooms, media affordance design is less like building a perfect machine and more like packing for a field trip with weather reports from three different planets. You plan carefully, but students will surprise you. A tool you expected to be intuitive may confuse everyone. A humble material may produce the deepest discussion of the day. A simulation may reveal misconceptions that were invisible during the physical build. That is why reflective teaching matters.
One useful experience is to pilot a STEM activity with a small group before using it with a full class. Even ten minutes of student interaction can reveal whether the instructions are clear, whether the media supports the goal, and whether students are focusing on the intended concept. If students spend most of the time decorating the rocket instead of testing fin shape, the medium may be pulling attention in the wrong direction. Glitter is a powerful force, but it is not always aligned to the standard.
Another practical lesson is that students need explicit transitions between media. When moving from a simulation to a physical experiment, teachers should ask students what they expect to stay the same and what might change. Simulations are clean; real materials are noisy. A digital pendulum may swing perfectly, while a homemade pendulum may wobble, twist, or behave like it has personal issues. Discussing those differences helps students understand the limits of models.
Documentation also improves learning. Photos of prototypes, short student videos, screenshots of simulations, and quick voice reflections can capture thinking that would otherwise disappear. This is especially helpful during engineering challenges, where the first design may fail quickly but contain important reasoning. A design journal turns “it broke” into “the base was too narrow, so we widened it in version two.” That shift is gold.
Teachers also learn to respect cleanup, charging, storage, and classroom flow. A beautiful activity can collapse if students cannot access materials, devices die, or the room layout prevents collaboration. Media affordance planning should include logistics because logistics shape learning. A sensor locked in a cabinet is not an affordance; it is a museum exhibit.
Finally, student voice should influence media choices. After an activity, ask students which tool helped them understand the concept, which tool confused them, and what they would change. Students often give blunt, useful feedback. They may say the video was too long, the diagram helped, the app was annoying, or the physical model made the idea finally click. That feedback helps educators refine future activities and build a more responsive STEM classroom.
The biggest experience-based insight is simple: media should earn its place. Every tool, material, screen, model, and handout should have a job. If it helps students ask better questions, test better ideas, see hidden patterns, collaborate more thoughtfully, or explain evidence more clearly, keep it. If it only adds noise, let it retire peacefully. STEM learning is already exciting. It does not need clutter. It needs design.
Conclusion
Considering media affordances when designing STEM hands-on activities helps educators create learning experiences that are active, inclusive, evidence-rich, and purposeful. Physical materials allow students to test reality. Digital tools help them visualize, simulate, record, and analyze. Discussion, writing, drawing, and presentation tools help them explain what they discovered. The magic is not in choosing one medium over another; it is in combining media so each one does what it does best.
When teachers design around affordances, STEM activities become more than classroom projects. They become structured opportunities for students to think like scientists, engineers, mathematicians, and problem-solvers. Students do not just build, click, watch, or write. They investigate. They revise. They explain. They learn why the bridge fell, why the turbine spun, why the graph changed, and why the second prototype was better than the first. That is hands-on learning with a brain attachedand really, that is the best kind.
Note: This HTML body is written for direct CMS publishing and excludes unnecessary citation placeholders or content reference markers.