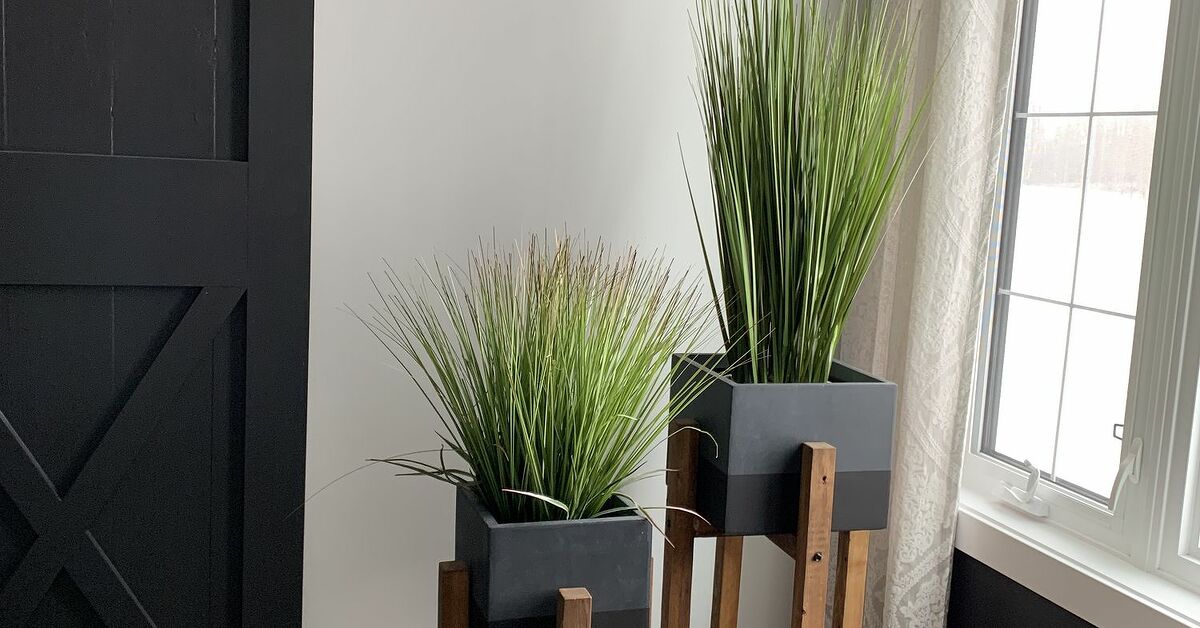
A good houseplant deserves better than a permanent address on the floor beside a forgotten dust bunny. Building a DIY plant stand raises greenery closer to natural light, protects flooring from damp pots, and turns an awkward corner into a miniature indoor junglewithout requiring furniture-store prices or master-carpenter credentials.
This project creates a simple three-tier wooden plant stand that works in a living room, sunroom, covered porch, or apartment balcony. Its clean vertical shape provides space for several pots while occupying only a small patch of floor. The plan is beginner-friendly, customizable, and forgiving enough that a tiny measurement mistake will not summon the woodworking police.
Why Build a DIY Plant Stand?
Plant stands do more than make pothos look important. Elevating plants can improve the way a collection fits into a room and help individual pots receive more appropriate light. A tiered display also keeps leaves from forming one dense green blob in which every plant appears to be competing for the same passport photo.
A homemade stand offers several practical advantages:
- Custom dimensions: Build it around your available corner, window, or plant collection.
- Better use of vertical space: Multiple shelves hold more plants without consuming an entire tabletop.
- Flexible styling: Paint, stain, or leave the wood natural to match your decor.
- Easier plant care: Raised pots are simpler to inspect, rotate, prune, and water.
- Lower waste: Offcuts, reclaimed boards, or leftover furniture lumber may be reused.
DIY plant displays can take many forms, including ladders, crates, pedestals, rolling carts, trellises, and midcentury-style stands. For this guide, however, we will build a straightforward three-shelf tower. It is stable, easy to modify, and useful for both small and medium houseplants.
Finished Size and Design
The completed wooden plant stand measures approximately:
- 36 inches high
- 28 inches wide
- 14 inches deep
It has three shelves positioned roughly 13 inches apart. The lower level can hold heavier or shade-tolerant plants, the middle shelf suits medium pots, and the top provides a sunny stage for a favorite specimen.
The design uses four vertical legs connected by horizontal rails. Solid shelf boards rest on the rails, distributing weight more effectively than attaching thin boards with only a couple of screws. It is simple furniture construction, minus the drawer that never closes correctly.
Tools and Materials
Tools
- Tape measure
- Pencil
- Carpenter’s square or speed square
- Circular saw, miter saw, or handsaw
- Drill and drill bits
- Countersink bit, optional
- Clamps
- Orbital sander or sanding block
- Level
- Paintbrush or clean finishing cloth
- Safety glasses, hearing protection, and dust mask
Lumber and Hardware
- Four 2-by-2 boards cut to 36 inches for the legs
- Six 1-by-3 boards cut to 25 inches for the front and back rails
- Six 1-by-3 boards cut to 11 inches for the side rails
- Three 1-by-12 boards cut to 28 inches for the shelves
- 2 1/2-inch wood screws
- 1 1/4-inch wood screws
- Wood glue
- Wood filler, optional
- Paint, stain, or clear protective finish
- Felt pads or rubber feet
- Plant saucers or waterproof trays
- Furniture anchor, recommended in homes with children or active pets
Board dimensions such as 1-by-3 and 2-by-2 are nominal sizes. Their actual measurements will be slightly smaller. That is normal and not evidence that your lumber has been on a diet.
Choosing the Best Wood
Indoor Plant Stands
Pine is affordable, widely available, and easy for beginners to cut. Poplar has a smoother grain and usually produces a cleaner painted finish. Hardwood can create a premium piece, although it costs more and may be less forgiving when drilling near an edge.
Outdoor or Porch Plant Stands
Cedar and redwood are strong choices for a covered outdoor location because they are naturally more resistant to decay than untreated interior lumber. Pressure-treated wood may also be used outdoors, but it should be dry before finishing, and all cutting and safety guidance supplied with the material should be followed.
No wood finish makes a stand immortal. Direct rain, standing water, harsh sunlight, and repeated freeze-thaw cycles will eventually affect almost any wooden project. A weather-resistant finish and sheltered placement can greatly reduce the abuse.
Step-by-Step DIY Plant Stand Instructions
Step 1: Inspect and Measure the Lumber
Select the straightest boards available. Place each board on a flat surface and look along its length for twists, bows, or dramatic curves. A mildly bowed board may still be usable, but badly twisted lumber can turn assembly into an unwanted geometry exam.
Measure the intended location before cutting anything. Confirm that a 28-inch-wide stand will fit comfortably and that nearby doors, curtains, heaters, or walkways will not interfere with the plants.
Step 2: Make the Cuts
Cut four legs at 36 inches, six long rails at 25 inches, six short rails at 11 inches, and three shelves at 28 inches. Mark every cut with a square so the lines remain perpendicular to the edge.
Clamp the wood securely before cutting. Keep hands away from the blade path, support long offcuts, and follow the manufacturer’s instructions for the saw. Do not attempt to hold a tiny board with one hand while operating a power saw with the other. Houseplants are easier to enjoy with the usual number of fingers.
Step 3: Sand Before Assembly
Sand the pieces while they are still separate. Begin with 80- or 100-grit sandpaper if the lumber is rough, continue with 120 grit, and finish with approximately 180 grit for a smooth painted or stained surface.
Soften sharp corners lightly, remove splinters, and pay attention to cut ends. Wipe away the dust with a vacuum and clean cloth. Pre-sanding is faster than attempting to squeeze a sanding block between assembled rails later.
Step 4: Mark the Shelf Heights
Place all four legs side by side with their bottoms aligned. Measure upward and mark the bottom edge of each rail at:
- 4 inches
- 17 inches
- 30 inches
Extend each mark across the inside face of every leg with a square. Matching marks are essential. When one rail sits higher than its partner, a round pot may begin testing gravity before the project is even finished.
Step 5: Build the Two Side Frames
Lay two legs parallel on a flat work surface, spaced 11 inches apart between their inside edges. Position one short rail at each marked height. The rail ends should sit between the legs.
Apply wood glue to the joints, clamp the pieces, and verify that the rails are square to the legs. Drill pilot holes through the legs and into the ends of the rails. Fasten each joint with 2 1/2-inch wood screws.
Repeat the process with the other two legs. You should now have two matching side frames. Place them together temporarily to confirm that all corresponding rails align.
Step 6: Connect the Frames
Stand the side frames upright and position a 25-inch rail between them at the front of the lowest level. Apply glue, clamp the assembly, drill pilot holes, and drive screws through the legs into the rail ends.
Add the matching back rail at the same height. Repeat for the middle and top levels until all six long rails are installed.
Check the structure with a square as you work. Measure diagonally from one upper corner to the opposite lower corner, then compare that number with the other diagonal. Similar measurements indicate that the frame is square.
Step 7: Attach the Shelves
Center one 28-inch shelf board over each rectangular support frame. Leave an equal reveal on the front and back. Drill pilot holes through the shelf into the rails, then secure it with 1 1/4-inch screws.
Use at least one screw near each corner without drilling excessively close to the board’s edge. Pocket-hole joinery may be used instead of visible screws, but it is optional. A countersink bit and wood filler can disguise standard screw heads effectively.
Step 8: Test for Wobble
Move the stand to a level surface and press gently on each corner. If it rocks, first confirm that the floor is level. Then inspect the leg lengths and joints.
A small rubber or felt pad can correct a slight floor variation. A structural wobble should be fixed at the joints rather than hidden beneath a stack of cardboard. Tighten the screws, verify that the rails are square, and add discreet metal corner braces if extra reinforcement is necessary.
Painting, Staining, and Sealing
Fill visible screw holes, allow the filler to dry, and sand the repaired areas smooth. Then choose a finish based on the location and desired style.
For a Painted Plant Stand
Apply a suitable primer, especially over knotty pine or when using a light paint color. Follow with two thin coats of furniture or cabinet paint. Thin coats usually level better and dry more evenly than one heroic layer applied with the optimism of frosting a birthday cake.
For a Stained Plant Stand
Test the stain on an offcut first. Softwoods such as pine may absorb pigment unevenly, so a compatible pre-stain wood conditioner can help create a more uniform appearance. Apply the stain in the direction of the grain and remove excess product according to its instructions.
For Outdoor Protection
Use a finish specifically labeled for exterior wood. Coat every accessible surface, including the undersides of shelves and exposed end grain. Exterior clear finishes formulated to handle moisture, ultraviolet exposure, and seasonal wood movement are more appropriate than interior-only topcoats.
Allow the finish to dry and cure fully before placing pots on the stand. A surface that feels dry may still be soft enough for a heavy saucer to leave a permanent ring.
How to Arrange Plants on the Stand
A beautiful houseplant display should consider light, weight, growth habit, and wateringnot merely which pot looks cutest beside the couch.
- Place the heaviest pots on the bottom shelf to lower the stand’s center of gravity.
- Use the upper shelf for plants that need brighter light.
- Reserve lower levels for plants that tolerate indirect or reduced light.
- Position trailing plants near shelf edges so vines can fall freely.
- Leave enough space for leaves to grow without rubbing constantly against walls.
- Rotate pots periodically so growth remains balanced.
- Use waterproof saucers beneath every pot with drainage holes.
Do not assume every shelf receives the same light. The top tier may be bright while the bottom remains shaded by leaves and pots. Observe the display throughout the day and arrange plants according to their individual needs.
Useful Customizations
Add Casters
Locking casters make a plant shelf easier to move for cleaning or seasonal light changes. Use hardware rated for the combined weight of the stand, pots, wet soil, and plants. Attach casters securely to reinforced leg bottoms rather than relying on short screws driven into fragile end grain.
Use Slatted Shelves
Replace each solid shelf with several narrow boards separated by small gaps. Slats create a lighter appearance and allow minor spills to drain rather than collect on one broad surface. Saucers are still necessary unless watering the floor is part of the decorating plan.
Create a Corner Version
Shorten the shelves or use triangular platforms to fit an unused corner. Corner stands are excellent for small apartments, although the available sunlight should be evaluated before permanently assigning the space to living plants.
Add a Hanging Bar
Extend the rear legs and connect them with a hardwood dowel or metal rod. Small hanging pots may then be suspended above the upper shelf. Reinforce the frame and keep hanging weight balanced across the bar.
Build Around a Specific Pot
For a midcentury-style single-pot stand, measure the widest part of the planter rather than trusting the number printed on its label. Build the inner support slightly larger so the pot can be inserted and removed without scraping the finish.
Common DIY Plant Stand Mistakes
Building Before Measuring the Pots
A shelf may look generous until a 12-inch ceramic planter arrives with a saucer, broad rim, and leaves reaching in every direction. Measure the complete pot setup, including drainage tray and foliage.
Skipping Pilot Holes
Driving screws directly into narrow rail ends can split the wood. Pilot holes reduce that risk and make it easier to keep joints aligned.
Ignoring Water Damage
Even sealed wood can develop stains if water remains trapped beneath a pot. Use saucers, wipe spills promptly, and lift pots occasionally so moisture can evaporate.
Placing Heavy Pots Too High
A top-heavy stand may tip when bumped by a person, vacuum cleaner, enthusiastic dog, or cat conducting unauthorized structural testing. Keep substantial planters low and anchor tall furniture where appropriate.
Finishing Only the Visible Surfaces
Moisture can enter through shelf undersides, screw holes, joints, and end grain. Apply protective finish consistently, especially when the plant stand will live outdoors.
Experience-Based Lessons From DIY Plant Stand Projects
The following observations reflect recurring experiences shared by woodworkers, home decorators, and plant owners who have built or adapted plant stands.
The Design Usually Changes After the Pots Arrive
One of the most common experiences is discovering that a plant stand designed from memory does not match the actual collection. A “small” pot may be much wider at the rim than at the base. A trailing plant may need twice the vertical clearance expected. A decorative saucer may extend an inch beyond the planter on every side.
The practical lesson is to arrange the pots on the floor before finalizing the dimensions. Move them into a rough three-tier formation and measure the real footprint. This simple rehearsal often reveals that one shelf should be deeper, the top tier should be narrower, or the middle level needs more headroom.
Assembly Is Easier on a Truly Flat Surface
Many first-time builders assume their garage or patio floor is flat. It frequently is not. When frames are assembled on an uneven surface, the finished plant stand may inherit the same twist.
A sturdy workbench, large table, or verified flat sheet of plywood makes alignment easier. Clamps are equally valuable. They hold the joint still while pilot holes and screws are added, preventing the rail from creeping a fraction of an inch out of position. That fraction may sound harmless until three levels multiply it into a visible lean.
Water Is a More Persistent Enemy Than Expected
The first few weeks often go beautifully. Then someone waters a plant in a hurry, the saucer overflows, and a dark ring appears beneath the pot. Experienced plant owners tend to use deeper waterproof trays, cork or rubber spacers, and removable shelf liners.
They also learn to take plants to a sink or bathtub for heavy watering whenever practical. Allowing excess water to drain before returning a pot to the stand protects both the wood and the plant’s roots.
The Lower Shelf Can Become Surprisingly Dark
A tiered plant stand beside a bright window may seem suitable for sun-loving plants at every level. In practice, upper leaves and pots can cast significant shade. Builders often rearrange the collection after observing it for several days.
Plants that need stronger light move upward or closer to the window. Shade-tolerant foliage plants take over the lower level. Some owners angle the entire stand slightly rather than positioning it flat against the wall. Others add a properly installed grow light when natural light remains insufficient.
Small Finishing Details Make the Project Look Professional
The difference between “homemade” and “custom-made” is often an extra hour of patient work. Sanding visible end grain, filling screw holes, wiping glue squeeze-out before it hardens, and applying thin finish coats can dramatically improve the result.
Builders also report that felt pads, matching screw plugs, and neatly centered shelves make an inexpensive pine stand look far more polished. None of these additions is exciting. Neither is flossing, yet both become noticeable when skipped.
A Plant Stand Rarely Stays in Its Original Location
Plant collections change with seasons, growth, propagation, and the sudden arrival of a discounted monstera that was supposedly “just being looked at.” A stand may move from the living room to a brighter bedroom, then to a porch for summer.
For that reason, a moderate size is often more useful than a huge permanent structure. Removable shelves, lightweight lumber, handles, or locking casters can make future changes easier. The best DIY plant stand is not merely attractive on the day it is built; it continues to work as the plants and household evolve.
Conclusion
A DIY plant stand is an approachable woodworking project with a highly visible payoff. With straight lumber, careful measurements, pilot holes, secure joints, and an appropriate finish, a beginner can create a useful piece of furniture that organizes plants and adds vertical interest to a room.
The three-tier design in this guide can remain minimal, wear a bold coat of paint, display warm natural stain, or evolve into a rolling outdoor plant stand. Measure the pots, keep heavier containers low, protect the shelves from water, and arrange each plant according to its light requirements. Your greenery will gain a better home, and the dusty corner will finally have a job.
Editorial note: This original guide synthesizes practical concepts from U.S. project and gardening resources published by The Home Depot, Lowe’s, This Old House, Better Homes & Gardens, Bob Vila, and Family Handyman. Additional design, repurposing, and plant-display guidance was reviewed from The Spruce, Martha Stewart, and HGTV. Woodworking and finishing principles were also informed by plans and product guidance from Kreg Tool, Ana White, and Minwax. Measurements and instructions were independently developed for this article and should be adapted to the actual lumber, pots, tools, and installation location.