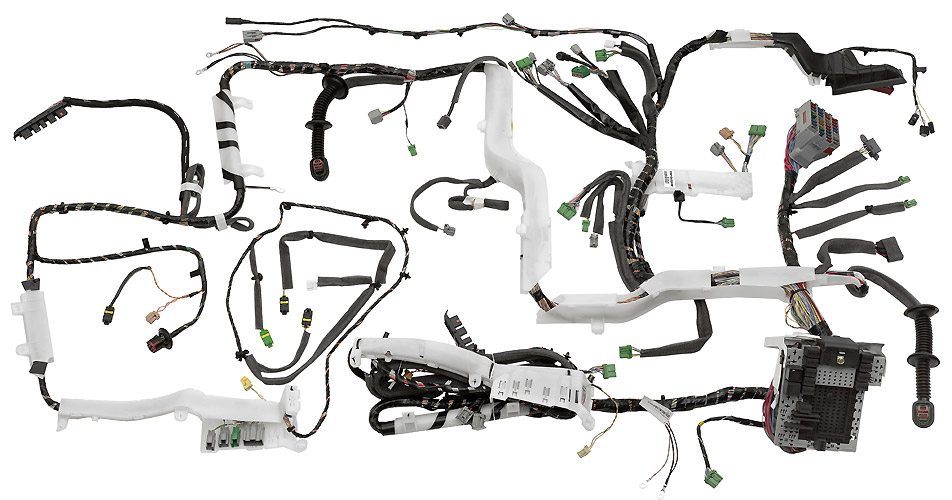
A wire harness may not look glamorous at first glance. It does not blink like a dashboard, roar like a motor, or politely ask for a software update at the worst possible moment. Yet inside cars, aircraft, medical devices, robots, appliances, and industrial machines, the wire harness is the quiet traffic controller that keeps power and signals moving where they belong. When it is built well, nobody notices. When it is built poorly, everybody suddenly becomes an electrical detective.
Wire harness mastery is the art and science of organizing wires, terminals, connectors, coverings, labels, and protective hardware into one reliable assembly. It is not simply “tie some wires together and hope the electrons behave.” A professional wire harness must survive vibration, heat, flexing, moisture, abrasion, installation stress, maintenance, and the occasional human who pulls on a connector like it owes them money.
This guide walks through the essentials of wiring like a pro: design planning, wire selection, crimping, routing, strain relief, testing, documentation, and practical shop habits. Whether you are building a custom automotive harness, designing industrial control wiring, or trying to understand why professional cable assemblies look so clean, the same principle applies: neatness is nice, but reliability is king.
What Is a Wire Harness?
A wire harness, also called a wiring harness or cable harness, is a structured bundle of wires and cables used to transmit electrical power, signals, or data between components. Unlike a loose pile of individual wires, a harness is planned, measured, terminated, protected, labeled, and tested as a complete assembly.
Think of it as the nervous system of a machine. Each wire carries a message or power supply. Each connector acts like a handshake. Each branch leads to a sensor, switch, motor, light, control board, or module. If one connection is loose, damaged, undersized, mislabeled, or routed through a danger zone, the whole system can become unreliable.
Why Wire Harness Quality Matters
Good wire harness design improves safety, serviceability, performance, and manufacturing efficiency. A clean harness reduces assembly errors, saves installation time, and makes troubleshooting much easier. A poorly built harness can create voltage drops, intermittent faults, heat buildup, broken conductors, signal interference, or premature connector failure.
Professional harness work is especially important in automotive, aerospace, medical, robotics, appliance, marine, telecommunications, and factory automation applications. In these environments, wires may face vibration, chemical exposure, tight packaging, temperature swings, water, dust, and electromagnetic noise. The harness must be designed for the real world, not the fantasy world where wires float peacefully in free space and never rub against a sharp bracket.
The Foundation: Start With Requirements
Every reliable harness begins before the first wire is cut. A pro starts by asking the boring questions, because boring questions prevent exciting failures.
Know the Electrical Load
Wire gauge must match the current, circuit length, allowable voltage drop, insulation rating, and operating temperature. A wire that is too small may overheat. A wire that is too large may waste space, money, and weight. In vehicles and machines where every inch matters, right-sizing conductors is a serious design decision.
Understand the Environment
A harness in a kitchen appliance does not live the same life as one under the hood of a truck. The designer must consider heat, oil, fuel, water, abrasion, sunlight, vibration, flex cycles, installation space, bend radius, and cleaning chemicals. The environment determines insulation type, connector sealing, loom selection, shielding, mounting method, and strain relief strategy.
Plan for Manufacturing
A brilliant design that cannot be assembled consistently is not brilliant; it is a puzzle with invoices. Design for manufacturability means using available components, practical wire lengths, clear drawings, realistic tolerances, accessible connectors, and repeatable assembly steps. Professional harnesses are not improvised. They are engineered to be built the same way again and again.
Wire Selection: The Conductor Is the Starting Line
The wire itself must be chosen carefully. Important factors include American Wire Gauge size, conductor material, stranding, insulation material, voltage rating, temperature rating, flexibility, flame resistance, and regulatory markings. Copper remains common because of its conductivity and workability, while tinned copper may be selected where corrosion resistance is important.
Stranding matters more than beginners expect. Fine-stranded wire is more flexible and better for moving or vibrating applications. Solid wire may work in fixed installations but is usually a poor choice for harnesses exposed to movement. Insulation also matters. PVC, XLPE, Teflon-style fluoropolymers, silicone, and other materials each have different strengths, temperature limits, and chemical resistance.
Color coding is another pro-level habit. A consistent color system makes assembly, inspection, and troubleshooting faster. A technician should not need to play “guess the mystery wire” with a multimeter for two hours while muttering words not approved by the company handbook.
Connector Selection: Where Reliability Meets Reality
Connectors are often the most failure-prone part of a harness because they combine electrical, mechanical, and environmental demands. A connector must handle the current, voltage, signal type, mating cycles, temperature, vibration, sealing needs, locking force, and available space.
For harsh environments, sealed connectors with proper grommets, cavity plugs, backshells, and strain relief may be necessary. For high-vibration applications, positive locks, terminal position assurance, connector position assurance, and secure contact retention help prevent looseness and intermittent faults.
Connector choice also affects assembly speed. Some connectors are excellent for automated production. Others are better for low-volume custom builds. A pro weighs cost, availability, tooling, repairability, and long-term sourcing before committing to a connector family.
Crimping: The Tiny Detail That Makes or Breaks the Harness
If wire harness mastery had a secret handshake, it would be the crimp. A proper crimp creates a strong mechanical and electrical connection between the conductor and the terminal. A bad crimp can look innocent while secretly plotting a future breakdown.
Professional crimping depends on the correct terminal, wire size, insulation diameter, applicator, die set, crimp height, and pull-force performance. Under-crimping may leave the wire loose, increasing resistance and heat. Over-crimping can crush strands, weaken the conductor, or damage the terminal. The sweet spot is controlled compression: tight enough for excellent conductivity and mechanical strength, not so brutal that the copper needs therapy.
Good crimp inspection looks for proper conductor brush, bellmouth, insulation support, terminal alignment, strand condition, and full seating in the connector housing. In production, crimp-height measurement, pull testing, visual inspection, and process control help keep quality consistent.
Routing: Give Every Wire a Safe Road
Routing is where harness design becomes physical. A wire diagram may look perfect on a screen, but the real harness must bend around brackets, pass through panels, avoid heat, clear moving parts, and fit into a crowded product.
Professional routing follows several core rules. Avoid sharp edges. Respect bend radius. Keep harnesses away from exhaust parts, motors, fans, hinges, belts, and pinch points. Use grommets where wires pass through panels. Separate high-current power wiring from sensitive signal wiring when needed. Use shielding, twisted pairs, or proper grounding where electromagnetic interference could affect performance.
One of the most common beginner mistakes is pulling a harness tight because it looks tidy. A harness needs enough slack for installation, service, vibration, thermal expansion, and component movement. Too much slack looks sloppy and can snag. Too little slack turns every connector into a stress experiment.
Strain Relief: Stop the Pull Before It Reaches the Terminal
Strain relief protects the electrical connection from mechanical stress. Without it, normal movement can transfer force directly to terminals, solder joints, or connector cavities. Over time, that stress can loosen contacts, break strands, crack solder, or damage insulation.
Common strain relief methods include cable ties, clamps, P-clips, backshells, boots, grommets, adhesive mounts, lacing, overmolding, and molded connector features. The goal is simple: secure the harness body so the delicate termination point does not carry the full load.
However, “secure” does not mean “strangled.” Cable ties that are too tight can deform insulation and create stress points. A pro tightens enough to hold, not enough to leave bite marks.
Protection: Looms, Sleeves, Wraps, and Shields
A wire harness often needs external protection. Split loom protects against light abrasion and makes service easier. Braided sleeving offers flexibility and a clean appearance. Heat-shrink tubing adds insulation, strain relief, and sealing in specific areas. Woven tape can reduce noise and improve abrasion resistance. Conduit or corrugated tubing may be used in rugged industrial and automotive environments.
Shielding is used when signal integrity matters. In systems with sensors, communication lines, audio circuits, or high-speed data, electromagnetic interference can cause noise, false readings, or communication errors. Twisted pairs help reduce interference, while shields and proper grounding provide additional protection. The key word is proper. Poorly terminated shielding can make a system look sophisticated while doing very little useful work.
Labeling and Documentation: Future You Will Be Grateful
Documentation is not paperwork for paperwork’s sake. It is the map that keeps the harness buildable, testable, repairable, and auditable. At minimum, a professional harness package may include a schematic, wire list, bill of materials, connector views, pinout chart, cut lengths, strip lengths, crimp specifications, tooling references, routing layout, branch dimensions, labels, test procedure, and revision history.
Clear labels help technicians identify circuits quickly. Heat-shrink labels, printed sleeves, flags, and laser-marked wires can all be used depending on the application. Labels should be durable enough to survive the operating environment and readable enough that nobody needs a magnifying glass and emotional support.
Revision control is equally important. If a connector pinout changes, the drawing must change. If the drawing changes, production must know. If production does not know, congratulations: you have invented a very expensive guessing game.
Testing: Trust, but Verify With Electricity
Every serious harness should be tested before installation. Basic checks include continuity, shorts, opens, correct pin-to-pin wiring, and connector orientation. More advanced tests may include insulation resistance, hipot testing, voltage drop, functional load testing, signal integrity checks, and environmental validation.
Continuity testing confirms that each wire connects where it should. Short testing confirms that wires do not connect where they should not. Pull testing verifies crimp strength. Visual inspection catches damaged insulation, missing seals, crossed wires, poor routing, loose terminals, and incorrect labels.
Testing is not an insult to the builder. It is respect for reality. Even skilled technicians make mistakes, and a tester never has a bad day, never skips coffee, and never says, “I’m pretty sure pin 7 was green.”
Quality Standards and Professional Expectations
Many professional harness shops use IPC/WHMA-A-620 as a key workmanship and acceptance reference for cable and wire harness assemblies. This standard helps define expectations for crimped, mechanically secured, and soldered interconnections, as well as marking, shielding, protection, and final assembly quality.
UL programs and wire markings also matter in many markets because they help verify that wire and cable products are suitable for specific applications. In manufacturing, traceability can connect materials to suppliers, lots, processes, inspections, and final assemblies. That traceability becomes especially valuable when products must meet safety, regulatory, or customer audit requirements.
OSHA electrical safety principles are also relevant in shops and field work. Workers must treat electricity as a serious hazard, use appropriate procedures, and follow lockout/tagout rules when servicing equipment that could unexpectedly energize. A beautiful harness is not worth a preventable injury.
Common Wire Harness Mistakes to Avoid
Using the Wrong Wire Gauge
Undersized wire can cause overheating and voltage drop. Oversized wire can create routing problems and unnecessary cost. Choose gauge based on electrical load, length, environment, and standards.
Skipping Strain Relief
If force reaches the terminal, failure may follow. Use clamps, backshells, grommets, or supports to protect terminations.
Routing Near Heat or Sharp Edges
Heat hardens insulation. Sharp edges cut it. Moving parts chew it. None of these are friends of reliability.
Using Poor Crimp Tools
Hardware-store pliers may be fine for emergency repairs, but professional harness work needs correct, calibrated crimp tooling matched to the terminal and wire.
Forgetting Serviceability
A harness should not require a magician, a mirror, and three tiny hands to unplug. Design for assembly and maintenance.
Experience Section: Lessons From Wire Harness Work in the Real World
The biggest lesson in wire harness mastery is that small decisions become big outcomes. A single missing grommet may not look dramatic during assembly, but after months of vibration against a metal panel, that tiny shortcut can become an intermittent short that takes hours to diagnose. A cable tie placed too close to a connector may seem tidy, but if it forces the wire to bend sharply, it can create stress exactly where flexibility is needed most.
In practical harness work, the best builders develop a habit of thinking three steps ahead. They do not only ask, “Can I connect this?” They ask, “Can this survive? Can someone install it? Can someone remove it? Can someone test it? Can someone understand it two years from now when the original builder is on vacation and the machine is down?” That mindset separates a neat-looking harness from a truly professional one.
Another experience-based truth is that the layout board is your friend. For repeatable builds, a harness board with pegs, fixtures, connector locations, branch points, and measurement references saves time and reduces variation. It turns a messy bundle into a controlled process. Even for custom one-off projects, laying the harness out physically before final wrapping helps reveal routing problems early. It is much better to discover that a branch is two inches short on the bench than after the harness is halfway installed behind a panel.
Crimping also teaches humility. A crimp can look acceptable to an untrained eye and still fail a pull test. That is why professional shops care about tool setup, crimp-height checks, terminal compatibility, and inspection criteria. When a crimp is right, it feels almost boring: repeatable, clean, and consistent. When it is wrong, it becomes the villain in a troubleshooting story that begins with “It only fails when the machine warms up.”
Labeling is another area where experience changes behavior. Beginners often think they will remember which wire is which. They will not. Nobody does. Labels, color codes, connector maps, and updated drawings are gifts to the future. A good label can turn a repair from a two-hour investigation into a five-minute fix. A missing label can make a simple circuit feel like ancient archaeology.
Finally, experienced harness builders respect the installation environment. A harness on the bench may look perfect, but the real test happens inside the equipment. Is there enough slack for service? Is there protection where it passes through metal? Are connectors accessible? Are high-current wires separated from sensitive signals? Is the harness supported at reasonable intervals? Does it avoid hot surfaces and moving parts? These questions are not decoration; they are the difference between “works today” and “works for years.”
Wire harness mastery is not about making wires pretty, although a great harness does have a certain clean beauty. It is about discipline. Measure carefully. Cut consistently. Strip without nicking strands. Crimp with the right tool. Route with intention. Protect against the environment. Label everything. Test before celebrating. Do those things, and your harness will not merely carry electricity. It will carry confidence.
Conclusion: Professional Harnesses Are Built, Not Wished Into Existence
Wire harness mastery combines engineering judgment, skilled workmanship, quality control, and practical experience. The best harnesses are not accidents. They are the result of correct wire selection, thoughtful routing, reliable crimps, durable connectors, proper strain relief, environmental protection, clear documentation, and thorough testing.
Whether you are designing a production harness or building a custom project, the professional mindset stays the same: every wire needs a purpose, every connector needs protection, every crimp needs verification, and every layout choice should help the harness survive its real operating conditions. When done correctly, a wire harness becomes almost invisible. It simply works, day after day, quietly proving that good craftsmanship does not need applause to matter.