A beautiful vintage silk scarf deserves better than permanent retirement in the back of a drawer. Maybe you love its colors but never wear it. Maybe it belonged to someone special. Or perhaps you discovered it at an estate sale while confidently pretending you knew exactly what you were going to do with it. Now you do: turn it into a one-of-a-kind, West Elm inspired pouf.
This DIY silk scarf pouf combines the collected character of vintage fabric with the clean, tailored shape associated with modern home décor. The scarf becomes the decorative top panel, while sturdy upholstery fabric supports the sides and bottom. The result is a lightweight accent piece that can serve as a footrest, floor cushion, vanity stool, or emergency seating when your guests outnumber your chairs.
Poufs are especially useful in smaller rooms because they can move easily between functions. Designers regularly use them as footrests, occasional seats, compact side tables, and decorative accents. A tray placed on top can even create a temporary surface for books or snacks, although a soft pouf and a full glass of red wine remain natural enemies.
Why a Vintage Silk Scarf Works So Well
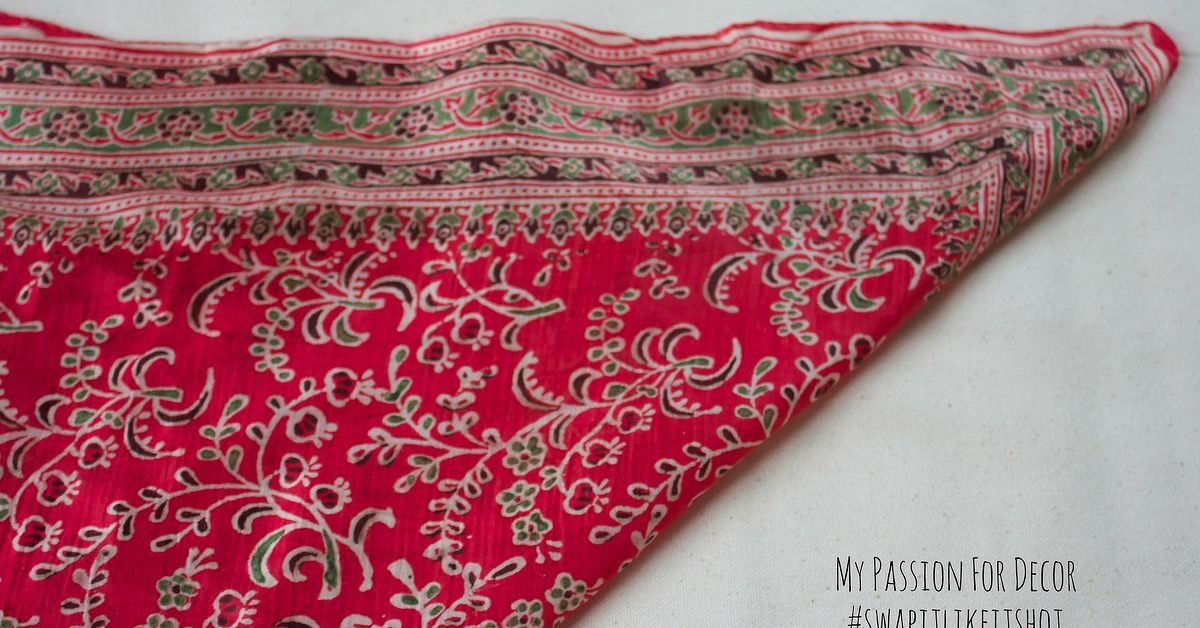
Vintage scarves often feature saturated colors, intricate borders, painterly florals, geometric motifs, or architectural patterns that resemble expensive designer textiles. Using one as the focal point of a pouf allows the entire image to remain visible rather than cutting it into tiny craft pieces.
However, silk is not upholstery fabric. It is usually lighter, more slippery, and less resistant to abrasion than canvas, denim, or conventional home décor material. The secret is to treat the scarf as a decorative surface instead of the structural layer. A strong backing fabric carries the stress while the silk supplies the drama.
This layered approach also makes the finished pouf look more polished. Silk gains body when supported by an underlining or interfacing, and stabilizing delicate fabric can reduce stretching and distortion during sewing.
Choose the Right Scarf Before Cutting Anything
Inspect Its Condition
Hold the scarf up to indirect light and check for thin spots, small tears, loose hems, stains, fading, or brittle areas. Pay particular attention to fold lines. Older silk can weaken where it has remained sharply creased for years.
If the scarf has historic, financial, or deep sentimental value, do not cut it. Create a removable cover that holds the scarf without permanently altering it, or use a high-quality printed reproduction. Conservation guidance warns that aged silk may become brittle and split after long exposure to light, stress, or improper storage.
Test for Colorfastness
Before washing or steaming a vintage scarf, test a hidden corner. Dampen a white cotton swab or cloth with cool water and press gently against each major color. If dye transfers, avoid wet cleaning and consult a textile-care professional.
Never assume that every scarf labeled silk can be washed the same way. Care instructions vary, and older dyes may react unpredictably. When washing is appropriate, use cool water, a mild silk-safe detergent, and gentle handling. Avoid bleach, aggressive stain removers, twisting, and high heat.
Evaluate the Pattern
Square scarves are the easiest choice because they already resemble a finished cushion panel. A scarf measuring approximately 28 to 36 inches square can be centered on a round, square, or softly rounded pouf. Rectangular scarves also work, but you may need to crop the design or piece the fabric carefully.
Before making a pattern, place a paper window over the scarf and move it around until the best portion of the design appears inside the opening. This simple step prevents the classic DIY tragedy of cutting first and realizing later that the most beautiful bird, flower, or border is now hiding in a seam allowance.
Materials and Tools
- One vintage silk scarf in stable condition
- One yard of lightweight cotton muslin or silk organza for backing
- One to two yards of durable upholstery fabric, canvas, denim, or heavy cotton
- Lightweight sew-in interfacing or soft fusible interfacing suitable for silk
- Coordinating all-purpose polyester thread
- A new size 60/8 or 70/10 Microtex needle
- Fabric scissors or a rotary cutter with a fresh blade
- Fine silk pins, clips, or pattern weights
- Ruler, measuring tape, tailor’s chalk, and paper for the pattern
- A 16- to 22-inch upholstery zipper
- Optional cotton piping cord and fabric strips
- Polyester fiberfill, shredded upholstery foam, or a combination of fillings
- Optional inner liner fabric for a separate stuffing insert
A sharp Microtex needle is particularly useful for silk because its fine point can penetrate tightly woven fabric with less risk of snagging. Testing the needle, thread tension, and stitch length on a scrap remains essential because one silk fabric may behave very differently from another.
Plan the Pouf’s Size and Shape
A finished diameter of 22 to 26 inches works well for a compact floor pouf. Aim for a height of approximately 10 to 14 inches if the piece will mainly be used as a footrest or casual floor seat. A taller pouf may look more like a small ottoman, while a lower one reads as a luxurious floor cushion.
For this project, imagine a finished pouf measuring 24 inches across and 12 inches high. Its construction includes:
- One decorative top panel featuring the scarf
- One durable bottom panel
- One long side panel, also called the boxing strip
- One zipper opening in the bottom or side seam
Add a 1/2-inch seam allowance around every pattern piece. When working with an especially slippery scarf, a 5/8-inch allowance offers a little more room for handling and trimming.
Step-by-Step: How to Make the Pouf
Step 1: Stabilize the Vintage Scarf
Lay the scarf wrong side up on a clean, flat surface. Place cotton muslin, silk organza, or another lightweight backing fabric beneath it. Smooth both layers without pulling or stretching the silk.
Hand-baste the layers together around the perimeter and across a few interior areas that will not disrupt the pattern. Long, removable basting stitches are safer than excessive pinning. If you choose fusible interfacing, test it on an inconspicuous area first and use the lowest suitable iron temperature with a pressing cloth.
Lightweight silk can also be temporarily stabilized with removable spray products or paper during cutting and sewing. These techniques help prevent the material from sliding into a completely different ZIP code while you are trying to stitch a straight line.
Step 2: Create the Top Pattern
For a round pouf, draw a 25-inch circle on pattern paper, including the seam allowance. Fold the paper into quarters to check that the curve is symmetrical. Place the pattern over the scarf and center the design.
If the scarf is smaller than the circle, frame it with a border of upholstery fabric. Cut the central scarf panel as a square, circle, or octagon, then add coordinating fabric around it until the complete top reaches the required size. This technique can look even more custom because it creates a deliberate picture-frame effect.
Step 3: Cut the Structural Pieces
Cut the top backing along with the scarf as one unit. From the upholstery fabric, cut a matching bottom circle.
To determine the side-panel length, multiply the finished diameter by 3.14. For a 24-inch pouf, the circumference is approximately 75.4 inches. Add at least one inch for seam allowances, plus a little extra for matching and trimming. Cut the side strip 13 inches wide for a finished height of 12 inches with two 1/2-inch seam allowances.
If your fabric is not wide enough for one continuous strip, join two or three shorter pieces. Place the seams in visually balanced positions rather than allowing one random seam to appear front and center like an unexpected microphone at a press conference.
Step 4: Add Optional Piping
Piping gives the pouf a crisp, professionally upholstered outline. Cut fabric strips on the bias, join them into one long piece, wrap the strip around piping cord, and stitch close to the cord using a zipper foot.
Baste the finished piping to the top panel with all raw edges aligned. Repeat around the bottom panel if desired. Sewing tutorials for piped cushions and ottomans consistently use a zipper or cording foot because it allows the stitching line to sit close to the cord.
Step 5: Install the Zipper
A removable cover is strongly recommended. Poufs live near floors, shoes, snacks, pets, and other energetic agents of chaos. A zipper allows you to remove the filling insert and clean or repair the outer cover more easily.
Place the zipper in the bottom panel or along one section of the side seam. Reinforce the zipper area with narrow strips of lightweight interfacing so the surrounding material does not stretch. Baste first, check the alignment, and then stitch with a zipper foot. Interfacing along a zipper seam is especially helpful when the adjoining fabric is delicate or prone to rippling.
Step 6: Sew the Side Panel Into a Loop
With right sides together, join the short ends of the side strip. Press the seam carefully. Pin or clip the side loop to the top panel, distributing the fabric evenly around the curve.
Stitch slowly with the silk panel facing upward so you can watch for puckers. Stop periodically with the needle down, lift the presser foot, and smooth the next section. Do not pull the fabric from behind the machine; allow the feed dogs to move it naturally.
Step 7: Attach the Bottom
Open the zipper at least halfway before attaching the bottom panel. This matters because turning a completely sewn pouf through a closed zipper is not a test of sewing ability; it is a test of emotional resilience.
Pin the bottom to the remaining edge of the side panel and stitch around the circle. Finish raw seams with a zigzag stitch, pinking shears, binding, or a serger. Turn the cover right side out and inspect every seam before filling it.
Step 8: Make a Separate Inner Insert
A liner protects the silk cover from direct contact with loose filling. Use inexpensive cotton, ticking, or tightly woven muslin to make a second pouf approximately the same size. Leave a generous opening for stuffing, then close it securely by machine or hand.
The insert also makes future repairs less dramatic. You can unzip the decorative cover without releasing thousands of foam pieces into your living room, where they would immediately form a tiny synthetic snowstorm.
Step 9: Choose and Add the Filling
Polyester fiberfill creates a lightweight, soft pouf, but it may flatten with use. Shredded foam produces a firmer seat and springs back more effectively. Fabric scraps can add density, though they also add weight and may create lumps if not distributed carefully.
A practical combination is shredded foam in the center with polyester fiberfill around the exterior. The foam provides support, while the fiberfill softens the shape and fills the corners. Add the material gradually, rotating and pressing the insert as you work.
Do not overstuff. A pouf should feel supportive, but excessive pressure can strain seams and damage the silk top. Stop when the surface appears smooth and the sides hold their shape without becoming drum-tight.
How to Achieve the West Elm Inspired Look
Use a Restrained Supporting Fabric
Let the vintage scarf remain the star. Pair a colorful scarf with neutral linen-look canvas, oatmeal cotton, charcoal denim, muted velvet, or a solid fabric drawn from one of the scarf’s quieter colors.
A modern pouf often succeeds because its silhouette is simple even when its texture or pattern is expressive. Contemporary interiors use poufs to introduce color, softness, and sculptural form without consuming the visual space of a full chair.
Add One Tailored Detail
Choose piping, a centered fabric-covered button, contrast topstitching, or small tasselsbut not all four unless your design philosophy is “the more, the merrier.” One carefully executed detail makes the project look intentional rather than overloaded.
Style It With Purpose
Place the finished silk scarf pouf beside a lounge chair, under a console, near a daybed, or at the foot of a bed. It can add color to a neutral room or connect several existing accent colors.
For occasional table use, add a flat tray that is wider than the softest central area. Do not place hot, wet, or oily objects directly on the silk. In an entryway, use the pouf for setting down a bag rather than as a daily shoe-changing seat if the scarf is especially delicate.
Care and Maintenance
Vacuum the pouf lightly with a clean upholstery attachment covered by a fine mesh screen. Avoid rubbing the nozzle directly against the silk. Blot fresh spills immediately with a dry white cloth, working from the outside of the spot toward the center.
Keep the pouf away from strong direct sunlight. Light damage to textiles is cumulative, and silk is particularly vulnerable to fading, weakening, and brittleness. Rotate the piece occasionally so one section does not receive all the exposure.
If the cover can be cleaned safely, follow the scarf’s tested care requirements rather than the care instructions for the sturdier side fabric. When the materials have incompatible cleaning needs, professional dry cleaning may be the safest option.
Common Problems and Easy Fixes
The Silk Puckers While Sewing
Replace the needle, reduce the upper-thread tension slightly, lengthen or shorten the stitch after testing, and support the fabric with tissue paper or stabilizer. Remove temporary paper carefully after stitching.
The Top Looks Wrinkled After Stuffing
Redistribute the filling toward the edges and add a thin layer of polyester batting directly beneath the top. Do not solve every wrinkle by adding more and more filling; overstuffing can make the seams carry too much pressure.
The Pouf Collapses After Several Weeks
Open the liner, break apart compressed filling, and add more shredded foam. Flexible fillings settle naturally, especially during the first few weeks of use.
The Scarf Is Too Fragile to Sew
Mount it on a complete backing panel with widely spaced hand stitches, then construct a clear or sheer protective overlay. Another option is to photograph or scan the scarf and have the image printed on durable fabric. You preserve the original while still enjoying its design.
My Experience Making a Vintage Silk Scarf Pouf
The first time I attempted this project, I approached the scarf with the confidence of someone who had watched several sewing videos and therefore believed geometry had become optional. It had not.
My scarf was a 32-inch square with an elaborate border, jewel-toned flowers, and a slightly theatrical golden leopard in the center. The leopard looked as though it had opinions about my fabric choices. I paired it with dark teal canvas, believing the solid color would make the silk appear brighter without competing with it.
My first useful discovery was that stabilizing the scarf was not merely a suggestion. Without backing, the silk shifted every time I touched it. One corner moved north, another moved west, and the central leopard began leaning as if the entire project were taking place on a hill. Hand-basting the scarf to cotton muslin immediately made cutting and sewing more manageable.
I also learned to use pattern weights instead of ordinary pins wherever possible. Fine pins did not destroy the fabric, but every additional hole made me nervous. A rotary cutter with a fresh blade produced a cleaner edge than scissors because I did not have to lift the silk from the table.
The piping was the slowest part. I initially chose a shiny gold cord that looked elegant on the spool and surprisingly festive once attached. The pouf began to resemble a decorative drum preparing for a holiday parade. I removed it and replaced it with self-covered teal piping, which created a quieter, more expensive-looking finish.
The zipper caused another small crisis. I installed it directly into the bottom fabric without reinforcing the seam, and the material developed a slight wave. It was not disastrous, but it looked homemade in the less flattering sense of the word. On the second attempt, I applied narrow strips of interfacing along both zipper edges. The difference was immediate: flatter stitching, cleaner corners, and far less muttering at the sewing machine.
For stuffing, I tried polyester fiberfill alone. The pouf looked wonderfully plump for approximately three days, then developed a shallow crater where people rested their feet. I reopened the liner and added shredded upholstery foam to the center. That combination held its shape much better while preserving a soft outer surface.
The biggest surprise was how useful the finished pouf became. I originally considered it a decorative piece, but it moved constantly. It sat beside the sofa during movie nights, became an extra perch when friends visited, and occasionally supported a tray of books. It also filled an awkward empty corner without making the room feel crowded.
I did establish a few household rules. No shoes on the silk. No uncovered drinks. No enthusiastic jumping. The pouf was sturdy, but a vintage scarf is still a vintage scarf, not commercial performance upholstery wearing a fake mustache.
After several months, the top remained smooth because the scarf had been fully backed and the filling had not been packed too tightly. I rotated the pouf to prevent uneven light exposure and used a soft brush attachment for dust. The project aged gracefully, and the silk developed none of the stretched areas I had feared.
What I liked most was that the pouf did not look like something selected from a catalog. It had the proportions and tailored finish of a modern retail piece, but the scarf gave it a history. Its slightly faded colors and unusual motif made the room feel more personal and collected.
The project also changed how I viewed old textiles. A scarf does not have to remain wearable to remain useful, and repurposing does not require chopping it into dozens of tiny pieces. With thoughtful backing, removable construction, and careful use, one beautiful textile can become the focal point of an entire object.
My final advice is to move slowly during preparation and confidently during construction. Test everything: the dye, the needle, the tension, the iron temperature, the zipper, and the filling. Most errors are inexpensive to correct before the final seams are closed. Afterward, corrections tend to involve seam rippers, deep breathing, and a snack break.
Conclusion
A West Elm inspired pouf made from a vintage silk scarf offers the best parts of upcycling: less waste, more personality, and a finished piece that cannot be duplicated by ordering product number 8472 from a warehouse. The project works because it respects the difference between decorative and structural fabric. The silk provides art and color, while the backing, upholstery cloth, reinforced zipper, secure seams, and supportive filling handle everyday demands.
Whether your scarf came from a family closet, a flea market, or an impulsive late-night auction, this project gives it a new role without erasing its original charm. Take time to stabilize the textile, keep the overall shape simple, and use restrained finishing details. The resulting pouf will feel modern, useful, and completely personalthe kind of accent that makes guests ask where you bought it. You may answer modestly, dramatically, or with a five-minute presentation documenting every seam.
Note: Use an irreplaceable or historically significant scarf only after consulting a qualified textile conservator. This DIY pouf is best suited to decorative use, light footrest duty, and occasional seating rather than daily heavy wear.