Note: This guide uses plant-based compost and cautious pest-control methods. Skip animal-manure teas, avoid spraying homemade brews on edible leaves, and do not assume every kitchen leftover belongs in a flowerpot. Your plants deserve better than a mystery smoothie.
Gardeners have been brewing things for plants long before “compost tea” became a phrase people said with a straight face. A bucket, some compost, water, a few hopeful glances at droopy basil, and suddenly you are running a tiny café for tomatoes.
The good news is that a simple DIY plant fertilizer can be useful. The better news is that you do not need a bubbling laboratory, a gallon of molasses, or a wizard hat to make it. The catch? Homemade plant tea is not a miracle cure, not a replacement for healthy soil, and definitely not a magical force field that makes aphids pack tiny suitcases and move away.
This practical guide explains how to make a mild compost tea fertilizer, how to use it safely, what natural pest-control methods actually make sense, and which viral garden “hacks” are better left on the internet where they can do less damage.
What Is Plant Tea, Exactly?
“Plant tea” is a broad nickname for water-based garden mixtures made from compost, plant material, or organic amendments. The most sensible version for home gardeners is a simple compost tea: finished, plant-based compost or worm compost steeped in water, then strained and used as a light soil drench.
Compost itself is decomposed organic material that can improve soil structure, support soil organisms, and contribute nutrients over time. In other words, compost is the slow-cooked stew of the garden world. Compost tea is more like the broth: lighter, faster to apply, and not nearly as filling on its own.
University of Maryland Extension describes compost tea as compost steeped in water at roughly five parts water to one part compost for one to three days. It recommends using plant-based compost or vermicompost rather than compost made with animal manure. The resulting liquid is low in nutrients, which makes it better thought of as a gentle supplement for seedlings and transplants than a complete fertilizer program.
That last point matters. A weakly growing tomato might need more sunlight, more consistent water, improved soil drainage, less crowding, pest control, or an actual nutrient correction based on a soil test. A bucket of brownish water cannot solve every problem, no matter how artisanal the bucket looks.
Why Healthy Soil Beats Any Fancy Brew
The best DIY plant fertilizer is usually not a tea at all. It is healthy soil built with finished compost, mulch, appropriate fertilizer, and steady watering. Compost improves physical soil conditions, including moisture retention, aeration, and root penetration. It also helps soil hold nutrients more effectively, which gives plants a better chance to use what is already there.
Think of compost tea as a supporting actor, not the movie star. It can be convenient for newly transplanted vegetables, container plants that need a mild boost, or seedlings that are settling into a new home. But it should not replace:
- Proper sunlight for the crop you are growing.
- Consistent watering and good drainage.
- A layer of compost or mulch around plants.
- Enough spacing for airflow and root growth.
- A soil test when nutrient or pH problems are suspected.
A soil test is especially useful because it measures nutrient levels, pH, and organic matter, helping gardeners avoid throwing random ingredients at the ground like they are seasoning a casserole. Too much phosphorus, magnesium, ash, manure, or fertilizer can create more trouble than it solves.
Easy DIY Compost Tea Fertilizer Recipe
What You Need
- 1 part finished plant-based compost or worm castings
- 5 parts clean water
- A bucket
- A stirring stick
- A strainer, old cloth, or fine mesh bag
- A watering can
How to Make It
- Add one part finished compost to five parts water.
- Stir the mixture well.
- Let it steep for 24 to 72 hours in a shaded location.
- Stir once or twice a day if you remember. If you forget, the garden police will not arrive.
- Strain the liquid so compost particles do not clog your watering can.
- Use the finished tea promptly as a soil drench around the base of plants.
The compost should smell earthy, like a forest floor after rain. If the mixture smells rotten, sour, or like something that should be discussed only with a plumber, do not use it. Toss it into a compost pile or spread it over non-edible ornamental soil, then start fresh.
How to Apply Compost Tea
Apply compost tea directly to the soil near plant roots rather than coating leaves. Soil application is simple, lowers the chance of leaf spotting, and keeps the mixture away from edible parts of vegetables and herbs.
A good rule is to use it sparingly. Give seedlings and transplants a light drink after planting. For established container plants, use it occasionally during active growth, especially if the potting mix has been heavily watered and may be losing nutrients. Do not use it every day just because the bucket is sitting there looking productive.
Compost tea is low in nutrients, so plants with large appetitessuch as tomatoes, peppers, corn, squash, roses, or vigorous annual flowersmay still need a balanced fertilizer appropriate for their growth stage. Use the compost tea as a gentle bonus, not the entire meal plan.
Should You Add Molasses, Sugar, or Fancy Ingredients?
Probably not. Many compost tea recipes call for molasses, sugar, fish emulsion, seaweed extract, or other ingredients meant to stimulate microbial activity. The idea sounds appealing: feed the microbes, make more microbes, unleash a microscopic gardening army.
In real home-garden conditions, these additions make the process less predictable. Illinois Extension notes that claims about compost tea controlling plant diseases are not strongly supported, and researchers have found inconsistent results. Compost applied directly to the soil as mulch or an amendment has more reliable, well-established benefits.
For a simple DIY plant fertilizer, keep the recipe boring. Finished plant compost, water, a short steep, and a soil drench are enough. Your garden does not need a kombucha startup.
Used Tea Leaves: Helpful, but Not Magical
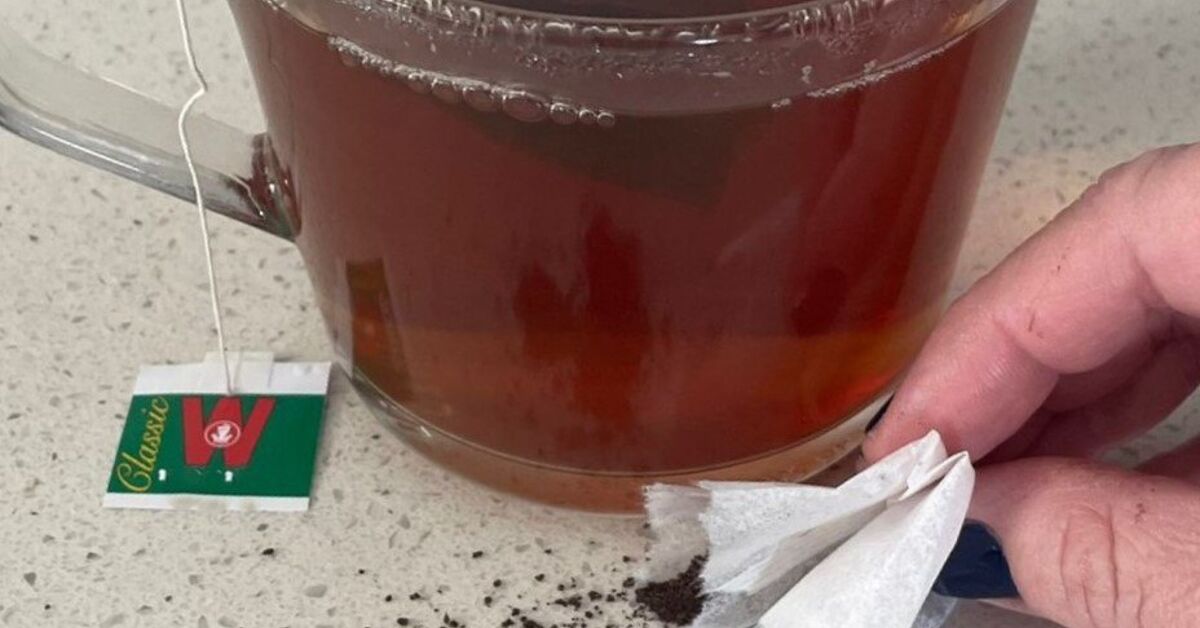
Used tea leaves can be added to a compost pile in modest amounts. They contribute organic material, but they should not be treated as a complete fertilizer or a shortcut to perfect soil. If you use tea bags, check whether the bag is actually compostable. Some tea bags contain synthetic fibers, staples, glue, or plastic mesh that do not belong in your garden bed.
Plain, cooled tea leaves can also be mixed into compost or worm bins. Avoid leaves from sweetened tea, flavored tea with oils, creamy drinks, or anything containing milk. Your pothos is not requesting a chai latte.
It is fine to enjoy the ritual of recycling kitchen scraps, but most plants benefit more from consistently good compost than from occasional dramatic leftovers.
DIY Plant Fertilizer Ideas That Need a Reality Check
Coffee Grounds
Coffee grounds are often promoted as an instant acidifier for blueberries, hydrangeas, and other acid-loving plants. That claim is oversold. University of Minnesota Extension notes that coffee grounds can contribute organic matter and feed soil organisms, but they do not consistently lower soil pH. Compost them instead of relying on them as a pH-adjustment strategy.
Eggshell Water
Eggshells contain calcium, but they break down slowly. They are not a quick solution for tomato blossom-end rot, which is often related to uneven water movement within the plant rather than a lack of calcium in the soil. Keep soil moisture even, mulch around plants, and use a soil test before adding extra amendments.
Epsom Salt Tea
Epsom salt is magnesium sulfate, not bottled garden magic. It may help only when a real magnesium deficiency exists. Applying it without a reason can interfere with calcium uptake, damage leaves when sprayed, and add unnecessary salts to soil and water.
Wood Ash Water
Wood ash can raise soil pH and add potassium, but it is not a casual fertilizer. It can be harmful when overapplied, is unsuitable for acid-loving plants such as blueberries and azaleas, and should never be used from treated wood, trash-burning fireplaces, or coal ash. If you cannot explain why your soil needs ash, do not make ash tea.
Natural Pest Repellent: What Actually Works?
Here is the truth gardeners learn after enough chewed leaves and mild emotional damage: no homemade spray repels every pest. Garlic, pepper, vinegar, soap, essential oils, and mystery blends are often advertised as universal insect repellents, but they can burn leaves, harm beneficial insects, or simply fail to work.
Homemade mixtures designed to kill or repel pests are still pesticides in practical terms, even if they came from your kitchen cabinet. Treat them carefully, keep them away from children and pets, and do not spray first and identify later.
The best natural garden pest control starts with identification. An aphid, a caterpillar, a spider mite, and a whitefly do not respond to the same strategy. A ladybug larva may look odd and slightly prehistoric, but it is a garden helper. Do not spray your allies because they failed the vibes check.
The Simplest DIY Pest Spray: Plain Water
For aphids, spider mites, and whiteflies, a strong spray of plain water can be surprisingly effective. Aim at the undersides of leaves, where many sap-sucking pests hide and hold their tiny meetings. Repeat as needed, especially early in an infestation.
Spider mites are especially common in hot, dusty, dry conditions. They cause pale stippling, bronzed foliage, yellowing leaves, and fine webbing. Water-stressed plants are more likely to suffer damage, so regular irrigation and reduced dust are part of pest prevention, not just plant comfort.
For a small outbreak, use a hose nozzle or spray bottle to rinse pests off leaves. Do this early in the morning so plants can dry, and avoid blasting delicate seedlings hard enough to launch them into a new zip code.
When to Use Insecticidal Soap
If water alone is not enough, use a commercially labeled insecticidal soap designed for plants. These products can help control soft-bodied pests such as aphids, mealybugs, whiteflies, young scale insects, and spider mites.
Insecticidal soap works only when it contacts the pest. It does not create a long-lasting invisible shield, so coverage matters. Spray the undersides of leaves and the pest itself. Expect to repeat treatment every several days if eggs hatch or new pests arrive.
Colorado State University Extension warns against using household liquid soap or cleaning products as homemade pesticides because they can damage plants. Commercial insecticidal soaps use potassium salts of fatty acids and are formulated for plant use.
Apply any soap or oil spray in the early evening or during cooler conditions. Do not spray drought-stressed plants, plants in intense sunlight, or foliage during extreme heat. Whitefly guidance from UC Integrated Pest Management recommends avoiding soap or oil applications when temperatures are above 90°F because leaf burn can occur.
DIY Physical Repellents That Beat Most Sprays
The most dependable pest repellent is often a barrier, not a bottle. A few simple physical controls can prevent problems before they begin:
- Fine mesh netting: Keep cabbage moths, beetles, leaf miners, and other insects away from susceptible crops.
- Cardboard collars: Place collars around young brassicas and tomatoes to discourage cutworms near the soil line.
- Hand-picking: Remove large caterpillars, beetles, egg masses, and slugs before they turn a snack into a buffet.
- Mulch: Use straw, shredded leaves, or compost to conserve moisture, reduce weeds, and limit soil splash onto leaves.
- Sticky traps: Use carefully for monitoring whiteflies or fungus gnats, remembering that sticky surfaces can catch beneficial insects too.
- Clean-up: Remove heavily infested leaves and fallen plant debris so pests have fewer places to hide.
Prevention is not glamorous, but neither is discovering that one hornworm ate half your tomato plant while you were busy brewing peppermint-vinegar-cinnamon apocalypse juice.
A Simple Weekly Plant Tea and Pest Check Routine
Healthy gardening is mostly observation. Once a week, take ten minutes to walk through your plants with a drink in handpreferably your own tea, not theirs.
- Check soil moisture one or two inches below the surface.
- Look under leaves for aphids, mites, whiteflies, eggs, or webbing.
- Remove yellow, diseased, or badly damaged leaves.
- Check whether containers have adequate drainage.
- Look for wilting, leaf scorch, unusual spotting, or nutrient symptoms.
- Apply compost tea only when plants could benefit from a mild soil supplement.
- Use plain water or a targeted plant-safe treatment only when you identify a real pest problem.
This routine prevents a common gardening mistake: treating every yellow leaf as a fertilizer emergency. Sometimes the plant needs nitrogen. Sometimes it needs less water. Sometimes it needs more water. Sometimes it needs to be moved six inches away from the air conditioner because it is not auditioning for an Arctic expedition.
Experiences From the Garden: Lessons Learned the Slightly Messy Way
The first time many gardeners make compost tea, they expect a dramatic transformation. They imagine their basil standing taller by sunset, their peppers producing a standing ovation, and their roses whispering thank-you notes in the breeze. Usually, what happens is more modest: the garden looks mostly the same, but the gardener feels wonderfully industrious.
That is not a failure. Gardening rewards the slow improvements that are easy to overlook. A little compost tea around newly planted lettuce may help it settle in. A few shovelfuls of finished compost mixed into a tired bed can make soil easier to work. A layer of mulch can keep tomatoes from swinging between thirsty and swampy. None of these changes are flashy, but together they make plants sturdier and less stressed.
One useful experience is learning to judge compost by smell and texture. Finished compost should smell earthy, not rancid. It should look dark and crumbly, not like a pile of recognizable banana peels having an identity crisis. When compost is mature, it is easier to use in garden beds, around shrubs, and in simple tea recipes. When it is unfinished, it is better left to keep decomposing rather than rushed into service because you are feeling productive on a Saturday morning.
Another lesson is that weak plants attract attention. Aphids often show up on soft, tender new growth. Spider mites thrive when plants are dry and stressed. Whiteflies enjoy crowded, poorly ventilated areas. Before reaching for any spray, it helps to ask a boring but powerful question: “What is making this plant vulnerable?” The answer may be inconsistent watering, too much nitrogen, poor air circulation, or a container that has become all roots and no soil.
Houseplants teach this lesson particularly well. A stressed indoor plant can develop fungus gnats, mealybugs, or spider mites while sitting quietly in the same corner for months. The temptation is to spray it with every household potion imaginable. In practice, a better approach is often to isolate the plant, remove visible pests, rinse leaves, let the potting mix dry appropriately between waterings, and use a labeled product only when needed.
Container gardens also reveal why measured feeding matters. A tomato in a five-gallon pot has limited soil, limited water storage, and limited patience. Compost tea can be a mild supplement, but containers often need a reliable fertilizer program because nutrients wash out with watering. The goal is not to drown the plant in fertilizer; it is to provide steady nutrition at a level that matches the crop.
Experienced gardeners also learn not to panic over every insect. A few aphids may feed ladybugs, lacewings, hoverflies, and other beneficial creatures. A few chewed leaves may be the price of hosting a future butterfly. The goal is not a perfectly sterile garden. The goal is a garden where plants stay healthy enough to grow, flower, fruit, and recover from ordinary life outdoors.
There is also a certain joy in replacing complicated advice with simple habits. Water deeply. Mulch the soil. Add compost. Observe often. Feed only when there is a reason. Identify pests before treating them. Keep expectations reasonable. This may not feel as thrilling as brewing a thirteen-ingredient moonlight tonic, but it works far more often.
Ultimately, the best “tea time for plants” is a small ritual of attention. Mix a gentle compost tea when it makes sense. Give the roots a drink. Check the leaves. Pull a weed. Look for a ladybug. Notice what changed since last week. Gardening gets easier when you stop chasing miracle cures and start building a system that lets plants do what they already know how to do: grow.
Final Thoughts
A DIY plant fertilizer does not need to be complicated to be useful. A mild compost tea made from finished plant-based compost can be a simple soil supplement, especially for seedlings and transplants. But the foundation of a thriving garden remains the same: healthy soil, steady moisture, adequate light, mulch, good spacing, and targeted nutrition when plants actually need it.
For pest problems, skip the all-purpose kitchen potion. Start with identification, water sprays, hand removal, barriers, and plant-safe insecticidal soap when necessary. Your garden will be healthier, your pollinators will be safer, and your kitchen cabinets can return to their original purpose: holding snacks for the gardener.