Some dinners walk into the kitchen wearing sweatpants and still manage to impress everyone. Breaded pork chops are exactly that kind of meal: humble, golden, crunchy, affordable, and dangerously good when cooked right. But when cooked wrong? Well, let’s just say a dry pork chop can make you question every decision that led you to adulthood.
The good news is that tender breaded pork chops are not a mystery reserved for grandmothers, restaurant cooks, or people who own six kinds of salt. The secrets are practical: choose the right cut, season early, control moisture, build a proper breading station, cook at the right temperature, and stop before the pork turns into a beige hockey puck. Once you understand the “why” behind each step, this classic comfort food becomes reliable enough for a weeknight and impressive enough for company.
This guide breaks down the best techniques for making crispy breaded pork chops that stay juicy inside, with specific tips for pan-frying, baking, air frying, reheating, and troubleshooting. Grab your skillet. We are about to make pork chops that crunch politely and chew like a dream.
Why Breaded Pork Chops Often Turn Out Tough
Pork chops are leaner than many people realize, especially modern loin chops. That means they cook quickly and can dry out even faster. The biggest mistake is treating them like a slow-cooked roast. Breaded pork chops need confident heat, careful timing, and a little restraint. In other words, don’t wander off to fold laundry unless you enjoy edible cardboard.
Tough pork chops usually come from three problems: the meat is too thick or uneven, the breading traps steam instead of crisping, or the chops are overcooked. Overcooking is the main villain. Pork only needs to reach 145°F followed by a short rest, which leaves the center juicy and tender. If you cook it until every trace of moisture has packed a suitcase and left town, no sauce can fully rescue it.
Secret 1: Start with the Right Pork Chop
Choose the Best Cut
For classic breaded pork chops, center-cut loin chops, rib chops, or boneless pork loin chops work well. Bone-in chops often have slightly better flavor and moisture retention because the bone slows cooking a little and the surrounding fat adds richness. Boneless chops are easier to eat and quicker to prepare, but they need extra attention because they can dry out faster.
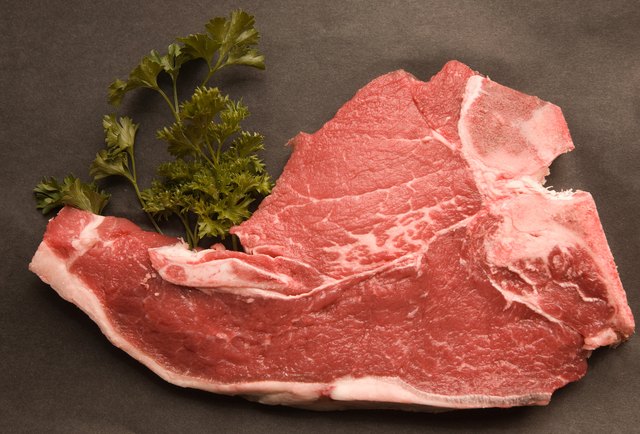
Look for pork chops with a fresh pink color, fine marbling, and a small fat cap around the edge. Avoid chops that look gray, watery, or pale. A little fat is not the enemy here. Fat is flavor’s loyal assistant, and it helps keep the pork tender while the coating gets crisp.
Thickness Matters
The ideal thickness for breaded pork chops is usually between 1/2 inch and 3/4 inch. Thin chops cook quickly and are excellent for pan-frying, especially when you want a crisp crust. Thicker chops can work, but they often need a skillet-to-oven method so the crust does not burn before the inside finishes cooking.
If your chops are uneven, pound them gently between sheets of plastic wrap or parchment paper. The goal is not to punish the pork for its life choices. You simply want an even thickness so every bite cooks at the same pace.
Secret 2: Brine or Dry-Brine for Juicier Meat
One of the best secrets to tender breaded pork chops is seasoning before cooking. A quick brine helps pork hold onto moisture and improves flavor from the inside out. A basic wet brine can be as simple as water, kosher salt, and a little sugar. For four pork chops, dissolve 3 tablespoons kosher salt and 1 tablespoon sugar in 4 cups of water. Add garlic, peppercorns, bay leaf, or apple cider if you want extra flavor.
Let the chops brine in the refrigerator for 30 minutes to 2 hours. After brining, rinse briefly if the brine was salty, then pat the chops very dry. This matters because wet pork creates soggy breading, and soggy breading is just a breadcrumb sweater with commitment issues.
A dry brine is even easier. Sprinkle the pork chops lightly with kosher salt and let them rest uncovered in the refrigerator for 30 minutes or up to overnight. The salt draws out moisture, dissolves, and then gets reabsorbed, seasoning the meat while improving texture.
Secret 3: Pat the Pork Dry Before Breading
Dry surface, crispy crust. Wet surface, sad crust. Before breading, use paper towels to blot the pork chops thoroughly. This single step makes the flour stick better, helps the egg cling evenly, and gives the breadcrumbs a better chance of becoming golden and crisp.
If you brined the chops, drying is even more important. Moisture left on the outside can loosen the coating and cause the breading to slide off in the pan like it is trying to escape the recipe.
Secret 4: Build a Smart Breading Station
The standard breading process works because each layer has a job. Flour dries and grips the meat. Egg adds stickiness. Breadcrumbs create crunch. Skip one layer and the whole operation gets wobbly.
The Classic Three-Step Breading Method
Set up three shallow dishes:
- Dish 1: All-purpose flour seasoned with salt, pepper, garlic powder, and paprika.
- Dish 2: Beaten eggs with a splash of milk, buttermilk, Dijon mustard, or hot sauce.
- Dish 3: Panko breadcrumbs or fine dry breadcrumbs mixed with Parmesan, herbs, and a little oil if baking.
Dredge each pork chop in flour, shake off the excess, dip it in egg, then press it firmly into the breadcrumbs. Do not just sprinkle the crumbs on top like culinary confetti. Press them in so they bond to the surface.
Panko vs. Regular Breadcrumbs
Panko breadcrumbs create a lighter, crunchier crust because their flakes are larger and airier. Regular breadcrumbs give a finer, more even coating. For the best texture, use panko for crunch and add a small amount of finely grated Parmesan or crushed crackers for flavor and better coverage.
Secret 5: Let the Breaded Chops Rest Before Cooking
After breading, place the pork chops on a wire rack and let them rest for 10 to 20 minutes. This helps the coating hydrate and adhere to the meat. It also reduces the chance of breading falling off during cooking.
Use this time to heat your pan, preheat your oven, toss a salad, or stare proudly at your breaded chops like you are hosting a tiny awards ceremony. The rest period is small, but it makes a noticeable difference.
Secret 6: Use the Right Cooking Method
Pan-Fried Breaded Pork Chops
Pan-frying gives the best classic crust. Use a heavy skillet, preferably cast iron or stainless steel. Add enough neutral oil to cover the bottom of the pan by about 1/8 inch. Heat the oil over medium to medium-high heat until it shimmers. If the oil is too cool, the breading absorbs grease. If it is too hot, the crust burns before the pork cooks through.
Cook 1/2-inch chops for about 3 to 4 minutes per side, depending on thickness. Turn only once if possible. The crust should be deep golden brown, crisp, and slightly dramatic.
Baked Breaded Pork Chops
Baking is cleaner and easier for larger batches. For the crispiest baked breaded pork chops, toast the panko lightly before coating or mix the breadcrumbs with a tablespoon or two of oil. Bake on a wire rack set over a sheet pan at 400°F to 425°F until the pork reaches 145°F. The rack allows hot air to circulate, preventing a soggy bottom. Nobody invited soggy bottom to dinner.
Air Fryer Breaded Pork Chops
The air fryer is excellent for breaded pork chops because it circulates hot air quickly around the coating. Spray the breaded chops lightly with oil and air fry at 375°F to 400°F, flipping halfway through. Work in batches so the chops do not overlap. Crowding blocks airflow and leads to uneven browning.
Secret 7: Cook to Temperature, Not Guesswork
An instant-read thermometer is the quiet hero of tender pork chops. Insert it into the thickest part of the chop, away from the bone. Pull the pork when it reaches 140°F to 145°F, then let it rest. Carryover heat will help finish the job, and the juices will redistribute through the meat.
The safe target for whole pork chops is 145°F with a rest. This temperature keeps pork safe while preserving tenderness. If you grew up eating pork cooked until it looked like shoe leather in witness protection, this may feel surprising. Trust the thermometer.
Secret 8: Rest Before Serving
Rest cooked pork chops for 3 to 5 minutes before cutting. This gives juices time to settle instead of rushing onto the plate. Resting also protects the crust from being crushed by immediate slicing. Place the chops on a wire rack rather than a flat plate if possible, so steam does not soften the underside.
Flavor Ideas for Better Breaded Pork Chops
Once you master the technique, flavor is where the fun starts. Breaded pork chops are wonderfully flexible. They can go Southern, Italian, German, spicy, herby, or weeknight-simple.
Classic American Seasoning
Use salt, black pepper, garlic powder, onion powder, paprika, and a pinch of dried thyme. Serve with mashed potatoes, green beans, and applesauce for the comfort-food version that makes people suspiciously quiet at the table.
Italian-Style Pork Chops
Add Parmesan, Italian seasoning, lemon zest, and parsley to the breadcrumbs. Serve with arugula salad, roasted vegetables, or marinara sauce on the side.
Southern-Style Pork Chops
Season the flour with cayenne, smoked paprika, black pepper, and a little seasoned salt. Dip the chops in buttermilk and egg before coating with seasoned crumbs or crushed crackers. Serve with gravy if your heart says yes, which it probably will.
Common Mistakes to Avoid
Using Ice-Cold Pork
Let the pork chops sit at room temperature for about 15 to 20 minutes before cooking. You do not want them warm, just not refrigerator-cold. This helps them cook more evenly.
Skipping the Seasoning
Season every layer: the pork, the flour, the egg mixture, and the breadcrumbs. Breaded pork chops should not rely on the crust alone for flavor. The meat itself needs seasoning, or the inside will taste like it missed the meeting.
Crowding the Pan
If too many chops are packed into the skillet, the temperature drops and steam builds up. Cook in batches. Yes, it takes a few extra minutes. No, your patience will not go unrewarded.
Cutting Too Soon
Cutting immediately after cooking releases juices. Rest first, slice later. This is the pork chop version of letting someone finish their sentence.
How to Reheat Breaded Pork Chops Without Ruining Them
The best way to reheat breaded pork chops is in the oven or air fryer. Avoid the microwave unless you are comfortable turning crispy breading into a damp blanket. Reheat in a 325°F oven on a wire rack until warmed through, or use an air fryer at 350°F for a few minutes. If the chops are thick, cover loosely with foil for part of the reheating time, then uncover to crisp the coating.
What to Serve with Tender Breaded Pork Chops
Breaded pork chops love bright, fresh sides because the crust is rich and savory. Try cabbage slaw, cucumber salad, roasted broccoli, sautéed green beans, applesauce, lemony arugula, mashed potatoes, buttered noodles, or roasted sweet potatoes. A squeeze of lemon over the hot pork chops wakes everything up and keeps the dish from feeling heavy.
For sauces, keep it simple. Dijon cream sauce, mushroom gravy, honey mustard, apple chutney, ranch-style herb sauce, or a quick pan gravy all work beautifully. Just serve sauce on the side if you want to preserve the crunch.
Extra Experience: Real Kitchen Lessons for Better Breaded Pork Chops
The first thing experience teaches you about breaded pork chops is that the recipe is less important than the rhythm. Once you understand the rhythm, the process becomes almost automatic: season, dry, dredge, press, rest, cook, rest again. It sounds like a tiny pork chop yoga class, but it works.
One of the most useful lessons is to prepare everything before the pork touches the pan. Breaded chops cook quickly, and the moment they start sizzling is not the time to discover that your thermometer is in a drawer, your plate is across the kitchen, and your lemon is still emotionally unavailable in the fridge. Set up the wire rack, paper towels, thermometer, tongs, and serving plate before cooking. This makes the process calm instead of chaotic.
Another lesson: listen to the pan. A good sizzle should sound lively but not angry. If the oil is roaring, smoking, and making the breadcrumbs dark in thirty seconds, lower the heat. If the pork lands in the pan and barely whispers, the oil is too cool. The chop should sound like applause, not a fire alarm and not a shy handshake.
Experience also teaches that thicker breading is not always better. A heavy coating can separate from the pork and become greasy. A thin, well-pressed coating usually tastes better and stays attached. The goal is crisp armor, not a breadcrumb winter coat.
For family dinners, breaded pork chops are especially forgiving if you make smart choices. If cooking for kids, keep the seasoning mild and serve sauces on the side. If cooking for adults, add cayenne, mustard, lemon zest, fresh herbs, or Parmesan. If feeding a crowd, bake the chops on racks instead of pan-frying every single one. Pan-frying gives the deepest crust, but baking is far easier when you need six or eight chops on the table at once.
A final practical tip: make extra breadcrumbs mixture, but never save crumbs that touched raw pork or egg. If you want leftovers for another meal, set aside a clean portion before breading begins. Food safety is not glamorous, but neither is explaining to guests that dinner came with a side quest.
The best breaded pork chops are not fussy. They are thoughtful. A little brining, a dry surface, seasoned layers, steady heat, and proper resting can turn an ordinary pork chop into a juicy, crunchy dinner that tastes like someone knew exactly what they were doing. And now, conveniently, that someone is you.
Conclusion
The secrets to tender breaded pork chops are simple but powerful: choose good pork, season early, dry the surface, use a proper flour-egg-breadcrumb coating, let the breading rest, avoid crowding the pan, and cook to 145°F instead of guessing. Whether you pan-fry, bake, or air fry, the goal is the same: a crisp golden crust wrapped around juicy, flavorful pork.
Once you master these techniques, breaded pork chops become more than a quick dinner. They become a reliable comfort-food classic that can be dressed up with Parmesan and lemon, made cozy with gravy, or served simply with applesauce and vegetables. Tender pork, crunchy coating, happy table. That is the kind of kitchen math we can all support.
Note: This article is written for web publication and synthesizes established cooking techniques and food-safety guidance from reputable U.S. culinary and food-safety sources without inserting source links into the article body.