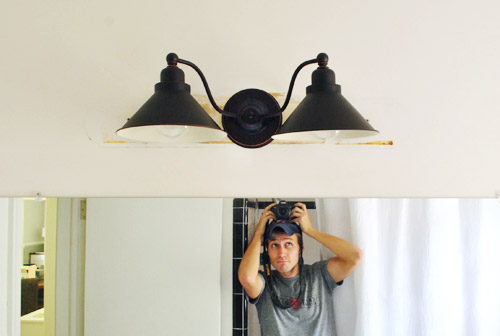
Replacing an old bathroom light is one of those home upgrades that looks small on paper and surprisingly heroic in real life. One minute your bathroom has a tired fixture that makes everyone look like they are being questioned in a 1980s police drama. The next minute, you have clean, flattering light, a fresher wall, and a mirror that no longer tells ghost stories at 7 a.m.
The best part? A bathroom light fixture replacement can be a smart, budget-friendly update when done carefully. Unlike a full bathroom remodel, swapping a dated vanity light does not require choosing tile for three weeks, negotiating with grout colors, or discovering that your “simple project” now includes moving plumbing. Still, this is electrical work, so the fun stops immediately if safety is ignored. Water, electricity, ladders, and overconfidence are not the dream team.
This guide explains how to approach replacing an old bathroom light the practical way: choosing the right fixture, understanding damp-rated bathroom lighting, preparing the wall, knowing the basic replacement process, and recognizing when it is time to call a licensed electrician. Think of it as a glow-up plan for your bathroom, minus the chaos and mystery sparks.
Why Replacing an Old Bathroom Light Is Worth It
An old bathroom light can drag down the whole room. Even if the vanity is clean, the mirror is polished, and the towels are folded like a hotel with ambitions, a rusty or outdated fixture can make the space feel neglected. Replacing it improves both style and function.
Bathroom lighting matters because it is task lighting, mood lighting, and “please help me find my contact lens” lighting all at once. A good fixture helps with shaving, makeup, skincare, cleaning, and checking whether that black shirt is actually navy. The right bathroom vanity light also reduces shadows, balances brightness, and makes the room feel larger and fresher.
There is also an energy angle. Many older fixtures use inefficient bulbs or awkward bulb types that run hot, waste electricity, and need replacing more often. Modern LED bathroom lights can offer better brightness while using far less energy than old incandescent bulbs. That means your bathroom can look better while your electric bill gives a tiny sigh of relief.
Before You Buy: Check What You Already Have
Before falling in love with a beautiful new fixture online, take a few measurements. Bathroom lights are not one-size-fits-all, even when the product photos make everything look magically centered and perfect. Reality has wall studs, medicine cabinets, mirror frames, and mystery holes from the previous owner’s “creative era.”
Measure the Existing Fixture
Start with the width, height, and depth of your current light. Also measure the distance between the fixture and the mirror, ceiling, side walls, and cabinet doors. If the current light sits above the mirror, check whether a taller replacement would hit the ceiling or look squeezed. If you are replacing side sconces, make sure the new fixtures will not crowd the mirror or block cabinet doors.
Look at the Wall Behind the Fixture
Older vanity bars often hide unpainted drywall, old screw holes, wallpaper scars, or a patch of wall that has not seen daylight since flip phones were cool. If your new fixture has a smaller backplate than the old one, those marks may show. A larger backplate can hide imperfections, while a smaller one may require patching, sanding, priming, and painting.
Confirm the Electrical Box
A modern light fixture should be mounted to a proper electrical box, not just drywall. Some older bathroom light bars were installed in ways that would make today’s electricians raise one eyebrow and slowly back away. If you remove the old fixture and find no electrical box, damaged wiring, loose mounting, burn marks, or brittle insulation, stop and contact a licensed electrician.
Choose the Right Bathroom Light Fixture
The best replacement bathroom light is not just pretty. It needs to be safe for the room, sized correctly, bright enough, and compatible with your wiring and bulbs. The goal is to create lighting that works every morning, not just lighting that looks adorable in a shopping cart.
Pick a Damp-Rated Fixture
Bathrooms are humid spaces, so choose a fixture rated for damp locations unless the manufacturer and local code indicate a different rating is needed. A damp-rated bathroom light is designed for areas with moisture in the air, such as vanity walls outside the direct splash zone. If the fixture is inside or near a shower area where water spray may reach it, a wet-rated fixture may be required.
As a simple rule, vanity lights over a sink usually need to handle humidity, while lights inside shower zones need more serious moisture protection. Always follow the fixture label, installation instructions, and local electrical code. If you are not sure where your bathroom fixture falls, ask an electrician before installing it. Guessing is for jellybean flavors, not bathroom wiring.
Think About Brightness and Color Temperature
Bathroom lighting should be bright enough for grooming but not so harsh that it makes your reflection look like it has unpaid taxes. For many bathrooms, soft white to neutral white LED lighting works well. Around 2700K feels warm and cozy, 3000K is a popular balanced choice, and 3500K to 4000K can feel cleaner and more task-oriented.
For vanity lighting, look for good color rendering. A higher CRI, often 90 or above, helps skin tones, makeup, and clothing colors look more natural. This is especially helpful if the bathroom is where you get ready before stepping into daylight, office lighting, or the terrifying honesty of a car mirror.
Choose the Right Size
A vanity light should feel proportional to the mirror and sink area. A small powder room may only need a compact two-light fixture or one stylish sconce. A wider double vanity may need a longer linear light, multiple sconces, or two separate fixtures. If you are replacing an old bathroom light above a mirror, a fixture that is roughly two-thirds to three-quarters the width of the mirror often looks balanced, though design rules can bend depending on the room.
Check Bulb Compatibility
If the fixture uses replaceable bulbs, confirm the maximum wattage and bulb base type. If it has integrated LED lighting, check the lumen output, color temperature, dimming compatibility, and expected lifespan. If you plan to use a dimmer, the fixture and bulbs must both be dimmable, and the wall dimmer should be compatible with LED lighting.
Tools and Materials You May Need
A straightforward bathroom vanity light replacement usually calls for basic tools, but every home is a little different. Gather everything before you begin so you do not end up balancing on a step stool while asking the universe where the screwdriver went.
- New damp-rated or properly rated bathroom light fixture
- Compatible bulbs, if not included
- Non-contact voltage tester
- Screwdrivers
- Wire connectors approved for the wire size and fixture
- Wire stripper, if needed
- Level
- Painter’s tape
- Drywall patch, sandpaper, primer, and paint if the wall needs touch-up
- Safety glasses
Read the manufacturer’s instructions before starting. Different fixtures use different mounting brackets, backplates, screws, and wire connector requirements. The instructions are not decorative paper confetti. They are part of the project.
Safety First: Do Not Skip This Part
Replacing an old bathroom light can be manageable for a careful, experienced adult DIYer, but it is still electrical work. Turn off power at the circuit breaker, not just at the wall switch. A switch can be wired in ways that leave power present at the fixture box even when the light appears off.
After turning off the breaker, test the wires with a voltage tester before touching them. Work on a dry floor, keep hands dry, and use stable footing. Do not work in a bathroom immediately after a hot shower when the room is steamy. Moisture is excellent for ferns, not electrical projects.
Call a licensed electrician if you find aluminum wiring, cloth-covered wiring, burned wires, loose connections, missing grounding, no electrical box, cracked boxes, buzzing, frequent breaker trips, or anything that simply does not look right. Also call a pro if you are moving the fixture location, adding a new light, installing lighting in a shower area, or dealing with local permit requirements.
How to Replace an Old Bathroom Light: A Practical Overview
The exact steps depend on your fixture and local code, but the general process for replacing a bathroom vanity light usually follows a predictable path. This overview is meant to help you understand the project, not replace the manufacturer’s instructions or professional advice.
Step 1: Turn Off the Breaker and Test for Power
Find the correct breaker and turn it off. Then verify that the light no longer turns on. Remove the bulbs and shade only after the fixture has cooled. Use a voltage tester at the fixture wiring before touching any wires. If your tester indicates power, stop and recheck the circuit.
Step 2: Remove the Old Fixture Carefully
Take off glass shades, bulbs, decorative nuts, and the fixture cover. Support the fixture as you loosen it from the wall so it does not drop, pull wires, or perform an unwanted gymnastics routine. Before disconnecting wires, take a quick photo of the existing connections for reference.
Step 3: Inspect the Box and Wall
Once the old fixture is off, inspect the electrical box. It should be secure and appropriate for the new light. Check the wall surface too. If the new fixture will expose old paint lines or holes, patch and paint before installing the new light. It is much easier to touch up the wall before a shiny new fixture is in the way.
Step 4: Install the New Mounting Bracket
Most new bathroom lights include a mounting bracket. Attach it to the electrical box according to the manufacturer’s directions. Use a level before tightening everything. A slightly crooked vanity light will bother you forever, especially when you are brushing your teeth and have nothing else to stare at.
Step 5: Connect the Wires as Directed
Follow the fixture instructions and local code. In many standard installations, the grounding wires connect together, the neutral wires connect together, and the hot wires connect together. Wire colors are often black for hot, white for neutral, and green or bare copper for ground, but older homes may not be that polite. If wire colors are confusing or connections do not match the instructions, stop and call a professional.
Step 6: Secure the Fixture and Add Bulbs or Shades
Carefully tuck the wires into the box without pinching them. Attach the fixture body to the bracket, tighten the decorative nuts or screws, and check that the fixture sits flat and level. Install bulbs and glass shades as instructed. Do not exceed the fixture’s wattage limit.
Step 7: Restore Power and Test
Turn the breaker back on and test the light. If it works, celebrate modestly. If it flickers, buzzes, trips the breaker, smells hot, or does not turn on, switch the breaker off and troubleshoot safely. Persistent problems deserve a licensed electrician, not ten more minutes of hopeful tapping.
Common Problems When Replacing Bathroom Lights
Even a simple bathroom lighting upgrade can reveal surprises. The trick is to expect a little drama and respond calmly.
The New Backplate Does Not Cover the Old Marks
This is extremely common. Old vanity bars are often wide, while modern fixtures may have smaller decorative plates. Patch holes, sand smooth, prime, and paint before installing the new fixture. If matching paint is impossible, consider repainting the wall section or choosing a fixture with a larger backplate.
The Fixture Is Not Centered Over the Mirror
Sometimes the electrical box was installed off-center, but the old fixture was wide enough to hide it. A new fixture may reveal the problem. Some fixtures allow slight side-to-side adjustment on the mounting bracket. If not, moving the box is usually a job for an electrician.
The Old Light Had No Junction Box
Do not mount a new fixture directly to drywall if it requires a proper electrical box. The box protects wire connections and supports the fixture. If there is no box, have one installed correctly.
The New LED Light Flickers
Flickering can happen when LED bulbs are paired with an incompatible dimmer, when connections are loose, or when the fixture has a defect. Check bulb and dimmer compatibility first. If flickering continues, turn off power and get professional help.
Bathroom Lighting Design Tips That Make a Big Difference
Replacing an old bathroom light is a perfect chance to improve the way the whole room functions. Do not simply copy the old setup if the old setup made everyone look tired, shadowy, or vaguely haunted.
Avoid Harsh Shadows
A single light above the mirror can cast shadows under the eyes, nose, and chin. Side sconces, when space allows, create more even facial lighting. If you keep an overhead vanity fixture, choose one that diffuses light well instead of blasting it in one sharp direction.
Layer the Lighting
A bathroom works best with layers: vanity lighting for grooming, ceiling lighting for general brightness, and possibly shower-rated lighting where appropriate. In a small bathroom, one good vanity fixture may be enough. In a larger bathroom, layered lighting keeps the room functional and comfortable.
Match the Finish Thoughtfully
Your new bathroom light does not have to match every faucet, towel bar, and cabinet pull perfectly, but it should look intentional. Matte black can add contrast, brushed nickel feels classic, chrome looks crisp, brass adds warmth, and bronze can soften traditional spaces. If your bathroom already has three metal finishes, a fourth may be brave. Or chaotic. Sometimes both.
When Replacing the Light Becomes a Bigger Project
Sometimes a simple fixture swap turns into a mini bathroom refresh. That is not always bad. If the wall needs paint, the mirror is outdated, or the medicine cabinet looks tired, replacing the light can become the first step toward a cleaner, more modern space.
For example, if your old fixture is a long chrome strip with exposed round bulbs, replacing it with a streamlined LED vanity bar can instantly modernize the room. Pair it with a framed mirror and fresh wall paint, and the bathroom may look renovated even if the sink, tile, and floor stayed exactly where they were. This is the home improvement version of getting a haircut and suddenly believing you can organize your entire life.
Cost Considerations
The cost of replacing an old bathroom light depends on the fixture, wall repairs, tools, and whether you hire a professional. Basic vanity lights can be affordable, while designer fixtures, integrated LED bars, specialty finishes, and high-end sconces cost more. If the wiring and box are already in good shape, the project may be fairly simple. If electrical corrections are needed, professional labor becomes part of the budget.
Do not choose the cheapest fixture if it lacks the right rating, has poor reviews, or uses awkward bulbs. Bathroom lighting lives in a humid space and gets used daily. A reliable, properly rated fixture is worth more than a bargain that rusts, flickers, or makes your bathroom look like a basement hallway.
Maintenance After Installation
Once your new bathroom light is installed, keep it looking and working its best. Dust the fixture regularly, clean glass shades with a soft cloth, and make sure the bathroom fan works well to reduce humidity. Excess moisture can shorten the life of finishes, bulbs, and electrical components.
If the fixture uses replaceable bulbs, keep spares that match the correct wattage, base, and color temperature. If it uses integrated LEDs, keep the product information in a safe place so you know the model number if service or warranty questions come up later.
Real-Life Experience: What Replacing an Old Bathroom Light Teaches You
Replacing an old bathroom light sounds like a neat little weekend project, but in real homes, it often teaches a few memorable lessons. The first lesson is that old fixtures are excellent secret keepers. You may remove a dated light and discover paint from three bathroom colors ago, two extra screw holes, a strange outline on the wall, and enough dust to suggest the fixture had been guarding an ancient tomb. This is normal. Annoying, yes, but normal.
One practical experience many homeowners share is that the shopping part takes longer than expected. The fixture must look good, fit the wall, clear the mirror, match the bathroom style, provide enough light, and have the right damp or wet rating. A light that looks perfect online may be too wide, too tall, too dim, too shiny, or designed for a bathroom the size of a boutique hotel suite. Measuring first saves frustration later.
Another real-world lesson is that wall touch-up matters. A new fixture can make old paint look older. If the previous light had a large base and the new one has a smaller plate, the exposed wall may show fading or rough texture. Taking time to patch, sand, and paint before installing the new fixture makes the final result look professional. Skipping that step can make the new light look like it is wearing someone else’s jacket.
Lighting quality is also surprisingly emotional. A bad bathroom light can make mornings feel harsher than necessary. A better LED vanity light with a comfortable color temperature can make the room feel cleaner and calmer. It can also make daily routines easier, especially when the light spreads evenly across the face instead of creating dramatic shadows. Unless your goal is to look like a mysterious villain in a movie trailer, even lighting is your friend.
Many people also learn that old electrical work does not always follow expectations. Wire colors may be faded or unusual. The box may be loose. The old fixture may have been installed in a way that worked for years but does not meet modern standards. This is where patience matters. The best DIY decision is sometimes stopping the project and hiring an electrician. That is not failure. That is wisdom wearing safety glasses.
Finally, replacing an old bathroom light proves that small upgrades can change how a room feels. You may not replace the vanity, floor, shower, or tile, yet the bathroom suddenly looks more intentional. The mirror reflects better light. The walls feel fresher. The space feels cared for. It is a satisfying reminder that home improvement does not always need to be loud, expensive, or dramatic. Sometimes it is just one well-chosen fixture, properly installed, quietly making every morning a little brighter.
Conclusion
Replacing an old bathroom light is one of the most effective ways to refresh a bathroom without remodeling the entire space. The key is to balance style with safety. Choose a properly rated fixture, measure carefully, turn off power at the breaker, test before touching wires, and follow the manufacturer’s instructions. If the wiring, electrical box, or fixture location raises questions, bring in a licensed electrician.
A well-chosen bathroom light can improve visibility, reduce shadows, save energy with LED technology, and give the room a cleaner, more modern look. In other words, your bathroom does not need to remain trapped under the glow of a tired old fixture. Give it better lighting, and it may just start acting like the refreshed little room it always wanted to be.