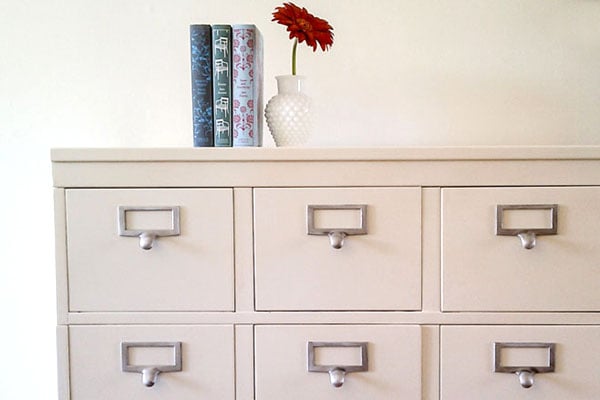
A stackable filing cabinet is rarely the most glamorous item in a room. It usually arrives wearing a tired beige, gray, or g the Reagan administration.” Yet beneath the scratches, rust spots, and bent label holders, an old metal cabinet can become attractive, durable, and genuinely useful storage.
Refinishing a stackable filing cabinet is also a practical alternative to buying new office furniture. You can customize the color, preserve a well-built cabinet, reduce waste, and create a storage system that fits a home office, craft room, workshop, entryway, or studio. The key is treating it as a functional metal object rather than simply spraying paint at it and hoping optimism counts as surface preparation.
Why Refinish a Stackable Filing Cabinet?
Older filing cabinets are often sturdier than inexpensive modern alternatives. Their steel bodies, mechanical drawer slides, removable label frames, and modular dimensions make them excellent candidates for restoration. A stackable design adds another advantage: vertical storage without requiring a large footprint.
Refinishing lets you coordinate the cabinet with the surrounding room. Matte black can create an industrial look, warm white can help it disappear against a wall, and deep green or navy can turn ordinary office storage into an intentional accent piece. Better Homes & Gardens specifically recommends removing file-cabinet drawers, pulls, and label holders before priming and painting because working with flat, separated surfaces produces cleaner results. ect can also cost considerably less than replacing several modular cabinets. Most of the expense involves cleaner, sandpaper, primer, paint, masking supplies, and optional replacement hardware. The real investment is patiencean ingredient that remains tragically unavailable in spray cans.
Inspect the Cabinet Before Starting
Identify the Material
Most vintage filing cabinets are made from steel, but some lightweight models contain aluminum components. This distinction affects surface preparation and primer selection. Ferrous metals such as steel can rust and generally benefit from a rust-inhibiting metal primer. Nonferrous metals require products specifically labeled to adhere to aluminum or similar surfaces. This Old House recommends choosing primer according to the type of metal rather than assuming one formula works for everything. the Structural Condition
Pull out every drawer and inspect the slides, stops, handles, corners, seams, and stacking connectors. Minor scratches and surface rust are manageable. Severe corrosion around a load-bearing seam, a drawer that no longer stays on its track, or a distorted cabinet body may require repair before cosmetic work begins.
Place each unit on a level floor and confirm that it does not rock. Stack the empty cabinets temporarily to verify that their feet, grooves, clips, or alignment points still engage correctly. Paint cannot repair a structurally unstable stack, although it can make the collapse look surprisingly coordinated.
Consider the Age of the Existing Finish
Unknown old coatings deserve caution. Sanding, scraping, or grinding painted surfaces can create hazardous dust. The Environmental Protection Agency advises testing questionable older painted surfaces and using lead-safe practices before disturbing them. Keep children and pets away from the work area, collect debris carefully, and avoid dry sanding an unidentified finish until you understand what it contains.
Tools and Materials
A typical refinished stackable filing cabinet project may require:
- Protective gloves, safety glasses, and suitable respiratory protection
- Drop cloths or cardboard
- Screwdrivers, pliers, and labeled storage bags
- Degreasing cleaner and clean water
- Lint-free cloths or tack cloths
- A wire brush for loose rust and flaking paint
- 80-, 180-, and 220-grit sandpaper
- Metal filler or automotive glazing putty for small dents
- Painter’s tape and masking paper
- Rust-inhibiting or bonding metal primer
- Metal-compatible enamel, acrylic, or alkyd paint
- Optional clear protective topcoat
- Replacement labels, drawer liners, handles, or casters
Read every product label before combining primer, paint, and clear coat. Staying within one manufacturer’s compatible coating system can reduce adhesion and curing problems.
How to Refinish a Stackable Filing Cabinet
1. Photograph and Label Everything
Before disassembly, take photographs of the drawer order, slide arrangement, hardware orientation, and stacking mechanism. Label each drawer and cabinet section with removable tape. Put screws, stops, handles, and label frames into separate bags.
This five-minute step prevents the traditional end-of-project mystery in which one tiny metal clip remains on the floor and every drawer suddenly develops a personality disorder.
2. Remove the Drawers and Hardware
Pull each drawer to its release point and follow the cabinet’s removal mechanism. Some drawers lift slightly before sliding free, while others use side tabs or stops. Do not force them. Remove handles, card holders, locks, rubber feet, and decorative pieces whenever possible.
Separating the parts gives you better access to edges and corners. It also prevents paint from bridging moving components together.
3. Degrease the Surfaces
Clean the cabinet before sanding. Oils, adhesive residue, furniture polish, smoke film, and ordinary grime can contaminate abrasives and push dirt deeper into the finish. Use a suitable degreaser, rinse away cleaner residue, and allow the metal to dry completely.
Benjamin Moore and Bob Vila both emphasize cleaning as a critical first step when painting metal furniture. Moisture must be gone before primer is applied because trapped water encourages corrosion and interferes with adhesion. ove Loose Paint and Rust
Use a wire brush or coarse sandpaper on loose rust and flaking paint. You do not necessarily need to strip every square inch to bare metal. The goal is to remove unstable material, smooth abrupt paint edges, and create a sound surface that primer can grip.
Feather chipped areas with medium-grit sandpaper, then scuff glossy sections with approximately 180- to 220-grit paper. The Home Depot, Lowe’s, and This Old House recommend removing loose corrosion and peeling coatings before applying metal primer or paint. nding, vacuum the work area and wipe every surface clean. Dust hiding in drawer seams has an impressive ability to appear only after the final coat.
5. Repair Dents and Damaged Edges
Small dents can sometimes be pushed outward from inside the cabinet using a wood block and gentle pressure. Shallow imperfections may be filled with a metal-compatible filler or automotive glazing putty. Let the repair cure, sand it smooth, and check it under angled light.
A perfectly flat surface is not essential for a useful filing cabinet. However, smoothing prominent damage helps glossy and satin finishes look more professional because those sheens reflect imperfections more clearly than matte paint.
6. Mask Moving and Functional Parts
Mask drawer slides, lock cylinders, identification plates, threaded holes, stacking connectors, and areas where metal parts rub together. Avoid coating the inside of mechanical tracks unless the manufacturer specifically recommends it.
Paint adds thickness. A beautiful finish on a tight-fitting drawer edge can quickly become a beautiful scraping noise. Protecting contact points helps the drawers continue moving freely after reassembly.
7. Apply the Correct Primer
Primer improves adhesion, helps isolate repaired areas, and protects exposed steel from corrosion. Use a rust-inhibiting primer on cleaned steel or spot-prime bare and rusted areas according to the product instructions. A bonding primer may be appropriate for intact, glossy factory finishes.
Apply light, even coats rather than flooding corners and seams. This Old House recommends rust-resistant metal primer for exposed cabinet surfaces, while Rust-Oleum notes that primer is particularly valuable when changing from a dark finish to a light color or adding corrosion protection. e primer to dry for the stated recoat time. Lightly sand rough areas if permitted, then remove all sanding dust.
8. Paint With Several Thin Coats
Spray paint is popular for metal filing cabinets because it can create a smooth finish around corners, recessed handles, and narrow edges. Brushing or rolling can also work when using a metal-compatible enamel and a high-density foam roller.
When spraying, begin each pass just beyond the cabinet, move steadily across the surface, and release the nozzle after passing the opposite edge. Slightly overlap each stroke. Keep the can at the distance specified on its label and resist the temptation to obtain full coverage in one coat.
Krylon recommends multiple thin coats to reduce drips and create a more consistent surface. Rust-Oleum likewise warns that excessive paint thickness and unsuitable temperature or humidity can cause bubbling, wrinkling, cracking, or slow curing. awer fronts horizontally when possible. Horizontal positioning reduces runs, especially around handles and label frames. Rotate the cabinet only after the coating can be handled safely.
9. Allow the Finish to Cure
Dry paint and cured paint are not the same thing. A surface may feel dry but remain soft beneath the outer film. Reassembling too soon can produce fingerprints, stuck drawers, chipped edges, and hardware impressions.
Follow the manufacturer’s recoat, handling, and full-cure times. Give drawers additional time before loading them with heavy files. Patience here protects every hour already spent cleaning, sanding, priming, and explaining to family members why the garage smells like a hardware store.
10. Reassemble and Test
Reinstall handles, label holders, drawer stops, feet, and locks. Test each empty drawer before adding files. If an edge rubs, identify the contact point and correct it gently rather than repeatedly forcing the drawer.
Stack the cabinets according to their original design. Use factory clips or compatible connectors when available. Place heavier units and heavier contents at the bottom, keep the stack level, and avoid opening several loaded drawers simultaneously.
Safety When Painting and Stacking
Spray painting should be performed in a properly ventilated area away from flames, pilot lights, sparks, and other ignition sources. Use protective equipment appropriate for the coating and application method. OSHA guidance emphasizes controlling spray mist and vapors through ventilation and suitable respiratory protection, especially in enclosed areas. cabinets are in service, treat the finished stack as functional furniture rather than decorative blocks. The Consumer Product Safety Commission recommends anchoring furniture with drawers, doors, or shelves to help prevent tip-over incidents. Wall anchoring is especially important in homes with children, on carpeted floors, or where multiple drawers could be opened.
Design Ideas for a Refinished Filing Cabinet
Classic Industrial
Choose charcoal, matte black, gunmetal, or deep navy. Preserve metal label frames and use cream card inserts for a vintage records-room appearance.
Warm Modern Office
Use soft white, mushroom, taupe, or muted olive. Add leather-look pulls or brushed brass hardware, provided the replacement handles are strong enough for loaded drawers.
Color-Blocked Storage
Paint the cabinet bodies one neutral color and give each drawer front a coordinated shade. This approach can visually identify categories such as taxes, household records, warranties, craft supplies, and business documents.
Workshop Utility Cabinet
Use a durable satin or semigloss enamel that can be wiped clean. Add large printed labels for fasteners, electrical supplies, manuals, sandpaper, and tool accessories.
Vintage Library Style
Choose dark green, oxblood, warm brown, or near-black. Antique-style label cards and restrained metallic details can create the appearance of an old card catalog without pretending that your appliance warranties are rare manuscripts.
Organizing the Finished Cabinet
A refinished cabinet should function as well as it looks. Use hanging folders for broad categories and interior folders for specific subjects. Label every file clearly and leave enough unused space for new documents. The Container Store recommends using hanging files for main topics, interior files for subtopics, and consistent labels to make retrieval easier. te weight across the lowest drawers first. Store light supplies, blank paper, photographs, or frequently used forms in upper units. Avoid overfilling drawers because compressed folders become difficult to browse and place unnecessary strain on slides.
You can also add removable liners to protect drawer bottoms. Magnetic label plates, dry-erase tags, or printed card inserts allow the cabinet’s purpose to change without repainting it.
Common Refinishing Mistakes
- Painting over grease: The coating may separate or form uneven patches.
- Skipping the scuff sanding: Glossy factory finishes may not provide enough adhesion.
- Leaving active rust beneath paint: Corrosion can continue spreading under the new finish.
- Using one heavy spray coat: Thick applications are more likely to sag, wrinkle, or remain soft.
- Painting drawer tracks: Added thickness can interfere with movement.
- Ignoring cure time: Hardware and drawers can damage paint that feels dry but has not hardened.
- Stacking without checking stability: A tall cabinet loaded at the top can become unsafe.
- Assuming every old coating is harmless: Unknown finishes should be evaluated before aggressive sanding.
Maintaining the New Finish
Clean the cabinet with a soft cloth and a mild cleaner. Avoid abrasive pads and aggressive solvents unless the coating manufacturer approves them. Wipe spills promptly, especially around drawer edges and seams.
Keep a small amount of matching paint for touch-ups. A chip that exposes steel should be cleaned and repaired before rust develops. Check wall anchors, stacking clips, feet, and drawer stops periodically, particularly after moving the cabinet.
With sensible care, a refinished stackable filing cabinet can provide many more years of service while looking far more intentional than its original office-basement disguise.
Practical Experience: Lessons From a Typical Cabinet Makeover
The most surprising part of refinishing a stackable filing cabinet is how little time the exciting steppaintingoccupies compared with preparation. A typical two-unit project may involve hours of cleaning, labeling, sanding, masking, and waiting, followed by only a few minutes of spraying per coat. That imbalance initially feels unfair, but the finished surface quickly reveals why preparation matters.
One common project begins with two steel cabinets found at a thrift store or office liquidation sale. From several feet away, they look reasonably clean. Under brighter light, however, the lower cabinet usually reveals oily fingerprints, tape adhesive, rust near the bottom seam, and dust packed behind the drawer stops. Spraying directly over that collection would preserve it forever, like an archaeological site with handles.
Removing the drawers also exposes differences between units that appeared identical. One may have a slightly bent rail, while another contains a missing rubber foot. Correcting these issues before painting prevents frustration later. A thin furniture shim or replacement foot can stabilize the base, and a carefully adjusted rail can stop a drawer from rubbing against its new finish.
Color selection often changes once the cabinet is cleaned. A bold color may look exciting on a small sample but overwhelming across several stacked drawer fronts. Muted green, navy, warm gray, and satin black tend to balance personality with practicality. Testing the paint on the back panel is useful because it shows the actual sheen and texture on metal.
The first primer coat frequently looks disappointing. Repaired areas remain visible, coverage appears uneven, and every scratch seems more obvious. This is normal. Primer is not supposed to provide the final appearance; it reveals imperfections and creates a stable foundation. A light sanding after the primer cures can smooth dust particles and feather repaired spots before the color coats begin.
Another valuable lesson is to paint drawer fronts while they are lying flat. Vertical spraying makes it easy to overload recessed handles, producing drips that emerge several minutes after the surface looked perfect. Flat positioning allows lighter, more controlled passes and gives the paint time to level.
Reassembly requires equal restraint. Sliding a drawer into place as soon as the paint feels dry is tempting, particularly when every part is occupying valuable floor space. Waiting through the full curing period is less satisfying but far safer. Soft paint can stick at contact points, and pulling the drawer back out may tear away an entire strip of the new coating.
Once cured and assembled, the project’s biggest improvement is often not the color. It is the sense that the cabinet now belongs in the room. Clean labels, smooth drawers, matching hardware, and a stable stack transform discarded office equipment into useful furniture. The cabinet still stores paperwork, but it no longer looks as though the paperwork is serving a sentence.
The final practical lesson is to organize immediately. Empty refinished drawers attract random objects at astonishing speed. Installing labeled hanging folders before moving the cabinet indoors ensures that the restored storage system begins with a purpose rather than becoming an attractive metal habitat for receipts, charging cables, and instruction manuals from appliances nobody owns anymore.
Conclusion
A refinished stackable filing cabinet combines responsible reuse, efficient storage, and personalized design. Success depends less on artistic talent than on careful inspection, thorough cleaning, proper rust removal, compatible primer, thin paint coats, adequate curing, and safe stacking.
Whether finished in understated white, industrial black, vintage green, or a playful color-blocked palette, the cabinet can serve as more than hidden office equipment. It can become a durable part of a home office, workshop, studio, or craft spaceproof that even paperwork storage deserves a second chance and a respectable paint job.