Note: This article is written in standard American English, structured for SEO publishing, and based on widely used paper mache craft methods, bowl-forming techniques, drying practices, finishing tips, and beginner-friendly DIY experience.
Introduction: A Bowl Made From Paper? Yes, and It Has Main Character Energy
If you have ever looked at a stack of old newspaper, junk mail, or scrap paper and thought, “You belong in a design magazine,” congratulations: you may already have the spirit of a paper mache artist. A paper mache bowl DIY project is one of those magical crafts that feels almost suspiciously simple. You take paper, paste, a bowl or balloon as a mold, and a little patience. Somehow, after a few layers and some drying time, you end up with a handmade decorative bowl that looks charming, artsy, and far more expensive than it has any right to be.
Paper mache bowls are perfect for beginners because they do not require fancy equipment, advanced skills, or a craft room that looks like a television set. You can make one on a kitchen table with a mixing bowl, strips of paper, flour paste or Mod Podge, plastic wrap, paint, and a clear sealer. The result can be rustic, modern, colorful, minimalist, boho, farmhouse, coastal, or wildly experimental. In other words, this DIY paper mache bowl is basically a blank canvas with a rim.
This guide walks you through the full process: choosing materials, making paste, layering paper, drying the bowl properly, removing it from the mold, sanding, painting, sealing, styling, troubleshooting, and avoiding the common mistakes that make beginners mutter dramatic things at damp newspaper. Whether you want a decorative catchall for keys, a centerpiece for faux fruit, a handmade gift, or a weekend craft project that does not require a second mortgage, this tutorial will help you create a beautiful paper mache bowl from start to finish.
What Is a Paper Mache Bowl?
A paper mache bowl is a lightweight decorative bowl made by layering paper with adhesive paste over a temporary mold. Once the paper dries and hardens, the mold is removed, leaving behind a bowl-shaped shell. The technique is also known as papier-mâché, a French term that means “chewed paper.” Thankfully, modern crafting does not require chewing anything. Your teeth may remain peacefully uninvolved.
The basic idea is simple: paper fibers become stiff when saturated with paste and dried in layers. The more carefully you layer and dry the paper, the stronger the final shape becomes. A paper mache bowl can be made with newspaper, brown kraft paper, tissue paper, paper towels, book pages, magazine paper, or even handmade paper. The paste can be flour-and-water paste, white glue mixed with water, wallpaper paste, or decoupage medium such as Mod Podge.
Most DIY paper mache bowls are decorative rather than food-safe. They are great for holding wrapped candy, yarn, keys, dried botanicals, lightweight ornaments, or nothing at all. Sometimes “nothing at all” is a legitimate design choice. Ask any expensive home décor store.
Why Make a DIY Paper Mache Bowl?
The biggest reason to make a paper mache bowl is that it turns humble materials into something personal and beautiful. It is budget-friendly, beginner-friendly, and wonderfully forgiving. If a layer wrinkles, you call it texture. If the edge is uneven, you call it organic. If paint splatters somewhere unexpected, congratulations, you have discovered abstract expressionism.
Paper mache is also an excellent recycled craft. Old newspapers, packing paper, paper bags, and discarded office paper can all become part of the bowl. This makes the project ideal for eco-conscious crafters who like the idea of reducing waste while making something useful and decorative. It is also a fantastic family craft, classroom project, rainy-day activity, or relaxing weekend DIY for adults.
Another advantage is customization. You control the size, shape, color, finish, and style. A small bowl can become a jewelry dish. A wide shallow bowl can become a coffee table accent. A deep bowl can be used as a decorative centerpiece. You can paint it matte white, add gold leaf, brush on bold stripes, decoupage patterned paper, or leave the natural paper visible for a raw handmade look.
Materials You Need for a Paper Mache Bowl DIY
Basic Supplies
For a simple paper mache bowl, gather these supplies before you begin:
- Old newspaper, kraft paper, paper towels, or scrap paper
- A bowl, balloon, or plastic container to use as a mold
- Plastic wrap, aluminum foil, or cooking spray for release
- Flour and water, white glue and water, or Mod Podge
- A mixing bowl and whisk
- Paintbrush or foam brush
- Scissors or your hands for tearing paper strips
- Drying rack or protected surface
- Acrylic paint
- Fine-grit sandpaper, optional
- Clear acrylic sealer or varnish
Best Paper for Paper Mache Bowls
Newspaper is the classic choice because it is thin, flexible, and easy to shape around curves. Brown kraft paper creates a warmer, more natural finish and can be very attractive if you want a handmade artisan look. Paper towels are soft and absorbent, which makes them useful for a smoother final layer, though they can be more delicate when wet. Magazine pages can work, but glossy paper does not absorb paste as easily, so it is better for decorative top layers than structural layers.
For the strongest result, tear the paper instead of cutting it. Torn edges blend into one another more smoothly than sharp scissor-cut edges. This small detail makes a surprisingly big difference. Paper mache loves ragged edges. It is one of the few times in life when being a little rough around the edges is a genuine advantage.
Choosing the Right Mold
The mold determines the final shape of your DIY paper mache bowl. A regular kitchen bowl is the easiest option for beginners. Choose a shape with a smooth outside and a wide enough opening so the dried paper shell can be removed easily. Avoid bowls with complicated ridges, handles, or deep undercuts because the paper may cling to them like it has abandonment issues.
A balloon is another popular mold, especially if you want a rounded, organic bowl. Blow up the balloon, place it knot-side down in a cup or small container, and apply the paper layers over the upper half. Once dry, pop the balloon and trim the rim. Balloons create beautiful curved forms, but they can shift while you work, so patience is required. Also, balloons are dramatic. They may roll, wobble, or attempt escape. Tape and a sturdy cup are your friends.
You can also use plastic containers, mixing bowls, glass nesting bowls, or even thrifted serving bowls as molds. Always protect the mold with plastic wrap, foil, or a release layer before applying paste. Otherwise, you may accidentally create a permanent emotional bond between your paper mache and your favorite salad bowl.
Best Paste Options for Paper Mache Bowls
Flour and Water Paste
The traditional paper mache paste is made with flour and water. A common no-cook ratio is one part flour to about one to two parts water, whisked until smooth. The texture should be like thin pancake batter: fluid enough to coat paper but not so watery that it runs everywhere. Some crafters add a small pinch of salt to help discourage mold, especially in humid climates.
Flour paste is affordable, easy, and great for kids’ crafts. The downside is that it takes longer to dry and can spoil if the bowl stays damp too long. Good airflow is important. If you live somewhere humid, choose thinner layers and allow more drying time between rounds.
White Glue and Water Paste
White school glue or craft glue mixed with water creates a stronger, smoother paste. A simple mixture of about two parts glue to one part water works well. Some crafters prefer a 50/50 mix for easier brushing. Glue paste tends to dry harder and is less prone to the sour smell that can happen when flour paste stays wet too long.
Mod Podge or Decoupage Medium
Mod Podge and similar decoupage mediums are excellent for paper mache bowls when you want convenience and a cleaner finish. They work as adhesive and sealer, although an additional clear coat is still recommended for durability. This option costs more than flour paste but can make the process smoother, especially for decorative bowls you plan to paint and display.
Step-by-Step Paper Mache Bowl DIY Tutorial
Step 1: Prepare Your Workspace
Cover your table with newspaper, a plastic tablecloth, parchment paper, or an old shower curtain. Paper mache is messy in the way toddlers eating spaghetti are messy: technically manageable, but only if you prepare. Wear old clothes or an apron, and keep a damp cloth nearby for sticky fingers.
Step 2: Prepare the Mold
Turn your chosen bowl upside down. Cover the outside with plastic wrap or aluminum foil, smoothing it as much as possible. If using foil, press it firmly around the bowl. If using plastic wrap, pull it tight so large wrinkles do not transfer too strongly to the finished piece. You may also apply a light coat of cooking spray to help the dried bowl release more easily.
Step 3: Tear the Paper
Tear your paper into strips about one inch wide and three to six inches long. Smaller strips are easier to shape around curves. For a small bowl, prepare more strips than you think you need. Paper mache has a sneaky way of using up supplies faster than expected, like craft glitter but less emotionally permanent.
Step 4: Mix the Paste
Choose your paste. For flour paste, whisk one cup of flour with one to two cups of water until smooth. For glue paste, mix white glue with a little water until brushable. For Mod Podge, use it straight from the container or thin it very slightly if needed. The paste should coat the paper evenly without leaving heavy clumps.
Step 5: Apply the First Layer
Dip a strip of paper into the paste, then slide it between your fingers to remove the excess. The paper should be wet but not dripping like it just lost a water balloon fight. Lay it onto the mold and smooth it down with your fingers or a brush. Continue overlapping strips until the mold is covered.
For the first layer, place strips in one direction. For the second layer, change direction. This crisscross pattern helps strengthen the bowl. Think of it as tiny paper engineering, except you do not need a hard hat.
Step 6: Build Up Several Layers
A decorative paper mache bowl needs at least three to five layers. For a sturdier bowl, use six to eight thin layers. Thin layers are better than thick soggy layers because they dry more evenly and are less likely to warp. If you want a smooth interior and exterior, use newspaper for the base layers and plain white paper or paper towels for the final layer.
Step 7: Let It Dry Completely
Drying is not the glamorous part of paper mache, but it is the most important. Place the bowl in a warm, dry area with good airflow. Depending on paste type, paper thickness, and humidity, drying may take overnight or up to twenty-four hours between heavier applications. The bowl should feel firm, cool-free, and dry all the way through before you remove it from the mold.
Do not rush this step with high heat. A hair dryer on low can help small areas, but too much heat can cause warping or cracking. Paper mache is basically a craft and a patience test wearing the same outfit.
Step 8: Remove the Bowl From the Mold
When fully dry, gently loosen the paper shell from the mold. If you used plastic wrap or foil, the release should be fairly easy. Work slowly around the edges. If the bowl resists, do not yank it. Wiggle gently, flex the mold if possible, and use patience instead of panic.
Step 9: Trim the Rim
The rim may be uneven, especially if you used a balloon. Use scissors to trim it into a smooth circle, scalloped edge, wavy organic edge, or intentionally irregular handmade shape. A slightly uneven rim can look beautiful and artisanal. A wildly jagged rim can look like the bowl fought a raccoon. Choose your level of rustic wisely.
Step 10: Sand and Smooth
If you want a polished finish, lightly sand the dry bowl with fine-grit sandpaper. Focus on rough bumps, thick paste ridges, and the rim. Do not oversand because paper mache can become thin. Wipe away dust before painting.
Step 11: Paint the Bowl
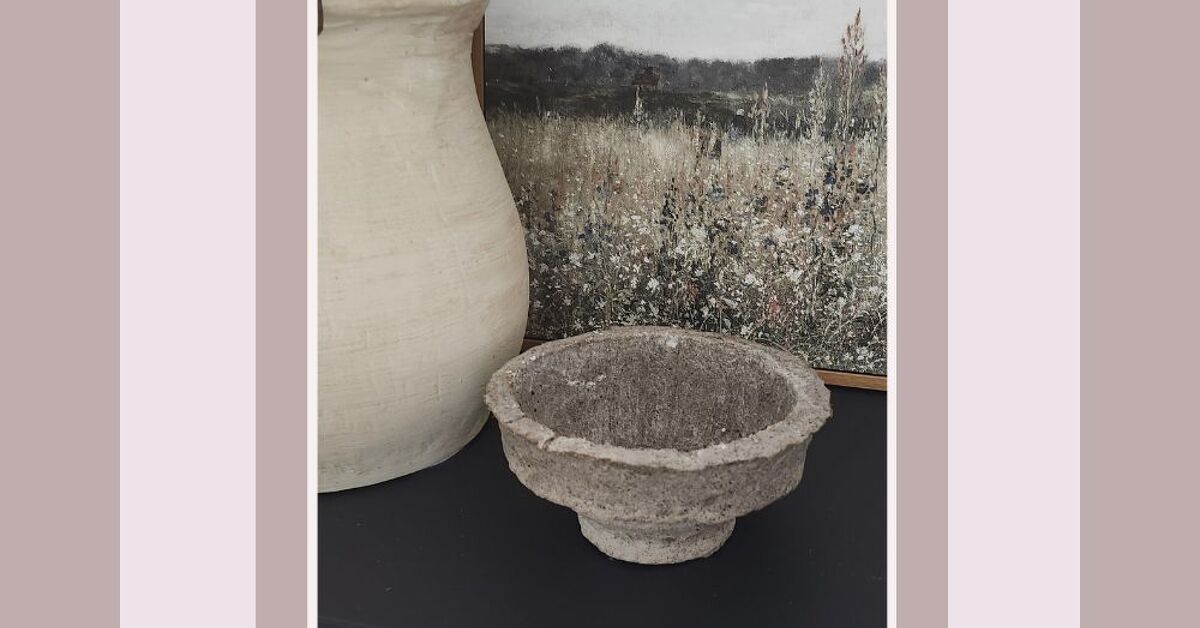
Acrylic paint is the best choice for most paper mache bowls. Start with a white primer or base coat if you want bright colors. Use two thin coats rather than one heavy coat. Popular design ideas include matte white with a natural rim, black exterior with gold interior, soft pastel stripes, terrazzo-style dots, botanical patterns, or a simple clay-colored finish for a modern handmade look.
Step 12: Seal the Bowl
Once the paint is completely dry, seal your bowl with a clear acrylic spray, brush-on varnish, or decoupage sealer. This helps protect the surface from dust, light handling, and minor moisture. Remember, most homemade paper mache bowls are not waterproof or food-safe unless you use a specific food-safe finish. Even then, it is best to use them for decorative purposes rather than serving salad. Lettuce deserves stability.
Design Ideas for a Beautiful Paper Mache Bowl
Modern Minimalist Bowl
Paint the outside matte white, beige, charcoal, or soft gray. Leave the rim slightly imperfect for a handmade ceramic look. This style works well on shelves, coffee tables, and entry consoles.
Gold Interior Bowl
Paint the outside a solid color and add metallic gold, copper, or bronze paint inside. This creates a glowing accent that looks surprisingly high-end. It is ideal for holiday décor or a dramatic centerpiece.
Colorful Confetti Bowl
Use tissue paper or painted paper scraps as the final decorative layer. Overlap bright pieces for a playful confetti effect. This is a great paper mache bowl craft for kids, parties, or cheerful home offices.
Natural Kraft Paper Bowl
Use brown paper bags or kraft packing paper for the final layer and seal it with a matte clear coat. The result has an earthy, organic look that pairs well with dried flowers, woven trays, and neutral décor.
Patterned Decoupage Bowl
Add decorative napkins, wrapping paper, book pages, or printed paper to the final layer. Use a thin coat of decoupage medium to prevent wrinkling. This technique is excellent for vintage, cottagecore, or personalized gift designs.
Common Paper Mache Bowl Mistakes and How to Fix Them
The Bowl Is Too Soft
If your bowl feels flexible after drying, it probably needs more layers or more drying time. Add two or three additional thin layers and let each one dry fully. Strength comes from layering, not from drowning the bowl in paste.
The Bowl Smells Sour
A sour smell usually means flour paste stayed damp too long. Place the bowl in a dry, well-ventilated area. For future projects, use thinner layers, add a pinch of salt to flour paste, or switch to glue paste or decoupage medium.
The Paper Wrinkles Too Much
Some wrinkles are normal. For a smoother result, use smaller paper strips, remove extra paste before applying, and smooth each strip carefully. Finish with a layer of white tissue paper or paper towel for a softer surface.
The Bowl Sticks to the Mold
This usually happens when the mold was not protected well. Next time, use plastic wrap, foil, or cooking spray. To rescue the current bowl, loosen the edges slowly and work around the form little by little.
The Paint Looks Patchy
Paper mache is absorbent, so paint can soak in unevenly. Apply a primer coat first, let it dry, then paint with two thin layers. A final sealer will help unify the finish.
How to Use and Style Your Finished Paper Mache Bowl
A finished paper mache bowl can be used in many decorative ways. Place it near the front door as a catchall for keys and sunglasses. Use it on a bookshelf to add handmade texture. Fill it with dried orange slices, pinecones, ornaments, wrapped candy, wooden beads, or faux fruit. Set a shallow bowl on a coffee table as a sculptural accent. Make several small bowls in different colors and group them together for a collected look.
Because paper mache is lightweight, it is easy to move around and restyle. It also makes a thoughtful handmade gift. You can personalize a bowl with someone’s favorite colors, initials, map pieces from a meaningful place, sheet music, comic book scraps, or decorative paper that matches their home. Handmade gifts always carry a little extra charm, especially when they do not require batteries or come with impossible plastic packaging.
Safety and Care Tips
Paper mache bowls should be kept dry. Do not wash them in the sink or use them for wet food. Dust them gently with a soft cloth. If the bowl gets damp, let it air dry completely. Keep it away from candles, open flames, and very hot surfaces. Paper is still paper, even when it has dressed up as home décor.
If children are helping, choose non-toxic glue, washable paint, and child-safe scissors. Adult supervision is important when using balloons, sealers, spray paint, or sharp tools. For indoor spray sealing, follow product instructions carefully and ventilate the area well.
Personal Experience: What Making Paper Mache Bowls Teaches You
Making a paper mache bowl sounds simple, and it is, but the first experience often teaches you a few things no supply list can fully explain. The first lesson is that paper mache is not a craft for people who need instant gratification. It asks you to slow down. You layer, smooth, wait, check, add more, wait again, and eventually discover that the drying stage is not an interruption to the project. It is part of the project.
The second lesson is that messy crafts are often the most satisfying. There is something funny and freeing about dipping strips of paper into paste and smoothing them over a bowl like you are repairing a tiny paper spaceship. At first, it may feel chaotic. Your fingers get sticky, the paper curls, and one strip always seems determined to fold itself into a sad little worm. But after a few minutes, you find a rhythm. Dip, wipe, place, smooth. Dip, wipe, place, smooth. It becomes almost meditative.
One of the best experiences with a paper mache bowl DIY project is the moment it releases from the mold. Until then, it can look like a lumpy wet hat. But when it finally dries and you lift it away, the shape feels like a small miracle. It is lightweight but firm. It has texture, personality, and evidence of your hands in every layer. It may not be perfectly round, but that is part of the charm. Handmade objects do not need to look machine-made. In fact, they are more interesting when they do not.
Another experience worth mentioning is how much the final layer matters. A bowl made only with newspaper has a casual recycled look, while a final layer of white paper makes painting easier. A layer of kraft paper gives it warmth. Tissue paper adds softness and color. Decorative napkins can make the bowl look like it came from a boutique craft fair. Once you understand that the surface layer controls the personality, the project becomes much more creative.
Painting is where many people start feeling ambitious. Maybe you planned a plain white bowl, but then the gold paint appears. Then dots. Then stripes. Then suddenly your modest paper mache bowl is wearing a full outfit. The good news is that acrylic paint is forgiving. If you dislike a design, paint over it. If the pattern looks too bold, soften it with a dry brush. If the rim looks rough, highlight it with metallic paint and pretend it was the plan from the beginning. Many great DIY decisions begin as cover-ups.
The biggest practical tip from experience is to make more than one bowl at a time. Since drying takes a while, it is efficient to prepare two or three molds and work in batches. You can test different pastes, papers, and finishes. One bowl might become rustic, another modern, and another colorful enough to make your desk look happier. Small variations teach you faster than a single perfect attempt.
Finally, paper mache bowls remind you that creativity does not have to be expensive. You can create something lovely from paper scraps, flour, glue, and leftover paint. That is the quiet joy of this craft. It turns ordinary materials into something with presence. It also gives you permission to experiment without fear. If the bowl fails, you have lost a little paper and paste. If it succeeds, you have a handmade piece of décor and the right to casually say, “Oh, that? I made it.” That sentence never gets old.
Conclusion: A Simple Craft With Surprisingly Stylish Results
A paper mache bowl DIY project is proof that beautiful home décor does not have to start with expensive supplies. With paper, paste, a mold, paint, and patience, you can create a lightweight decorative bowl that feels personal, creative, and completely unique. The process is easy enough for beginners but flexible enough for experienced crafters who want to explore texture, color, and finish.
The key is to work in thin layers, allow the bowl to dry fully, protect the mold properly, and seal the finished piece. From minimalist white bowls to colorful decoupage designs, paper mache offers endless possibilities. It is budget-friendly, eco-friendly, relaxing, and just messy enough to feel like real crafting. Best of all, every finished bowl carries the small imperfections that make handmade work beautiful.
So gather your paper scraps, protect your table, mix your paste, and let the layering begin. Your future decorative bowl is currently hiding in a recycling pile, waiting for its glow-up.