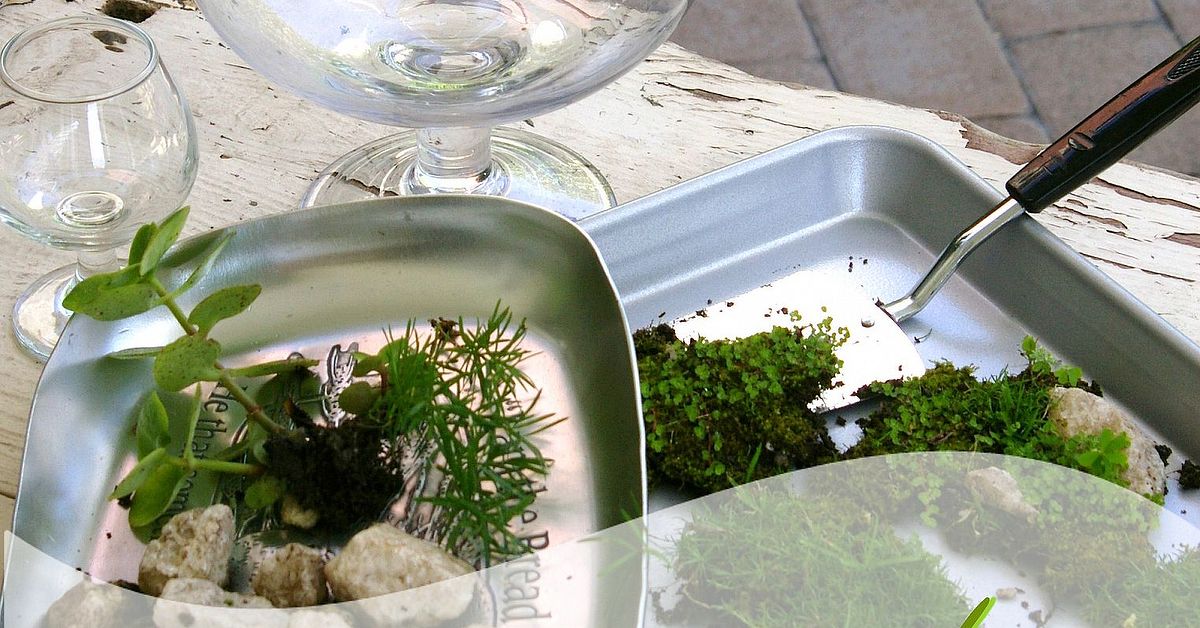
If you’ve got an empty jar, a shady patch of moss (from your own yard, with permission), and about an hour, you can build a tiny green world for basically zero dollars. That’s the magic of a moss terrarium: it looks fancy, feels peaceful, and costs less than a coffee if you use what you already have. In many cases, it’s genuinely free.
This guide walks you through how to make a free moss terrarium step by step, using household items and beginner-friendly methods. I’ll also show you how to avoid the classic mistakes (swamp jar, fog machine jar, mold jar… you get the idea), how to care for it long-term, and how to make it look good without buying a kit.
Whether you want a mini desk jungle, a rainy-day DIY project, or a low-maintenance plant setup that doesn’t demand daily attention, a moss terrarium is one of the easiest and most satisfying projects you can make.
Why a Moss Terrarium Is the Perfect “Free” DIY
Moss terrariums are ideal for budget projects because they don’t need much:
- A clear container (old pasta sauce jar, pickle jar, candle jar, fishbowl, etc.)
- A little drainage material (pebbles, gravel, or rinsed stones)
- A thin soil layer
- Moss and a few tiny humidity-loving plants (optional)
- Bright, indirect light
That’s it. No expensive planters. No complicated fertilizer schedule. No dramatic “my plant died while I was at school/work for two days” situation.
Closed terrariums naturally hold humidity, which is exactly what moss loves. That’s why they can go a long time with very little watering when set up correctly. In other words, this is a rare DIY project that looks high-end but behaves like a low-effort roommate.
What “FREE” Really Means (And How to Do It Safely)
Let’s define “free” the smart way. A free moss terrarium usually means you’re reusing materials and sourcing plants responsibly:
Free or nearly free items you can reuse
- Glass jar or container from the kitchen
- Small rocks or gravel you already have (washed well)
- A spoon, chopstick, tweezers, or paintbrush for arranging
- Leftover potting mix from another plant
- Tiny cuttings from houseplants you already own (fittonia, peperomia, baby tears, etc.)
Important: collect moss ethically
Don’t pull moss from public parks, protected areas, or trails. “Leave what you find” is the right rule here. If you want truly free moss, use moss from your own property, get permission from a friend, or buy a tiny amount from a garden center and let it spread. Your terrarium will look great, and you won’t be “that person” removing plants from protected places.
Best Containers for a Free Moss Terrarium
The best container is the one you already haveprovided it’s clear and clean.
Good options:
- Mason jars
- Pasta sauce jars
- Pickle jars
- Large glass food containers
- Old fish bowls or small aquariums
- Glass canisters with lids
Try to choose a clear container, not tinted or cloudy glass. Moss and terrarium plants need light, and cloudy glass cuts that down. If you’re making a closed terrarium, a lid is helpful because it keeps humidity in. If your container has no lid, you can still make an open moss terrariumit’ll just need more frequent misting.
Free Moss Terrarium Supplies Checklist
Use what you have first, then fill in the gaps later if needed.
Core materials
- Clear glass container
- Washed pebbles, gravel, or small stones (drainage layer)
- Optional: a little horticultural charcoal (helps with odor/fungal issues)
- Light potting soil (preferably clean, well-draining)
- Moss (sheet moss, cushion/mood moss, or local moss from your own yard)
- Spray bottle or spoon for adding water
Useful tools (all optional)
- Long spoon
- Chopstick or skewer (for positioning plants)
- Tweezers
- Small paintbrush (for cleaning glass and brushing soil off moss)
- Scissors (for trimming)
Optional extras for style
- Tiny sticks or driftwood
- Interesting stones
- Shells (if clean and dry)
- Mini figurines (if you want a fairy garden vibe)
Pro tip: if you’re going for “free,” your best decoration is usually a few great rocks and a nice piece of moss. Nature already handled the design work.
How to Make a FREE Moss Terrarium Step by Step
Step 1: Clean the container really well
Wash your jar or bowl with hot, soapy water and rinse thoroughly. Let it dry fully. A clean container gives your terrarium a much better start because it reduces the chances of mold, pests, or funky smells later.
If the jar held food, make sure all residue is gone (especially oils or sugar). Terrarium plants don’t want yesterday’s pasta sauce perfume.
Step 2: Add a drainage layer
Put 1–2 inches of washed pebbles or gravel in the bottom (less for a tiny jar, more for a larger container). Because terrariums don’t have drainage holes, this layer gives excess water a place to go instead of drowning the roots.
If you have activated charcoal, add a thin layer on top. It’s optional, but many terrarium guides recommend it to help keep the terrarium fresher and reduce odors.
Step 3: Add the soil layer
Add enough potting mix to support rootsusually 1.5 to 3 inches, depending on container size. Keep the soil slightly damp, not wet. You can slope it a bit higher in the back for a more natural landscape look.
For a moss-focused terrarium, you don’t need deep soil. Moss doesn’t have deep roots like most plants. A shallow, even base works fine.
Step 4: Plan the layout before planting
This step feels extra, but it saves you from rearranging everything with chopsticks later. Set your moss pieces and any tiny plants on a plate or table in roughly the same shape as your container. Try a simple design:
- One focal moss clump in back
- Lower moss in front
- A small stone or twig for contrast
- One tiny companion plant off-center
The goal is texture and scale, not clutter. Terrariums look best when they feel like a tiny landscape, not a crowded plant sale.
Step 5: Place moss and plants
Gently press moss onto the soil so it makes good contact. If you’re using multiple moss types, place taller clumps in the back and flatter moss in front.
If you’re adding tiny terrarium plants, leave space between them and keep foliage from touching the glass. Leaves pressed against the glass trap moisture and can invite disease. Also, try not to pack plants too tightly togetherairflow matters, even in a humid setup.
Step 6: Add decorative elements
Now add small stones, twigs, or other natural accents. Less is more. A single smooth pebble can make the whole thing look intentional.
If you use decorations from outdoors, rinse and dry them first. You want “forest vibes,” not mystery bugs.
Step 7: Water lightly (seriously, lightly)
This is where most terrariums go wrong. Water sparingly. Use a spray bottle or add a few spoonfuls of water. The soil and moss should be moist, but there should not be standing water pooling at the bottom.
For a closed moss terrarium, start with less water than you think. You can always add more later. Fixing overwatering is much harder.
Step 8: Close the lid and place it in bright, indirect light
Put the terrarium in a bright spot out of direct sun. Direct sunlight can overheat the glass container and damage the plantsthink greenhouse effect in a jar, but meaner.
Bright indirect light is the sweet spot for most moss terrariums.
Best Moss and Mini Plants for Terrariums
If you want a terrarium that stays cute instead of becoming a jungle in two weeks, choose slow-growing, humidity-loving plants.
Great moss choices
- Mood moss (broom forkmoss): Clumpy, sculptural, and great for small terrariums
- Sheet moss: Good for covering soil like a green carpet
- Cushion moss: Soft mounds that look like tiny hills
Great companion plants (optional)
- Fittonia (nerve plant)
- Peperomia (small varieties)
- Mini ferns
- Selaginella / spike moss
- Baby tears
- Small pilea varieties
Many terrarium-friendly plants thrive in high humidity and stay relatively compact when trimmed. If you’re brand new, moss + one tiny fittonia is a very beginner-friendly combo.
Moss Terrarium Care Tips (So It Stays Alive)
1) Light: bright but indirect
Moss likes bright, indirect light. A few feet from a bright window is usually perfect. Avoid direct sun, especially midday sun. It can heat the glass quickly and stress the entire terrarium.
2) Water: less than you think
A closed terrarium should rarely need much water once balanced. Watch the glass:
- Light condensation in the morning: usually perfect
- Heavy fog or constant dripping: too wet
- No condensation for long periods + dry moss: add a little water
If it’s too wet, open the lid for a few hours (or longer) to vent. If it’s too dry, mist lightly or add a spoonful of water.
3) Ventilation: yes, even for closed terrariums
Closed terrariums are humid, but they still benefit from occasional airing out. Crack the lid every week or two if you see heavy condensation, algae spots, or stale air. Think of it as giving your tiny forest a coffee break.
4) Trim and clean regularly
Use scissors to trim overgrowth, remove yellow leaves, and keep plants off the glass. Wipe the inside glass gently with a soft cloth or sponge on a stick if needed. A small paintbrush is great for brushing soil off moss and rocks.
5) Skip the fertilizer
Terrarium plants are supposed to grow slowly. Fertilizer often makes them outgrow the container faster and can upset the balance. In a small moss terrarium, slow growth is a feature, not a bug.
Common Moss Terrarium Mistakes (And How to Fix Them)
Mistake #1: Too much water
Symptoms: soggy soil, standing water, rotting smell, mushy plants, constant heavy condensation.
Fix: Open the lid, let it dry out, remove any rotting material, and reduce watering going forward.
Mistake #2: Direct sun
Symptoms: scorched moss, yellowing plants, sudden decline, overheating.
Fix: Move immediately to bright indirect light.
Mistake #3: Overcrowding
Symptoms: plants touching glass, mold, fast decline, hard-to-maintain setup.
Fix: Remove or trim plants. Give each one breathing room.
Mistake #4: Using dirty materials
Symptoms: algae blooms, odor, mold, fungus gnats.
Fix: Clean the container and rinse stones well before setup. Use clean potting mix.
How to Make It Look Amazing Without Spending Money
Here’s the fun part: a free terrarium can still look designer-level if you focus on composition.
Try this easy visual formula
- Height: one taller moss mound or fern
- Mid layer: a low plant or textured moss patch
- Foreground: flat moss or a small stone path effect
- Accent: one interesting twig, bark piece, or stone
Use odd numbers (1, 3, 5) for decorations and keep some open space visible. Terrariums feel more natural when everything isn’t packed edge to edge.
Experience-Based Notes: What People Usually Learn After Building Their First Moss Terrarium
Here’s the real-life part nobody tells you until after your first build: your terrarium probably won’t look “perfect” on day one, and that’s normal. Moss terrariums settle in. They’re living setups, not static crafts. The best-looking ones usually get that way after a couple of weeks, once moisture levels stabilize and the moss adjusts to the container.
A common beginner experience goes like this: you build a gorgeous little jar, mist it generously because you love it, close the lid, and the next morning the glass is so foggy you can’t even see your masterpiece. It looks like a tiny haunted swamp. The fix is simpleopen the lid for a few hours and let excess moisture escape. After one or two adjustments, most people get a feel for the right amount of water, and the terrarium becomes much easier to manage.
Another very common lesson is that “tiny plants” don’t stay tiny unless you choose carefully. Lots of people add whatever small houseplant they have on hand, and a month later one stem is trying to own the entire jar. That’s why slow-growing plants are your best friends. Moss is especially forgiving because it grows in a softer, more compact way than many tropical houseplants. If you do add fittonia, peperomia, or a mini fern, expect to trim them occasionally. Trimming is not a sign of failureit’s part of terrarium life.
People also notice how much placement matters. A terrarium on a bright desk with indirect light usually thrives; the same terrarium on a hot windowsill can decline fast. The glass magnifies heat, so even a short blast of direct sun can stress moss. Many beginners think they need to water more when the terrarium looks unhappy, but the issue is often light intensity or temperature, not thirst.
One of the best experiences with a moss terrarium is how calming it becomes. A lot of people start the project because it’s cheap and cute, but they keep it because it turns into a tiny ritual: checking the condensation, trimming one leaf, rotating the jar, brushing soil off the moss. It’s low-stakes plant care. You don’t need a big garden, a patio, or a giant budget. You just need a clear container and a little patience.
Another thing beginners love: terrariums make great conversation pieces. Guests always ask if it’s hard to maintain, and the answer is usually, “Nope, it mostly takes care of itself.” That “self-contained ecosystem” feeling is part of the appeal. Once the moisture cycle is balanced, the terrarium can go surprisingly long between waterings. That makes it a great project for students, busy households, or anyone who wants greenery without daily maintenance.
Finally, the most useful experience-based tip is this: start simple. Don’t build a giant fantasy forest on your first try. Make one small jar. Use one type of moss and maybe one small companion plant. Learn how your container behaves. Once you understand the moisture and light balance, your second terrarium will look even betterand you’ll probably make it from another “free” jar you were about to recycle anyway.
Conclusion
Making a free moss terrarium is one of the easiest ways to create something beautiful from things you already have. Reuse a clear jar, add a clean drainage base, use a little soil, place moss carefully, and keep it in bright indirect light. The biggest keys are simple: don’t overwater, don’t crowd the plants, and don’t put it in direct sun.
If you want a low-cost indoor garden project that feels creative, relaxing, and genuinely useful, this is it. Your first moss terrarium doesn’t need to be perfectit just needs to be balanced. Once it settles in, it becomes a tiny green world that looks great on a desk, shelf, or windowside table (the indirect-light kind, not the scorching one).
And yes, building a tiny forest in a pasta sauce jar is absolutely a valid hobby.