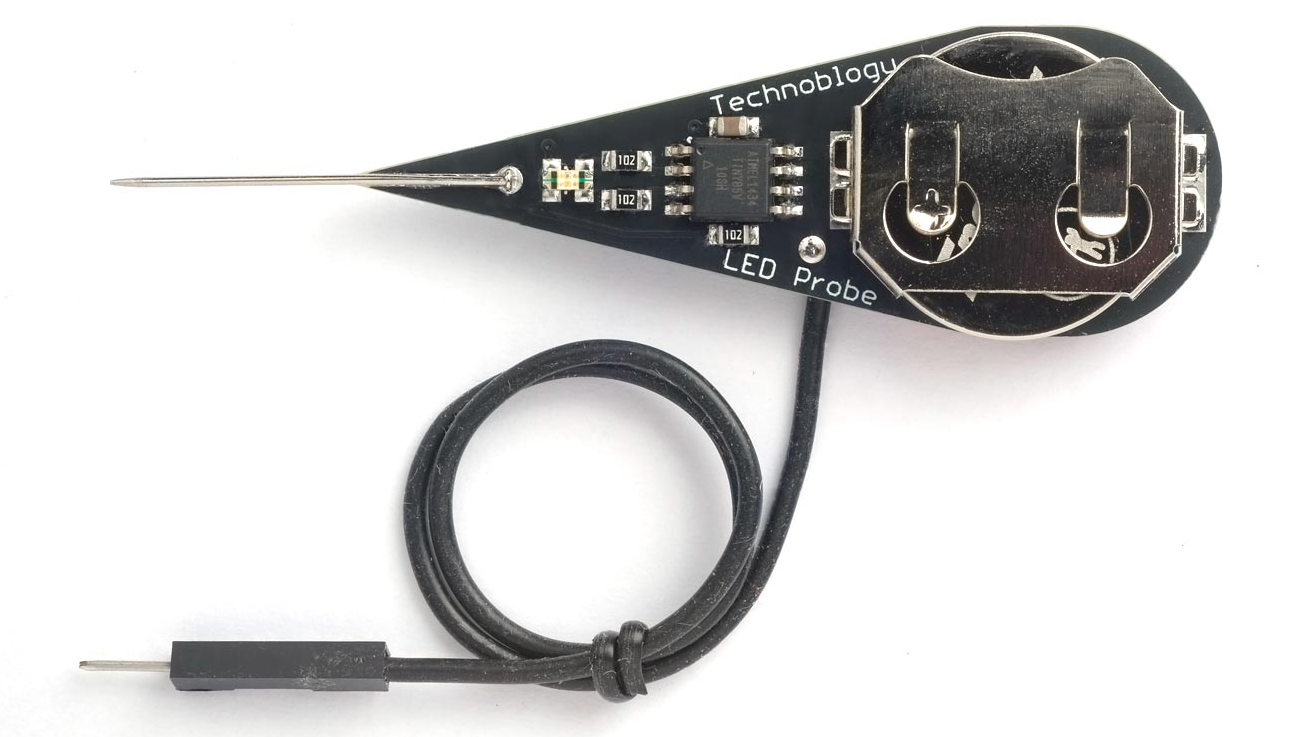
An LED is tiny, cheap, colorful, and surprisingly dramatic. Give it the right voltage and current, and it glows like a polite little firefly. Give it the wrong setup, and it either does absolutely nothing or retires permanently with no farewell speech. That is why an LED probe is such a useful tool for makers, repair technicians, students, and anyone who has ever stared at a mystery LED wondering, “Are you broken, backward, or just being difficult?”
An LED probe is a simple testing device used to check whether an LED works, identify its polarity, estimate its brightness, and sometimes help locate failed LEDs in a circuit. It can be as basic as a battery, resistor, and two test leads, or as polished as a handheld LED tester with current control, voltage display, and multiple sockets. Either way, the mission is the same: test LEDs quickly without frying them like tiny electronic toast.
This guide explains what an LED probe does, why it is smarter than guessing, how it compares with a multimeter, and what to consider when using one safely. Whether you are fixing a lamp, sorting parts from a drawer, repairing an LED strip, or building your first electronics project, a good LED probe can save time, prevent mistakes, and make troubleshooting much less annoying.
What Is an LED Probe?
An LED probe is a test tool designed to apply a controlled amount of power to an LED so you can see whether it lights. In most simple designs, it includes a low-voltage power source, a current-limiting resistor, and two probes or clips. Touch the probes to the LED leads, and if the LED is functional and connected in the correct direction, it glows.
That may sound almost too simple, but simplicity is the point. LEDs are directional components. They are diodes, which means current flows through them in one direction much more easily than the other. The positive side is called the anode, and the negative side is the cathode. Connect them correctly and the LED can light. Reverse them and, in a normal low-voltage test, nothing happens.
A probe makes that test faster. Instead of building a breadboard circuit every time you want to check an LED, you have a ready-to-use tool. For hobbyists, it is a bench helper. For repair work, it is a time saver. For beginners, it is a friendly introduction to polarity, forward voltage, and current control.
Why Testing LEDs Matters
LEDs are reliable, but they are not magical. They can fail from excessive current, reverse voltage stress, heat, poor soldering, damaged pads, faulty drivers, or plain old manufacturing defects. In a circuit with several LEDs, one failed part can make a whole section look dead, especially when LEDs are wired in series.
Testing matters because visual inspection is not enough. A clear LED lens does not mean the device works. A cloudy lens does not always mean it is dead. A tiny surface-mount LED may look perfect while being electrically open. A probe gives you direct evidence.
An LED probe can help answer common questions:
- Does this loose LED still work?
- Which lead is the anode and which is the cathode?
- Is this LED dimmer than the others?
- Is this LED strip segment failing because of one bad LED?
- Did I solder this surface-mount LED backward?
- Is my project problem caused by the LED or by the circuit driving it?
That last question is important. Many beginners replace a working LED when the real problem is a missing resistor, weak battery, wrong pin assignment, bad ground, or incorrect wiring. An LED probe separates the component from the rest of the circuit so troubleshooting becomes clearer.
How an LED Probe Works
At the heart of an LED probe is a controlled current path. LEDs need current to glow, but they cannot safely regulate current by themselves. Once an LED begins conducting, too much current can damage it. That is why most simple LED circuits include a resistor in series with the LED.
The common resistor formula is:
R = (Supply Voltage – LED Forward Voltage) / LED Current
For example, suppose you use a 9-volt battery to test a red LED with about 2 volts of forward voltage at 10 milliamps. The resistor must drop the remaining 7 volts. Using Ohm’s law, 7 volts divided by 0.01 amps equals 700 ohms. In real life, you might choose a nearby standard value such as 680 ohms or 750 ohms. If you want a gentler test current, a 1,000-ohm resistor is often a practical choice for many small indicator LEDs.
The resistor is the humble bodyguard of the circuit. It does not look glamorous, but it prevents the LED from receiving more current than it should. Without current limiting, a direct connection to a battery or power supply can damage an LED quickly.
LED Polarity: The Tiny Detail That Causes Big Confusion
Most through-hole LEDs have a longer lead for the anode and a shorter lead for the cathode. Many also have a flat edge on the lens near the cathode side. Inside the LED package, the larger internal metal piece is often connected to the cathode. These clues are helpful, but they are not perfect. Leads get trimmed. Plastic shapes vary. Some parts ignore the usual conventions just to keep life spicy.
This is where an LED polarity tester or LED probe shines. Touch the positive probe to one lead and the negative probe to the other. If the LED lights, you have identified the direction. If it does not, reverse the probes. If it lights after reversing, the LED is good and the first direction was backward. If it never lights, it may be damaged, require a higher forward voltage than the probe can supply, or be part of a circuit that affects the test.
Surface-mount LEDs can be even trickier. They may use a notch, chamfer, dot, green mark, printed line, or package shape to indicate polarity. Unfortunately, markings differ by manufacturer. A probe helps confirm what the markings are trying to say.
LED Probe vs. Digital Multimeter
A digital multimeter is one of the best tools on any electronics bench. Many meters include a diode test mode, which applies a small voltage and displays the voltage drop across a forward-biased diode. For standard diodes, this is excellent. For LEDs, it can also work, especially with red, yellow, and some green LEDs.
However, not every multimeter can light every LED. Blue and white LEDs often need a higher forward voltage than red LEDs. Some meters do not provide enough test voltage in diode mode to visibly light higher-voltage LEDs. In that case, the meter may show little or no useful result even when the LED is fine.
An LED probe built with the right supply voltage and current limiting can be more convenient for LED-specific testing. It gives a visible result immediately. Some dedicated LED testers can also test LED strings or backlight strips, which a basic multimeter usually cannot do by itself.
When a Multimeter Is Better
Use a multimeter when you need numeric information, such as forward voltage, circuit voltage, continuity, current draw, or resistor values. A probe tells you “this LED lights.” A meter can tell you “this LED drops about 1.9 volts at this test current.” Both tools are useful; they are just different personalities at the same electronics party.
When an LED Probe Is Better
Use an LED probe when you need fast sorting, polarity checks, brightness comparisons, or quick confirmation that an LED is alive. If you have a pile of LEDs from an old parts bin, a probe is faster than setting up a meter for each one. If you are repairing a panel with many indicator LEDs, a probe helps you move quickly from part to part.
Types of LED Probes and LED Testers
1. Simple Battery-and-Resistor Probe
This is the classic DIY version. It uses a low-voltage battery, a resistor, and two test leads. It is cheap, portable, and easy to understand. A 3-volt coin cell can light many red LEDs briefly, but adding current limiting is still the safer and more professional approach. A 9-volt battery with a suitable resistor gives more headroom for different LED colors.
2. Adjustable Current LED Tester
An adjustable tester lets you choose the test current. This is helpful when comparing brightness or testing LEDs with different ratings. A tiny indicator LED may look fine at 2 mA, while a high-brightness LED may be designed for 20 mA or more. Adjustable current gives better control and reduces the risk of overdriving delicate parts.
3. Constant-Current LED Probe
A constant-current design is more advanced. Instead of relying only on a fixed resistor, it regulates current through the LED. This makes testing more consistent across LEDs with different forward voltages. Constant-current testers are especially useful when testing high-power LEDs, though those parts also need attention to heat management.
4. LED Backlight Tester
LED backlight testers are used for TV and monitor repair. They can supply higher voltages with limited current to test long LED strings. These tools are powerful and useful, but they require more caution. They are not toys, and they should not be used casually on unknown circuits without understanding the voltage involved.
What Can an LED Probe Diagnose?
An LED probe can identify several common LED problems. If the LED lights normally, the part is likely good. If it lights only when the probes are reversed, the original polarity assumption was wrong. If it glows very dimly compared with similar LEDs under the same test conditions, it may be aged, damaged, or a different specification. If it never lights in either direction, it may be open, internally damaged, or outside the probe’s voltage range.
In LED strips, signs of failure may include one dark segment, uneven brightness, flickering, or color mismatch in RGB strips. A probe can help test individual LEDs or segments once power is removed and the circuit is safe. In repair situations, always remember that in-circuit testing can be affected by surrounding components. If results are confusing, one side of the LED may need to be isolated from the circuit.
Safety Tips Before Using an LED Probe
LED testing is usually low voltage, but good habits matter. Never use a simple LED probe on household mains wiring, high-voltage power supplies, charged capacitors, or circuits you do not understand. Turn power off before probing components in a circuit. If the circuit has capacitors, make sure they are safely discharged. Use insulated leads and avoid letting probe tips slip and short nearby pins.
For high-power LEDs, do not stare directly into the LED when testing. Some LEDs are extremely bright and can be uncomfortable or unsafe to view at close range. Also, high-power LEDs can heat quickly if tested without a heat sink. A quick flash test is different from running the LED continuously.
How to Choose a Good LED Probe
A good LED probe should be safe, predictable, and easy to use. Look for current limiting, clear polarity markings, comfortable probes or clips, and a supply voltage suitable for the LEDs you test most often. For general electronics, a low-current tester is usually enough. For repair work involving LED strips, lamps, or backlights, a tester with voltage and current information may be more useful.
Consider these practical features:
- Current control: Prevents accidental overdrive.
- Polarity indication: Helps identify anode and cathode quickly.
- Multiple sockets or clips: Makes testing through-hole and SMD LEDs easier.
- Voltage display: Useful for estimating forward voltage.
- Durable leads: Cheap leads fail at the worst possible moment, usually when you are already annoyed.
- Portable power: Battery operation is convenient for field repair or quick bench checks.
Common Mistakes to Avoid
Testing Without a Resistor
The most common beginner mistake is connecting an LED straight to a battery or power supply. Sometimes the LED survives. Sometimes it does not. Electronics should not be run on luck and positive vibes. Use a resistor or current-limited source.
Assuming All LEDs Have the Same Voltage
Red LEDs often have lower forward voltage than blue or white LEDs. Infrared LEDs may behave differently from visible LEDs. High-power LEDs are a different category altogether. A probe should match the LED type being tested.
Confusing Brightness With Health
Brightness depends on current, LED design, color, viewing angle, lens style, and age. A dim LED is not always bad, but if it is much dimmer than identical LEDs under identical conditions, it deserves suspicion.
Testing In-Circuit Without Thinking
Other components can affect the result. Parallel paths, driver chips, resistors, and capacitors may change what the probe sees. If in-circuit testing gives strange results, remove the LED or lift one lead if practical.
Real-World Uses for an LED Probe
In a workshop, an LED probe is useful for sorting mixed LEDs by color, checking polarity before soldering, testing indicator lights from old equipment, and confirming that replacement LEDs work before installation. In school labs, it helps students understand anode, cathode, forward voltage, and current limiting in a hands-on way.
In repair work, it can speed up diagnosis. A dead appliance display, a dark control panel, a failed decorative light, or a broken LED strip may contain one bad LED among many good ones. Testing each LED with a probe is often faster than guessing. When combined with a multimeter, the probe becomes part of a practical troubleshooting routine: inspect, test, measure, confirm, repair.
Experience Notes: What Using an LED Probe Teaches You
After using an LED probe for a while, you start to notice patterns that datasheets alone do not teach. The first lesson is that LEDs are not all created equal. Two LEDs from different batches may both be “green,” but one looks soft and yellowish while the other looks sharp and emerald. A probe makes these differences obvious. It turns a drawer full of anonymous parts into a collection you can actually understand.
The second lesson is that polarity markings are helpful, but testing is better. Long lead means anode, flat edge means cathode, bigger internal plate usually means cathodeuntil the day one of those clues lies to you. A quick probe check before soldering can save you from removing a backwards LED later. Anyone who has desoldered a tiny LED from a crowded board knows this is not a small favor. It is an act of mercy.
The third lesson is that current changes everything. At a very low current, some LEDs glow gently, almost like they are whispering. Increase the current within a safe range, and they become much brighter. This is useful when designing battery-powered projects. You may discover that an indicator LED is perfectly visible at 2 mA instead of 20 mA, which can improve battery life. The probe becomes not just a tester, but a decision-making tool.
Another practical experience involves LED strips. When a section goes dark, the problem may be a cracked solder joint, damaged copper pad, failed resistor, or one bad LED. A probe helps narrow the suspect list. Testing individual points along the strip can reveal where the signal or power path stops. It feels a little like detective work, except the suspect is usually a component worth a few cents and it refuses to answer questions.
For surface-mount LEDs, a probe with fine tips or tweezers is especially helpful. SMD parts are small enough to make your confidence evaporate. A stable probe lets you test before soldering, after soldering, and after rework. This is valuable because heat damage, reversed orientation, and poor pad contact can all create similar symptoms. If the LED worked before soldering but not after, your troubleshooting path becomes much clearer.
A good LED probe also teaches patience. If an LED does not light, do not immediately declare it dead. Reverse the probes. Check the tester battery. Confirm the resistor or current setting. Try a known good LED. Check whether the LED is infrared, because your eyes may not see it. If needed, use a phone camera to detect some infrared LEDs. Troubleshooting is less about dramatic guesses and more about calm elimination.
Over time, the LED probe becomes one of those tools you reach for automatically. It is not as fancy as an oscilloscope and not as universal as a multimeter, but it solves a specific problem beautifully. It answers a simple question quickly: “Will this LED light safely?” On a busy bench, that answer is worth a lot.
Conclusion
An LED probe is a smart, simple solution for testing LEDs because it combines speed, safety, and clarity. It helps identify polarity, confirm whether an LED works, compare brightness, and troubleshoot LED-based circuits without building a fresh test setup every time. The best versions include current limiting, clear probe markings, and enough voltage range for the LEDs you use most often.
If you work with electronics, repair LED strips, build Arduino projects, restore old panels, or simply keep a suspiciously large parts drawer, an LED probe belongs on your bench. It is small, affordable, and practical. Most importantly, it keeps your LEDs from becoming accidental smoke experiments. And in electronics, fewer smoke experiments is generally considered a win.
Note: This article is intended for low-voltage LED testing and general electronics education. Do not use a simple LED probe on mains voltage, high-voltage LED drivers, charged capacitors, or unknown power circuits.