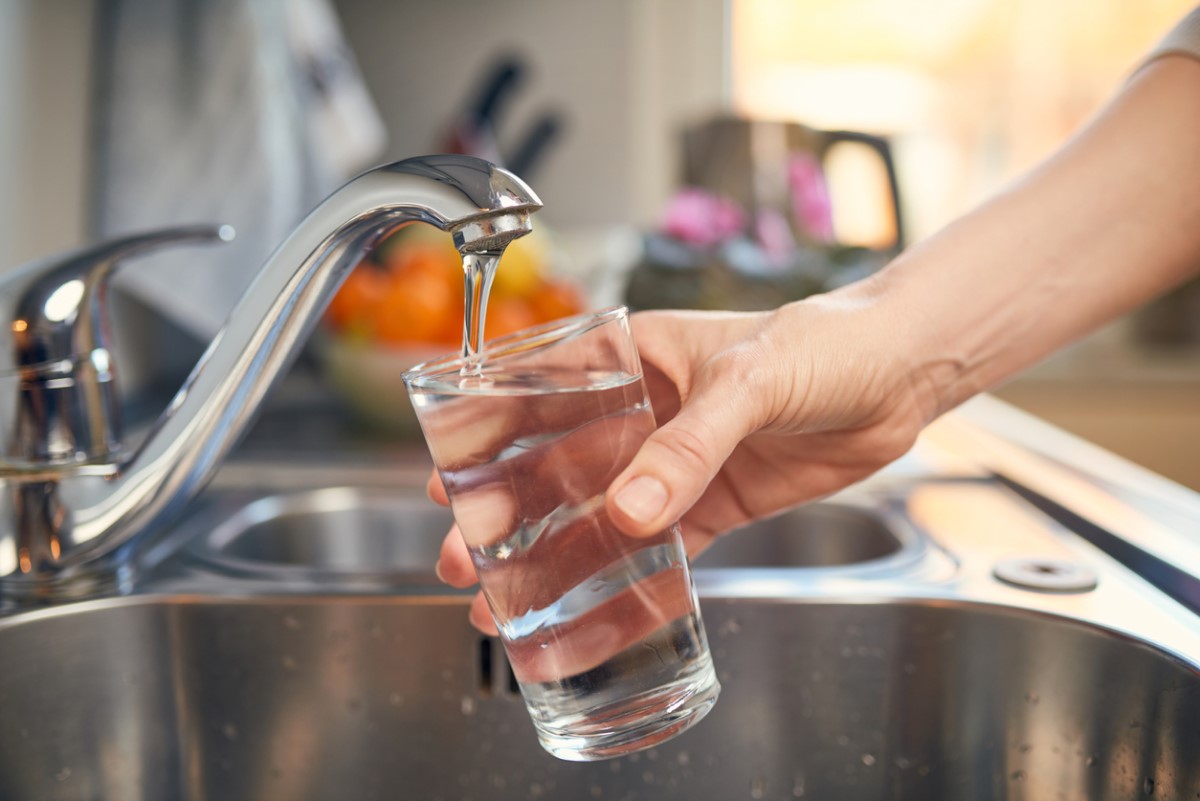
Lead pipes are not exactly the kind of “vintage charm” anyone wants in an older home. Original hardwood floors? Wonderful. Crown molding? Lovely. A hidden lead service line quietly adding a risky metal to drinking water? Hard pass.
If you live in an older house, especially one built before the late 1980s, you may have wondered whether your plumbing contains lead. The tricky part is that lead in drinking water usually does not announce itself. It does not smell like trouble, taste like a chemistry experiment, or turn your water a dramatic movie-villain color. Clear water can still contain lead.
The good news is that homeowners can take smart, practical steps. You can inspect visible pipes, request records from your water utility, test your tap water through a certified lab, reduce exposure with the right filters, and plan for replacement if a lead service line is confirmed. This guide explains how to test for lead pipes at home, what your results may mean, and what to do next without panicking or buying every water gadget on the internet.
Why Lead Pipes Are a Big Deal
Lead is a toxic metal that can enter drinking water when plumbing materials corrode. The most common sources include lead service lines, older faucets, lead solder, brass fixtures, and galvanized pipes that may have captured lead particles over time. A lead service line is the pipe that connects the water main in the street to your home. When it is made of lead, it is often the biggest contributor to lead in tap water.
There is no known safe level of lead exposure for young children. Lead can affect learning, development, behavior, and overall health. Pregnant people and babies are also more vulnerable. Adults are not immune either; long-term exposure may contribute to blood pressure, kidney, and cardiovascular concerns. That does not mean one suspicious pipe should send you sprinting into the yard with a shovel. It means lead deserves a careful, informed response.
Another important point: lead in water is usually a plumbing problem, not a sign that the treated water leaving the water plant is contaminated. Water can meet federal standards when it leaves the treatment facility and still pick up lead as it travels through old service lines or household plumbing. In other words, the last stretch of the journey matters.
Signs Your Home May Be at Higher Risk
You cannot confirm lead pipes by age alone, but some homes deserve extra attention. If your house was built before 1986, it may have older plumbing components, lead solder, or fixtures that contain more lead than newer products. In some cities, lead service lines were installed decades ago and may still serve older neighborhoods today.
Common risk factors include:
- A home built before 1986, especially in an older urban area.
- A water utility notice saying your service line is lead, galvanized requiring replacement, or unknown.
- Visible dull-gray service piping entering through a basement wall or floor.
- Recent street work, meter replacement, or plumbing changes that may disturb old pipes.
- Older faucets or plumbing fixtures installed before modern “lead-free” requirements became stricter.
- Water that has been sitting unused in pipes for several hours, such as overnight or after vacation.
The highest-risk homes are often those with a lead service line. However, even if the service line is copper or plastic, lead can still come from older interior plumbing, solder, or fixtures. That is why a full answer often requires both pipe identification and water testing.
Step 1: Find the Service Line
Start where the water enters your home. In many houses, this is in the basement, crawlspace, utility room, garage, or near the water meter. Look for the pipe that comes through the wall or floor before it connects to the meter or shutoff valve.
Make sure you are inspecting the service line, not a random interior pipe. The service line is the main incoming pipe from the street. If you are unsure, follow the plumbing from the water meter or main shutoff valve. Bring a flashlight, a magnet, a coin, and a healthy respect for spiderwebs.
Step 2: Do a Basic Pipe Material Check
A home inspection cannot replace lab testing or utility verification, but it can provide helpful clues. Lead, copper, galvanized steel, and plastic have different appearances and behaviors.
The scratch test
Gently scratch the pipe surface with a coin or flat screwdriver. Do not gouge the pipe like you are trying to win a plumbing duel. Just expose a small fresh area.
- Lead: Usually dull gray on the outside and turns shiny silver when scratched. It is soft and easy to scratch.
- Copper: Looks orange, brown, or penny-colored when scratched.
- Galvanized steel: Gray, harder to scratch, and often threaded at joints.
- Plastic: Usually white, blue, black, or flexible tubing, depending on material.
The magnet test
Place a magnet on the pipe. A magnet will not stick to lead or copper. It usually will stick to galvanized steel. If the pipe is gray, scratches silver, and a magnet does not stick, lead is possible. If the pipe is gray and the magnet sticks, galvanized steel is more likely.
The tap test
Lead is softer than steel and may sound dull when tapped. Steel often sounds sharper and harder. This test is less reliable than the scratch and magnet tests, but it can add another clue.
After any inspection, take clear photos of the pipe where it enters the home, the meter area, and any fittings. Your water utility or plumber may be able to help identify the material from photos.
Step 3: Check Your Water Utility’s Records
Many utilities now maintain service line inventories or public maps showing whether each service line is lead, non-lead, galvanized requiring replacement, or unknown. Search your utility’s website for “lead service line inventory,” “water service line map,” or “lead pipe lookup.”
If you cannot find an online map, call the utility directly. Ask whether the public side, private side, or both portions of your service line are known. In many communities, the utility owns the portion from the water main to the curb stop, while the homeowner may own the portion from the curb stop to the house. Ownership rules vary, and so do replacement programs.
Do not be discouraged if your record says “unknown.” Unknown does not mean safe or unsafe. It means more investigation is needed. In some cases, your utility may ask you to self-report pipe material or schedule an inspection.
Step 4: Test Your Drinking Water for Lead
Identifying pipe material is important, but water testing tells you what is coming out of the tap. The most reliable option is to use a state-certified or accredited laboratory. Many water utilities, health departments, or state environmental agencies can point you to approved labs. Some communities also offer free or low-cost lead test kits.
Follow sampling instructions exactly. Lead levels can vary depending on how long water sits in pipes, which faucet you test, whether the aerator is attached, and whether recent plumbing work has disturbed the system. A typical “first-draw” sample collects water after it has sat unused for several hours. Other sampling methods may be used to investigate lead service lines or specific fixtures.
At-home lead test strips can be tempting because they are cheap and fast, but they are not a substitute for certified lab testing. They may provide a rough screening, but they often lack the accuracy needed for decisions about plumbing replacement or long-term safety.
Which faucet should you test?
Test the tap you use most for drinking and cooking, usually the kitchen sink. If you have young children, formula preparation, or a home office where you drink water all day, test the faucet that matters most for daily exposure.
How often should you test?
Test when you move into an older home, after major plumbing work, after a lead service line replacement, or if your utility notifies you about lead, galvanized, or unknown service lines. Testing may also be wise if you replace fixtures, disturb old plumbing, or notice construction near water mains.
What Your Test Results Mean
Lead is measured in parts per billion, often written as ppb. The ideal result is zero. The EPA’s health-based goal for lead in drinking water is zero because lead can be harmful at low levels. Regulatory action levels are used for water systems, but homeowners should not treat “below the action level” as a reason to ignore a known lead source.
If your result shows any detectable lead, look for the source and reduce exposure. A single test is a snapshot, not a complete movie. Lead can appear intermittently, especially when particles break loose from pipes, solder, or fixtures. That is why a lead service line should be replaced even if one sample looks “not too bad.” Plumbing should not be graded on a curve when your kitchen tap is involved.
What to Do Right Away If You Suspect Lead
While you confirm pipe material or plan replacement, you can reduce risk with several practical steps.
Use cold water for drinking and cooking
Always start with cold tap water for drinking, cooking, coffee, tea, and baby formula. Hot water can dissolve metals more readily from plumbing. If you need hot water, draw cold water first, then heat it on the stove or in an electric kettle.
Do not boil water to remove lead
Boiling water kills many germs, but it does not remove lead. In fact, boiling can concentrate some contaminants as water evaporates. If lead is the concern, boiling is not the fix.
Flush stagnant water
If water has been sitting in the pipes for several hours, run the cold tap before using it for drinking or cooking. The right flushing time depends on your plumbing and utility guidance. Some homes may need 30 seconds; others may need several minutes. You can also shower, run laundry, or flush toilets first to move water through the system, but still flush the drinking-water faucet before use.
Clean faucet aerators
Unscrew and clean faucet aerators regularly. These small screens can trap sediment and metal particles. Rinse them carefully and replace damaged parts. This is one of those five-minute chores that feels suspiciously too easy, but it can help.
Use a certified filter
Choose a filter certified to reduce lead. Look for NSF/ANSI Standard 53 for lead reduction or NSF/ANSI Standard 58 for reverse osmosis systems. The packaging should specifically list lead reduction. A filter that improves taste is not automatically a lead filter. “Crisp mountain freshness” is nice; certified lead reduction is the assignment.
Follow the filter instructions carefully. Install it correctly, replace cartridges on schedule, and use only cold water unless the product says otherwise. An expired or improperly maintained filter may not protect you.
When Bottled Water Makes Sense
Bottled water can be a temporary option for households at higher risk, especially when preparing infant formula or when a certified lead-reduction filter is not available. However, bottled water can be expensive, inconvenient, and waste-heavy. For many homes, a certified filter is the more practical bridge while planning permanent plumbing fixes.
If your household includes infants, young children, pregnant people, or anyone with specific medical concerns, talk with your pediatrician, health department, or healthcare provider about the safest short-term water plan.
The Permanent Fix: Replace the Lead Service Line
Filters and flushing reduce exposure, but they do not remove the source. If you have a lead service line, full replacement is the long-term solution. Full replacement means replacing the entire lead pipe from the water main connection to the home, not just one portion.
Partial replacement can disturb lead scale and temporarily increase lead levels in water. If only the public or private side is replaced, the remaining lead pipe can continue to contribute lead. Whenever possible, coordinate with your utility to replace the entire line at once.
Who pays for replacement?
Costs vary widely by city, pipe length, digging conditions, street layout, and ownership rules. Some utilities offer free replacement, subsidies, grants, payment plans, or replacement during scheduled infrastructure projects. Federal and state funding programs are also helping many communities locate and remove lead service lines.
Before hiring a contractor, contact your water utility. Ask whether your home is eligible for a lead service line replacement program and whether the utility has approved contractors, permits, inspection requirements, or cost-sharing options.
What happens after replacement?
After lead service line replacement, follow your utility’s flushing instructions. Use a certified lead-reduction filter for the recommended period, clean aerators, and retest water after the system has stabilized. Lead particles can remain in plumbing for a while after construction, so post-replacement care matters.
Do Newer Homes Have Lead Problems?
Newer homes are generally less likely to have lead service lines, but “newer” does not mean impossible. Fixtures, brass components, and solder rules changed over time. Modern plumbing products must meet stricter lead-content requirements, but older replacement parts may still exist in some homes.
If you live in a home built after 2014 with modern plumbing and no lead service line, your risk is typically much lower. Still, testing is the only way to know what is actually coming from the tap.
Should You Replace Old Faucets?
If water testing shows lead and your service line is not lead, older faucets may be part of the problem. Kitchen faucets installed before stricter lead-free standards can contribute lead, especially when water sits in the fixture overnight.
Look for replacement faucets labeled as compliant with current lead-free plumbing standards. Replacing one faucet is not the same as replacing a lead service line, but it may help if the fixture is the main source. Test before and after if possible, so you know whether the change worked.
What About Galvanized Pipes?
Galvanized steel pipes are not lead pipes, but they can still be a concern. Over time, galvanized pipes located downstream of lead service lines may accumulate lead particles inside. Some utility inventories classify certain galvanized lines as “galvanized requiring replacement.”
If your service line is galvanized and your utility record says it may have been connected to lead in the past, treat it seriously. Ask your utility whether replacement is recommended and whether your home qualifies for assistance.
Lead Pipe Testing Checklist for Homeowners
- Find where the water service line enters your home.
- Inspect the pipe color, texture, and connection style.
- Perform a gentle scratch test and magnet test.
- Take photos of the service line and meter area.
- Check your utility’s lead service line inventory or call customer service.
- Order a certified lab test for lead in drinking water.
- Use cold water, flush stagnant water, and clean aerators while waiting for results.
- Install a filter certified for lead reduction if lead is suspected or confirmed.
- Replace confirmed lead service lines fully, not partially, whenever possible.
- Retest after replacement or major plumbing work.
Common Mistakes to Avoid
Mistake 1: Assuming clear water is safe
Lead is usually invisible in drinking water. Taste, smell, and appearance are not reliable indicators.
Mistake 2: Buying the wrong filter
A basic pitcher or refrigerator filter may improve flavor but may not reduce lead. Check for certification and confirm that lead is listed as a reduced contaminant.
Mistake 3: Using hot tap water for cooking
Hot water can pick up more lead from plumbing. Use cold water first, then heat it.
Mistake 4: Boiling water for lead
Boiling does not remove lead. Use certified filtration, bottled water temporarily, or plumbing replacement.
Mistake 5: Replacing only part of the service line
Partial replacement may leave the source in place and can disturb lead-containing scale. Full replacement is the goal.
When to Call a Professional
Call a licensed plumber if you cannot identify pipe material, if the service line is hard to access, if old plumbing appears corroded, or if you are planning replacement. Call your water utility before any digging or service line work. You may need permits, inspections, utility coordination, and safe excavation.
Also contact your local health department if your water test shows lead and your household includes children or pregnant people. A healthcare provider may recommend a blood lead test for children depending on exposure risk and local health guidance.
Real-World Homeowner Experience: What the Process Feels Like
Finding out that your home might have lead pipes can feel like discovering a raccoon has been living rent-free in the attic. First comes disbelief. Then comes frantic searching. Then comes the sudden urge to become a part-time water chemist before breakfast. The experience is stressful, but it becomes much more manageable when you treat it as a sequence of steps instead of one giant mystery.
A common homeowner story starts with a letter from the water utility. It may say the service line is “unknown,” which is possibly the least comforting word in the English language after “moist.” The homeowner checks the basement, finds a gray pipe near the meter, scratches it with a coin, and sees a shiny silver mark. A magnet does not stick. At that point, lead is possible, but not yet officially confirmed.
The next smart move is documentation. Take photos in good light. Photograph the pipe entering the wall, the water meter, shutoff valves, and any visible joints. Then contact the utility. Many utilities can compare your photos with records or send someone to inspect. Some may ask you to submit the information through an online form. This step can update the local inventory and may help your neighborhood too.
While waiting for confirmation, the homeowner switches to cold water for cooking, flushes the kitchen tap after long periods of nonuse, cleans the aerator, and buys a filter certified for lead reduction. The key word is certified. A pretty water pitcher with vague promises is not enough. The label should clearly say it reduces lead under NSF/ANSI 53 or reverse osmosis under NSF/ANSI 58. The cartridge replacement schedule gets written on the calendar because filters are not magical forever machines.
Next comes water testing. The homeowner orders a kit from a certified lab or uses a utility-provided test. The instructions say not to use water for a certain number of hours before collecting the sample. This part feels oddly ceremonial, like the tap is preparing for a final exam. The sample is mailed or returned, and the results arrive later. If lead is detected, the homeowner now has evidence for the next conversation with the utility, plumber, landlord, or local health department.
For homeowners who confirm a lead service line, replacement planning can feel intimidating. There may be questions about cost, who owns which portion, whether the city has a program, and how long the work takes. The best experience usually comes from coordinating early with the utility rather than hiring someone blindly. Some communities have grants or scheduled replacement projects. Others require homeowners to handle the private side. Either way, written estimates, permits, and clear post-work flushing instructions matter.
After replacement, the job is not quite finished. Homeowners should flush plumbing as directed, use certified filters during the recommended period, clean aerators, and test again. Construction can shake loose particles, so patience and follow-up are part of the process. It is not glamorous, but neither is most responsible homeownership. Nobody bought a house dreaming of aerator maintenance, yet here we are, being adults with tiny sink screens.
The biggest lesson from real homeowners is this: do not rely on guessing. A home’s age, a neighbor’s pipe material, or a quick glance in the basement can point you in the right direction, but testing and official verification provide confidence. Lead pipes are serious, but the path forward is clear. Identify the material, test the water, reduce exposure now, replace the source when needed, and retest afterward. That is how you turn a scary plumbing question into a practical home improvement plan.
Conclusion: Test First, Protect Now, Replace for Good
Lead pipes at home are a serious issue, but they are not a mystery you have to solve with guesswork. Start by locating your service line and checking its material. Confirm records with your water utility. Test your drinking water through a certified lab. While you wait, use cold water, flush stagnant water, clean aerators, and choose a filter certified to reduce lead.
If a lead service line is confirmed, replacement is the permanent fix. Filters and flushing are helpful temporary protections, but removing the source is the goal. Coordinate with your utility, ask about funding or replacement programs, hire qualified professionals, and retest after the work is complete.
Your home should be a place where the scariest thing in the kitchen is an overstuffed junk drawer, not the water coming from the tap. With the right steps, you can understand your risk, protect your household, and make a confident plan for safer drinking water.
Note: This article is for general homeowner education and should not replace guidance from your local water utility, health department, certified laboratory, licensed plumber, or healthcare provider.