Note: This guide covers careful, light at-home honing for pinking shears that are dull but otherwise in good condition. Stop and use a professional scissor-sharpening service if the teeth are chipped, bent, badly misaligned, or attached with a nonadjustable rivet. Pinking shears are specialty tools, not ordinary scissors wearing a zigzag costume.
Pinking shears are one of those sewing tools that make you feel wildly productive. One squeeze creates a neat row of zigzags, trims a seam allowance, and gives raw fabric edges a tidy finish. Then, one day, they begin chewing fabric instead of cutting it. Suddenly your elegant cotton project looks like it survived a disagreement with a small lawnmower.
Fortunately, dull pinking shears are not always doomed. With patience, good lighting, and an extremely light touch, you may be able to restore a cleaner cut. The key is understanding what makes these shears different: their interlocking teeth must stay aligned. You are not trying to reinvent every zigzag tooth. You are simply refreshing the existing cutting edges while protecting the shape that lets the blades mesh together.
This step-by-step guide explains how to sharpen pinking shears safely, when to stop, which popular “hacks” to avoid, and how to keep your fabric scissors from becoming the sad, crunchy drawer residents nobody wants to use.
Why Pinking Shears Need Special Treatment
Pinking shears have sawtooth-shaped blades that create a zigzag edge in woven fabric. That angled edge can reduce visible fraying by limiting how far loose threads can travel. It does not make fabric magically fray-proof, especially on loose weaves or garments that will be washed often. Think of pinking as a helpful assistant, not a tiny textile superhero.
Unlike straight sewing shears, pinking shears rely on tooth alignment. Each peak and valley has to meet its partner smoothly during the cutting motion. Removing too much metal, filing into the valleys, flattening the wrong side of a blade, or changing the factory bevel can cause the teeth to skip, catch, or cut unevenly.
That is why the safest DIY approach is a light hone, not aggressive grinding. A light hone refreshes the cutting surface without reshaping the blades. Serious damage belongs in the hands of a professional who sharpens specialty scissors and shears.
First: Decide Whether Your Pinking Shears Actually Need Sharpening
Before you reach for any sharpening tool, figure out what problem you are solving. A pair of pinking shears may feel dull because lint is packed near the pivot, adhesive residue is dragging along the blades, or the screw is loose. None of those problems require grinding metal.
- Likely needs cleaning: The shears feel stiff, squeak, or cut better after you wipe the blades.
- Likely needs light honing: The teeth are intact, but the shears consistently leave uncut fibers or require more pressure across the entire blade.
- Likely needs professional repair: One section always skips, a tooth is chipped, the tip is bent, the blades wobble, or the zigzag pattern looks uneven.
Test the shears on a scrap of tightly woven cotton. Cut slowly from near the pivot to the tip. A healthy pair should leave a consistent zigzag pattern with no hanging threads, random crushed spots, or areas that resemble a fabric crime scene.
What You Need for Safe Pinking Shear Sharpening
Gather everything before you begin. A rushed sharpening attempt is how a five-minute repair turns into a new-scissors shopping trip.
- A clean, well-lit work surface
- A soft cloth or microfiber towel
- Cotton swabs or a soft toothbrush
- Mild soap and water for basic cleaning
- A small amount of sewing machine oil
- A fine ceramic slipstone or fine diamond sharpening tool, around 600 to 1,000 grit
- A magnifying glass or phone flashlight for inspecting tooth edges
- Scraps of woven cotton in light and medium weights
Avoid ordinary pull-through knife sharpeners, countertop scissor sharpeners, coarse files, power grinders, aluminum foil, and sandpaper. Those tools may be useful elsewhere, but pinking shears are not the place to experiment. Their teeth are precision-shaped, and they hold grudges.
How to Sharpen Pinking Shears in 9 Steps
Step 1: Clean the Blades and the Pivot Thoroughly
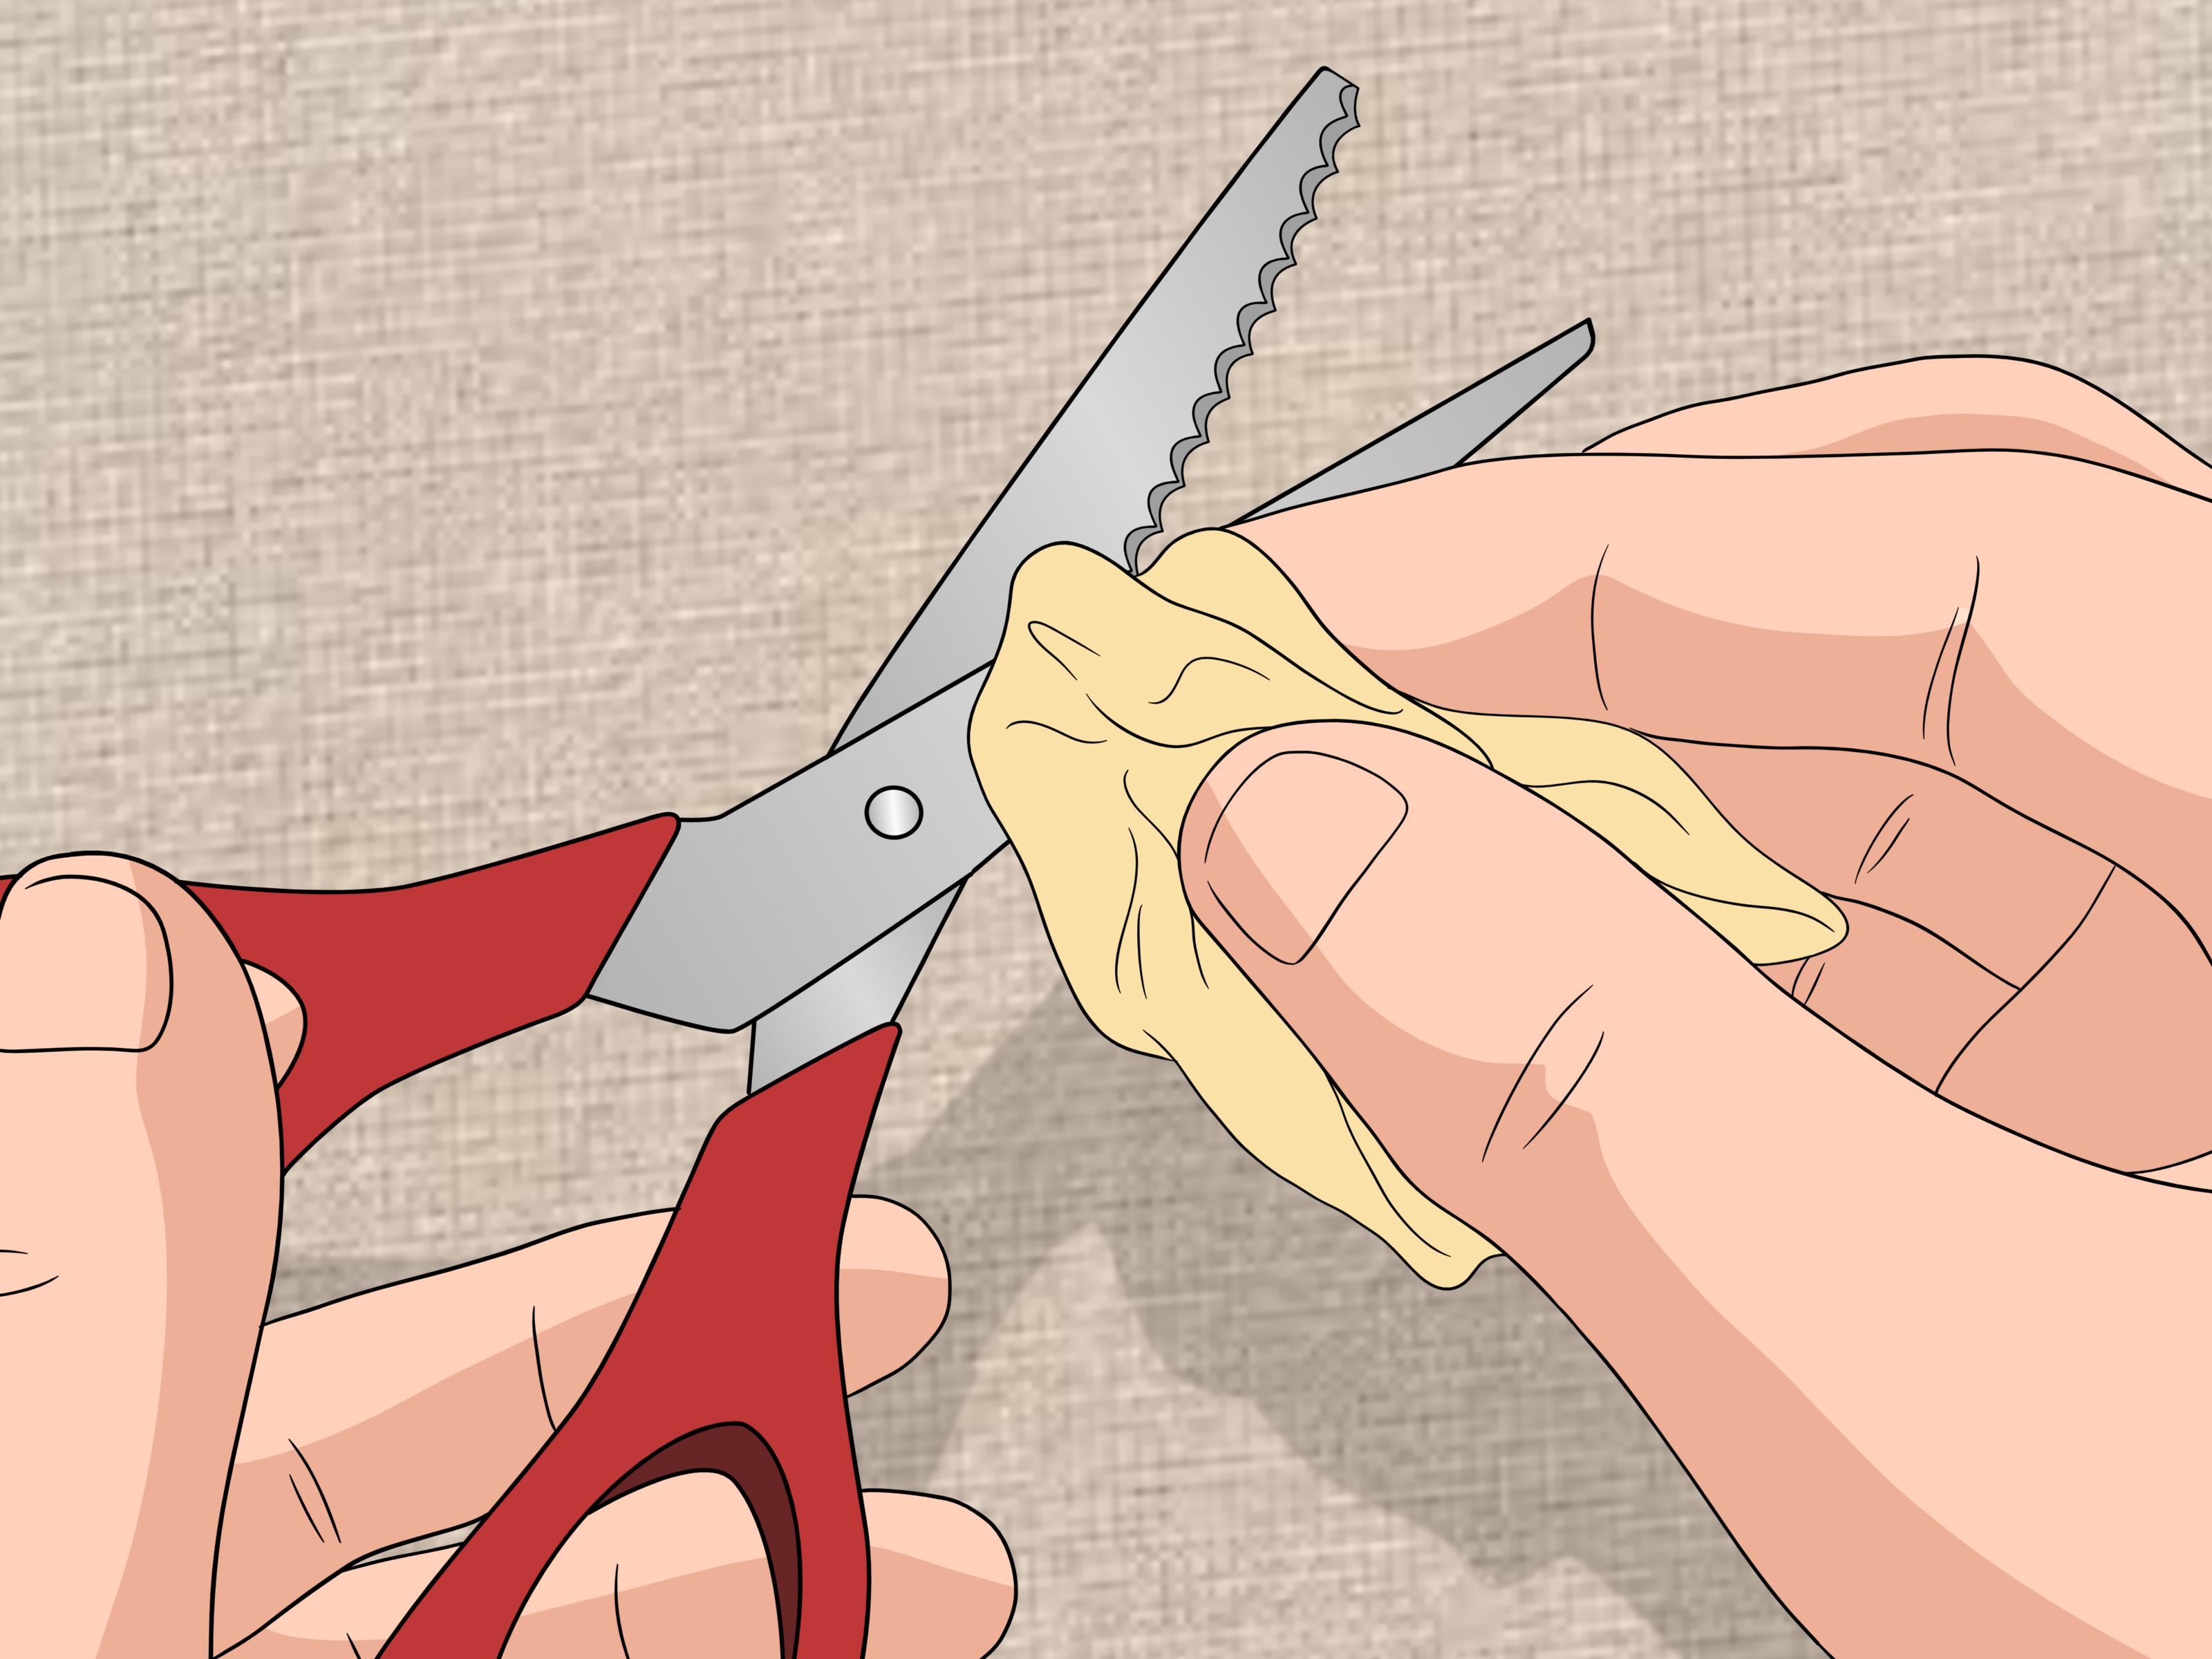
Open the pinking shears fully. Wipe both blades with a slightly damp cloth and mild soap if needed, then dry them completely. Use a cotton swab or soft toothbrush to remove lint from between the teeth and around the pivot. Synthetic fibers can create fine abrasive lint, while sticky residue can make a sharp pair feel strangely dull.
Do not soak the shears. Water left in the pivot can encourage rust, and rusty pinking shears have about as much charm as a wet sock in a sewing basket.
Step 2: Test the Cut Before Sharpening
Use a scrap of woven cotton and make several cuts: near the handles, through the middle, and near the tip. Look closely at the pinked edge. Are the zigzags even? Does one area fail to cut? Are threads being pulled rather than sliced?
This test tells you whether the issue is general dullness or localized damage. If the shears cut well near the pivot but fail at the tip, do not assume the entire blade needs work. You may only need a very light hone in the affected section, or you may have an alignment problem that requires professional care.
Step 3: Inspect Tooth Alignment and the Pivot
Hold the shears open under bright light. Slowly close them without cutting fabric. The teeth should pass one another smoothly without clashing, wobbling, or visibly separating. Check the pivot screw as well. If it is adjustable and clearly loose, tighten it only a tiny amount, then test again.
Do not overtighten the pivot. A too-tight screw makes cutting exhausting and can create unnecessary wear. A too-loose screw lets the blades spread apart and causes fabric to fold between the teeth instead of being cut. The correct setting feels smooth, controlled, and pleasantly boring.
Step 4: Identify the Factory Bevel
Examine the outside edge of each blade. You should see a narrow factory-ground bevel where light reflects differently. That existing bevel is your guide. The goal is to follow it exactly, not create a fresh angle of your own.
Do not grind the sidewalls of the triangular teeth, do not file deeply between the teeth, and do not flatten the inner mating surfaces. Those areas help the blades interlock. Altering them can permanently affect the cutting action.
Step 5: Stabilize the Shears and Use a Fine Sharpening Tool
Place a folded towel on your work surface to keep the shears from slipping or scratching the table. Open the blades and position one blade so you can reach its factory bevel comfortably. Hold the sharpening tool at the same angle as the original bevel.
The pressure should be extremely light. Imagine you are brushing away dust from an antique photograph, not sanding a deck. Heavy pressure removes too much metal and can quickly change the tooth shape.
Step 6: Hone the First Blade with Short, Controlled Passes
Starting near the pivot, move the fine ceramic or diamond tool gently along the visible factory bevel toward the tip. Use a few smooth passes, keeping the tool on the shallow cutting surface rather than digging into the tooth valleys.
For most pinking shears, three to five very light passes are enough for an initial attempt. Stop, wipe away any metal dust, and inspect the edge. The goal is a subtle refreshed surface, not a dramatic change in appearance. If you can see large scratches, your tool is too coarse or your pressure is too heavy.
Step 7: Repeat the Light Hone on the Second Blade
Turn the shears and repeat the same process on the matching factory bevel of the second blade. Use the same number of light passes whenever possible. Uneven sharpening can alter the way the teeth meet, especially on older or inexpensive pinking shears.
Take your time near the tip. The point is often where pinking shears first begin to skip, but it is also easy to round off or distort. A few careful strokes are far better than enthusiastic overcorrection.
Step 8: Remove Residue, Lubricate the Pivot, and Work the Blades
Wipe the blades carefully with a clean, dry cloth to remove any sharpening residue. Add one tiny drop of sewing machine oil to the pivot, then open and close the shears several times to distribute it. Wipe off all excess oil before cutting fabric.
Do not oil the teeth heavily. Oil can transfer to fabric and leave stains, which is an impressively inconvenient way to celebrate a successful sharpening session.
Step 9: Test, Compare, and Know When to Stop
Test the shears on several scraps of woven fabric. Make one cut near the pivot, one in the middle, and one close to the tip. A good result is a smooth cutting action and an even zigzag edge with fewer hanging threads.
If the shears improve but are not perfect, clean them once more and make only a few additional light honing passes. If they still skip, drag, cut unevenly, or require force, stop. More DIY sharpening will not solve a bent tooth, incorrect blade tension, or a damaged pivot. At that point, professional sharpening is the smarter and usually cheaper move.
Why Aluminum Foil and Sandpaper Are Not Reliable Fixes
You may have seen advice telling you to cut folded aluminum foil or sandpaper with dull scissors. Those tricks are popular because they are easy, dramatic, and involve items already living in a kitchen drawer. Unfortunately, easy is not the same as correct.
Foil and sandpaper can create the temporary feeling of improvement by knocking off tiny burrs, cleaning residue, or slightly altering a rough edge. They do not reliably restore the precise cutting bevel of pinking shears. Worse, they can wear the serrated teeth unevenly or create rough spots that snag fabric.
Wax paper is sometimes used as a maintenance trick because it can leave a small amount of wax behind and make the cutting action feel smoother. That may help with lubrication, but it is not sharpening. Treat it as a small tune-up, not a cure for dull blades.
When Professional Sharpening Is the Best Choice
Professional service is the right answer when your pinking shears are valuable, vintage, heavily used, or damaged. A trained sharpener can assess blade tension, restore the bevel without ruining tooth geometry, and correct issues that cannot be fixed with a light hone.
Consider professional sharpening when you notice chipped teeth, uneven tooth spacing, a damaged tip, persistent skipping in the same area, or a riveted joint that cannot be adjusted. High-quality pinking shears can be worth restoring, while a cheap pair with badly worn teeth may cost more to repair than replace.
How to Keep Pinking Shears Sharp Longer
The best sharpening session is the one you do not need for a while. Treat your pinking shears as fabric-only tools. Keep a separate pair of general-purpose scissors for paper patterns, packaging, tape, thread spools, plastic, and every mysterious household task that begins with, “These will probably work.”
- Cut fabric only, not paper, cardboard, tape, wire, or plastic packaging.
- Wipe the blades after each project, especially after cutting synthetic fabrics.
- Store the shears clean, dry, and closed in a pouch, case, or drawer divider.
- Apply a tiny drop of sewing machine oil to the pivot when the action feels stiff.
- Do not force the blades through too many layers of heavy fabric.
- Avoid cutting over pins, which can nick the teeth and damage the cutting edge.
Frequently Asked Questions About Sharpening Pinking Shears
Can pinking shears really be sharpened?
Yes, but they are harder to sharpen than ordinary fabric scissors. A light at-home hone may improve mildly dull shears, while professional sharpening is best for damaged, expensive, or heavily worn pairs.
Should I take pinking shears apart before sharpening them?
Usually no. Many pinking shears have riveted joints that are not designed for home disassembly. Taking them apart can create alignment problems that are harder to solve than dullness.
Do pinking shears stop fabric from fraying?
They reduce fraying on many woven fabrics by creating a zigzag edge, but they do not completely prevent unraveling. For garments that receive frequent washing or heavy wear, add a sturdier seam finish such as stitching, zigzagging, serging, or binding.
How often should I sharpen pinking shears?
There is no fixed schedule. Sharpen only when test cuts show that the shears are dragging, skipping, or leaving hanging threads after they have been cleaned and checked for pivot tension.
Hands-On Sewing Lessons: What Pinking Shear Experience Teaches You
One of the most useful lessons from working with pinking shears is that “dull” is not always the correct diagnosis. Many sewing tools feel worse long before they are truly worn out. A pair of shears may become stiff because lint has collected around the pivot. They may pull fabric because a tiny bit of adhesive from fusible webbing has coated the blades. They may feel awkward because the screw has loosened after months of use. Cleaning, inspecting, and testing can solve problems that an enthusiastic sharpening session would only make worse.
Experienced sewists also learn to test tools on scraps before trusting them near a real project. This sounds obvious until you are halfway through cutting the only piece of expensive linen that matches your plan. A small scrap reveals more than a dramatic squeeze through a thick fabric stack. Test near the handles, in the middle, and at the tip. Notice whether the zigzag pattern looks consistent. Notice whether the fabric is being sliced cleanly or compressed and torn. Those details tell you whether the problem is dullness, alignment, fabric thickness, or simply a pair of shears being asked to do too much.
There is also a patience lesson hiding inside every pinking-shear repair. Straight scissors invite big gestures: run a sharpening tool down the blade, test, repeat. Pinking shears reward restraint. The tooth pattern is already engineered to meet in a specific way. The more you try to “improve” it by removing metal, the greater the chance of changing the geometry that makes it work. A light touch is not timid. It is skilled.
Another common experience is discovering that cheap and premium shears do not age in the same way. A good pair tends to feel balanced, cut smoothly through the full blade length, and stay aligned longer. A lower-priced pair may work perfectly for occasional craft projects but struggle with several layers of fabric or frequent use. Neither category is automatically wrong; the important part is matching the tool to the job. Heavy upholstery fabric, thick wool, and layered quilting cotton demand more from pinking shears than a single layer of lightweight cotton.
Finally, pinking shears teach the value of keeping tools in their lane. Fabric-only scissors are not a fussy sewing-room rule invented to make life harder. Paper, tape, cardboard, pins, and plastic packaging create wear that fabric does not. A separate utility pair saves your pinking shears for the work they were made to do. That little boundary preserves cleaner cuts, reduces frustrating repairs, and keeps your next seam finish from looking like it was designed by a very determined squirrel.