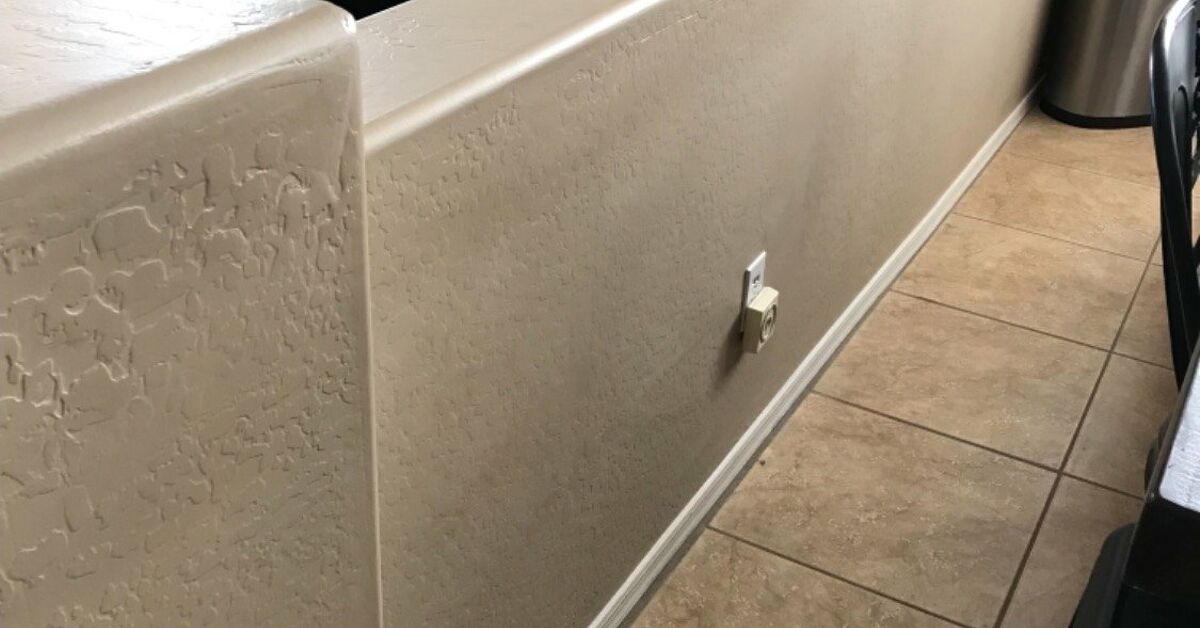
A pony wall can make a room feel neatly divided, gently private,ighter kitchen, a more open living area, or fewer places for dust bunnies to hold committee meetings, removing that short wall can make a dramatic difference.
The good news: removing a non-load-bearing pony wall is often a realistic DIY project for a careful homeowner. The less-good news: “short” does not automatically mean “harmless.” A half wall can hide electrical wiring, plumbing, ductwork, structural support, or a surprise collection of 1994 construction debris. Before you swing a hammer with cinematic confidence, make sure you know exactly what the wall is doing.
This guide explains how to remove a pony wall safely, repair the surrounding surfaces, and avoid turning a weekend upgrade into an expensive conversation with a structural engineer.
What Is a Pony Wall?
A pony wall, also called a half wall or knee wall in some situations, is a short interior wall that does not reach the ceiling. It may separate a kitchen from a dining room, define an entryway, provide a ledge behind a sofa, shield a toilet area, support a countertop, or create a visual boundary near stairs.
Most pony walls are framed with wood or metal studs, covered with drywall, and finished with trim, a wood cap, tile, stone, or a countertop. Some are purely decorative. Others carry electrical outlets, plumbing vents, cabinets, railings, or part of a counter overhang.
The key question is not, “Is this wall short?” The key question is, “Is this wall structural or connected to something important?” Those are very different questions, and only one of them lets you enjoy a stress-free demolition day.
Can You Remove a Pony Wall Yourself?
You can usually remove a pony wall yourself when it is clearly non-load-bearing, contains no plumbing or HVAC equipment, and does not support cabinets, countertops, stair railings, or other built-in features. A simple decorative half wall between two rooms is often the best DIY candidate.
Good Candidates for DIY Pony Wall Removal
- A freestanding decorative half wall in a living room or hallway.
- A short divider that does not support a countertop or cabinetry.
- A wall with no outlets, switches, plumbing, ducts, or vents.
- A wall that runs parallel to ceiling joists and has no signs of structural framing above it.
- A recently built partition wall with accessible plans or clear construction details.
When to Call a Professional
Stop the DIY project and consult a licensed contractor, electrician, plumber, or structural engineer if the pony wall supports a countertop, contains wiring or pipes, connects to a stair guardrail, sits under a beam, or appears to carry weight from above. You should also pause if your home has unusual framing, multiple stories, a complicated roofline, or an older structure with plaster walls.
Removing a load-bearing wall without the correct temporary support and replacement beam is not a “learn as you go” situation. Gravity is not impressed by confidence, tool belts, or inspirational renovation playlists.
How to Tell Whether a Pony Wall Is Load-Bearing
There is no single visual clue that guarantees a wall is nonstructural. However, several clues can help you decide whether you need professional confirmation before demolition.
Check the Direction of Ceiling Joists
If the pony wall runs parallel to the ceiling joists above it, it is less likely to carry their load. If it runs perpendicular to the joists, it may support them. This is only a clue, not a final verdict. Framing changes, beams, headers, and remodels can make a wall more important than it first appears.
Look Above and Below the Wall
Check the attic, crawlspace, basement, or unfinished area below the room when possible. Look for beams, posts, floor joists, roof framing, or other walls aligned with the pony wall. A wall sitting directly over another support wall deserves extra suspicion.
Review Plans and Permits
Original building plans, remodeling plans, and permit records can reveal whether the wall is structural. If you cannot find documents, a contractor or structural engineer can inspect the framing and provide an informed answer before demolition begins.
Assume It Matters Until Proven Otherwise
Even a half wall can be part of a larger support system. Some pony walls hold up a counter, a beam, a railing, or a portion of a ceiling assembly. If you are not completely sure, spend money on an inspection instead of spending much more money on a ceiling that suddenly develops opinions.
Tools and Materials for Removing a Pony Wall
The exact tools depend on how the wall is built, but most DIY pony wall removal projects need the following:
- Safety glasses, work gloves, hearing protection, and a dust mask or respirator.
- Drop cloths, plastic sheeting, painter’s tape, and heavy-duty trash bags.
- Utility knife and drywall saw.
- Pry bar, flat bar, hammer, and nail puller.
- Reciprocating saw with wood-and-metal demolition blades.
- Drill or impact driver.
- Stud finder and non-contact voltage tester.
- Level, tape measure, pencil, and straightedge.
- Drywall scraps, drywall screws, joint tape, joint compound, and sanding sponge.
- Primer, matching paint, caulk, and replacement trim if needed.
- Floor patch materials for hardwood, tile, carpet, laminate, or vinyl flooring.
Before buying supplies, inspect the wall cap. A pony wall topped with granite, butcher block, tile, or a countertop may require additional tools and professional help. Heavy finishes can crack, chip, or become a two-person lift very quickly.
How to Remove a Pony Wall DIY: Step-by-Step
Step 1: Plan the Finished Room Before You Demo
Decide what the room should look like after the wall is gone. Will you patch hardwood flooring? Extend tile? Replace carpet? Add a kitchen island? Move furniture? Install a new electrical outlet? Planning the final look first prevents the classic DIY moment when the wall disappears and reveals a strip of unfinished floor that looks like it has been guarding a secret since the Clinton administration.
Measure the wall’s length, width, and height. Take photos from several angles. Photograph nearby outlets, baseboards, flooring transitions, and ceiling texture. These pictures will help when you shop for matching materials or explain the project to a professional.
Step 2: Check for Electrical, Plumbing, and HVAC Lines
Look for outlets, switches, light fixtures, vents, water lines, drain pipes, or thermostat wiring near the pony wall. Turn off the appropriate breaker before opening the wall. Use a voltage tester, but do not rely on a tester as permission to cut blindly. Treat every hidden cable as potentially live until it has been properly identified and disconnected.
If the wall contains wiring, hire an electrician to reroute the circuit and remove or relocate electrical boxes. If it contains water or drain pipes, call a plumber. If it contains ductwork, consult an HVAC professional. Cutting into a pipe or energized wire is a terrible way to add “water feature” or “sparkle effect” to your remodeling plan.
Step 3: Protect the Work Area
Move furniture, rugs, artwork, and electronics out of the room. Cover nearby surfaces with plastic sheeting and drop cloths. Tape plastic over doorways to limit dust travel, especially if the project is near bedrooms, kitchens, or air returns.
If your home was built before 1978, take lead paint seriously. Disturbing older painted surfaces can create hazardous dust. Use lead-safe work practices, minimize dust, clean thoroughly, and consider professional testing before demolition. Do not sand or smash old painted drywall just because your inner renovation host is feeling energetic.
Step 4: Remove the Wall Cap, Trim, and Baseboards
Start with the decorative parts. Score paint and caulk lines using a utility knife. Carefully pry off the wall cap, baseboards, shoe molding, or trim with a flat bar. Slip a thin scrap of wood behind the pry bar to protect nearby drywall and flooring.
Label trim pieces if you plan to reuse them. Keep nails and screws in a small container rather than leaving them on the floor, where they will immediately begin their migration toward bare feet.
Step 5: Open One Side of the Drywall First
Cut a small inspection opening between studs on one side of the pony wall. Make the opening large enough to see inside without destroying more than necessary. Use a flashlight to inspect for wires, pipes, blocking, insulation, brackets, or fasteners.
Once you confirm the cavity is clear, score the drywall along corners and seams. Remove drywall in manageable sections rather than attacking the entire wall with a sledgehammer. Controlled demolition creates less dust, less damage, and fewer emotional speeches to your spouse about why the ceiling has a dent.
Step 6: Remove Any Hidden Utilities Properly
If you discover electrical wiring, plumbing, or ductwork, stop work. A licensed professional should disconnect, cap, reroute, or replace those systems according to local code. Never bury an abandoned electrical junction box behind drywall. Junction boxes must remain accessible.
If the wall contains low-voltage wire, speaker cable, or old telephone wiring, remove or label it carefully. You may decide to reuse the path for future networking, lighting, or smart-home wiring.
Step 7: Remove the Studs
After both sides of drywall are removed and the cavity is confirmed clear, remove the vertical studs. Use a reciprocating saw to cut through nails near the top and bottom plates, or pry studs out one at a time.
Work slowly near adjoining walls, cabinets, and finished flooring. If a stud resists removal, inspect for screws, metal brackets, or hidden blocking rather than applying increasingly dramatic force. The wall is not stubborn; it is attached to something.
Step 8: Remove the Top and Bottom Plates
The horizontal boards at the top and bottom of the framing are called plates. The top plate may be attached to ceiling framing, while the bottom plate is usually fastened to the floor with nails, screws, or construction adhesive.
Cut the plate into shorter sections if needed, then pry each piece loose gradually. Avoid digging the pry bar into hardwood, tile, or subflooring. On concrete slabs, the bottom plate may be secured with masonry fasteners. Remove those carefully, then patch the holes with an appropriate concrete repair product.
Step 9: Repair the Ceiling, Walls, and Floor
Once the framing is gone, the repair phase begins. This is where your room stops looking like an archaeological dig and starts looking intentional again.
Patch drywall holes with drywall pieces cut to fit. Screw backing strips inside larger openings, attach the patch, tape the seams, and apply joint compound in several thin coats. Feather each coat wider than the previous one. Let the compound dry completely before sanding lightly and applying another coat.
Prime repaired areas before painting. Primer helps new joint compound absorb paint evenly, preventing the patched area from flashing like a spotlight every time afternoon sun hits the wall.
For flooring, use the correct repair method for your surface. Hardwood may need replacement boards and refinishing. Tile may require matching pieces, mortar, grout, and careful leveling. Carpet can sometimes be stretched or patched. Vinyl and laminate may need new planks or a transition strip. Plan for this possibility before demolition, because flooring rarely matches itself out of politeness.
Step 10: Finish the Space
Install new baseboards, touch up paint, add a transition strip if needed, and clean every surface thoroughly. Vacuum slowly with a HEPA-equipped vacuum if possible, especially after drywall sanding or work in an older home.
Stand back and check sight lines from the kitchen, dining room, entry, and seating area. Removing a pony wall can make a modest room feel larger, brighter, and more connected without changing the home’s footprint. It is one of those upgrades where a few inches of framing can make a surprisingly large difference.
Common Mistakes to Avoid When Removing a Half Wall
- Assuming short equals nonstructural: A pony wall may still support a counter, railing, beam, or ceiling assembly.
- Skipping the inspection opening: Always look inside before making larger cuts.
- Forgetting about floor repairs: The missing wall may reveal unfinished flooring, holes, or color differences.
- Using a sledgehammer too early: Controlled removal protects nearby finishes and hidden systems.
- Ignoring lead paint concerns: Older painted surfaces require careful dust control.
- Burying electrical connections: Electrical boxes must remain accessible and properly covered.
- Rushing drywall finishing: Thin coats, drying time, sanding, and primer create a much cleaner result.
DIY Pony Wall Removal Experiences and Lessons
Homeowners who remove a pony wall often say the demolition itself is easier than expected, while the finishing work is where patience becomes the real tool of choice. The first few minutes can feel wonderfully satisfying: trim comes off, drywall opens up, and suddenly the room looks bigger. Then comes the part no renovation show lingers on for very long: dust, nails, patching, sanding, cleaning, repainting, and trying to remember exactly where the matching baseboard was purchased six years ago.
One common experience is discovering that the wall has become a design anchor over time. A kitchen pony wall may hide the back of lower cabinets, carry a narrow counter ledge, or create a natural stopping point for flooring. When it disappears, the room can look beautifully open but temporarily unfinished. This is why it helps to think beyond demolition. A homeowner might decide to replace the wall with a kitchen island, extend the flooring, add a peninsula, or simply use the extra space for a larger dining table.
Another frequent lesson involves hidden surprises. Even a simple half wall can contain an outlet, a cable, a small plumbing line, or extra blocking added during a previous renovation. Opening a small inspection hole first can save a great deal of frustration. Many experienced DIYers consider that small hole the most valuable cut of the entire project because it turns assumptions into information.
Drywall repair is another area where expectations and reality sometimes have a polite disagreement. It is easy to patch a hole. It is harder to make the patch disappear under normal room lighting. Wide feathering, thin layers of compound, gentle sanding, primer, and matching paint make a major difference. Rushing through the compound coats often leads to visible ridges or flashing after paint dries. A slow finish usually looks better than a fast finish, even though no one has ever described waiting for joint compound to dry as a thrilling hobby.
Flooring is often the final plot twist. If the pony wall was installed before the finished flooring, there may be a bare strip of subfloor beneath it. If the wall was added after the flooring, you may be lucky enough to uncover an intact surface. Hardwood can show color differences from sunlight and foot traffic, tile may be difficult to match, and carpet repairs may require help from a flooring professional. Taking a few minutes to investigate the flooring at the wall edges before demolition can prevent an unpleasant surprise later.
The best DIY pony wall removal projects share one thing: the homeowner knows when to stop. Bringing in an electrician for wiring, a plumber for pipes, or a structural professional for load questions is not giving up on DIY. It is simply using DIY judgment. The goal is not to prove that you can remove every screw, stud, and wire yourself. The goal is to create a safer, better-looking room without accidentally redesigning the ceiling from below.
Conclusion
Removing a pony wall can be one of the most rewarding ways to make a room feel open, modern, and more functional. A non-load-bearing half wall with no utilities is usually manageable for a careful DIYer with basic demolition and drywall skills. The smartest approach is simple: inspect first, protect the work area, remove the wall in controlled stages, and give the finishing work the time it deserves.
When in doubt about structure, electrical wiring, plumbing, HVAC, railings, countertops, or permits, bring in a professional before demolition. A pony wall may be small, but the consequences of guessing can be surprisingly large. Remove it thoughtfully, patch it patiently, and enjoy the extra light, flow, and elbow room.