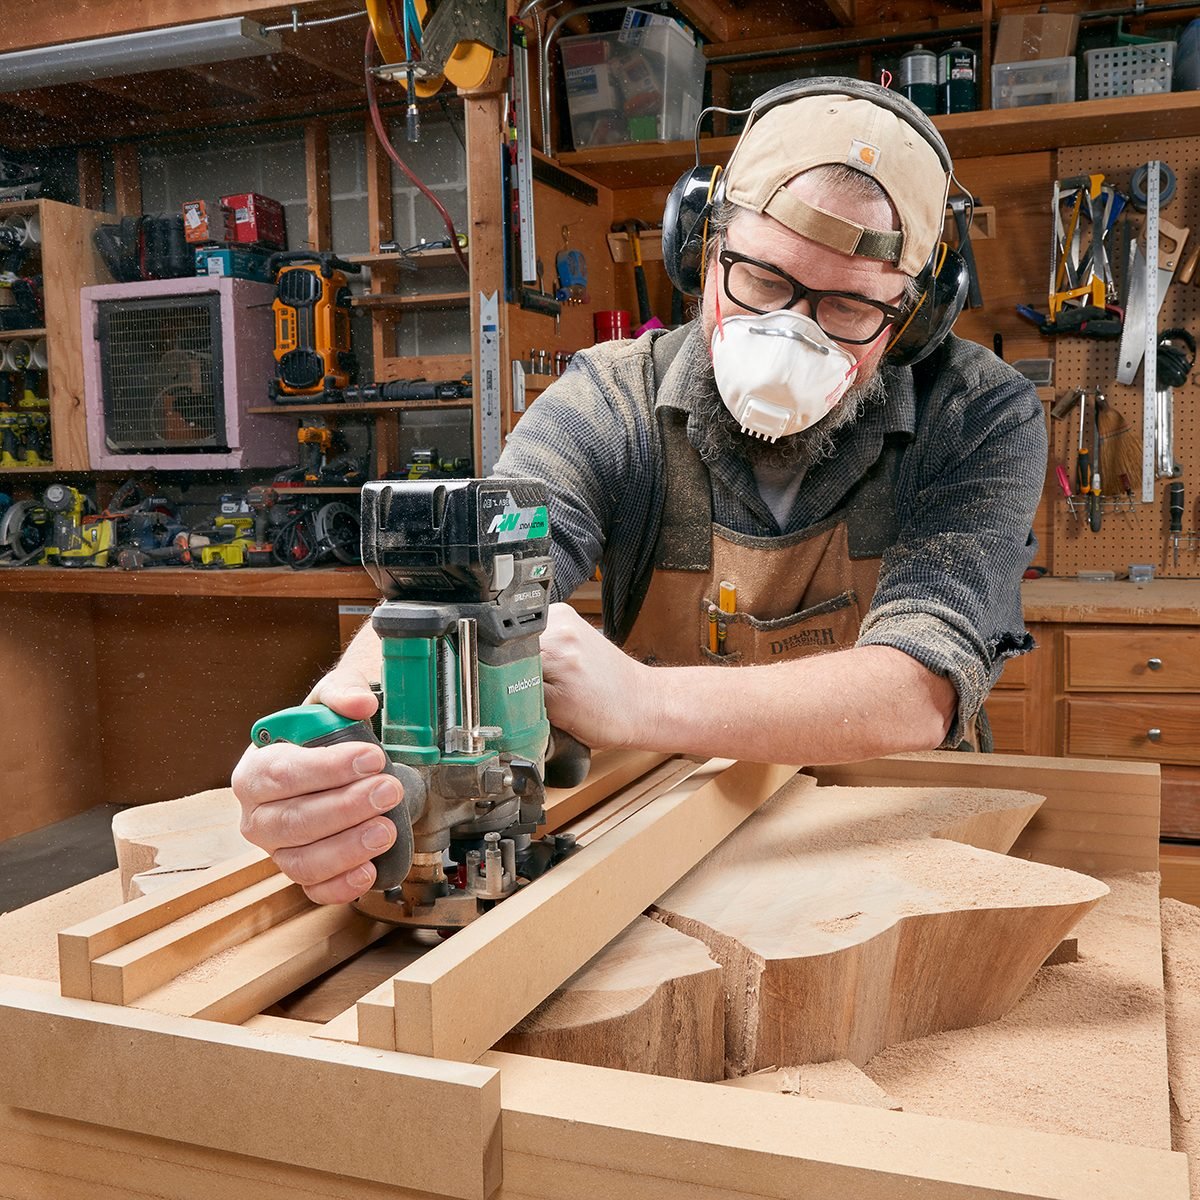
If you’ve ever tried to flatten a wide tabletop glue-up or a live-edge slab and realized your planer taps out at “nope,” welcome to the club. A router gantry (also called a router sled) is the DIY woodworking hack that turns a handheld router into a big-board surfacing machine. It’s not magicthere will be dust, noise, and at least one moment where you question your life choicesbut it is an incredibly effective way to plane large boards when a jointer or wide planer isn’t in the budget (or the garage).
In this guide, you’ll learn how to build a simple, sturdy router gantry and use it to flatten large boards accurately. We’ll cover setup, bit choice, pass strategy, how to avoid ridges and tear-out, and how to get from “potato chip slab” to “ready for finish” without turning your shop into a snow globe made of MDF dust.
Why Use a Router Gantry Instead of a Planer or Jointer?
A thickness planer is greatuntil your board is too wide, too long, too heavy, or too cupped to safely feed through. A jointer can flatten one face, but wide jointers are expensive and still limited by width. A router gantry flips the problem: instead of forcing the board through a machine, you bring the cutting tool to the board and travel across the surface.
What a Router Gantry Does Well
- Handles extra-wide panels and slabs (tabletops, countertops, live-edge pieces).
- Flattens cupped or twisted stock without relying on a reference face first.
- Works with common tools (router, shop-made rails, basic sheet goods).
What It Doesn’t Do So Well (Be Honest With Yourself)
- It’s slower than a planer and requires cleanup (sanding/scraping).
- It’s loud and makes fine dustdust collection matters.
- It’s only as accurate as your setup. If your rails sag, your board won’t be flatjust consistently wrong.
Tools and Materials You’ll Need
Core Tools
- Router: 2–3+ HP is ideal, plunge router preferred. A 1/2″ collet helps with larger bits.
- Surfacing bit: 1″–2″ spoilboard/surfacing bit (insert cutter styles are popular and durable).
- Measuring and checking tools: straightedge, winding sticks (or two straight sticks), square, feeler gauges (optional but nice).
- Clamps (or screws into a sacrificial base).
For the Gantry/Sled Build
- Rails: straight, rigid material (MDF/plywood laminations, aluminum extrusion, or straight construction lumber that’s been verified flat).
- Base platform: plywood/MDF work surface bigger than your board.
- Sled/carriage material: plywood/MDF for the router carriage plus side runners that slide on the rails.
- Hardware: screws, glue, washers, and optionally UHMW tape or wax for smoother sliding.
Dust Collection and Safety Gear (Non-Negotiable)
- Hearing protection (routers scream; your future self would like to keep hearing music).
- Eye protection.
- Respirator or quality dust mask (surfacing creates fine dust, especially with MDF jigs).
- Shop vac or dust extractor with a hose near the cut. A router dust shroud helps a lot.
How to Build a Simple DIY Router Gantry
A router gantry has three main parts: (1) two parallel rails, (2) a sliding bridge/sled that rides on those rails, and (3) a router carriage that moves left-right across the bridge. The router travels in a controlled “grid” over the board, shaving the high spots until the surface is flat.
Step 1: Build or Select Straight Rails
Your rails are the “reference surface” for the whole system. If they bow, your board will copy that bow. Good options include:
- Laminated plywood rails: Glue two strips together to increase stiffness, then true them as best you can.
- Aluminum straightedges/extrusions: More expensive, very stable, and great for long spans.
- Verified straight lumber: Works in a pinch, but check carefully for twist and crown.
Pro move: If your rails are long, support them often. Sag is sneaky and shows up as a “mysterious dip” in the center of your slab.
Step 2: Make a Flat Base and Create a Work Zone
Use a sheet of plywood or MDF as your base. It should be larger than the board. If you’ll do this often, build a dedicated “flattening station” with space for clamps and a sacrificial spoilboard top you don’t mind drilling into.
Step 3: Set the Rails Parallel and Level With Each Other
Place the rails on either side of the board with enough clearance for the sled to pass over it. The rails must be:
- Parallel (same distance apart along the entire length).
- Coplanar (their top edges are in the same planeno one rail higher than the other).
Use shims under the rails to level them relative to each other. Don’t assume your workbench is flat. Most benches have “character.” That’s a polite way of saying “dips.”
Step 4: Build the Sliding Sled/Bridge
The sled rides on top of the rails and spans across them. A basic sled is a flat panel with two “runners” on the sides that keep it from tipping. You want smooth travel without slop.
- Make the sled wide enough to feel stable.
- Add side fences/runners that hug the rail tops.
- Apply paste wax or slick tape on contact points for smoother movement.
Step 5: Add a Router Carriage That Slides Side-to-Side
You can mount the router directly to the sled, or build a carriage that moves laterally on the sled (often with two parallel strips acting like tracks). The goal: the router can sweep across the slab width while the sled advances along the length.
Stability tip: Keep the router as low as practical. A tall, tippy router mount is a recipe for chatter and uneven cuts.
Bit Selection and Router Setup
Pick the Right Surfacing Bit
For flattening large boards, a spoilboard/surfacing bit (often 1″–2″ diameter) is the go-to. Larger diameter means fewer passes and less time, but it also demands a router with enough power and a solid setup. Insert cutter surfacing bits are popular because you can rotate/replace cutters when they dull.
Set Your Speed and Depth Like You Enjoy Not Burning Wood
Big bits generally run at lower RPM than small bits. Follow the bit manufacturer guidance if available. In general:
- Take shallow passes (think 1/32″–1/16″ per pass depending on wood hardness and router power).
- Keep the router moving to avoid burn marks.
- Overlap passes by about 25–50% of the bit diameter to minimize ridges.
How to Flatten the First Face (The Important One)
Step 1: Secure the Board and Stop the Wiggles
A board that shifts mid-cut will ruin your day. Clamp the board if possible. For slabs with odd shapes, use wedges and blocks. Hot glue can be surprisingly effective for temporary bracing. If you screw down blocks, screw into the sacrificial base, not your future tabletop face.
Step 2: Shim to Prevent Rocking
If the board rocks, you’re not flatteningyou’re chasing a moving target. Shim low corners until the board is stable. Use thin wedges, playing cards, veneer offcuts, or dedicated shims. The goal is a solid, no-rock platform.
Step 3: Mark the Surface
Scribble pencil lines across the entire surface. These marks are your “progress meter.” As you surface, the pencil disappears from high spots first. When the pencil is gone everywhere, you’ve reached the same plane across the board (at least for that pass depth).
Step 4: Establish the First Cutting Depth
Lower the bit until it just kisses the highest point. Lock your router depth. Start conservativetaking too much at once increases chatter and tear-out.
Step 5: Plane in a Repeatable Pattern
Use a methodical path so you don’t miss strips:
- Move the router left-to-right across the width.
- Advance the sled forward a small amount (your overlap distance).
- Repeat until the entire surface is covered.
Tip: If you notice ridges between passes, increase overlap, slow down slightly, and check for flex in your sled or rails.
Step 6: Check Flatness (Don’t Trust Your Eyes)
Use a long straightedge in multiple directions: lengthwise, across the width, and diagonally. For twist, place winding sticks at each end and sight across them. If the sticks aren’t parallel, the board is twisted and you’ll need to remove material strategically from high corners.
How to Flatten the Second Face and Thickness the Board
Once the first face is flat, flip the board. Now you have a reference face. Shim and secure it again (it should be more stable now), then surface the second face until you reach your target thickness.
Avoid the “Oops, It’s Too Thin” Moment
- Measure thickness at several points before you start the second face.
- Decide your minimum finished thickness and don’t go below it.
- If you’re flattening a cupped board, remember you’re removing material from the high areas firstthickness can drop fast.
Reducing Ridges and Tear-Out (Because Sanding Builds Character)
Ridges: What Causes Them and How to Fix Them
- Not enough overlap: Overlap passes more.
- Sled flex: Beef up the sled with thicker material or bracing.
- Rails not coplanar: Re-shim and verify rail tops are in the same plane.
- Inconsistent feed: Move smoothlyno stop-and-go.
Tear-Out: How to Keep Fibers From Exploding
- Take lighter passes, especially in figured wood.
- Consider changing direction if one direction tears more than the other.
- Use a sharp bitdull cutters tear, burn, and complain loudly (through your router).
Clean-Up: Getting to a Finish-Ready Surface
A router gantry leaves a “scalloped” texturetiny arcs from the bit. You’ve got options:
- Card scraper: Fast and satisfying once you get the burr right.
- Random orbit sander: Start around 80–120 grit, then work up.
- Drum sander (if available): Great for flattening marks without digging in.
If the board is a tabletop, check flatness again after sanding. Aggressive sanding in one area can introduce subtle dips (yes, sanders can lie too).
Example: Flattening a Live-Edge Slab for a Dining Table
Let’s say you’ve got a 7-foot slab that’s 28 inches widetoo wide for most planers. Here’s a practical approach:
- Build a base platform slightly larger than the slab and attach sacrificial strips along the edges for clamping blocks.
- Set rails on both sides and shim until they’re coplanar. Support the rails every couple of feet to prevent sag.
- Stabilize the slab with wedges at low corners so it doesn’t rock. Clamp using blocks that press against the slab edges.
- Mark the surface with pencil, then surface in shallow passes until marks disappear.
- Flip and repeat to reach a consistent thickness, keeping an eye on your final target (like 1-3/4″ for a substantial tabletop).
- Scrape and sand to remove tooling marks, then you’re ready for joinery, finish, or attaching base hardware.
Common Mistakes (And How to Avoid Them)
1) Building a Gantry That Flexes
If your sled feels like a trampoline, your surface will show it. Use thicker material, add ribs/braces, and keep spans supported.
2) Assuming Your Rails Are “Probably Straight”
“Probably straight” is how you end up with a board that’s flat in a theoretical universe. Verify straightness and support rails to reduce sag.
3) Skipping Shims Under the Board
If the board rocks, you’ll plane it into something that’s flat… in motion. Shim until it’s stable.
4) Taking Deep Passes to “Save Time”
Deep passes often cost more time in sanding, tear-out repair, and re-flattening. Light passes win the long game.
Neat Conclusion: Is a Router Gantry Worth It?
Absolutelyespecially if you work with slabs, wide glue-ups, or reclaimed lumber that laughs at your jointer. A DIY router gantry gives you control, flexibility, and the ability to flatten boards far larger than typical shop machines allow. Build it stiff, set it up carefully, take light passes, and use a repeatable pattern. Your reward is a dead-flat surface ready for joinery, finishing, and showing off to anyone who will listen.
Shop Stories and Real-World Experience (The “I Learned This the Dusty Way” Section)
The first time I used a router gantry, I thought, “How messy can it be?” That sentence aged like milk. Surfacing a big board produces the kind of fine dust that floats, settles, and somehow ends up in rooms you didn’t even enter. The biggest upgrade I made wasn’t a fancier bitit was better dust collection. Even a shop vac parked close to the cut helped, but adding a router dust shroud and keeping the hose positioned where chips actually fly made the whole process feel less like woodworking and more like… woodworking with slightly less regret.
Another lesson: rigidity beats cleverness. Early on, I built rails from MDF because it was cheap and straight-ish. It worked fine for smaller panels. Then I tried flattening a long slab and couldn’t figure out why the center always ended up a hair low. The rails were sagging just enough to create a shallow “smile” across the board. I didn’t notice until I put a long straightedge on the rails themselves. The fix was simple: support the rails more often and use stiffer rail material when spanning longer distances. It’s amazing how quickly “close enough” becomes “why is my tabletop rocking?”
I also learned to love pencil scribbles. Marking the surface seems too basic to matteruntil you skip it. Without those marks, it’s easy to miss a strip, especially when you’re tired and the router is singing the song of its people. Pencil lines give instant feedback: high spots disappear first, and you can see exactly where you still need to cut. On twisty boards, the pencil trick plus winding sticks turned guesswork into a plan. I stopped randomly chewing down the whole surface and started targeting the problem areas.
Bit choice matters, but technique matters more. I’ve used wide surfacing bits that left minimal ridges and narrow bits that left more scallops. The common factor in good results was consistent overlap and steady movement. When I moved too fast, the surface looked like a washboard. When I hesitated, I got burn marks. Finding a smooth, even pacelike mowing a lawn where the grass is hardwoodmade cleanup faster. And yes, I still had cleanup. A router gantry can flatten like a champ, but it’s not a finish planer. A card scraper became my best friend for knocking down the last traces of tool marks without accidentally sanding a shallow bowl into the middle of the panel.
My favorite “save” happened on a giant glued-up countertop that had a stubborn high ridge along one seam. I was tempted to keep dropping the bit deeper to erase it in one pass. Instead, I took two lighter passes with more overlap, then checked with a straightedge. The ridge faded without creating a dip on either side. That experience taught me the router gantry’s superpower: you can remove material precisely where neededif you stay patient. The gantry rewards calm, methodical work. The moment you rush, it hands you a new hobby: sanding.
So if you’re building your first router sled, here’s the real-world takeaway: build it stiffer than you think you need, support the rails more than you think is necessary, and treat setup like part of the projectnot a speed bump before the “real” woodworking begins. Do that, and you’ll end up with big, flat boards that look like they came out of a much fancier shop. And you’ll only find dust in your pockets for, say, three days instead of seven.