Opening an RV awning looks simple until you are standing beside your camper with an awning rod in one hand, a mysterious lever above your head, and the quiet fear that the whole thing may spring open like a giant vinyl taco. The good news? Once you understand the basic parts and the right order of operations, opening an RV awning is usually quick, safe, and surprisingly satisfying.
This guide explains how to open an RV awning in 7 steps, including manual awnings, electric RV awnings, hybrid crank awnings, and common safety checks. Whether you are setting up shade at a lakeside campground, creating a dry patio outside your travel trailer, or simply trying not to look confused in front of your campsite neighbors, these steps will help you open your awning with confidence.
Before you begin, remember that RV awnings vary by brand and model. Dometic, Carefree of Colorado, Solera, Girard, and other awning systems may use different switches, knobs, locks, pitch arms, or override methods. Always check your owner’s manual for exact instructions. This article gives practical, general guidance that applies to many common RV patio awnings.
Before You Open an RV Awning
An RV awning is not just a fancy sun umbrella bolted to the side of your camper. It is a fabric canopy attached to a roller tube, support arms, brackets, springs or motors, and locking hardware. When it works properly, it gives you shade, rain protection, and an outdoor living area. When it is rushed, ignored, or left out in a windstorm, it can become an expensive kite.
Before opening the awning, park the RV on level ground if possible, set the parking brake, and make sure the awning side has enough clearance. Look for trees, picnic shelters, other RVs, posts, slide-outs, and low branches. Also check the entry door. Some awnings can rub against a tall door if the door is open during extension, so close the door first if clearance is tight.
Know Your Awning Type
Most RV patio awnings fall into one of three categories:
- Manual RV awning: Uses a pull strap, awning rod, travel locks, knobs, rafters, and support arms.
- Electric RV awning: Extends with a wall switch, remote, or control panel.
- Hybrid or crank awning: Uses a crank handle or rod to extend and retract the roller tube.
The 7 steps below focus mainly on the classic manual RV awning, because it has the most moving parts. Electric awning tips are included where the process differs.
How to Open an RV Awning: 7 Steps
Step 1: Check the Weather and Campsite Clearance
Start with the two things that ruin awnings most often: wind and obstacles. Walk along the awning side of the RV and look up, down, and around. Make sure the roller tube can extend without hitting tree limbs, a fence, a power pedestal, a neighboring vehicle, or your own slide-out room. If the awning fabric is wet, dirty, or stiff from storage, open it slowly and inspect as you go.
Next, check the weather. Awnings are made for shade and light weather protection, not for wrestling thunderstorms. If strong wind, heavy rain, hail, or snow is expected, leave the awning closed. If you will be away from the RV for several hours, retract it. The campsite may be calm when you leave, but weather has a bad habit of developing confidence when no one is watching.
For electric awnings, verify that your RV battery is charged or shore power is connected. Some power awnings also have wind sensors or ignition lockout features, but do not rely on electronics as your only safety plan. Sensors help; common sense helps more.
Step 2: Release the Travel Locks or Arm Locks
Manual RV awnings usually have locks or tabs that keep the support arms secure while traveling. These may be located near the top or bottom of the awning arms. Release the travel locks on both arms before trying to pull the awning out. If the awning does not move, do not yank harder like you are starting an old lawn mower. Something is probably still locked.
Look for rafter knobs, black adjustment knobs, or small latches that hold the inner and outer arms together. Loosen the knobs slightly, usually just a few turns. You do not need to remove them. The goal is to allow the arms to slide and extend when the fabric rolls out.
If you have an electric awning, this step may be as simple as confirming the awning area is clear and that no manual lock or strap is securing the arms. Some motorized awnings do not use travel locks, while others may have a locking system. Again, your specific model matters.
Step 3: Switch the Ratchet Lever to the Open Position
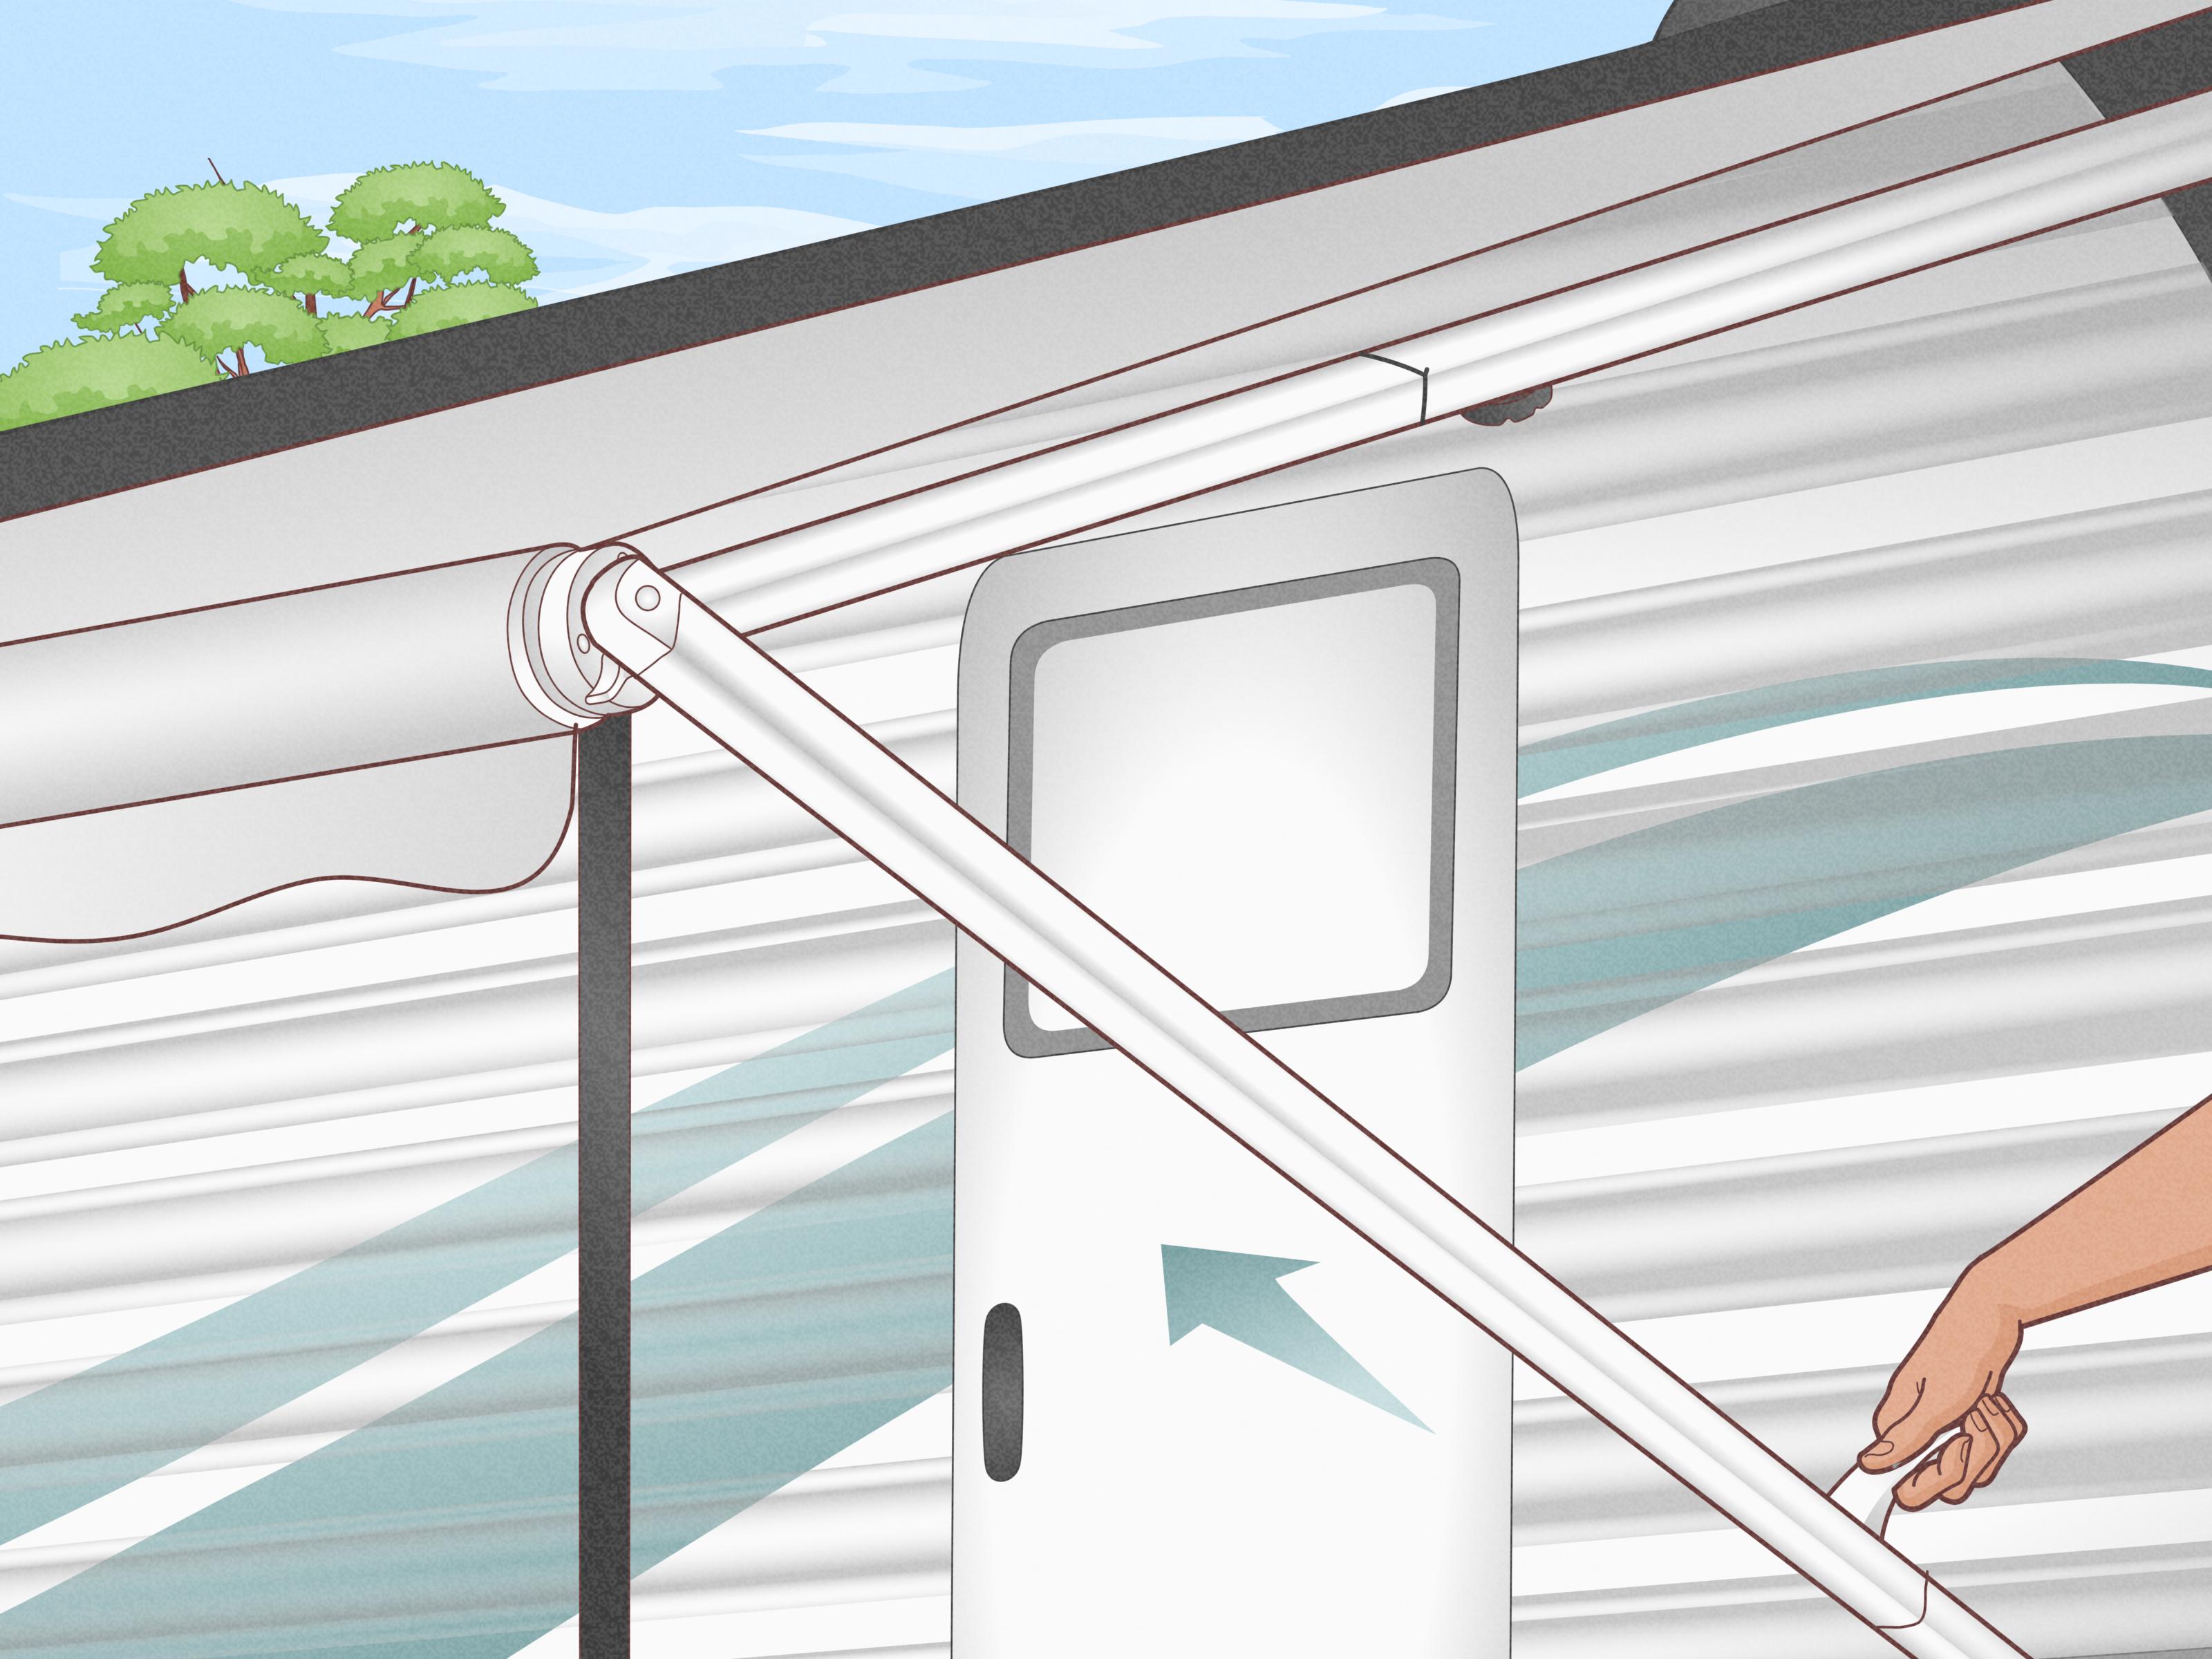
On many manual RV awnings, a small ratchet lever sits on the end of the roller tube. It may be labeled “open/close,” “roll up/roll down,” or simply move between two positions. Use your awning rod to flip the lever to the open or roll-down position.
This little lever does a big job. It tells the roller tube whether it should unwind or retract. If the lever is in the wrong position, the awning may refuse to open or may try to pull itself back in. Be gentle when moving it. If it feels stuck, inspect the mechanism and make sure there is no tension, debris, or damage.
For crank-style awnings, attach the crank handle to the drive hook or gearbox. For electric awnings, locate the extend switch or remote button. The process is different, but the same idea applies: put the awning into extension mode before asking it to move.
Step 4: Pull the Awning Strap or Press Extend
Now comes the fun part. For a manual awning, hook the pull strap with the awning rod and gently pull the awning outward. Walk backward slowly as the fabric unrolls. Keep the strap centered so the roller tube extends evenly. If the awning starts coming out crooked, stop and correct it before the fabric binds.
Do not let the awning fly open. Manual awnings are often spring-loaded, and the tension can surprise you. Keep steady control of the strap until the awning is fully extended. If another person is available, have them watch the arms and fabric while you pull. Two sets of eyes are useful, especially if one set is busy trying not to trip over a camp chair.
For electric RV awnings, press and hold the extend button until the awning reaches the desired position or fully extends. Many electric awnings stop when you release the button. Some models offer one-touch extension, but you should still watch the awning as it moves. Stop immediately if it makes unusual noises, binds, sags unevenly, or contacts an obstacle.
Step 5: Slide and Lock the Support Arms
Once the manual awning is extended, slide the inner support arms upward into position. Depending on the design, the rafters may lock automatically, click into place, or require tightening with knobs. This step gives the awning structure and keeps the fabric taut.
Tighten the rafter knobs firmly, but do not overdo it. You want the arms secure, not crushed into submission. If the awning fabric looks loose, adjust the rafters evenly. If one side looks much lower than the other, check that both arms are seated correctly.
Some manual awnings allow the legs to remain attached to the RV or swing down into “patio mode,” where the legs rest on the ground. Use the configuration recommended by your manufacturer. If the legs are placed on the ground, make sure they are secure and not positioned where someone will kick them at midnight while searching for snacks.
Step 6: Adjust the Pitch for Shade and Rain Runoff
Pitch refers to the angle of the awning. A flat awning may look tidy, but it can collect rainwater. Water pooling on the fabric adds weight and can stretch the material, bend arms, or damage the roller tube. To help rain run off, lower one side of the awning slightly.
Many manual and electric awnings have adjustable pitch arms. On manual awnings, you may adjust the lower arm height or rafter position. On electric awnings, look for pitch adjustment knobs or articulating arms. Always adjust both sides carefully and keep hands clear of pinch points.
For shade, pitch also matters. In the morning or late afternoon, the sun may sneak under a perfectly level awning like it owns the campground. Lowering one side or adding an awning shade screen can make your outdoor area cooler and more comfortable.
Step 7: Inspect, Secure, and Enjoy the Shade
After the awning is open, step back and inspect everything. The fabric should be smooth, the roller tube should be straight, the arms should be locked, and the pitch should allow water to drain. Listen for odd creaks and look for loose fasteners, cracked fabric, or bent hardware.
If conditions are calm, you can add accessories such as LED lights, a shade screen, awning mat, or tie-downs approved for your setup. However, accessories are not a license to ignore weather. Tie-downs may reduce flapping in a breeze, but they do not make an awning stormproof. When in doubt, retract it.
Once everything is secure, enjoy the best part: shade. Set up the chairs, bring out the coffee, and admire your outdoor living room. Opening an RV awning correctly takes only a few minutes, but it can make the entire campsite feel more comfortable.
How to Open an Electric RV Awning
Electric RV awnings are simpler to operate, but they still require attention. First, clear the area and check the weather. Then press and hold the extend switch or remote button while watching the awning move. Stop before the awning hits anything. Once extended, adjust the pitch if your model allows it.
Never walk away while an electric awning is moving. Motors can strain if the fabric binds, and arms can be damaged if the awning catches an obstacle. If the awning stops unexpectedly, check power, fuses, battery voltage, and any lockout features. Some awnings include manual override options for power failures, usually involving a crank point, drill adapter, or access panel.
Common Mistakes to Avoid
Opening the Awning in Wind
Wind is the villain in most RV awning stories. A light breeze is usually fine, but gusts can lift the fabric and twist the arms. If trees are swaying, flags are snapping, or your paper plates are leaving the picnic table without permission, close the awning.
Forgetting to Pitch One Side
A level awning can collect water during rain. Always create a downward angle so water can drain. If rain becomes heavy or steady, retract the awning instead of trusting the pitch alone.
Leaving the Awning Out While Away
Many awning disasters happen when no one is at the campsite. Before leaving for a hike, grocery run, or day trip, retract the awning. It may feel inconvenient, but replacing awning hardware is far more inconvenient.
Rolling Up a Dirty or Wet Awning for Long Storage
If the fabric is wet, open it again later to dry. Long-term storage with moisture trapped inside can encourage mildew and odors. If it is dirty, rinse it with fresh water and use a mild cleaner suitable for RV awning fabric.
Maintenance Tips After Opening Your RV Awning
Every time you open your RV awning, take a minute to inspect it. Look for pinholes, small tears, loose stitching, mold, mildew, and worn seams. Catching small problems early can prevent larger repairs later.
Clean the awning with mild soap, water, and a soft brush. Avoid harsh chemicals, abrasive scrubbers, and oil-based cleaners unless the manufacturer specifically approves them. Rinse thoroughly and let the fabric air-dry completely before retracting for storage.
Check the arms, knobs, brackets, and fasteners. If anything is loose, tighten it carefully. Lubrication needs vary by awning model, so check your manual before spraying anything onto moving parts. The wrong product can attract dirt or damage fabric.
Real-World Experience: What Opening an RV Awning Teaches You
The first time many RV owners open an awning, they expect a simple pull-and-shade moment. What they often get is a small campsite ceremony involving levers, knobs, straps, and at least one person saying, “Wait, is it supposed to do that?” That is normal. RV awnings are not difficult, but they reward patience.
One practical lesson is that setup always goes better when you slow down. A manual awning should open smoothly. If you feel resistance, stop. Maybe a travel lock is still engaged. Maybe the ratchet lever is in the wrong position. Maybe the pull strap is off-center. Forcing the awning is like arguing with a folding chair: technically possible, but rarely dignified.
Another experience many campers share is learning to respect weather. On a calm afternoon, an open awning feels permanent. You place the chairs underneath it, hang a string of lights, roll out the outdoor mat, and suddenly the campsite looks like a tiny vacation resort. Then a gust of wind arrives, and the awning reminds everyone that it is attached to the RV by hardware, not magic. Experienced RVers often retract their awning at night or whenever they leave the site because they have either seen damage happen or heard the sad campground tale from someone who did.
Pitch adjustment is another lesson learned quickly. A flat awning might seem fine until a rain shower creates a heavy puddle in the middle. Lowering one side allows water to drain and keeps the fabric from sagging. Some campers make it a habit to set a slight pitch even on sunny days, just in case the weather changes while they are cooking, relaxing, or pretending not to check work email.
Opening an awning also teaches you how useful shade can be. In hot weather, the shaded side of the RV feels dramatically cooler. The awning can reduce direct sun on windows, create a better cooking area, and give kids or pets a comfortable outdoor space. It turns the narrow strip beside the RV into a patio, dining room, reading nook, and shoe-removal zone all at once.
The best habit is to treat the awning as part of your arrival and departure checklist. When arriving, inspect the space, open the awning carefully, lock the arms, adjust the pitch, and check the weather. Before leaving, remove accessories, retract the fabric, secure the locks, and confirm everything is tight for travel. This routine becomes second nature after a few trips.
There is also a social side to awnings. At campgrounds, people notice when someone is struggling. A neighbor may wander over with advice, a flashlight, or a story about “the time my awning almost became a sail.” Take the help. RVing is full of small mechanical mysteries, and awnings are one of the friendlier ones. Once you learn your system, you may become the person helping someone else flip the correct lever.
Ultimately, opening an RV awning is about more than shade. It is the moment your RV stops being just a parked vehicle and starts becoming a campsite. Done correctly, it is easy, safe, and satisfying. Done carelessly, it can become expensive outdoor origami. Take your time, watch the weather, and let the awning do what it was designed to do: make your camping life more comfortable.
Conclusion
Learning how to open an RV awning is an essential skill for comfortable camping. The basic process is simple: check the weather, clear the area, release locks, set the awning to open, extend the fabric, secure the arms, adjust the pitch, and inspect everything before relaxing underneath it. Manual awnings require more hands-on steps, while electric awnings simplify extension with a switch or remote. Either way, safety and patience matter.
The most important rule is also the easiest to remember: when wind or heavy rain threatens, retract the awning. Your awning is there to provide shade and light shelter, not to audition for a tornado documentary. Treat it well, clean it regularly, dry it before storage, and it will reward you with many comfortable mornings, lazy afternoons, and bug-swatting evenings at the campsite.
Note: RV awning systems differ by manufacturer and model. Always follow your specific owner’s manual for operating instructions, safety warnings, maintenance requirements, and emergency override procedures.