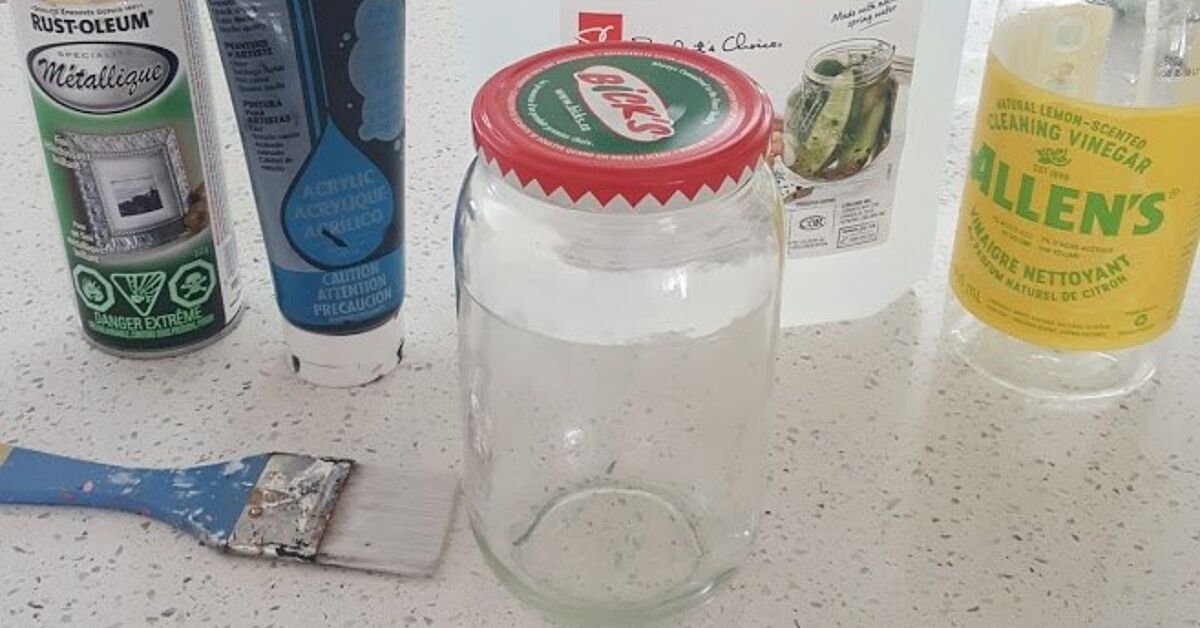
Glass jar luminaries are the rare DIY project that checks every happy little box: affordable, beginner-friendly, customizable, and just dramatic enough to make your patio, mantel, dining table, or front porch look like it hired a tiny lighting designer. Even better, you probably already have the star of the show sitting in your recycling bin, formerly known as “that pasta sauce jar I felt weirdly guilty throwing away.”
This guide will show you how to make glass jar luminaries DIY-style using simple supplies like clean jars, Mod Podge, tissue paper, pressed leaves, paint, twine, beads, Epsom salt, and LED tea lights. You’ll learn the basic method, creative variations, safety tips, troubleshooting tricks, and real-world experience notes that make the difference between “cute craft” and “where did you buy those?”
The best part? You do not need advanced crafting skills, a workshop, or the patience of a professional miniaturist. If you can clean a jar, brush on glue, and resist touching wet paint for five minutes, you are already qualified.
What Are Glass Jar Luminaries?
Glass jar luminaries are decorative light holders made from Mason jars, pickle jars, jam jars, baby food jars, or other clear glass containers. They are usually decorated on the outside and illuminated from within using LED tea lights, battery-operated fairy lights, solar lids, or, in certain safe outdoor situations, small candles.
The word “luminary” sounds fancy, but the concept is beautifully simple: a container diffuses light through color, texture, cutouts, frost, paper, leaves, paint, or glass gems. The result is a soft glow that feels warm and handmade without looking like a kindergarten art table exploded. Unless you invite glitter. Then all bets are off.
Why This DIY Glass Jar Luminary Project Works So Well
This project is popular for a reason. Glass jar luminaries are inexpensive, eco-friendly, and easy to adapt for holidays, weddings, garden parties, cozy fall nights, Halloween porches, Christmas centerpieces, or everyday home decor. They are also forgiving. A slightly wrinkled tissue paper layer can look artistic. A crooked twine bow can look rustic. A smudge of paint can become “texture.” Crafting is generous that way.
They also make excellent handmade gifts. Add a ribbon, a small tag, and a battery-operated candle, and suddenly an empty jelly jar has become a thoughtful present. That is a glow-up in the most literal sense.
Materials You’ll Need
You can make glass jar luminaries with many different materials, but the following list covers the most useful supplies for the classic version and several creative variations.
Basic Supplies
- Clean glass jars, such as Mason jars, jam jars, or recycled food jars
- Rubbing alcohol or white vinegar for final cleaning
- Paper towels or lint-free cloth
- Mod Podge or a similar decoupage medium
- Foam brush or soft paintbrush
- Tissue paper, pressed leaves, paper napkins, or thin decorative paper
- Battery-operated LED tea lights, fairy lights, or solar jar lights
- Twine, ribbon, raffia, lace, or decorative cord
- Scissors
- Optional: acrylic paint, glass paint, stencils, painter’s tape, Epsom salt, glitter, beads, pebbles, sea glass, or faux greenery
Best Jars to Use
Wide-mouth Mason jars are easy to work with because your hand can fit inside them, but almost any clear glass jar will do. Short jars work well for table centerpieces. Tall pasta sauce jars are great for porches or walkways. Small baby food jars can become adorable mini luminaries for party favors. Before decorating, inspect each jar for cracks, chips, or rough edges. A damaged jar may look charming in an “old farmhouse” way, but it is not ideal for lighting.
Step-by-Step: How to Make Glass Jar Luminaries DIY
Step 1: Remove Labels and Clean the Jars
Start by soaking your jars in warm, soapy water for 20 to 30 minutes. Most labels will peel off easily after soaking. For stubborn adhesive, rub the area with baking soda and cooking oil, vinegar, or rubbing alcohol. Wash the jar again with dish soap to remove oil residue.
Once the jar is dry, wipe the outside with rubbing alcohol. This final step matters because fingerprints, oils, and soap residue can stop paint or Mod Podge from sticking properly. Think of it as giving your jar a spa facial before its big debut.
Step 2: Choose Your Luminary Style
Before you start gluing, decide what look you want. A frosted white jar gives a snowy winter glow. Orange tissue paper creates a pumpkin-style Halloween lantern. Pressed leaves make a warm fall centerpiece. Blue and green tissue paper can mimic sea glass for a beachy summer table. A lace-wrapped jar feels romantic and works beautifully for weddings.
Planning your style first prevents the classic craft-table moment where you are holding a glue-covered jar and suddenly wondering why you bought neon purple glitter. We have all been there emotionally, even if not legally.
Step 3: Apply a Thin Layer of Mod Podge
Use a foam brush to apply a thin, even layer of Mod Podge to a small section of the jar. Work in sections rather than coating the entire jar at once, especially if you are using tissue paper or pressed leaves. Mod Podge dries quickly enough that a giant wet area can become tacky before you finish placing your design.
Thin layers are your friend. Thick layers can dry cloudy, wrinkle paper, or create drips. You want smooth coverage, not a jar wearing a glue sweater.
Step 4: Add Tissue Paper, Leaves, or Decorative Paper
For a classic tissue paper luminary, tear tissue paper into small pieces instead of cutting perfect squares. Torn edges blend more naturally and create a stained-glass effect when the light shines through. Place each piece onto the Mod Podge, overlapping slightly.
For a leaf luminary, use pressed leaves rather than fresh leaves. Fresh leaves hold moisture and may curl, brown, or refuse to cooperate like tiny botanical divas. Press leaves in a heavy book for several days before using them. Apply Mod Podge to the jar, place the leaf, then gently brush over it from the center outward.
For napkin luminaries, separate the printed top layer of the paper napkin from the plain backing layers. Use only the thin printed layer. It will look delicate and professional once sealed.
Step 5: Seal the Design
Once your first layer is in place, brush another thin coat of Mod Podge over the entire decorated area. This seals the paper or leaves and gives the jar a finished look. Let it dry for at least 20 minutes, then add another coat if needed.
If you want a more durable finish, allow the jar to dry overnight before handling it heavily. Even when it feels dry to the touch, decoupage can remain delicate for a while. Patience here pays off with a cleaner, smoother finish.
Step 6: Decorate the Rim
The rim is where your glass jar luminary goes from “craft project” to “home decor.” Wrap twine, ribbon, raffia, or lace around the top and tie it into a small bow. Add a charm, wooden tag, faux leaf, tiny pinecone, or sprig of artificial greenery if it fits your theme.
Avoid letting decorations hang down inside the jar, especially if you plan to use any type of real flame. For indoor use, LED tea lights are the safest and easiest choice.
Step 7: Add the Light
Place a battery-operated LED tea light, flameless votive, fairy light strand, or solar-powered insert inside the jar. LED lights are ideal because they stay cool, are reusable, and allow you to use paper, ribbon, and natural materials without worrying about open flame risks.
If you use fairy lights, coil them gently inside the jar rather than stuffing them in like holiday spaghetti. A loose coil distributes the glow more evenly.
Creative Glass Jar Luminary Ideas
1. Frosted Winter Luminaries
Brush the outside of the jar with Mod Podge and roll it lightly in Epsom salt for a snowy texture. Add white glitter sparingly if you like shimmer. Finish with twine and a faux evergreen sprig. These look beautiful on a mantel, windowsill, or holiday dining table.
2. Fall Leaf Jar Luminaries
Use pressed maple leaves, oak leaves, or faux fabric leaves in warm autumn colors. Arrange them around the jar before gluing so you can balance the colors. Add a burlap ribbon at the top for a cozy harvest look.
3. Stained Glass Tissue Paper Luminaries
Layer small pieces of tissue paper in two or three colors. Try blue and green for coastal decor, red and pink for Valentine’s Day, or orange and yellow for a sunset glow. When lit, the overlapping tissue creates richer color variations.
4. Halloween Silhouette Luminaries
Paint or decoupage the jar in orange, purple, smoky gray, or green. Add black paper silhouettes of bats, cats, haunted houses, moons, or jack-o’-lantern faces. Drop in an LED candle and line them up on the porch for spooky charm without the fire-breathing pumpkin drama.
5. Beach-Inspired Jar Lanterns
Add sea glass, small stones, sand, or shells to the bottom of a wide-mouth jar. Place an LED tea light or mini fairy light bundle inside. Wrap the rim with jute rope for a relaxed coastal style. These are especially pretty for summer dinners outdoors.
6. Wedding or Party Luminaries
Use lace, vellum, pearl beads, satin ribbon, or frosted glass spray for an elegant look. Make several in matching colors and group them down the center of a table. For a wedding, use jars in different heights to create depth while keeping the design cohesive.
Safety Tips for Glass Jar Luminaries
Glass jar luminaries are safest when used with LED lights. Flameless candles give you glow without heat, smoke, melting wax, or the need to monitor an open flame. This is especially important when your design includes tissue paper, dried leaves, twine, ribbon, lace, or other flammable materials.
If you choose to use a real candle outdoors, keep the design minimal and make sure no decorations are near the flame. Use a stable jar on a heat-resistant surface, keep it away from anything that can burn, and never leave it unattended. Do not use real candles in jars decorated with paper on the inside. Also avoid placing lit luminaries near curtains, dry leaves, table linens, pets, children, or that one friend who talks with their hands like they are directing airport traffic.
Never place a lid on a jar with a burning candle inside. Heat needs ventilation, and trapped heat can create unsafe conditions. When in doubt, choose LED. Your luminary will still look magical, and your smoke alarm will not become part of the evening entertainment.
Common Mistakes and How to Fix Them
Problem: The Tissue Paper Wrinkled
A few wrinkles are normal and often add texture. If the paper bunches badly, you may be using too much Mod Podge. Use thinner coats and smooth each piece gently with the brush instead of pressing hard with your fingers.
Problem: The Design Looks Cloudy
Mod Podge usually dries clearer than it looks when wet, so wait before panicking. If it remains cloudy, the layer may be too thick. Next time, apply thinner coats and allow more drying time between layers.
Problem: Paint Will Not Stick
The jar may still have oil, dust, or label residue on it. Clean the glass thoroughly with soap and water, dry it completely, then wipe with rubbing alcohol before painting.
Problem: Leaves Are Peeling
Leaves may peel if they are too thick, too fresh, or not pressed flat. Use thin, dry pressed leaves or flexible faux leaves. Apply Mod Podge under and over each leaf, then let it dry fully.
Problem: The Light Looks Too Dim
Use a brighter LED tea light, a short strand of fairy lights, or a jar with less opaque decoration. Dark paint and too many paper layers can block the glow. Luminaries need a little transparency to shine.
Where to Use DIY Glass Jar Luminaries
Glass jar luminaries are wonderfully versatile. Use them as patio lights for summer dinners, mantel decor for fall, pathway markers for parties, centerpiece lighting for weddings, nightstand accents, bathroom shelf decor, or front porch decorations during the holidays. Grouping them in odd numbers, such as three or five, creates a more natural display.
For outdoor use, choose covered areas when possible. Rain and paper decorations are not best friends. If you want weather-resistant luminaries, keep the design simple with glass paint, wire handles, pebbles, and solar lights instead of tissue paper or dried leaves.
How to Store and Reuse Your Luminaries
Store your finished luminaries in a dry box with tissue paper or newspaper between jars to prevent scratches. Remove batteries from LED candles or fairy lights before long-term storage. Seasonal designs can last for years if handled gently.
If you want to refresh an old luminary, remove the ribbon, wipe away dust, and add a new rim decoration. A fall leaf jar can become a Thanksgiving centerpiece with plaid ribbon, then shift toward Christmas with evergreen trim. Glass jars are basically the little black dress of DIY decor: change the accessories, and they are ready for a new event.
Real-Life Experience: What I Learned Making Glass Jar Luminaries
The first time I made glass jar luminaries, I had a wildly optimistic plan. I imagined a peaceful afternoon: soft music, neatly arranged supplies, perfect little jars glowing like something from a magazine spread. The reality involved sticky fingers, a runaway foam brush, and one piece of tissue paper that attached itself to my sleeve with the determination of a toddler refusing bedtime.
But here is the good news: even the imperfect jars looked beautiful once the lights went in. That is the secret charm of this project. Luminaries are incredibly forgiving. During daylight, you might notice a wrinkle, a brush mark, or a slightly lopsided leaf. At night, with the LED candle flickering, all those tiny flaws soften into texture. The glow does the editing for you.
One of the biggest lessons is to prepare more jars than you think you need. Once you make one, you will immediately want to make three more. A single jar is sweet, but a cluster of jars creates atmosphere. I like using different heights together: a short jam jar, a classic Mason jar, and a tall sauce jar. The varied shapes make the display feel collected rather than overly matched.
I also learned that less decoration often creates a better glow. My first instinct was to cover every inch of glass with tissue paper. The result was colorful but dim, like the light was trying to escape through a winter coat. Leaving small gaps or using pale colors lets the light shine brighter. If you want bold color, use it in sections rather than wrapping the jar completely in dark layers.
Another helpful trick is to test the light before sealing your design. Drop the LED candle or fairy lights inside while you are still arranging the paper, leaves, or paint. This shows you how the jar will look when illuminated. Some colors that seem mild in daylight become rich and dramatic at night, while others disappear. Yellow and orange tissue paper create a warm candle-like glow. Blue and green feel cooler and more modern. White tissue paper gives a frosted lantern effect that works almost anywhere.
For group projects with kids, LED lights are the way to go. Children can decorate freely with paper, stickers, ribbon, and glitter without creating safety concerns around open flames. The jars also make fun family holiday crafts because every person’s luminary looks different. One child may create a rainbow jar, another may make a monster face, and an adult may try to create a minimalist Scandinavian winter lantern before secretly adding glitter anyway.
If you are making luminaries for a party, create them assembly-line style. Clean all jars first, then cut or tear all decorative materials, then glue in batches. This keeps the process efficient and prevents the entire table from becoming a sticky supply swamp. Let the jars dry overnight if possible, especially if you plan to transport them.
My favorite version is still the pressed leaf luminary. It looks handmade in the best way: warm, natural, and seasonal without being fussy. Place three on a dining table with a few small pumpkins or pinecones, and you have a centerpiece that looks thoughtful but does not require a degree in floral design. The runner-up is the Epsom salt winter jar, which sparkles beautifully and makes a recycled jar look like it wandered in from a snowy cottage.
The most practical advice? Keep a few clean jars stored with your craft supplies. Once you realize how easy glass jar luminaries are, you will start seeing every empty jar as potential decor. Pasta sauce jar? Future patio lantern. Pickle jar? Rustic centerpiece. Jam jar? Tiny glowing gift. Congratulations: you are now the person who says, “Don’t throw that away, I can make something with it.” Welcome to the club. We have Mod Podge.
Conclusion
Learning how to make glass jar luminaries DIY-style is one of the easiest ways to turn everyday materials into warm, charming decor. With clean recycled jars, a little Mod Podge, simple decorations, and LED lights, you can create glowing accents for holidays, parties, weddings, patios, or cozy nights at home. The project is affordable, customizable, and beginner-friendly, but the finished result feels thoughtful and special.
Whether you choose pressed leaves, frosted Epsom salt, tissue paper, lace, sea glass, or painted silhouettes, the key is to keep the design light enough for the glow to shine through. Use flameless candles whenever possible, let your layers dry properly, and do not worry about tiny imperfections. Once the lights go on, your jars will look magical. Sometimes the best home decor begins as something headed for the recycling bin.