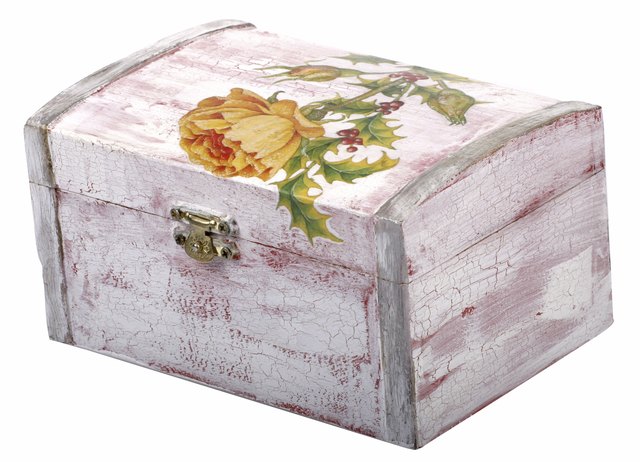
Gluing a photograph to wood and finishing it with shellac can turn an ordinary print into a warm, handmade display piece. The finished project may look as though it came from an expensive artisan shop, even when the wood started life as a humble craft-store plaque. That is the magic of a good finishand, occasionally, flattering lighting.
The process is simple in theory: prepare the wood, attach the photo, smooth it flat, let the adhesive dry, and protect everything with shellac. In practice, however, wet glue can wrinkle paper, trapped air can create bubbles, and an enthusiastic first coat of shellac can smear an inkjet print faster than you can say, “That was Grandma’s only copy.”
This guide explains how to glue photos to wood and apply shellac without damaging the image. It also covers adhesive selection, wood preparation, drying times, application methods, common mistakes, and practical lessons learned from hands-on projects.
Can You Shellac Over a Photo Glued to Wood?
Yes, shellac can be applied over a photograph mounted on wood, but the photo and adhesive must be completely dry first. You should also test the entire finishing process on a spare print because inks, toners, photo papers, and shellac formulas do not all react in exactly the same way.
Shellac is an alcohol-based finish that dries quickly and builds a clear protective film. Clear shellac adds warmth without changing colors as dramatically as amber shellac. Amber shellac can produce an attractive vintage effect, but it may turn bright whites creamy and shift pale blues or skin tones toward gold.
The safest approach for most projects is to begin with several extremely light spray coats. These initial “dust coats” help isolate the image before wetter coats are applied. Brushing liquid shellac directly onto an unsealed inkjet print is riskier because the solvent and brush movement may disturb the ink or paper surface.
Materials and Tools You Will Need
- A smooth, flat wood panel, plaque, plywood square, or hardwood board
- A duplicate photograph or freshly printed copy
- Neutral-pH PVA adhesive or a decoupage medium suitable for paper and wood
- Clear shellac, preferably in an aerosol can for the first coats
- 150-, 180-, 220-, and 320-grit sandpaper
- A foam brush or soft natural-bristle finishing brush
- A brayer, rubber roller, plastic scraper, or clean gift card
- Wax paper, parchment paper, or silicone release paper
- A clean lint-free cloth
- A utility knife, metal ruler, and cutting mat
- A flat board and several books or light clamps
- Disposable gloves and adequate ventilation
Choosing the Right Photograph
Laser-printed copies are often easier to seal because toner is fused to the paper with heat. Toner is not automatically immune to every solvent, however, so a test piece is still necessary. Inkjet photographs can also work well, but they should be allowed to dry and stabilize before gluing or finishing.
Matte or satin paper is usually easier to mount than heavy, resin-coated glossy paper. It lies flatter, accepts adhesive more evenly, and is less likely to show fingerprints. Glossy photo paper can still be used, but it may require longer drying time and more careful pressure during mounting.
Choosing the Best Glue for Photos on Wood
A neutral-pH PVA adhesive is a strong choice for keepsake projects because it dries clear, bonds paper to porous surfaces, and has good lay-flat properties. A commercial decoupage medium is another beginner-friendly option because it spreads easily and provides enough working time to position the image.
Avoid thick beads of ordinary wood glue. Wood glue can bond paper, but excessive moisture and uneven application may cause ridges, dark spots, or permanent wrinkles. Spray adhesive can produce a smooth bond, although repositioning may be difficult and overspray can create a sticky little weather system around your workbench.
How to Glue Photos to Wood Then Shellac: Step by Step
Step 1: Prepare and Sand the Wood
Start with a flat, dry piece of wood. Sand the face and edges with 150-grit sandpaper, followed by 180-grit. The goal is to remove milling marks, splinters, dents, and raised grain without polishing the wood so finely that the adhesive struggles to grip it.
Round sharp edges slightly if the panel will be handled frequently. Vacuum the sanding dust, then wipe the surface with a clean, dry, lint-free cloth. Do not leave dust behind; every forgotten speck has dreams of becoming a visible bump beneath the photograph.
If you plan to stain or paint the exposed wood border, complete that work before attaching the photo. Allow the color coat to dry fully according to the product instructions. Keep wax, furniture polish, silicone, and oily cleaners away from the bonding area because they can interfere with adhesion.
Step 2: Trim and Test-Fit the Photo
Place the photo on the panel and decide whether it will cover the entire face or leave a visible wooden border. Use a metal ruler and sharp utility knife to make clean cuts. Scissors are acceptable for casual projects, but a knife usually produces straighter edges.
Mark the placement lightly with a pencil. For a centered image, measure the border on all four sides rather than trusting your eyes. Human vision is excellent at recognizing faces and surprisingly bad at noticing that a photograph is tilted three degrees until the glue has cured.
Before proceeding, prepare a small test piece using a scrap of the same wood, paper, adhesive, and shellac. This sample reveals whether the ink runs, the paper darkens, or the finish changes the colors.
Step 3: Let the Print Dry Completely
A newly printed photograph may feel dry while moisture or solvents remain within the coating. Allow an inkjet print to rest in a clean, dry location for at least 24 hours when possible, especially if it was printed on glossy paper or in humid conditions.
Handle the print by its edges or wear clean cotton gloves. Oils and moisture from fingers can leave marks that become more obvious after a clear finish is applied.
Step 4: Apply a Thin, Even Layer of Adhesive
Place the photo face down on a clean sheet of wax paper. Spread a thin, uniform coat of adhesive over the back, reaching all the way to the edges. Depending on the adhesive, you may also apply a very thin coat to the wood.
Do not flood the paper. Excess glue does not create an extra-strong masterpiece; it creates a damp photograph that behaves like a potato chip. Aim for complete coverage without puddles, dry islands, or thick ridges.
Work efficiently so one area does not begin drying before another. Pay particular attention to corners and edges, which are the first places to lift later.
Step 5: Position and Smooth the Photo
Lower one edge of the photograph onto the wood using your pencil marks as a guide. Gradually lay the rest of the image down instead of dropping it flat all at once. This method pushes air forward and reduces the chance of trapping bubbles.
Cover the photo with clean wax paper. Use a brayer, rubber roller, or plastic scraper to smooth from the center toward the edges. Apply firm but controlled pressure. If wet glue squeezes out, wipe it away immediately with a barely damp cloth without soaking the wood or photo.
Do not repeatedly scrape the same area. Wet paper becomes fragile, and aggressive rubbing can stretch, burnish, or tear the surface.
Step 6: Press the Photo Flat and Let It Dry
Place a fresh sheet of wax paper over the mounted photo, followed by a flat board. Add evenly distributed books or use light clamps around the perimeter. The pressure should keep the photo flat without forcing all of the adhesive out.
Leave the assembly undisturbed for the full drying time recommended by the adhesive manufacturer. For many water-based craft adhesives, an overnight wait is sensible. A 24-hour drying period is even better before shellac is introduced.
Do not trap a freshly glued project under nonporous weight for days. After the initial pressing period, remove the weight and allow the panel to air-dry so residual moisture can escape.
Step 7: Seal the Image With Light Shellac Mist Coats
Move the project to a well-ventilated area away from flames, pilot lights, sparks, heaters, or smoking materials. Shellac solvent is flammable, and ventilation is essential during application and drying.
Shake the aerosol shellac according to the label. Hold the can approximately 10 to 12 inches from the panel and spray one extremely light pass. The surface should look barely misted rather than wet.
Let that coat dry, then apply two or three additional light passes. Alternate the spray direction with each coat. These first coats create a barrier over the photograph and reduce the risk of ink movement when heavier coats are added.
Resist the temptation to achieve a glossy surface immediately. The first coat should look unimpressive. That is its job. It is a diplomatic introduction between the photograph and the solvent, not the grand finale.
Step 8: Build the Final Shellac Finish
After the protective mist coats have dried, apply additional light coats until the surface has an even appearance. Aerosol shellac is convenient for the whole project, particularly when the photograph covers most of the panel.
If you prefer liquid shellac, use a soft brush or lint-free pad and work quickly. Apply the finish in long, confident strokes. Avoid repeatedly brushing an area that has started to become tacky because fresh alcohol can soften the previous shellac and create drag marks.
Allow each coat to dry according to the product label. Shellac may feel dry within minutes, but giving the project additional time before sanding or handling helps prevent fingerprints and surface damage.
Apply three to six coats depending on the desired depth and protection. Thin coats produce a smoother result than one heavy coat, which may sag, ridge, or remain soft longer.
Step 9: Sand Carefully Between Coats
Once several coats have built a protective film, lightly sand dust nibs with 320- or 400-grit paper. Use very little pressure and avoid sanding through the finish over the image.
Do not sand the photograph itself after only one or two coats. At that stage, the protective film may be too thin. Concentrate first on obvious roughness along the exposed wooden border.
Remove all sanding dust with a clean lint-free cloth before recoating. Avoid oily tack cloths unless the manufacturer confirms that they are compatible with shellac.
Step 10: Let the Finished Project Cure
When the final coat has dried, place the panel in a clean, dust-free area. Avoid stacking objects on it or wrapping it tightly for several days. A finish may be dry enough to touch before it has reached its best hardness.
Attach hanging hardware only after the surface can be handled safely. Add felt pads to the back if the piece will rest against a painted wall.
Common Problems and How to Fix Them
The Photo Develops Bubbles
Small bubbles usually result from uneven glue coverage, trapped air, insufficient pressure, or excessive moisture. While the adhesive is still wet, cover the photo with wax paper and gently roll the bubble toward the nearest edge.
After the adhesive has dried, repairs become harder. A tiny bubble can sometimes be pierced with a fine needle, injected with a minute amount of adhesive, and pressed flat. Test this technique on scrap material before attempting it in a visible area.
The Ink Smears or Changes Color
Ink movement indicates that the print was not fully dry or that the shellac coat was too wet. Stop applying finish and let the surface dry. Do not wipe the image, as wiping usually spreads the damage.
For the next attempt, use a duplicate print, allow more drying time, and begin with lighter aerosol coats. A laser copy may also be more cooperative than the original inkjet print.
The Paper Wrinkles
Minor ripples may flatten as water leaves the adhesive. Severe wrinkles usually mean too much glue was applied or pressure was uneven. Use less adhesive on the next project and press the entire panel between flat surfaces.
The Shellac Looks Cloudy
Cloudiness can result from moisture, high humidity, heavy application, or trapped adhesive that was not fully dry. Move the project to a warm, dry, ventilated area and allow additional drying time before deciding whether another coat is necessary.
Brush Marks Appear
Shellac dries quickly, so slow brushing can leave ridges. Use a thinner coat, load the brush adequately, work in one direction, and stop touching the area once it begins to tack. Light sanding after the finish has dried can level minor marks.
How Durable Is a Shellac-Coated Photo?
A shellac finish is well suited to wall art, keepsake plaques, decorative boxes, ornaments, signs, and other indoor pieces that receive light handling. It offers clarity, warmth, easy repair, and fast application.
Shellac is less suitable for outdoor displays, drink coasters, bathroom décor, or tabletops exposed to standing water, heat, cleaning chemicals, or alcoholic beverages. Alcohol can soften shellac, and prolonged moisture may leave white rings or dull areas.
Keep the finished photo away from direct sunlight and high humidity. For an especially valuable image, consider displaying the piece behind UV-filtering glass or acrylic rather than relying on shellac alone for long-term protection.
Conclusion
Learning how to glue photos to wood and then shellac the surface is mostly an exercise in thin layers and patient drying. Prepare the wood carefully, use a flat-drying adhesive, smooth the photograph from the center outward, and allow all moisture to escape before finishing.
When shellac is introduced, begin with nearly invisible spray coats. Build the finish gradually instead of soaking the image. The result should be a smooth, warm, handcrafted display in which the photograph remains the star and the finish quietly does its supporting work.
Workshop Experience: Lessons From Gluing Photos to Wood
The most important lesson from making photo-on-wood projects is that the visible mistake often occurred several steps earlier. A bubble noticed during shellacking was probably created during gluing. A cloudy patch may trace back to moisture trapped beneath the paper. A dark edge may have started as a tiny line of excess adhesive that nobody bothered to remove because lunch was calling.
On an early project, I mounted a family photograph on a pine plaque using a generous layer of craft glue. “Generous” sounded like a positive quality at the time. The photograph looked perfect for about five minutes, then developed three wrinkles across the sky and a bubble directly over one person’s forehead. The lesson was immediate: complete adhesive coverage matters, but thickness does not equal quality.
The next panel received a much thinner coat spread with a foam brush. I lowered the print from one edge, covered it with wax paper, and rolled it slowly from the center outward. That version dried almost perfectly flat. The difference was not expensive equipment or advanced woodworking talent. It was simply controlled moisture and even pressure.
Another useful discovery involved the test print. It is easy to dismiss testing as wasted time, especially when only one panel is being made. In reality, a four-inch scrap can prevent the loss of an entire afternoon. One glossy inkjet print handled light shellac beautifully. A different paper from another printer reacted with a faint color shift. Without the test sample, that change would have appeared on the finished gift.
Spraying the first shellac coats lightly has also proven more reliable than brushing directly over the image. The first mist coat should not make the project look finished. It may appear spotty or slightly rough. After several passes, however, the surface develops enough protection to accept a wetter coat without disturbing the print.
Patience between stages consistently produces better work. A photograph that has dried overnight is easier to handle. Adhesive that has dried for a full day is less likely to trap moisture. Shellac that has had time to harden sands into fine powder instead of rolling into gummy streaks.
Wood selection matters too. Smooth birch plywood provides a clean, modern background, while pine adds knots and rustic character. Hardwood panels feel substantial but require more cutting effort. Whatever wood is selected, flatness is more important than price. A warped board will remain warped after receiving a beautiful photograph; shellac is talented, but it does not negotiate with geometry.
Edges deserve special attention because viewers notice them when they pick up the piece. Lightly rounding the corners, cleaning glue squeeze-out, and carrying the finish over the sides can make an inexpensive panel feel professionally made. For a floating-photo effect, leaving a narrow wood border and staining it before mounting the image works especially well.
Finally, keep expectations appropriate for the finish. A shellac-coated photo plaque can last for years indoors when treated reasonably. It should not be placed beside a sink, used as a cutting board, or tested for resistance to spilled cocktails. Hang it on a wall, place it on a shelf, and let it collect compliments rather than condensation.
The reliable formula is straightforward: use a copy, test every material, apply less adhesive than your nervous instincts demand, press the photo evenly, wait longer than feels necessary, and build shellac with light coats. Follow those habits and the project becomes pleasantly predictablewhich, in a workshop, is another way of saying successful.