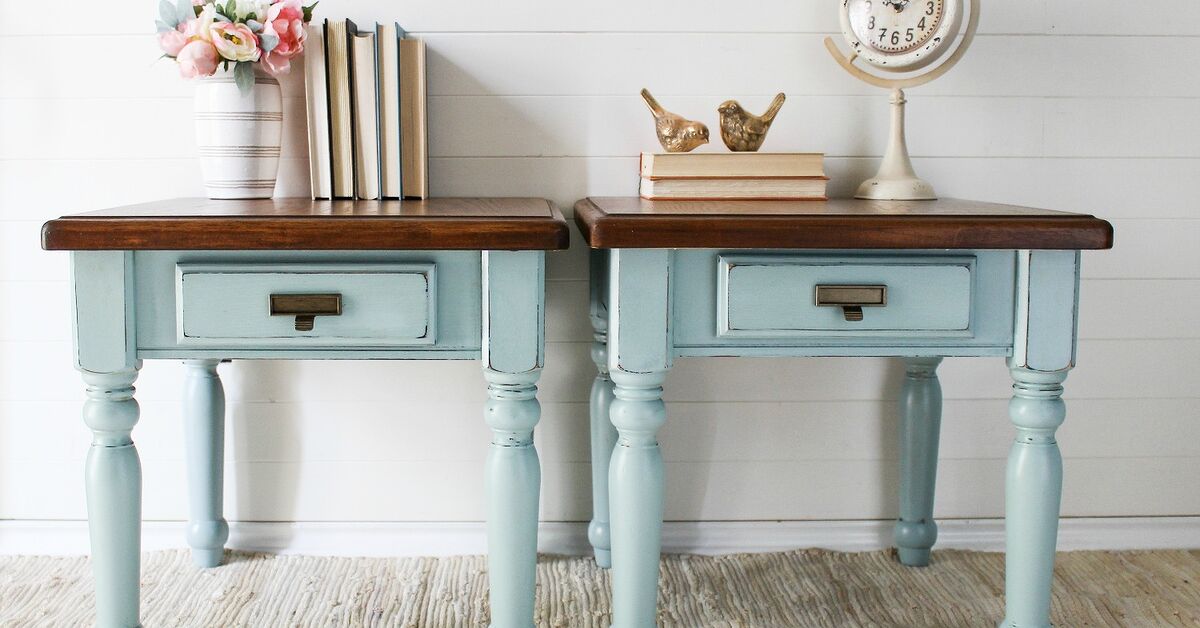
An end table may be small, but it performs an unreasonable number of jobs. It supports the lamp, catches the remote, holds your coffee, displays a plant, he most approachable pieces of furniture to build or update yourself.
A DIY end table can be designed around your room rather than squeezed into it. You can match the exact height of a sofa arm, add storage for chargers, reuse a thrift-store nightstand, or turn inexpensive materials into something that looks surprisingly high-end. The following DIY end table ideas include beginner-friendly makeovers, practical woodworking projects, and creative designs using wood, tile, concrete, crates, and salvaged materials.
Research synthesis: ch0turn482851search15turn482851search35
Plan Your DIY End Table First
Measure the Sofa or Chair
The tabletop should generally sit close to the height of the nearby sofa or chair arm. A table that is too low forces you to reach awkwardly for a drink, while an excessively tall one can block sightlines and make the furniture arrangement feel unbalanced.
Measure the arm height, available floor area, and nearby walkways. A compact end table might be 14 to 18 inches wide, while a larger design can exceed 20 inches. Use painter’s tape or a cardboard template to preview the footprint before cutting any material.
List the Features You Actually Need
Decide whether the table needs a drawer, open shelf, charging area, magazine rack, plant-friendly surface, or outdoor finish. Function should influence the design from the beginning. A beautiful table that cannot hold your lamp is technically just a sculpture with confidence.
Select Suitable Materials
Pine and poplar are approachable options for painted or stained furniture. Plywood is stable and works especially well for modern box-style designs. MDF provides a smooth painted finish but requires careful edge preparation and should normally remain indoors.
Reclaimed boards, crates, old stools, concrete pavers, stone remnants, and thrifted furniture can also become attractive end tables. Inspect reused items for loose joints, rot, odors, insects, and hidden fasteners. Rustic character is welcome; structural mystery is not.
10 DIY Ideas for Stunning End Tables
1. Build a Classic Four-Leg Wood Table
A simple wood table is an excellent first furniture project. The basic design uses four legs, apron boards connecting the legs, and a solid or planked top. Pocket-hole screws provide beginner-friendly hidden joinery, while dowels or traditional mortise-and-tenon joints offer a greater challenge.
Dry-fit the base before applying glue. Measure diagonally from corner to corner; matching diagonal measurements indicate that the frame is square. Attach a solid-wood top with tabletop fasteners or slotted holes so seasonal wood movement does not split the surface. For an easy designer look, stain the top and paint the base in a contrasting color.
Construction references: a-Friendly C-Table
A C-table slides partly beneath a sofa or chair, bringing the tabletop directly over the seat edge. It is convenient for laptops, drinks, notebooks, and anyone who believes the coffee table is located in another time zone.
The structure usually consists of a flat base, one vertical support, and a cantilevered top. Make the base broad enough to resist tipping and reinforce each corner carefully. Before building, measure the clearance under the sofa and confirm that the upper surface will fit comfortably above the seat or arm.
3. Update a Thrifted Nightstand
A secondhand nightstand can become a custom end table with less construction and plenty of personality. Look for sound joints, functional drawers, and proportions that work beside your seating. Scratches, dated stain, and unfashionable knobs are usually easy to correct.
Clean the piece, repair loose joints, fill damaged areas, and scuff-sand glossy surfaces. Apply an appropriate primer followed by several thin coats of furniture paint. New drawer pulls can shift the style dramatically. Cane webbing, patterned paper, contrasting feet, or a geometric painted detail can make the makeover feel completely original.
Makeover references: olorful Tiled End Table
Tile can turn a plain cube or inexpensive table into a bold accent piece. Mosaic sheets are relatively easy to wrap around corners, while larger tiles produce a clean architectural appearance. Begin with a rigid substrate and plan the complete layout before applying adhesive.
Use spacers to maintain even grout lines, and account for the combined thickness of the tile, adhesive, and grout. Choose matching grout for a seamless appearance or a contrasting shade for a graphic effect. Seal porous materials when required by the manufacturer.
This idea works particularly well in colorful living rooms, bathrooms, covered patios, and spaces where the beige furniture appears to be organizing a committee.
5. Combine Wood With Concrete or Stone
A concrete paver, cast slab, marble remnant, or leftover piece of stone can create a substantial tabletop. Because these materials are heavy, the base must resist both downward weight and sideways movement.
A three-leg base can remain stable on slightly uneven floors, while four-leg designs may benefit from adjustable glides. Secure the top with suitable adhesive, brackets, or mechanical support rather than optimism. Ask local stone fabricators about small remnants; they may have pieces that are too small for countertops but ideal for an end table.
Mixed-material references: Live-Edge Slab
A natural-edge wood slab or thick tree slice brings organic texture into a room. Choose dry, stable material, remove loose bark, flatten the top, fill deep cracks if desired, and sand the surface progressively. Sealing all sides helps the wood respond more evenly to humidity.
Hairpin legs create a modern industrial look, while a wood pedestal feels more rustic. Keep the base visually simple if the grain is dramatic. The tree has already completed most of the design work and would probably appreciate some credit.
7. Turn Wooden Crates Into Storage
A sturdy wood crate can become a fast, affordable table with built-in storage. Position one crate vertically for a narrow design or combine two crates for a wider surface. Sand rough edges, reinforce weak corners, and fasten multiple crates together securely.
Add a solid top if the slats are uneven. Feet create a more polished profile, while casters make the table mobile. Point the opening toward the sofa for discreet storage or toward the room for books and decorative objects. Lightweight decorative crates should receive an internal support frame before carrying substantial weight.
8. Add a Drawer or Charging Station
A shallow drawer can organize remotes, glasses, cables, and other small objects. A lower shelf provides space for books or baskets, while a cabinet door can hide routers, power cords, and technology that somehow reproduces overnight.
For charging capability, install only listed electrical products according to their instructions. Provide ventilation, cord strain relief, and access for replacement. Route cables through a smooth grommet rather than an unfinished hole. Test a concealed wireless charger through the intended tabletop thickness before permanently assembling the furniture.
9. Build a Round Pedestal Table
A round table softens a room dominated by rectangular furniture and eliminates sharp corners from busy walkways. Cut the top with a jigsaw and circle guide, purchase a precut wood round, or repurpose a sturdy tray.
The base might be a turned furniture leg, fluted cylinder, cluster of dowels, or salvaged pedestal. Make the base broad or heavy enough to resist tipping. Paint the entire piece one saturated color for a sculptural effect, or pair a stained top with a painted base.
10. Construct Space-Saving Nesting Tables
Nesting tables provide extra surfaces when guests arrive and slide together when more floor space is needed. Build two or three matching tables with gradually decreasing widths and heights. Include enough clearance for paint, finish, felt pads, and normal wood movement.
Waterfall-style plywood designs suit modern interiors, while slim framed tables feel more traditional. Use one finish across the entire set or choose closely related colors. Nesting tables are especially useful in apartments and multifunctional rooms where another temporary surface is frequently needed.
Space-saving references: e a Professional Finish
Sand Progressively
Begin with a grit appropriate for the condition of the wood, then move through finer grits without making enormous jumps. Sand in the direction of the grain on visible solid wood and soften sharp corners lightly rather than rounding every edge into a bread roll.
Whenever possible, pre-sand shelves and interior panels before assembly. It is easier to smooth a shelf on a workbench than after it has been trapped between four legs like a wooden hostage.
Test Stain and Paint on Scrap
Wood species, sanding grit, conditioner, stain, and topcoat can all change the final color. Test the complete finishing process on an offcut from the project. Some softwoods absorb stain unevenly, so a compatible pre-stain conditioner may help reduce blotching.
Fill exposed plywood edges or cover them with edge banding before painting. Apply primer suited to the material, followed by multiple thin coats. Always follow the finish manufacturer’s instructions for ventilation, drying, recoating, and disposal.
Finishing references: ing Before Applying Finish
Place the unfinished table on a known flat surface and press each corner. If it rocks, check whether the frame is square and whether the legs are equal. Small differences can be corrected with adjustable glides or properly fitted pads. One enormous felt pad is not leveling; it is furniture theater.
Experiences and Lessons From DIY End Table Projects
One of the first lessons learned from building small furniture is that a compact project is not automatically a simple one. End tables place the legs, joints, edges, and drawer openings close together, so small inaccuracies are easy to notice. A base can appear square on the workbench yet wobble after the top is installed. This often happens when clamps pull the frame out of alignment or screws are tightened before both diagonal measurements are checked. Dry-fitting every component, labeling matching joints, and tightening fasteners gradually can prevent a surprising amount of frustration.
Finishing also takes longer than many first-time builders expect. Cutting and assembly may require only an afternoon, while filling, sanding, priming, painting, and curing stretch across several days. That does not mean the project has gone wrong. A tabletop is constantly touched and viewed under direct light, so hurried finishing is especially visible. Several thin coats generally produce a smoother result than one heroic coat. The most difficult step is often resisting the urge to place the lamp on the table while the finish is still soft.
Thrifted furniture teaches another useful lesson: structure is usually more valuable than surface appearance. A scratched solid-wood nightstand with strong joints may be a better candidate than a clean-looking piece made from swollen particleboard. Cleaning is also more important than it appears. Furniture polish, wax, cooking residue, and unidentified garage grime can prevent primer or paint from adhering. A careful wash, complete drying, minor repairs, and appropriate sanding often determine whether the new finish lasts for years or begins peeling within weeks.
Mixed materials require attention to proportion and weight. A concrete or stone top may overwhelm a narrow base, while a thick wood slab can look awkward on delicate legs. Before committing, place the components together or create a cardboard mock-up. Cardboard is useful for testing tabletop dimensions, round shapes, shelf positions, and clearance around a recliner. Five minutes with a template can prevent five hours of explaining why the new table blocks the chair from opening.
Customization does not require advanced joinery. A basic wooden frame can look distinctive through its proportions and finishing details. Tapered legs, a routed edge, fluted trim, leather drawer pulls, a contrasting shelf, or one bold paint color may be enough. Projects tend to look more polished when they feature one or two memorable details rather than every current furniture trend at once.
The final test should happen beside the intended seat. Place a lamp, mug, book, and phone on the table. Open the drawer while seated. Confirm that cords reach an outlet and that the base does not interfere with feet, pets, or reclining mechanisms. A successful DIY end table eventually disappears into the routine of the roomuntil a guest asks where you bought it. At that moment, modesty is entirely optional.
Conclusion
DIY end tables offer an ideal balance of practical woodworking and personal design. Beginners can build a basic four-leg table, update a thrifted nightstand, or reinforce stacked crates. More adventurous makers can experiment with tile, concrete, live-edge wood, hidden charging, nesting frames, and custom storage.
Measure the room first, design for stability, prepare every surface carefully, and allow the finish to cure completely. The goal is not factory perfection. It is a durable, useful table that suits your home better than a generic product ever could. Slight variations in grain or small handmade details are not defects; they are evidence that your furniture has a storypreferably one with fewer stripped screws than the first draft.
Note: Wear suitable eye, hearing, and respiratory protection, secure every workpiece, use tools only as directed by their manufacturers, and follow all product instructions for ventilation, application, drying, and disposal.