A kitchen island is the golden retriever of home projects: friendly, useful, and somehow always where everyone gathers. The good news is that you do not need a luxury remodel budget to get one. With unfinished cabinets, a butcher block top, thoughtful trim, and a weekend’s worth of “where did I put the drill?” energy, you can build a gorgeous DIY kitchen island that looks custom without requiring custom-cabinet money.
This project works because it combines two practical materials: unfinished stock cabinets and a butcher block countertop. The cabinets provide instant storage and structure, while the butcher block top adds warmth, texture, and that cozy “yes, I do make pancakes from scratch sometimes” feeling. Even better, unfinished cabinets allow you to paint, stain, distress, glaze, or seal the base to match your kitchen instead of forcing your kitchen to match a store display.
Below is a complete guide to planning, building, finishing, styling, and maintaining a DIY kitchen island from unfinished cabinets and a butcher block top. It is written for real homes, real budgets, and real humans who occasionally measure twice and still cut something suspiciously short.
Why Build a Kitchen Island From Unfinished Cabinets?
Unfinished cabinets are one of the smartest shortcuts in DIY kitchen design. They are already built to function as cabinet boxes, which means you skip the complicated part of constructing drawers, doors, face frames, and shelving from scratch. Instead of starting with lumber and a nervous laugh, you begin with a solid foundation.
The main advantage is customization. You can choose base cabinets with drawers, doors, shelves, pull-out trays, or a trash-bin cabinet depending on how you use your kitchen. Need a baking station? Choose deep drawers for mixing bowls and sheet pans. Need more hidden storage? Use cabinets with doors and adjustable shelves. Want a breakfast-prep zone? Add one drawer cabinet for utensils and one door cabinet for small appliances.
Unfinished cabinets also give you control over the final look. A painted navy island with brass hardware feels polished and modern. A sage green base with black pulls feels cottage-inspired. A warm walnut stain leans rustic and traditional. White paint creates a classic farmhouse look. The island becomes a design feature instead of just a storage box wearing a countertop hat.
Why Butcher Block Is Perfect for a DIY Island
Butcher block is popular for kitchen islands because it adds natural warmth in a room often filled with hard surfaces. Stone, tile, stainless steel, and painted cabinets can look beautiful, but wood makes the space feel more inviting. It softens the kitchen visually and gives the island that furniture-like quality designers love.
A butcher block top also makes sense for DIYers. It is generally easier to cut, sand, finish, and install than stone. It can be trimmed with common woodworking tools, and small imperfections are more forgiving. If you scratch the surface later, you can sand and refinish it. Try doing that with chipped quartz while keeping your blood pressure cute.
For an island, butcher block can serve as a prep surface, buffet station, coffee bar, homework zone, or casual dining spot. However, it does need proper sealing and regular care. Wood and standing water are not best friends. Treat the surface correctly, wipe spills quickly, and your butcher block island can age beautifully instead of turning into a science experiment.
Planning the Size and Layout
Before buying cabinets, decide where the island will sit and how people will move around it. A stunning island that blocks the dishwasher is not a kitchen upgrade; it is an obstacle course with drawer pulls.
Measure the Floor Space
Start by measuring the open area in your kitchen. Mark the island footprint on the floor with painter’s tape. Live with that outline for a day or two. Open the refrigerator. Open the oven. Walk around with a laundry basket. Pretend you are carrying a hot pan. If the taped shape makes you shuffle sideways like a crab, shrink the island.
Most kitchens need generous clearance around an island so doors and appliances can open comfortably. If your kitchen is tight, consider a smaller island, a narrow cabinet configuration, or a movable island instead of a fixed one.
Choose Your Cabinet Combination
A simple island can be made from two or three base cabinets joined together. Common combinations include two 30-inch base cabinets back to back, one drawer base plus one door base, or a center cabinet flanked by narrow drawer units. If you want seating, plan for a butcher block overhang on one side, supported properly with brackets, corbels, legs, or a frame.
Think about function first. If you cook often, drawers are usually more useful than deep lower shelves because you can see everything at once. If you store bulky appliances, doors may be better. If your kitchen trash can currently lives in plain sight like a rebellious raccoon, a pull-out trash cabinet can make the whole room feel calmer.
Tools and Materials You May Need
Your exact supply list depends on the island design, but most DIY kitchen island projects use similar basics. Plan for unfinished base cabinets, a butcher block countertop, wood screws, cabinet clamps, construction adhesive, finish nails, trim, base molding, sandpaper, primer, paint or stain, polyurethane or another suitable topcoat for the cabinet base, butcher block oil or sealer, mounting brackets, shims, a level, drill, circular saw or jigsaw, stud finder, measuring tape, wood filler, caulk, and safety gear.
If you are adding electrical outlets, hire a licensed electrician or follow local code requirements. A fixed kitchen island may have electrical rules that do not apply to a freestanding furniture piece. Electricity is not the part of the project where you want to improvise like a cooking show contestant.
Step-by-Step: How to Build the Island
Step 1: Dry-Fit the Cabinets
Place the unfinished cabinets where the island will go. Check the layout from every angle. Make sure doors and drawers open without hitting each other. If you are using cabinets back to back, align the faces carefully. If you are using side-by-side cabinets, clamp them together and check that the front edges are flush.
This is also the moment to confirm the butcher block overhang. A typical countertop overhang for cabinet edges may be modest, while seating overhangs need more depth for knees and comfort. Larger overhangs require support, so do not rely on optimism and two screws to hold up breakfast.
Step 2: Attach the Cabinets Together
Once the dry fit looks right, clamp the cabinet frames together. Drill pilot holes through the face frames or side panels where appropriate, then fasten the cabinets with screws. Keep checking for level and alignment as you work. Cabinet boxes can shift slightly, and a small mismatch at the beginning can become an obvious gap once the trim and countertop are installed.
If the floor is uneven, use shims under the cabinet base. Trim excess shim material after the island is secured. A level island matters because drawers operate better, the countertop sits properly, and soup does not slowly migrate to one side of the bowl.
Step 3: Secure the Island Base
For a permanent island, the base often needs to be anchored to the floor. One common method is to attach wood cleats to the floor inside the island footprint, then fasten the cabinet base to those cleats. The exact method depends on your flooring, subfloor, cabinet style, and local requirements.
Avoid fastening through flooring in a way that creates damage or instability. If your kitchen has floating floors, radiant heat, tile, or uncertain subfloor conditions, get professional advice before anchoring. A kitchen island should feel solid, not like furniture that might wander away during taco night.
Step 4: Add End Panels, Trim, and Decorative Details
Unfinished cabinets often look plain from the sides and backs. This is where trim transforms the project from “cabinets in the middle of the kitchen” to “custom island that definitely cost more than it did.”
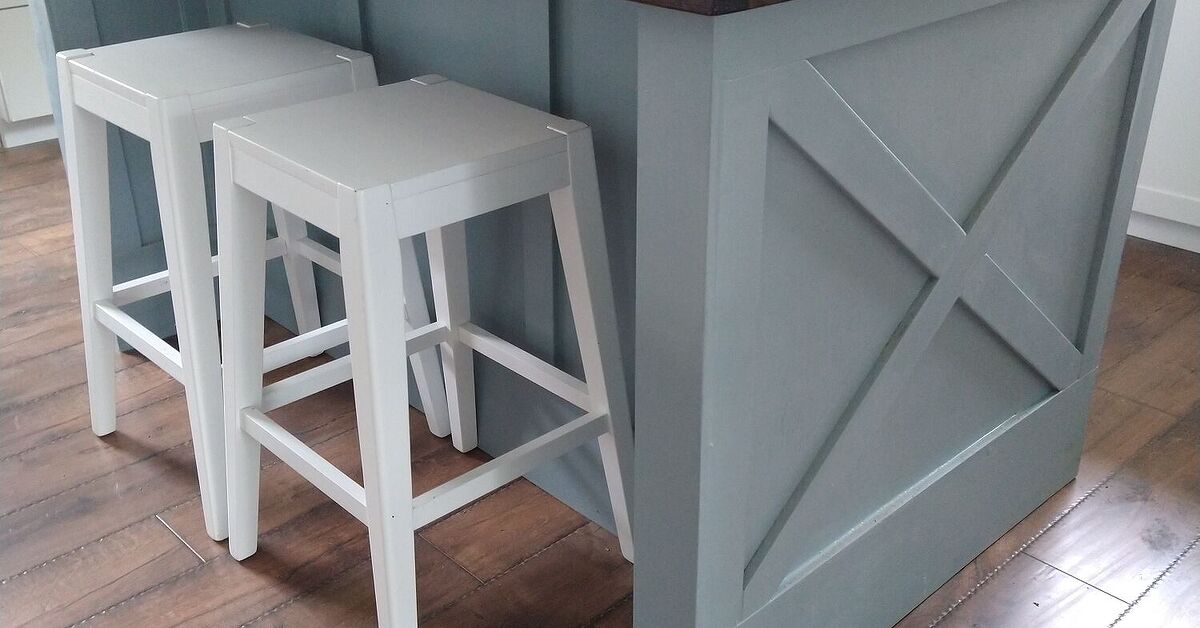
Add finished panels to exposed sides. Use baseboard or base shoe around the bottom. Frame the ends with simple molding for a shaker-style look. Add beadboard for cottage charm, fluted trim for a designer detail, or furniture-style legs if your island has an overhang. Fill nail holes, caulk seams, and sand everything smooth before finishing.
Step 5: Paint or Stain the Cabinet Base
Because the cabinets are unfinished, surface prep is essential. Sand lightly, remove dust, and apply a quality primer if painting. For stain, test the color on a hidden area or scrap piece first because different woods absorb stain differently. A stain that looks “warm oak” on the can may look “orange gym floor” on your cabinet.
For paint, choose a durable cabinet-grade enamel or trim paint. Kitchen islands get bumped by stools, shoes, pets, backpacks, and the occasional hip-check from someone opening a stubborn jar. A tough finish is worth it. Apply thin coats, let each coat dry properly, and avoid rushing the cure time.
Step 6: Prepare the Butcher Block Top
Dry-fit the butcher block before attaching it. Check the overhang on all sides and mark any cuts. Use a straightedge and painter’s tape to reduce tear-out when cutting. Sand cut edges smooth and slightly ease sharp corners so they feel comfortable to the touch.
Seal all sides of the butcher block, not just the top. The underside and edges also absorb moisture. If only one side is sealed, the wood can expand unevenly, which may cause cupping or movement. Follow the manufacturer’s instructions for your chosen finish, whether it is mineral oil, butcher block conditioner, water-resistant sealer, or a food-safe hardwax oil.
Step 7: Attach the Butcher Block
Wood naturally expands and contracts with humidity, so attach the butcher block in a way that allows slight movement. Many DIYers use screws with washers through oversized holes or countertop mounting brackets designed for wood movement. Avoid overtightening. The goal is secure, not strangled.
If the island has a seating overhang, install proper support. Depending on the size of the overhang, that may mean heavy-duty brackets, corbels, support legs, or a hidden frame. A beautiful butcher block top should not sag like a tired sandwich.
Design Ideas for a Gorgeous Finish
The magic of this project is that the same basic build can suit many kitchen styles. For a modern farmhouse island, paint the base warm white, add black cup pulls, and finish the butcher block with a natural oil. For a coastal kitchen, try soft blue or muted green paint with brushed nickel hardware. For a moody designer look, use deep charcoal, forest green, or navy with warm brass pulls.
If your kitchen already has painted perimeter cabinets, consider making the island a contrasting color. A darker island grounds a light kitchen. A wood-stained island adds warmth to white cabinets. A colorful island can create personality without committing the entire kitchen to a bold shade.
Lighting also matters. Pendant lights above the island make it feel intentional and finished. Choose fixtures that match the scale of the island. Tiny pendants over a large island can look like earrings on a refrigerator, while oversized pendants in a small kitchen can feel like low-flying aircraft.
Smart Storage Upgrades
A DIY kitchen island should work hard. Add drawer organizers for utensils, dividers for cutting boards, pull-out baskets for produce, hooks for towels, or a narrow shelf for cookbooks. If one end of the island faces the dining area, consider open shelving for serving bowls or baskets. If children use the island for homework, dedicate a drawer to pencils, chargers, and the mysterious object every household owns but cannot identify.
For small kitchens, every inch counts. A towel bar on one side, magnetic strips inside a cabinet door, or a built-in paper towel holder can reduce countertop clutter. The best island does not just look good in photos; it solves daily annoyances quietly.
Butcher Block Maintenance Tips
Butcher block is durable, but it needs care. Clean it with mild dish soap and warm water, then dry it promptly. Avoid letting wet dishes, damp towels, or spills sit on the surface. Use trivets under hot pans because wood can scorch. Use cutting boards if your finish is not meant for direct cutting, and always follow the finish manufacturer’s food-safety instructions.
If your butcher block is oil-finished, reapply food-safe mineral oil or butcher block conditioner as needed. Dry-looking wood is thirsty wood. If the surface gets scratched, light sanding and reconditioning can usually refresh it. That repairable quality is one reason butcher block remains a favorite for DIY islands.
Common Mistakes to Avoid
Skipping the Layout Test
Never assume an island will fit because it looked good online. Tape the footprint on the floor first. Test appliance doors, traffic paths, and seating space before committing.
Ignoring Countertop Support
Butcher block is heavy. Overhangs need proper support, especially if people will lean, sit, or eat at the island. Support brackets are less exciting than hardware shopping, but much more important.
Sealing Only the Top Surface
Seal the underside and edges as well. Wood moves with moisture, and balanced finishing helps prevent problems.
Choosing Pretty Hardware That Hurts
Some handles look gorgeous but feel sharp, awkward, or too small. Kitchen island hardware gets used constantly. Choose pulls that feel good in your hand and do not snag clothing as people walk by.
Budget-Friendly Ways to Make It Look Custom
Trim is your best friend. Add simple shaker panels to the ends, install base molding, and use decorative corner posts to create a furniture-style island. Upgrade the hardware. Paint the base in a rich color. Add a thicker-looking edge to the butcher block if the design allows. Use baskets or styled open shelves to make storage feel intentional.
Another trick is to match one element already in your kitchen. If your faucet is matte black, use matte black pulls. If your shelves are warm wood, choose a butcher block finish in a similar tone. Repeating materials makes a DIY project feel integrated rather than dropped into the room by a very enthusiastic weekend warrior.
Experience Notes: What This Project Feels Like in Real Life
Building a DIY kitchen island from unfinished cabinets and a butcher block top is one of those projects that seems simple in theory and deeply educational in practice. The basic idea is easy: put cabinets together, add a top, make it pretty. The reality includes discovering that your floor has the emotional complexity of a roller coaster, your wall is not square, and your favorite pencil has entered another dimension.
The first major lesson is that planning saves money. It is tempting to start buying cabinets the moment inspiration strikes, especially when you see a photo of a perfect island with golden light and a bowl of lemons behaving like paid actors. But measuring first prevents regret. When you tape the footprint on the floor, you may realize that a 72-inch island would technically fit but would also turn your kitchen into a narrow hallway with snacks. A slightly smaller island often feels more luxurious because people can move comfortably around it.
The second lesson is that unfinished cabinets are wonderfully flexible, but they are not automatically flawless. Inspect them before finishing. Check door alignment, drawer movement, rough edges, and gaps. Sand more than you think you need to. A smooth painted finish depends heavily on prep work. Paint does not hide roughness; it throws a tiny spotlight on it and invites all your guests to notice.
The third lesson is that butcher block changes the whole mood of the kitchen. The moment the wood top goes on, the island stops looking like a project and starts looking like furniture. It adds warmth immediately. Even a basic cabinet base feels richer under a thick slab of wood. But the butcher block also demands respect. Seal it before installation if possible, including the underside. Do not leave it raw while you decide what finish to use. Raw wood in a busy kitchen is like wearing white pants to a spaghetti dinner: brave, but risky.
Another real-world tip is to think carefully about color. Bold island colors are beautiful, but test samples in your kitchen’s actual light. A deep green that looks elegant online may look nearly black at night. A cheerful blue may become much brighter under daylight. Paint a large sample board and move it around the kitchen before committing. The island will be a focal point, so the color should feel good in morning coffee light and midnight-snack light.
Hardware is another place where experience matters. Oversized pulls can make inexpensive cabinets look more custom, but they need to match the cabinet scale. Small knobs may disappear on a large island. Long pulls may interfere with adjacent drawers or doors if placement is careless. Before drilling holes, tape the hardware in place and pretend to use it. This looks ridiculous, but it is better than drilling confidently into regret.
The most satisfying part of the project is the final styling. Once the island is built, resist the urge to cover it with every decorative item you own. A wood bowl, a small lamp, a vase of herbs, or a tray with everyday essentials is enough. The butcher block is already beautiful. Let it breathe. The goal is not to create a showroom display; it is to create a hardworking center of the kitchen where chopping vegetables, serving pizza, wrapping gifts, helping with homework, and drinking coffee can all happen without drama.
In the end, this DIY project feels valuable because it improves how the kitchen works every day. You gain storage, prep space, and a natural gathering spot. You also get the pride of knowing you built something useful with your own hands. Every tiny imperfection becomes part of the story. That slightly uneven bead of caulk? Character. The extra trip to the hardware store? Tradition. The finished island? Absolutely worth it.
Conclusion
A DIY gorgeous kitchen island from unfinished cabinets and a butcher block top is one of the best projects for homeowners who want custom style without a custom price tag. It combines practical storage, a warm work surface, and endless design flexibility. With careful measuring, solid cabinet attachment, proper butcher block sealing, and a few thoughtful details, you can create an island that looks intentional, functions beautifully, and becomes the heart of the kitchen.
The secret is to treat the project like both furniture and cabinetry. Make it strong, make it level, make it easy to clean, and make it fit the way your household actually lives. Whether your style is farmhouse, modern, cottage, rustic, or somewhere between “Pinterest board” and “kids live here,” this island can be tailored to your space. And once it is finished, do not be surprised when everyone gathers around it. That is what kitchen islands do best.