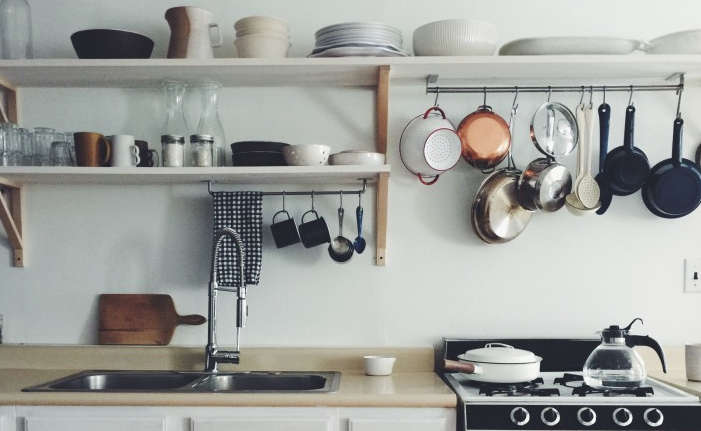
If your kitchen currently looks like it still remembers dial-up internet, take heart: a dramatic upgrade does not always require a contractor, a dumpster, and a financial therapist. Sometimes it requires a gallon of paint, new hardware, decent lighting, and the courage to peel off a backsplash backing sheet without gluing it to your own shirt.
The truth is that many budget kitchen makeovers work because they focus on what your eyes notice first. Cabinets dominate the room. Hardware acts like jewelry. Lighting changes mood and function. A backsplash adds personality without demanding a full demolition. When you tackle those layers in the right order, even a tired kitchen can go from “landlord beige” to “wait, did you renovate?” in two weekends and for about $350.
This article walks through how a realistic DIY kitchen overhaul can happen on a tight budget, what changes make the biggest difference, how to split the work into two weekends, and where people usually go wrong. Spoiler: it is almost never the paint color. It is the prep. Prep is the broccoli of DIY. Nobody gets excited about it, but it keeps the whole thing alive.
The Before: What a $350 Kitchen Usually Looks Like Before You Touch It
Most low-budget kitchen makeovers start with a room that is not structurally broken, just visually exhausted. Think honey oak or dark wood cabinets, shiny old knobs, poor overhead lighting, a bare wall behind the stove or sink, and countertops crowded with things that do not need starring roles. The layout may still work. The cabinet boxes may still be solid. That is the sweet spot.
If your kitchen has these issues, you are exactly the kind of homeowner or renter-friendly DIYer who can get a lot of mileage from a small budget:
- Cabinets are sturdy but dated
- Drawer pulls and knobs look old or mismatched
- The backsplash area feels unfinished or visually noisy
- Task lighting is weak, especially on counters
- Countertops are cluttered, making the whole room feel smaller
- The room feels darker than it actually is
What you do not need for this kind of makeover is a full gut remodel. If the cabinets are falling apart, the countertop is water-damaged, or the flooring is failing, $350 is not a makeover budget. It is a pep talk. But if the bones are decent, cosmetic upgrades can carry surprising weight.
The After: What Changes Make a Small Kitchen Look Fresh, Bright, and Expensive
A convincing “after” is not about adding more stuff. It is about creating contrast, clean lines, and visual calm. The best budget kitchen refreshes make the room look cleaner, lighter, and more intentional. In practical terms, that usually means painted cabinets, consistent hardware, a simple backsplash, better light, and less countertop chaos.
Picture this finished result: the heavy cabinets are now a warm white, soft greige, muted sage, or deep moody charcoal. Old knobs have been replaced with slim black pulls or brushed brass hardware. A peel-and-stick subway-style backsplash catches the light and gives the eye somewhere pleasant to land. Plug-in under-cabinet LEDs make the counters brighter and the kitchen more useful at 6 a.m. or 9 p.m. The counters are styled, not stuffed. Suddenly the kitchen looks newer, even if the layout has not moved an inch.
That is the magic of a budget DIY kitchen overhaul. You are not changing square footage. You are changing perception.
A Realistic $350 Budget Breakdown
Can you really pull off a kitchen transformation for $350? Yes, if you spend like a strategist and not like someone who blacked out in the home improvement aisle. Here is one realistic way to divide the budget:
1. Cabinet paint and prep supplies: $120
- Cabinet paint or durable trim enamel
- Primer
- Cleaner or degreaser
- Sandpaper, tack cloth, painter’s tape, mini rollers, and brushes
2. New hardware: $70
- Knobs or pulls for doors and drawers
- Optional screws or filler if you are changing hole spacing
3. Peel-and-stick backsplash: $55
- Enough for the main wall area behind the range or sink
- Utility knife, measuring tape, and straightedge
4. Under-cabinet or accent lighting: $35
- Battery or plug-in LED strip/puck lights
5. Shelf liner, small organizers, caulk, and finishing details: $40
- Contact paper or shelf liner
- A tray for oils or spices
- Small bin for under-sink organization
- Touch-up caulk or paintable sealant
- A tiny contingency fund for the inevitable “one more thing”
Total: about $320 to $350, depending on kitchen size and your talent for coupons, clearance aisles, and resisting decorative rabbit holes.
Why Cabinets Should Eat the Biggest Slice of the Budget
If you do only one thing, paint the cabinets. Cabinets visually anchor the whole room, so changing them changes almost everything. That is why so many budget makeover guides return to cabinet refreshes again and again. Replacing cabinetry is wildly expensive, but refinishing or painting solid existing cabinets can create the feeling of a much bigger remodel.
The key is durability and prep. Kitchens collect grease the way porch lights collect moths. If you skip cleaning and sanding, your pretty new finish may peel, chip, or develop that sad “I tried” texture. Remove doors and hardware, label everything, clean thoroughly, sand lightly, prime properly, and sand again if needed before the final coats. It sounds tedious because it is. It is also what separates “custom refresh” from “school play set.”
Color choice matters, too. Warm whites, light taupes, soft greens, and muted blues tend to brighten small kitchens without making them feel sterile. Darker shades can be stunning in larger or well-lit rooms, especially when paired with brighter walls and reflective backsplash materials. The goal is not chasing a trend. The goal is making the room feel cleaner, calmer, and intentionally styled.
The Fastest High-Impact Upgrade: Hardware
Swapping cabinet hardware is one of the rare projects that is cheap, fast, and genuinely transformative. This is the kitchen equivalent of changing into a tailored jacket. The bones are the same, but the room suddenly has opinions.
For the easiest install, match the new pull size to your existing hole spacing. That way you avoid filling, drilling, measuring, re-measuring, panicking, and drilling anyway. Matte black pulls create a crisp modern look. Brushed brass feels warmer and more decorative. Stainless or satin nickel works well if your appliances already lean silver. Just keep the finish consistent across the room so the update feels deliberate.
The Backsplash Trick That Makes the Room Feel Finished
A backsplash is one of those details people think they can live without, right up until they install one and wonder why they waited so long. It protects the wall, yes, but more importantly it visually connects the upper and lower halves of the kitchen.
For a two-weekend, $350 overhaul, peel-and-stick backsplash is the practical hero. It is renter-friendlier, less messy, easier to cut, and much faster than traditional tile. Done well, it can look surprisingly polished. Choose a style that plays nicely with your cabinets rather than fighting for attention. Faux subway tile, simple marble-look patterns, or lightly textured neutral finishes work especially well in smaller kitchens because they brighten without overwhelming.
If you cook like an enthusiastic tornado, choose a material that wipes clean easily. Beautiful is good. Beautiful and washable is better.
Lighting: The Upgrade People Forget Until They Turn It On
Lighting is the quiet overachiever of kitchen makeovers. A room can have fresh cabinets and stylish hardware and still feel underwhelming if the counters are dim. Under-cabinet lights instantly improve task visibility, make prep safer, and add a cozy glow that makes the entire kitchen feel more expensive.
You do not need a dramatic electrical project here. Battery-operated or plug-in LED lights are often enough for a budget makeover. They are especially useful in older kitchens where overhead lighting casts shadows right where you chop, mix, and attempt to open impossible pickle jars.
Even something as simple as replacing old bulbs with LEDs in a better color temperature can make the room feel less yellow, more inviting, and more true to your paint color. Good lighting does not merely illuminate your kitchen. It forgives it.
Don’t Ignore Organization, Because Clutter Kills the “After”
You can repaint every cabinet in America and still lose the makeover if the counters are crowded with random gadgets, paper stacks, and mystery cords. One of the smartest budget-friendly changes is reducing visible clutter and assigning zones.
Use a tray to corral oils, salt, and pepper near the stove. Put utensils on a wall rail or in a crock if drawer space is limited. Add a small bin system under the sink so cleaning supplies stop staging a rebellion every time you open the door. Line shelves or drawers for a cleaner look. Group items by task, not by where they happened to land six months ago.
This is not glamorous, but it makes the kitchen feel calmer and more functional. And calm is half the reason expensive kitchens look expensive.
How to Split the Project Into Two Weekends
Weekend One: Prep and Paint
- Empty cabinets and clear counters
- Remove doors, drawers, knobs, and pulls
- Label everything so reassembly is not a puzzle from the underworld
- Degrease all surfaces thoroughly
- Sand lightly and repair small dents or holes
- Prime cabinets and let them dry
- Apply first and second coats as timing allows
This is the messy weekend. It is the one where your kitchen temporarily looks worse, your patience is tested, and you question your life choices around coat number one. Stay the course.
Weekend Two: Reassemble and Style
- Rehang doors and drawers once the paint cures enough
- Install new hardware
- Add peel-and-stick backsplash
- Install under-cabinet lighting
- Caulk touch-up gaps if needed
- Organize counters, shelves, and under-sink storage
- Step back dramatically and admire your own brilliance
This is the satisfying weekend. The room starts making sense again. The after photo is hiding in this stage, waiting for you to remove the tape and stop leaving tools on the counter.
What Not to Do If You Want the Makeover to Last
- Do not skip cleaning. Grease is the enemy of adhesion.
- Do not rush curing time. Dry to the touch is not the same as ready for daily abuse.
- Do not buy hardware before measuring. Your future self would like a word.
- Do not overload the design. If cabinets, backsplash, counters, and decor all shout at once, the room gets noisy fast.
- Do not ignore home age. If your home was built before 1978, lead-safe precautions matter before sanding or scraping painted surfaces.
Is a $350 DIY Kitchen Overhaul Worth It?
Absolutely, if your goal is visual transformation rather than structural reinvention. A tight-budget refresh will not give you custom cabinetry, new plumbing, or celebrity-chef appliances. What it can give you is a cleaner-looking, brighter, more functional kitchen that feels cared for and current. That is a huge win for a couple of weekends and a modest spend.
The smartest thing about this kind of kitchen makeover is that it improves both aesthetics and everyday use. Better lighting helps you cook. Better organization helps you clean. Better cabinet color changes the room’s entire mood. Better hardware makes old cabinetry feel intentional instead of outdated. These are not cosmetic fluff upgrades. They change how the kitchen works and how it feels to be in it.
And that is really the whole point of a successful before-and-after. The kitchen does not need to become unrecognizable. It just needs to become a place you enjoy walking into again.
Extended Experience: What a $350 Kitchen Overhaul Actually Feels Like in Real Life
The emotional arc of a budget kitchen makeover deserves its own award category. At first, it feels deceptively manageable. You buy paint, pulls, backsplash sheets, and a few organizers, and suddenly you are convinced you are the kind of person who “just does projects now.” Then Saturday morning arrives, you remove the cabinet doors, and the kitchen begins to resemble a yard sale hosted by a paint store.
Still, there is something deeply satisfying about the first real sign of progress. It might be one freshly painted cabinet door drying on a drop cloth. It might be the moment you hold a matte black pull against an old drawer front and realize the room already looks better. Budget DIY upgrades thrive on those little victories. They keep you moving when the sink is full of parts and you cannot find the screwdriver you literally just had.
One of the most surprising experiences in a project like this is how quickly lighting changes your mood. Before the upgrade, the kitchen may feel flat and shadowy, especially early in the morning or after sunset. Once under-cabinet lights go in, even inexpensive ones, the counters become more usable and the room feels warmer and more finished. It is not just prettier. It is easier to exist in. That matters more than many people expect.
There is also a psychological shift that comes with painting cabinets. Old cabinets often make a kitchen feel permanently stuck in another decade. Once they are refreshed, even if the layout is exactly the same, the room feels less accidental. You start noticing how much visual weight cabinets carry. It is like giving the kitchen a haircut and suddenly realizing it had cheekbones all along.
Another real-life lesson is that organization is not a side quest. It is part of the makeover. After spending time painting, reattaching hardware, and installing a backsplash, most people naturally become less interested in putting the same old clutter back on the counters. A tray for cooking oils, a bin for sponges, a better setup under the sink, and fewer random items on display can make the room feel twice as finished. The makeover works better because the kitchen starts behaving better, not just looking better.
And yes, there are frustrating moments. Paint drips. A peel-and-stick tile may go on slightly crooked. One cabinet door will somehow take longer than all the others combined. But that is the charm of a budget DIY kitchen overhaul: perfection is not the goal. Improvement is. The room starts to reflect effort, taste, and a little problem-solving grit. In the end, that often feels more rewarding than a polished renovation done entirely by someone else.
When the second weekend wraps up and you make coffee in the newly refreshed space, the result feels bigger than the budget. The kitchen is brighter. It is easier to clean. It feels calmer. And every time someone says, “Wait, you did this for how much?” you get to enjoy one of the best parts of DIY home improvement: answering that question like it is no big deal, when secretly you are absolutely thrilled.
Conclusion
A $350 DIY kitchen overhaul in two weekends is not a fantasy. It is a focused strategy. Keep the layout, improve the surfaces, brighten the lighting, swap the hardware, and cut the clutter. That combination creates the kind of before-and-after transformation people notice immediately because it addresses the details that visually define the room. In other words, you do not need a massive budget to give your kitchen a second act. You just need a solid plan, patience during prep, and enough determination to survive one weekend of sanding.