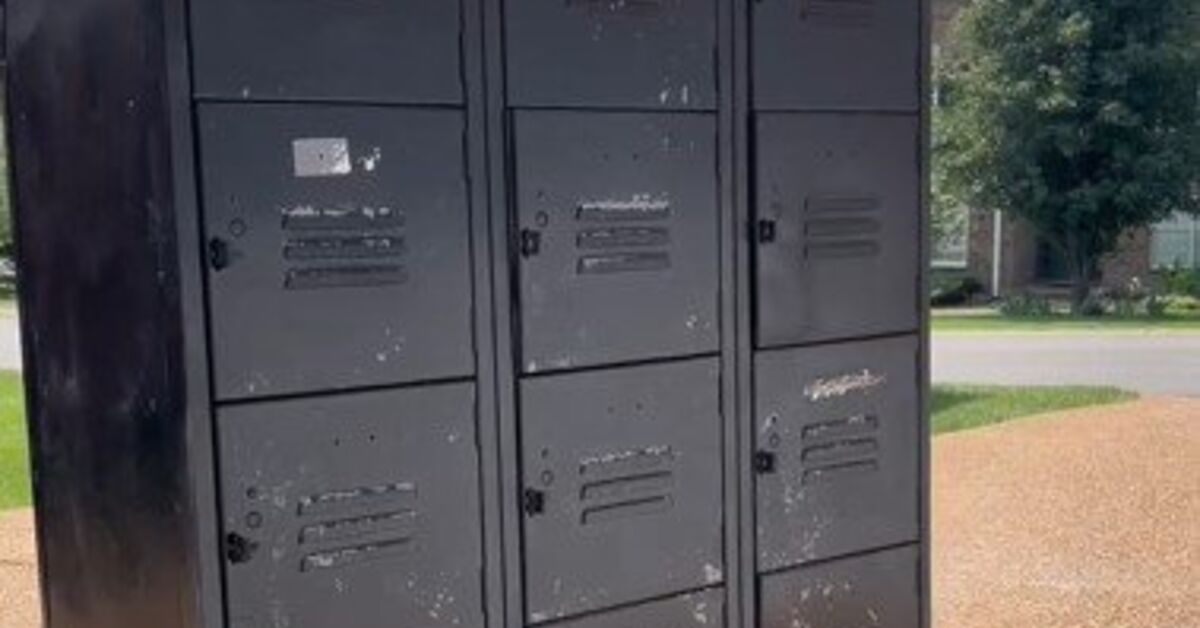
Old lockers have a special kind of charm. They are sturdy, practical, slightly mysterious, and usually look like they survived three decades of gym class, lost lunch money, and one very dramatic dodgeball tournament. But with the right locker makeover plan, those scratched, rusty, forgotten metal cabinets can become stylish storage for an entryway, bedroom, garage, mudroom, craft room, office, or even a modern living room.
The best part? You do not need to be a professional furniture restorer to pull it off. A successful DIY locker renovation is mostly about patience, prep work, and not pretending that spray paint is magic in a can. Paint is wonderful, but it cannot hide dust, grease, peeling paint, rust flakes, or your decision to “just wing it” at 11 p.m.
In this step-by-step guide, you will learn how to clean, repair, sand, prime, paint, style, and organize old lockers so they look intentional instead of abandoned. Whether you found a vintage locker at a flea market, rescued school lockers from a storage room, or bought used metal lockers online, this guide will help you turn them into a functional statement piece with personality.
Why Old Lockers Are Worth Saving
Before we start scrubbing rust like we are auditioning for a hardware-store commercial, let’s appreciate why old lockers are such great makeover candidates.
First, metal lockers are durable. Unlike flimsy flat-pack furniture, many older lockers were built to take daily abuse. They can hold shoes, bags, sports gear, cleaning supplies, craft materials, kids’ backpacks, office files, pet supplies, and all the random household items that somehow have no official address.
Second, lockers have instant character. A freshly painted cabinet can look nice, but a restored vintage locker has history. It adds industrial style, farmhouse charm, schoolhouse nostalgia, or modern utility depending on how you finish it.
Third, a locker makeover is budget-friendly. New storage furniture can be expensive, especially if you want something sturdy. Old lockers often cost less than new cabinets, and a few supplies can completely change their look.
Step 1: Inspect the Lockers Before You Start
Do not grab a paint can yet. The first step in any old locker transformation is inspection. Think of yourself as a detective, except the mystery is “Why does this smell like a basement?”
Check the Structure
Look at the frame, doors, hinges, vents, legs, shelves, and back panel. Make sure the locker stands evenly and the doors open and close without heroic effort. A little squeaking is normal. A door that falls off in your hand is less charming.
Look for Rust
Surface rust is common on old metal lockers and can usually be fixed. Deep rust, holes, or flaking metal may require more serious repair. Pay close attention to the bottom, corners, feet, inside seams, and areas around vents.
Check for Old Paint Concerns
If the lockers are very old or came from an unknown source, be cautious before sanding. Older painted items may contain hazardous coatings. If you suspect lead-based paint, use a lead test kit or consult a professional before disturbing the surface. Safety is not the glamorous part of DIY, but neither is breathing mystery dust.
Step 2: Gather Your Locker Makeover Supplies
A smooth project starts with the right supplies. You do not need every tool in the hardware store, although walking through the paint aisle may convince you otherwise.
Basic Supplies
- Drop cloth or plastic sheeting
- Painter’s tape
- Degreasing cleaner or mild detergent
- Clean rags or microfiber cloths
- Bucket and sponge
- Screwdriver or drill
- Sandpaper in medium and fine grits
- Wire brush or sanding sponge for rust
- Rust-inhibiting metal primer
- Spray paint or brush-on paint made for metal
- Clear protective topcoat, if needed
- Gloves, safety glasses, and a suitable mask or respirator
Optional Styling Supplies
- New hardware or handles
- Peel-and-stick wallpaper
- Magnetic hooks
- Labels or nameplates
- Contact paper for shelves
- LED puck lights
- Baskets or bins
- Decorative magnets
Choose products designed for metal. Regular wall paint may look fine for a week, but metal furniture needs products that can bond properly and resist chipping.
Step 3: Remove Hardware and Clean Everything
Cleaning is not the exciting part of a metal locker makeover, but it is the part that decides whether your paint sticks or peels off like a bad sunburn.
Remove What You Can
Take off handles, number plates, hooks, shelves, and any removable hardware. Put screws and small parts in a labeled bag so they do not disappear into the same universe as missing socks.
Wash the Lockers
Use a degreasing cleaner or mild detergent mixed with warm water. Wipe down the outside, inside, doors, vents, corners, shelves, and base. Old lockers can collect dust, oil, tape residue, sticker glue, and mystery grime with impressive dedication.
After cleaning, rinse with a damp cloth and let the lockers dry completely. Metal and moisture are not friends. If you paint over damp areas, you may trap moisture under the finish and invite rust to return like an unwanted sequel.
Step 4: Remove Stickers, Tape, and Old Adhesive
Many used lockers arrive with stickers, labels, tape marks, or old gum-like adhesive patches. Remove them before sanding and painting.
Start by gently lifting stickers with a plastic scraper. For stubborn adhesive, use a residue remover that is safe for metal, then clean the area again so no oily film remains. Avoid gouging the surface with sharp tools. You want a makeover, not a crime scene.
Step 5: Sand the Surface for Better Paint Adhesion
Sanding helps primer and paint grip the metal. You do not always need to sand every inch down to bare metal. In most cases, you are trying to dull glossy paint, smooth rough areas, feather chipped edges, and remove loose rust or flaking paint.
How Much Should You Sand?
If the existing finish is smooth and well attached, lightly scuff it with fine-grit sandpaper. If there is peeling paint, bubbling, or rust, use a wire brush, sanding sponge, or medium-grit sandpaper to remove loose material.
Focus on edges, corners, door fronts, handles, vents, and high-touch areas. These spots get the most wear, so they need the best prep.
Clean Again After Sanding
After sanding, wipe everything with a clean damp cloth or tack cloth. Dust left behind can create a rough finish and make paint look gritty. Paint does not hide dust; it frames it.
Step 6: Treat Rust Before Painting
Rust is common on old lockers, especially if they lived in a garage, basement, school storage room, or anywhere humidity had a membership card.
For Light Surface Rust
Use a wire brush or sandpaper to remove loose rust. Sand until the area feels stable and smooth. Wipe away dust and residue before priming.
For Heavier Rust
If rust is more stubborn, consider a rust converter or a primer designed for rusty metal. Always follow the product instructions. Some primers are made for clean metal, while others are made for rusty surfaces. Mixing them up can lead to poor adhesion and a finish that flakes faster than a croissant.
Step 7: Prime the Lockers
Primer is the handshake between metal and paint. Skip it, and the paint may not bond well. Use a rust-inhibiting metal primer, especially if you sanded to bare metal or treated rust spots.
Spray Primer vs. Brush-On Primer
Spray primer works well for lockers because it reaches vents, corners, and narrow edges. Brush-on or roll-on primer can also work, especially for larger flat panels. A small foam roller helps create a smoother finish on door fronts.
Apply Thin, Even Coats
Do not blast the surface with one heavy coat. Thin coats dry more evenly and reduce drips. If using spray primer, keep the can moving and slightly overlap each pass. Let the primer dry according to the manufacturer’s instructions before painting.
Step 8: Paint the Lockers
Now comes the fun part: color. This is where your old lockers stop looking like a forgotten hallway prop and start looking like they belong in a design magazineor at least in a very proud Instagram post.
Choose the Right Paint
Use paint designed for metal furniture or metal surfaces. Spray paint is popular because it creates a smooth finish and gets into vents and seams. Brush-on enamel or direct-to-metal paint can also work well if you prefer less overspray.
Pick a Finish
A satin finish is forgiving and modern. Semi-gloss is easy to wipe clean and works well for busy areas. Matte can look stylish but may show scuffs more quickly. Glossy paint can be dramatic, but it highlights dents and surface imperfections, so prep matters even more.
Apply Multiple Light Coats
Several light coats are better than one thick coat. Heavy coats can run, bubble, or stay tacky. Let each coat dry as directed before applying the next. The locker may look uneven after the first coat. Do not panic. The first coat is often just the awkward first pancake of painting.
Step 9: Add a Protective Topcoat
A topcoat is optional but helpful if the lockers will get heavy use. Entryway lockers, kids’ storage, mudroom lockers, garage lockers, and office lockers all benefit from extra protection.
Choose a clear coat compatible with your paint. Some paints do not require a separate sealer, while others may become more durable with one. Always test in a small hidden area first to make sure the topcoat does not change the color or finish.
Step 10: Reinstall Hardware or Upgrade It
Once the paint has cured enough to handle, reinstall the hardware. If the original handles and number plates look good, keep them. Original hardware adds vintage character.
If the hardware is damaged or unattractive, upgrade it. New handles, brass pulls, black hardware, leather tabs, or simple label holders can completely change the style. A plain locker can become industrial, modern, retro, farmhouse, or playful depending on the details.
Step 11: Style the Inside
The inside of your lockers deserves attention too. After all, storage furniture should be both pretty and useful. A gorgeous locker that becomes a black hole for scarves, batteries, and one lonely flip-flop is only halfway successful.
Add Shelves or Bins
If the lockers have adjustable shelves, arrange them based on what you plan to store. Use bins for small items, baskets for accessories, and clear containers for supplies you want to see quickly.
Use Magnetic Accessories
Because lockers are metal, magnets are your best friends. Magnetic hooks, cups, clips, labels, and small shelves can make the inside more functional without drilling holes.
Try Peel-and-Stick Wallpaper
For a bold surprise, line the inside back panel with peel-and-stick wallpaper. A floral print, geometric pattern, faux wood, or simple stripe can make the locker feel custom. It is like giving your storage a secret outfit.
Step 12: Place the Lockers Safely
Before loading your finished lockers with shoes, books, tools, or sports gear, think about placement and stability. Tall storage furniture can tip if overloaded, climbed on, or placed unevenly. If your lockers are tall or used around children, anchor them securely to the wall with appropriate hardware.
Place heavier items on lower shelves to keep the center of gravity low. Avoid storing extremely heavy objects in the top compartments. A good locker makeover should look great, function well, and not behave like it is trying to join a demolition derby.
Locker Makeover Design Ideas
Not sure what style to choose? Here are several ideas to help you match your old locker makeover to your home.
Industrial Black Lockers
Black lockers look sleek, bold, and timeless. Pair them with wood floors, leather accents, vintage signs, or matte black hardware. This look works especially well in offices, lofts, garages, and entryways.
Soft Neutral Lockers
Warm white, beige, greige, taupe, or soft gray can make metal lockers feel calmer and more home-friendly. This is a great choice for mudrooms, laundry rooms, and family spaces.
Colorful Kids’ Lockers
For children’s rooms or playrooms, try cheerful colors like blue, green, coral, yellow, or lavender. Add labels for backpacks, art supplies, shoes, and toys. The children may still throw things on the floor, but at least the storage will look optimistic.
Vintage Schoolhouse Lockers
Keep some original patina, use classic colors, and preserve number plates if possible. This style works well with wood benches, old maps, chalkboards, and antique hooks.
Two-Tone Lockers
Paint the frame one color and the doors another. A navy-and-white combination feels coastal. Green and brass feels vintage. Charcoal and natural wood accents feel modern and grounded.
Common Locker Makeover Mistakes to Avoid
Skipping the Cleaning Step
Paint will not bond properly to grease, dust, or residue. Even if the lockers look clean, wash them first. Old metal furniture often hides dirt in seams, vents, and corners.
Painting Over Loose Rust
Paint does not freeze rust in time like a museum display. Remove loose rust and use the right primer. Otherwise, rust may continue spreading underneath the finish.
Using the Wrong Paint
Choose products made for metal. The right paint improves adhesion, durability, and long-term results.
Applying Paint Too Thickly
Heavy coats cause drips and uneven drying. Light coats require more patience, but they create a cleaner finish.
Moving the Lockers Too Soon
Paint may feel dry before it has fully cured. Give the finish time to harden before heavy use. Your future self will thank you when the surface does not scratch the first time you slide in a storage bin.
Budget-Friendly Locker Makeover Tips
A beautiful old locker transformation does not have to drain your wallet. Start by deciding which elements matter most: paint color, hardware, interior organization, or decorative details.
If the original hardware is usable, clean and reuse it. If the shelves are scratched, line them with contact paper instead of replacing them. Use inexpensive magnetic hooks instead of drilling. Shop for baskets, bins, and labels at discount stores. Choose a paint color you love enough to keep for years, not just one that looked trendy for six minutes online.
Also, buy slightly more paint than you think you need. Running out halfway through the final coat is a special kind of DIY heartbreak.
My Real-World Experience Notes: What Actually Makes a Locker Makeover Work
After working through several furniture refresh projects, the biggest lesson is simple: the final look depends more on preparation than on paint color. A trendy color can make people click “save,” but a clean, sanded, properly primed surface is what makes the project last.
With old lockers, the first surprise is usually how much dirt hides in the vents and seams. From a distance, a locker may look dusty but harmless. Once you start wiping it down, you discover old tape glue, pencil marks, rust dust, and maybe a paperclip from the ancient civilization known as “seventh period.” Taking time to clean the inside and outside makes the whole piece feel fresher before paint even enters the room.
The second lesson is that rust needs respect. Light rust can often be handled with sanding and primer, but it should never be ignored. If you paint over rough, flaky rust, the finish may look fine at first, but it can fail quickly. The best approach is to remove loose material, smooth the edges, and use a primer that matches the condition of the metal.
The third lesson is to test your color. Metal lockers are large, vertical, and visually strong. A color that looks soft on a tiny paint cap may look much louder across six locker doors. If possible, spray or brush a small hidden area first. Look at it in morning light, afternoon light, and room lighting. Lockers have a way of turning “subtle sage” into “hello, I am a vegetable cabinet” if the undertone is wrong.
The fourth lesson is that spray painting requires patience. The temptation is to cover everything immediately, especially when the first coat looks patchy. Resist. Thin coats are the secret. Keep the can moving, overlap lightly, and let each coat dry. A patchy first coat is normal. A dripping first coat is a warning sign from the DIY universe.
The fifth lesson is to think about function before styling. Before adding wallpaper, cute labels, or little bins, decide what the lockers will store. Shoes need different spacing than craft supplies. Backpacks need hooks. Cleaning products need wipeable shelves. Office supplies need small containers. When the interior layout matches real life, the locker stays useful instead of becoming a decorative storage statue.
Finally, do not erase every sign of age unless you truly want a brand-new look. A few tiny dents or original number plates can make the finished lockers more interesting. The goal is not always perfection. Sometimes the best locker makeover keeps a little character while adding a clean finish, safer structure, better storage, and a color that makes the whole room feel more intentional.
Conclusion
A locker makeover is one of the most satisfying ways to turn old metal storage into something useful, stylish, and full of personality. The process is straightforward: inspect the lockers, clean them well, remove rust, sand the surface, prime properly, paint in thin coats, upgrade the details, and organize the inside for real life.
Whether you want vintage schoolhouse charm, modern industrial storage, a cheerful kids’ room feature, or a practical mudroom solution, old lockers are flexible enough to fit almost any space. Treat the prep work seriously, choose the right metal-friendly products, and give the finish time to cure. Your reward will be a piece of furniture that looks custom, stores more than you expected, and gives old lockers a second life far better than standing in a dusty corner judging everyone.