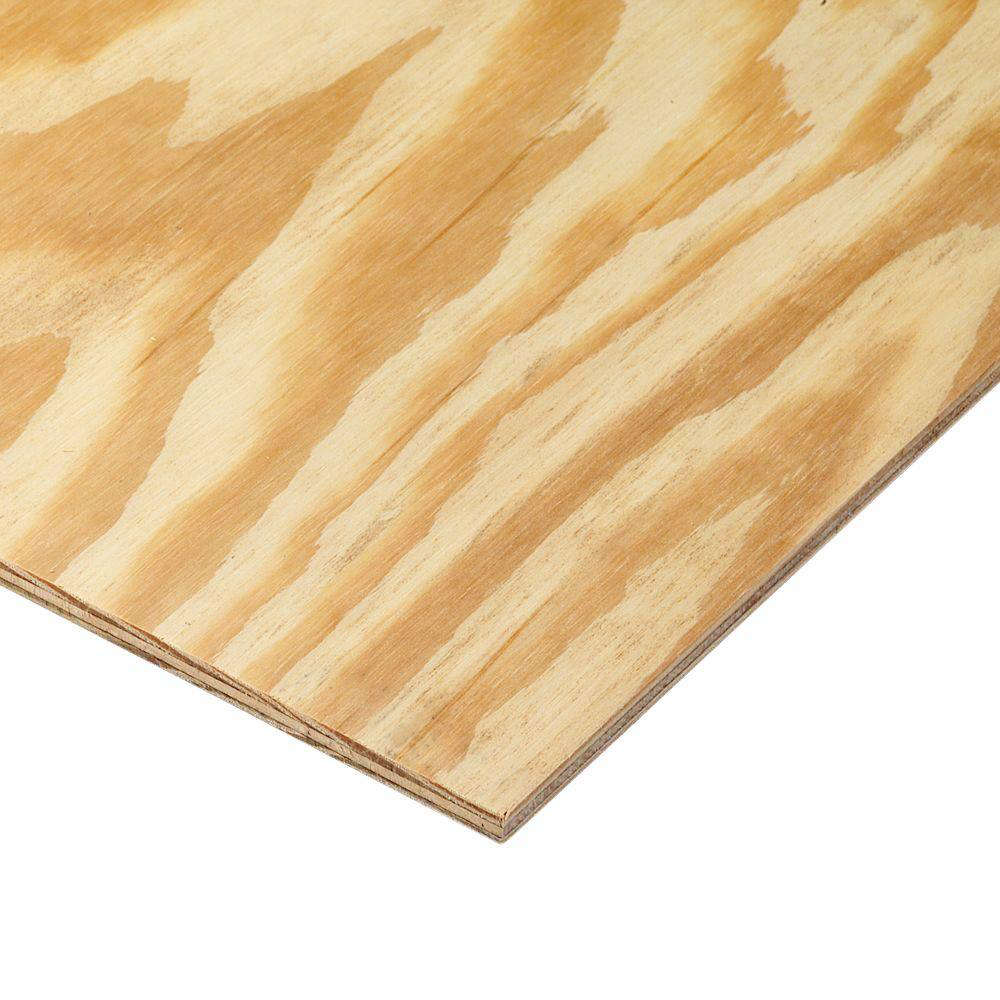
Some building materials arrive with dramatic promises. Others quietly sit in the lumber aisle waiting to become cabinet backs, wall panels, workshop templates, drawer bottoms, signs, crafts, and approximately 47 projects you have not thought of yet. The 1/4 in. x 4 ft. x 8 ft. BC sanded pine plywood sheet belongs firmly in the second group.
This thin plywood panel combines a relatively smooth face, a large working area, manageable weight, and the familiar grain of pine. It is easier to handle than thick structural plywood and more durable than many hardboard or fiberboard alternatives. However, its modest thickness also creates limits. It bends easily, needs adequate support, and should not be mistaken for heavy-duty flooring, shelving, or structural sheathing simply because it happens to be made of wood.
Understanding the BC grade, actual panel thickness, suitable applications, cutting methods, finishing options, and installation requirements will help you turn a promising sheet into a clean finished project instead of an eight-foot-long lesson in splinters.
What Is BC Sanded Pine Plywood?
Plywood is manufactured by bonding thin wood veneers in alternating grain directions. This cross-laminated construction helps the panel remain more dimensionally stable than a single board of comparable width. It also distributes strength in more than one direction, which is why plywood appears everywhere from furniture shops to construction sites.
The letters in BC plywood describe the appearance grades of the two outer veneers. They do not mean “basic construction,” “builder’s choice,” or “buy cautiously,” although inspecting every sheet is still a smart idea.
The B-Grade Face
The B side is the better-looking face. It is sanded and may contain small, neatly repaired defects or patches. It is suitable for painted surfaces, utility furniture, paneling, signs, soffits, and other projects where appearance matters but flawless furniture-grade veneer is unnecessary.
The C-Grade Back
The C side is more utilitarian. It can contain additional knots, repairs, color variation, and other visible characteristics. In most projects, this side faces a wall, cabinet interior, framing member, or another location where nobody will examine it while holding a magnifying glass and questioning your life choices.
Nominal Thickness Versus Actual Thickness
Although the product is commonly called 1/4-inch plywood, a current 1/4 performance-category panel may have a manufactured thickness of approximately 0.234 inch. Likewise, a sheet sold as 4 feet by 8 feet may be slightly under those nominal dimensions because of manufacturing tolerances.
That difference matters when the panel must fit into a dado, groove, cabinet frame, molding channel, or existing opening. Measure the actual sheet with calipers or a reliable tape measure before cutting joinery. Building a perfect 0.250-inch groove for a 0.234-inch panel can leave a loose fit that rattles like a tiny wooden tambourine.
Key Characteristics of a 1/4-Inch Pine Plywood Sheet
Large Coverage With Relatively Low Weight
A full 4-by-8-foot panel covers approximately 32 square feet. Compared with thicker plywood, a 1/4-inch sheet is easier to carry, lift onto a workbench, and position against a wall or cabinet frame. It is still awkward in wind or narrow hallways, so “lighter” should not be confused with “magically easy to steer.”
Flexible Rather Than Rigid
The thin profile allows the panel to follow gentle curves and irregular surfaces, but it also means the sheet can sag or buckle when insufficiently supported. It works best as a skin, facing, liner, back, or decorative panel attached to a stable framework or substrate.
Sanded, but Not Finish-Ready in Every Case
The B face is smoother than ordinary sheathing plywood, yet it may still show grain variation, filled repairs, raised fibers, or handling marks. For painted furniture or highly visible trim, expect to perform light surface preparation. Sanded plywood saves work; it does not eliminate work entirely. Lumber has apparently negotiated that clause into its contract.
Exterior Bond Does Not Mean Maintenance-Free
Some commonly sold BC sanded pine panels carry an Exterior bond classification, indicating that the adhesive system is suitable for repeated wetting and drying or weather exposure as specified by the manufacturer. That classification does not transform pine veneer into plastic, marine plywood, or pressure-treated lumber.
Outdoor applications still require proper design, protected edges, suitable primer or sealer, compatible topcoats, drainage, and regular maintenance. Always verify the stamp on the actual panel because classifications and specifications can vary by product and mill.
Best Uses for 1/4 in. x 4 ft. x 8 ft. BC Sanded Pine Plywood
Cabinet Backs and Furniture Panels
This plywood is well suited to cabinet backs, entertainment-center backing, bookcase backs, lightweight door panels, drawer bottoms, and decorative furniture inserts. When secured around its perimeter and attached to interior supports, the panel can help keep a cabinet square without adding the bulk of thicker plywood.
For a cabinet back, placing the B face toward the visible interior creates a cleaner appearance. A shallow rabbet or groove can produce a more professional result than simply nailing the sheet over the back edges.
Wall and Ceiling Treatments
A 1/4-inch pine plywood sheet can be used for accent walls, workshop walls, utility-room paneling, porch ceilings, soffits, and certain decorative ceiling treatments. The supporting surface must be flat, dry, and capable of receiving the selected fasteners or adhesive.
Thin plywood will reveal bumps, framing irregularities, and uneven adhesive application. Preparing the substrate first is far easier than attempting to convince a wavy panel that it should suddenly become flat.
Templates, Patterns, and Shop Jigs
The panel is useful for full-size furniture patterns, routing templates, layout guides, temporary mockups, and reusable workshop jigs. It cuts more cleanly and survives more handling than cardboard while remaining easier to shape than thick lumber.
Signs, Displays, Crafts, and Seasonal Décor
The smooth pine face accepts paint, stencils, printed graphics, clear finishes, and many adhesives. It can become retail displays, photo backdrops, holiday cutouts, oversized signs, theatrical scenery, model bases, or school-project panels.
Flooring Underlayment in Approved Systems
Manufacturers may list certain sanded plywood panels for underlayment applications. However, a thin panel is not a replacement for a structurally adequate subfloor. Before using it beneath finished flooring, confirm that the specific plywood, fastening schedule, floor covering, substrate, and local requirements are compatible. Flooring manufacturers may have their own underlayment rules, and those instructions should take priority.
Where This Plywood Is Not the Best Choice
A 1/4-inch sheet is versatile, but versatility is not permission to use it everywhere. Avoid treating it as unsupported structural decking, a load-bearing shelf, a primary subfloor, or a direct substitute for thicker code-rated roof and wall sheathing.
Long shelves made only from this panel will sag quickly. Horizontal surfaces that support tools, books, appliances, or people require thicker material and appropriate framing. The panel is also a poor choice for permanently submerged locations, unprotected ground contact, or outdoor projects where exposed edges will continuously collect water.
For premium clear-stained furniture, hardwood plywood may provide a more consistent appearance. For wet marine environments, use plywood specifically manufactured and certified for that purpose. For structural work, select the panel thickness, grade, span rating, and fastening schedule required by the project design and applicable code.
How to Select a Good Sheet at the Store
Thin plywood can vary noticeably from sheet to sheet. Spending five careful minutes in the lumber aisle may save several hours of repair work later.
- Look across the surface: Sight along the sheet to identify bowing, twisting, ripples, or damaged corners.
- Inspect the B face: Choose a grain pattern and patch layout appropriate for the visible parts of your project.
- Examine the edges: Avoid sheets with obvious delamination, crushed areas, open voids, or water-swollen layers.
- Check the back: The C side will be less attractive, but major damage can still affect installation and finishing.
- Read the panel stamp: Confirm the grade, performance category, bond classification, product standard, and manufacturer information.
- Measure when fit matters: Do not rely exclusively on nominal dimensions for grooves, replacement panels, or precision cabinetry.
How to Cut Thin BC Sanded Plywood Cleanly
Support the Entire Sheet
A full sheet should not dangle between two sawhorses while you cut through the middle. Support it with a sacrificial foam panel, several evenly spaced boards, or a cutting table that holds both sides of the cut. Complete support reduces vibration, prevents the offcut from breaking away, and keeps the saw kerf from closing around the blade.
Use a Sharp, Fine-Tooth Blade
A fine-tooth plywood or finish blade generally produces cleaner edges than an aggressive framing blade. Set the circular-saw depth only slightly deeper than the sheet. Excessive blade exposure increases tear-out and makes an already thin panel more difficult to control.
Protect the Visible Face
With a typical circular saw, the upper surface is more likely to splinter because the blade teeth exit through it. Place the best face downward unless your saw or blade design requires a different orientation. With a table saw, the best face usually points upward. A jigsaw with standard upward-cutting teeth often produces its cleanest face on the underside.
Painter’s tape over the cut line, a shallow scoring pass, and a clamped straightedge can further reduce splintering. Test the setup on an offcut before making the one cut that absolutely, positively cannot be wrong.
Control Dust and Protect Yourself
Cutting and sanding plywood produces airborne wood dust. Work in a well-ventilated area, connect tools to effective dust collection when possible, and wear appropriate eye, hearing, and respiratory protection. Keep guards installed, secure the workpiece, and follow the tool manufacturer’s instructions.
Fastening and Installation Tips
Because 1/4-inch plywood is thin, screws driven only into the panel have limited holding power. Fasteners should usually penetrate framing, cabinet sides, cleats, blocking, or another substantial substrate.
For cabinet backs and decorative panels, narrow-crown staples, brads, panel nails, or appropriately sized screws may be used with a compatible wood or construction adhesive. Apply adhesive in controlled beads rather than random mountains. Thick adhesive ridges can telegraph through the finished face.
Keep fasteners a reasonable distance from panel edges, and reduce tool pressure so heads do not punch through the veneer. On highly visible surfaces, test the nailer setting on scrap. A brad buried halfway through the sheet is technically attached, but it is not exactly a triumph.
When installing large wall or ceiling panels, allow for expected movement and follow the manufacturer’s spacing and fastening recommendations. Do not force a damp, bowed, or cold-stored sheet into final position before it has adjusted to the project environment.
Painting, Staining, and Finishing
Preparing the Surface
Lightly sand the B face only as needed, following the grain. Avoid aggressive sanding because the attractive face veneer is thin. Fill unwanted dents, nail holes, and edge voids with a compatible filler, then remove all dust before applying a finish.
Painting BC Pine Plywood
For a smooth painted result, prime bare wood and repaired areas before applying the topcoat. Primer helps create a more uniform surface and reduces uneven absorption. Sand the dry primer lightly when the product instructions permit, remove the dust, and apply two thin finish coats rather than one heroic coat thick enough to qualify as weather.
Exposed plywood edges absorb finish quickly and often require extra filling, sanding, and primer. Edge banding, solid-wood trim, or a face frame can create a cleaner furniture-grade appearance.
Staining the Pine Face
Pine can absorb stain unevenly, producing dark and light patches. A compatible pre-stain wood conditioner may help reduce blotching. Test the complete finishing system on scrap or an inconspicuous section, including conditioner, stain, and clear coat. Factory repairs and veneer variations may accept stain differently, so a sample is more reliable than the optimistic little color square printed on the can.
Finishing Exterior Applications
For approved exterior uses, coat the face, back, cut edges, drilled holes, and end grain as recommended by the finish manufacturer. Edges deserve particular attention because they expose multiple veneer layers. Exterior bond classification supports glue-line durability, but the wood fibers still benefit from protection against repeated moisture absorption.
Storage and Handling
Store plywood indoors whenever possible, protected from rain and direct ground contact. Lay sheets flat on a level platform with several supports distributed along the length. Uneven support can encourage thin panels to develop curves that later appear in walls, doors, and cabinet backs.
If temporary outdoor storage is unavoidable, elevate the stack, cover it loosely, and maintain ventilation. A tightly wrapped stack left in sunlight can trap moisture and create condensation. Protect corners and edges during transport, and secure the sheet properly in a vehicle or trailer. A 4-by-8-foot panel catching highway wind is less “building material” and more “unexpected aviation experiment.”
Practical Workshop Experiences and Lessons
The first lesson many builders learn is that a thin plywood sheet can be both easy to lift and difficult to control. One person may carry it across a quiet workshop without trouble, but a doorway, ceiling fan, or outdoor breeze can suddenly make the panel behave like an enormous wooden sail. Planning the route before lifting the sheet prevents damaged corners and accidental redecorating of nearby walls.
The second lesson concerns flatness. A slightly bowed sheet may look acceptable while leaning in a store rack. Once cut into a cabinet back or large wall panel, however, that curve becomes much more obvious. Attaching the panel progressively from one straight edge, while checking alignment and keeping the substrate flat, usually produces better results than fastening all four corners first and attempting to flatten the center afterward.
Cut quality is another common surprise. Builders sometimes assume that a thin sheet can be cut with any available blade because there is less material to remove. In practice, a rough blade can shred the face veneer almost instantly. Supporting the sheet on rigid foam, using a sharp fine-tooth blade, and guiding the saw with a straightedge transforms the job. The cut becomes quieter, safer, and far more accurate.
Painting also teaches patience. The factory-sanded face may feel smooth to the hand, yet patches, grain changes, and exposed edges can remain visible after the first coat. A better process is to inspect the surface under side lighting, fill defects selectively, prime the entire visible face, and sand the primer lightly. This additional preparation often makes a larger difference than purchasing a more expensive topcoat.
Staining presents a different challenge. Pine grain can look attractive under a clear finish, but dark penetrating stains may exaggerate repairs and create uneven color. Testing on an offcut reveals whether the project needs conditioner, a lighter stain, a gel stain, color toning, or a switch to paint. That small test can prevent a full sheet from becoming a very large brown leopard.
Fastening thin plywood rewards restraint. Excessive air pressure in a brad nailer can drive fasteners through the face, while overdriven screws may crush the veneer. Reducing pressure, testing depth, and fastening into solid backing creates a cleaner installation. Adhesive can help distribute the load, but too much can form ridges or make future removal nearly impossible.
Finally, experienced users treat the sheet as a panel rather than a plank. It performs exceptionally well when supported around its perimeter, captured in grooves, bonded to a stable substrate, or reinforced by framing. It performs poorly when asked to bridge long unsupported distances. Respect that distinction, and 1/4-inch BC sanded pine plywood becomes one of the most useful and economical materials in the shop.
Final Verdict
The 1/4 in. x 4 ft. x 8 ft. BC sanded pine plywood panel is an excellent choice for lightweight construction, cabinet backs, decorative surfaces, templates, signs, wall treatments, craft projects, and other supported applications. Its B-grade face offers a practical surface for paint or clear finishes, while the C-grade back keeps the panel economical.
Its greatest advantages are coverage, workability, appearance, and manageable weight. Its greatest limitation is the same feature that makes it convenient: the 1/4-inch thickness. Support it properly, inspect it before purchase, cut it with a sharp blade, protect its edges, and choose a finish appropriate for the environment. Do that, and this humble pine panel can deliver polished results without requiring a heroic budget or a forklift.
Note: Exact thickness, veneer appearance, panel dimensions, bond classification, certifications, and availability may vary by manufacturer, mill, and retailer. Read the stamp on the actual sheet and verify local building-code or flooring-system requirements before using the panel in a regulated assembly.