Note: For the most durable result, always check the label on your specific paint, primer, or adhesion promoter. Plastic buckets vary by material, age, gloss, and previous use, so a small test patch is your best friend. It is cheaper than repainting the whole bucket while muttering inspirational phrases through clenched teeth.
Introduction: Yes, You Can Paint a Plastic BucketBut It Needs the Right Setup
Plastic buckets are the unsung heroes of garages, gardens, workshops, craft rooms, and mysterious “I’ll organize this later” corners of the house. They carry soil, soap, tools, toys, ice, compost, and sometimes every random screw you have owned since 2009. But when you want to paint one, plastic suddenly becomes dramatic. Ordinary paint may bead up, scratch off, peel in sheets, or look great for two days before giving up like a cheap umbrella in a thunderstorm.
So, what paint will stick on a plastic bucket? The best options are spray paint made for plastic, paint-and-primer-in-one products formulated for plastic, or a bonding primer made for plastic followed by acrylic, latex, enamel, or exterior paint. For the toughest plastics, especially common bucket materials like HDPE and polypropylene, an adhesion promoter or specialty plastic primer can make the difference between “nice finish” and “oops, it peeled when I looked at it.”
The real secret is not just the paint. It is the prep. Clean, scuff, prime, paint lightly, and cure patiently. That little sequence is what turns a slippery plastic surface into something paint can grip. Skip it, and your bucket may shed paint faster than a golden retriever sheds fur in July.
Why Plastic Buckets Are Hard to Paint
Most 5-gallon buckets and utility pails are made from high-density polyethylene (HDPE) or polypropylene (PP). These plastics are popular because they are tough, lightweight, moisture-resistant, and chemically resistant. Those qualities are fantastic when the bucket is holding detergent, soil, or paint. They are less fantastic when you want a coating to cling to the surface.
HDPE and polypropylene have low surface energy, which means paint does not naturally wet and bond to them as easily as it does to wood, drywall, or metal. Think of it like trying to stick a label to a waxed apple. The surface is smooth, slick, and not exactly rolling out the welcome mat.
Another issue is flexibility. Buckets bend, flex, stack, scrape against concrete, sit in sunlight, and get dragged across driveways by people who believe handles are optional. A rigid paint film can crack or flake when the plastic moves. That is why flexible, plastic-compatible coatings usually perform better than random leftover wall paint from the laundry room.
The Best Paints That Stick to a Plastic Bucket
There are several good options depending on how the bucket will be used. A decorative indoor bucket has different needs than a garden bucket that will live outside under sun, rain, mud, and possibly one judgmental squirrel.
1. Spray Paint Made Specifically for Plastic
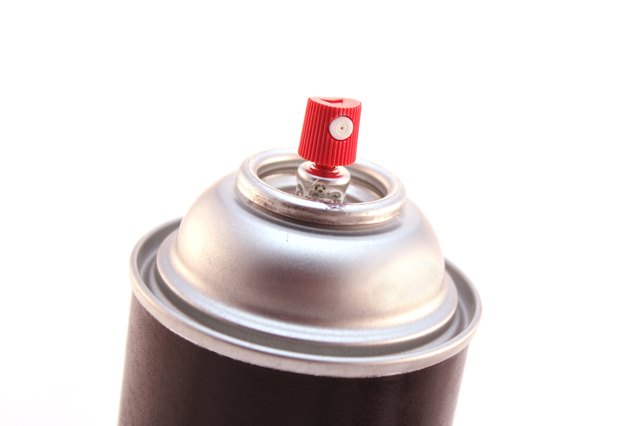
The easiest and most reliable choice for many DIY projects is spray paint designed for plastic surfaces. These products are formulated to bond better to plastic than general-purpose spray paint. They are commonly used on plastic chairs, planters, storage bins, outdoor décor, PVC items, and similar surfaces.
Plastic-specific spray paint is a smart choice when you want a smooth finish without brush marks. It works especially well for decorative buckets, garden planters, tool storage buckets, craft buckets, and color-coded organizing pails. Many versions are available in gloss, satin, matte, hammered, metallic, and textured finishes.
For best results, clean the bucket thoroughly, scuff glossy areas lightly, and apply several thin coats instead of one heavy coat. Heavy spray coats can sag, wrinkle, stay tacky, or collect dust like they are auditioning for a garage documentary.
2. Plastic Primer Plus a Topcoat
If you already have a paint color you love, use a specialty plastic primer first. Plastic primer creates a bonding layer between the slick bucket and the finish coat. Once the primer is properly dry, you can usually apply a compatible spray paint, acrylic paint, latex paint, enamel, or outdoor topcoat depending on the primer’s instructions.
This route is especially useful when painting hard-to-coat plastics such as polypropylene, polystyrene, resin, PVC, fiberglass, or vinyl. It is also a good choice if the bucket is smooth, glossy, or has been outside long enough to develop chalky, faded, or weathered areas.
The basic system looks like this: clean the bucket, scuff the surface, apply plastic primer, let it dry as directed, then apply two or more light coats of paint. A clear sealer can be added for extra protection if the bucket is decorative or used outdoors.
3. Bonding Primer Plus Acrylic or Exterior Paint
A high-adhesion bonding primer can also work on plastic buckets, especially when you prefer brush-on or roller-applied paint. Bonding primers are designed for difficult surfaces such as glossy tile, PVC, vinyl, laminate, glass, metal, and plastic. After priming, you can apply a suitable acrylic, latex, or exterior paint.
This method is helpful for larger buckets, storage tubs, or projects where spray paint is not practical. It also allows more control if you are adding hand-painted labels, decorative patterns, stripes, stencils, or designs. However, brush-on paint may show brush marks unless you use a quality brush, foam roller, or leveling paint.
For outdoor buckets, choose an exterior-rated topcoat. Interior wall paint may stick after priming, but it may not love rain, UV exposure, repeated handling, or being whacked by a garden trowel. Buckets live active lives.
4. Adhesion Promoter for Tough Plastics
An adhesion promoter is a specialty product often used in automotive and refinishing work to help coatings bond to plastic. It is particularly useful for plastics that are notoriously difficult to paint, such as polypropylene and certain polyethylene surfaces.
If your bucket is HDPE or PP and you need maximum durability, use an adhesion promoter or plastic primer recommended for those materials. Apply it exactly according to the label. These products often require thin coats and specific recoat windows. Too much product can reduce adhesion rather than improve it, which is rude but true.
How to Identify the Plastic Before Painting
Before you paint, flip the bucket over and look for the recycling code. Many plastic buckets show a number inside the recycling triangle. A #2 usually means HDPE, while a #5 usually means polypropylene. Both are strong, useful plastics, but both can be stubborn when painted.
If there is no symbol, assume the bucket is a difficult plastic and prepare it carefully. Smooth, flexible, slightly waxy-feeling buckets usually need more help than rigid plastics like PVC or ABS. A test patch on the bottom or back of the bucket is the safest way to check adhesion before painting the entire surface.
Step-by-Step: How to Paint a Plastic Bucket So It Actually Sticks
Step 1: Empty and Inspect the Bucket
Start with a bucket that is safe to handle. Do not paint a bucket that has held hazardous chemicals unless you know it has been properly cleaned and is safe for reuse. Never repurpose a painted or chemical bucket for food storage, pet food, drinking water, or gardening edibles that will touch the inside surface. Paint is for decoration and utility labeling, not for turning mystery containers into salad bowls.
Step 2: Wash It Thoroughly
Use warm water, dish soap, and a scrub brush or sponge to remove dirt, oil, dust, sticker residue, and old grime. If the bucket has been outdoors, pay special attention to algae, mildew, soil, and chalky oxidation. Rinse well and let it dry completely. Paint hates grease, moisture, and shortcuts.
Step 3: Remove Labels and Adhesive
Peel off stickers and labels if possible. For adhesive residue, use a plastic scraper and a cleaner that is safe for the bucket material. Avoid soaking the plastic in harsh solvents unless the paint or primer manufacturer recommends it. Some solvents can soften plastic, leave residue, or create a surface that looks like it lost a fight.
Step 4: Scuff the Surface
Lightly sand the outside of the bucket with fine-grit sandpaper, such as 220-grit to 320-grit. The goal is not to carve your initials into the bucket. You simply want to dull the glossy surface and create microscopic scratches that help primer and paint grab. After sanding, wipe away dust with a clean damp cloth or tack cloth and let the surface dry.
Step 5: Mask Areas You Do Not Want Painted
If you want clean lines, use painter’s tape. Mask the rim, handle mounts, measuring marks, or any part that should remain visible. If the bucket still needs to stack tightly with other buckets, avoid building up thick paint around the rim and bottom edge.
Step 6: Apply Plastic Primer or Adhesion Promoter
Use a primer made for plastic or a high-adhesion bonding primer. Apply a thin, even coat. When spraying, hold the can at the distance recommended on the label and move steadily across the surface. Start and stop each pass off the bucket to avoid blobs at the edges.
Let the primer dry according to the product instructions. Some primers can be recoated quickly, while others need several hours. Temperature and humidity matter. Cool, damp air slows drying and curing, so do not rush the process unless you enjoy fingerprints becoming part of your artistic legacy.
Step 7: Paint in Thin Coats
Apply two to four thin coats rather than one thick coat. Thin coats bond better, dry more evenly, and reduce drips. Rotate the bucket as you work so you can keep the spray angle consistent. If brushing or rolling, use light pressure and avoid overworking the paint once it begins to set.
For spray paint, a light tack coat can help the following coat cling more evenly. Let each coat dry as directed before adding the next. If the paint starts to wrinkle, bubble, or stay sticky, stop and let it cure longer before continuing.
Step 8: Add a Clear Sealer if Needed
A clear sealer is optional but useful for decorative buckets, outdoor planters, craft storage, and buckets that will be handled often. Choose a sealer compatible with your paint. A clear acrylic spray can protect the finish from scuffs, moisture, and UV exposure, although it will not make the bucket indestructible. It is paint, not chainmail.
Step 9: Let It Cure Before Hard Use
Dry paint is not always cured paint. A surface may feel dry in an hour but remain soft underneath for a day or longer. Give the bucket at least 24 to 72 hours before regular handling, stacking, or filling. Some primers and paints take several days to reach full hardness. Patience is boring, but peeling paint is worse.
Best Uses for a Painted Plastic Bucket
A painted plastic bucket is great for decorative and light-duty projects. You can turn one into a patio planter, tool organizer, kids’ toy bin, cleaning caddy, compost starter bucket, fishing gear container, craft supply holder, or garage sorting system. Color-coding buckets is especially useful: blue for car wash supplies, green for garden tools, red for emergency gear, and black for the random objects you refuse to identify emotionally.
If the bucket will be used outdoors, choose exterior-rated products and consider a UV-resistant clear coat. Sunlight can fade paint over time, especially darker colors. Also, remember that painted surfaces may scratch if the bucket is dragged across concrete, stacked tightly, or hit with metal tools.
What Paint Should You Avoid on a Plastic Bucket?
Avoid using ordinary interior wall paint directly on bare plastic. It may look acceptable at first, but it usually lacks the adhesion and flexibility needed for a plastic bucket. Also be careful with craft acrylic paint on bare plastic unless the bucket is purely decorative and has been primed. Craft paint can work for designs and lettering, but it needs a good base coat and sealer for durability.
Oil-based paints can sometimes bond well over the right primer, but they may dry slowly and can be less flexible than spray paints formulated for plastic. Two-part epoxy coatings may be durable on certain plastics, but they are not always DIY-friendly and may still require specialty prep. When in doubt, read the label and test first.
Common Mistakes That Make Paint Peel Off Plastic Buckets
Painting a Dirty Surface
Dust, oil, soap residue, and old grime are adhesion killers. Even a bucket that looks clean can have invisible residue from manufacturing, previous contents, or handling. Wash it well before sanding or priming.
Skipping Sanding on Glossy Plastic
Some paints claim no sanding is required, and that may be true for certain products and surfaces. Still, lightly scuffing a glossy bucket usually improves your odds, especially on older or slick plastic. The goal is a dull, clean surface.
Using the Wrong Primer
Not all primers are bonding primers. A drywall primer is not the same as a plastic primer. Use products that specifically mention plastic, PVC, vinyl, polypropylene, polyethylene, or hard-to-paint glossy surfaces.
Spraying Heavy Coats
Heavy coats cause runs, tackiness, uneven drying, and weak adhesion. Multiple light coats produce a smoother and tougher finish. Spray paint rewards restraint. It is basically the opposite of nacho cheese.
Using the Bucket Too Soon
If you paint a bucket in the morning and fill it with tools by lunch, do not be shocked when the finish scratches. Paint needs curing time. Give it a few days before rough use whenever possible.
Can You Paint the Inside of a Plastic Bucket?
You can paint the inside of a plastic bucket for decorative purposes, but it is usually not recommended for buckets that will hold water, food, soil for edible plants, pet supplies, or chemicals. Interior paint surfaces are more likely to be scratched, soaked, or contaminated by whatever the bucket holds.
If the bucket will be used as a planter, painting the outside is usually the better choice. Leave the inside unpainted, drill drainage holes if needed, and use a liner if you want extra separation between the plastic and the soil. For decorative storage, the inside can be painted, but let it cure fully before adding items.
Specific Examples: Which Paint System Should You Use?
For a Garden Planter Bucket
Use plastic spray paint or plastic primer followed by exterior spray paint. Add a UV-resistant clear coat if the bucket will sit in full sun. Paint only the outside unless the bucket is strictly ornamental.
For a Tool Bucket
Use a plastic primer or adhesion promoter followed by a tough enamel or plastic-compatible spray paint. Let it cure several days before loading it with tools. Expect some scratches over time because hammers are not known for their gentle personalities.
For a Craft or Toy Storage Bucket
Use plastic spray paint in a satin or gloss finish. Add stenciled labels with acrylic paint, then seal with a clear acrylic topcoat. This is one of the easiest and most satisfying bucket projects.
For a Bucket Labeling System
If you only need labels, do not paint the whole bucket. Scuff a rectangular area, apply plastic primer, then paint a label panel with chalkboard paint or acrylic enamel. This saves time and reduces peeling risk.
My Practical Experience With Painting Plastic Buckets
After painting more plastic containers than I care to admit, the biggest lesson is simple: the bucket decides how easy the job will be. Some plastics accept paint with minimal drama. Others act like they have signed a legal document refusing all coatings. The difference usually comes down to material, gloss, surface contamination, and how patient you are during prep.
One of the most successful plastic bucket projects I have seen was a set of color-coded garage buckets. The goal was not museum-level beauty; it was function. The owner wanted one bucket for car wash supplies, one for garden tools, one for extension cords, and one for “miscellaneous,” which is a polite word for chaos. Each bucket was washed with dish soap, rinsed, dried, scuffed lightly with 220-grit sandpaper, wiped clean, sprayed with plastic primer, and finished with two light coats of plastic-compatible spray paint. After a few days of curing, vinyl labels were added. The buckets were not flawless, but they looked sharp and held up well because they were not dragged across concrete every day.
The least successful project was almost the exact opposite. A glossy bucket was wiped once with a paper towel, sprayed heavily with leftover paint, and put back into service the next morning. It looked great for about ten minutes. Then the paint scratched around the handle, peeled near the rim, and flaked where the bucket flexed. That bucket taught a valuable lesson: paint cannot stick to hope. It needs a clean, dull, properly primed surface.
For outdoor buckets, I have found that lighter colors tend to age better in hot sun. Dark colors look dramatic, but they absorb more heat and may show scratches more clearly. If the bucket is going to sit on a patio as a planter, satin finishes are forgiving. Glossy finishes can look amazing, but they highlight every drip, dust speck, and sanding mistake. Matte finishes hide flaws but may be harder to clean.
Another practical tip is to elevate the bucket while painting. Place it upside down on scrap wood, a turntable, or an old box so you can rotate it without touching wet paint. Spray the bottom edge first, then the sides, then any handle area. If the handle is metal, decide whether to remove it, mask it, or paint it separately. A painted handle can chip quickly if it rubs against the plastic tabs.
Stencils work beautifully on painted buckets, but they need a steady hand and light paint application. Too much paint under a stencil creates fuzzy edges. Use painter’s tape, press the stencil down firmly, and apply light coats. If you are using acrylic craft paint for lettering, seal it after it dries. Otherwise, the first serious scrape may turn your elegant “Garden Tools” label into “Garde T ls,” which sounds like a questionable indie band.
For buckets that will see rough use, I prefer function over perfection. Paint the outside only, avoid thick layers near the rim, and accept that scratches may happen. The most durable painted bucket is the one that is properly prepared, lightly coated, fully cured, and used realistically. If the bucket will be abused daily, consider painting only a label area or using adhesive labels instead of coating the entire thing.
The final experience-based advice is to test before committing. Spray or brush a small patch on the bottom of the bucket using your chosen primer and paint. Let it cure for a couple of days, then scratch it with a fingernail or press tape onto it and pull it away. If the paint lifts easily, change the prep or product before painting the whole bucket. A test patch may feel annoying, but it is far less annoying than watching a full paint job peel like sunburn.
Final Verdict: What Paint Will Stick on a Plastic Bucket?
The paint most likely to stick on a plastic bucket is spray paint formulated for plastic or a plastic primer followed by a compatible topcoat. For difficult bucket plastics like HDPE and polypropylene, a specialty plastic primer, bonding primer, or adhesion promoter gives the finish a much better chance of lasting.
The winning formula is simple: clean the bucket, scuff glossy plastic, apply the right primer, paint in thin coats, and allow enough curing time. Do that, and your bucket can become a planter, organizer, tool caddy, or decorative storage piece without shedding paint like confetti at a parade.
Painting a plastic bucket is not complicated, but it is picky. Respect the prep, choose products made for plastic, and give the finish time to harden. Your reward is a bucket that looks better, works harder, and no longer has to live its life as a plain white pail with suspicious stains and no personality.