Sconce style outdoor lighting is the jewelry of a home’s exteriorexcept it also helps you find the keyhole, notice a slippery step, and determine whether the figure near the garage is a visitor or an unusually confident raccoon. Mounted directly to an exterior wall, these fixtures combine useful illumination with architectural character.
The best outdoor wall sconces do more than look attractive in a daytime product photo. They must direct light comfortably, withstand local weather, complement the scale of the building, and remain practical to maintain. This guide explains the major styles, sizing rules, placement strategies, materials, light specifications, controls, and installation considerations that can turn an ordinary exterior into a welcoming nighttime scene.
What Is Sconce Style Outdoor Lighting?
An outdoor sconce is a wall-mounted light fixture designed for exterior locations. It may resemble a traditional lantern, a farmhouse barn light, a compact cylinder, or a minimalist architectural box. Depending on its construction, the light can shine downward, upward, in both directions, or through glass panels around the fixture.
Outdoor sconces are commonly installed beside entry doors, around garages, along patios, near gates, and on exterior walls bordering walkways. They can provide several layers of illumination:
- Ambient lighting creates general visibility around an entrance or seating area.
- Task lighting helps people unlock doors, use an outdoor kitchen, or navigate steps.
- Accent lighting emphasizes stonework, siding, columns, plants, and other architectural details.
- Security lighting improves awareness around access points without turning the property into a stadium parking lot.
Popular Outdoor Wall Sconce Styles
Traditional Lantern Sconces
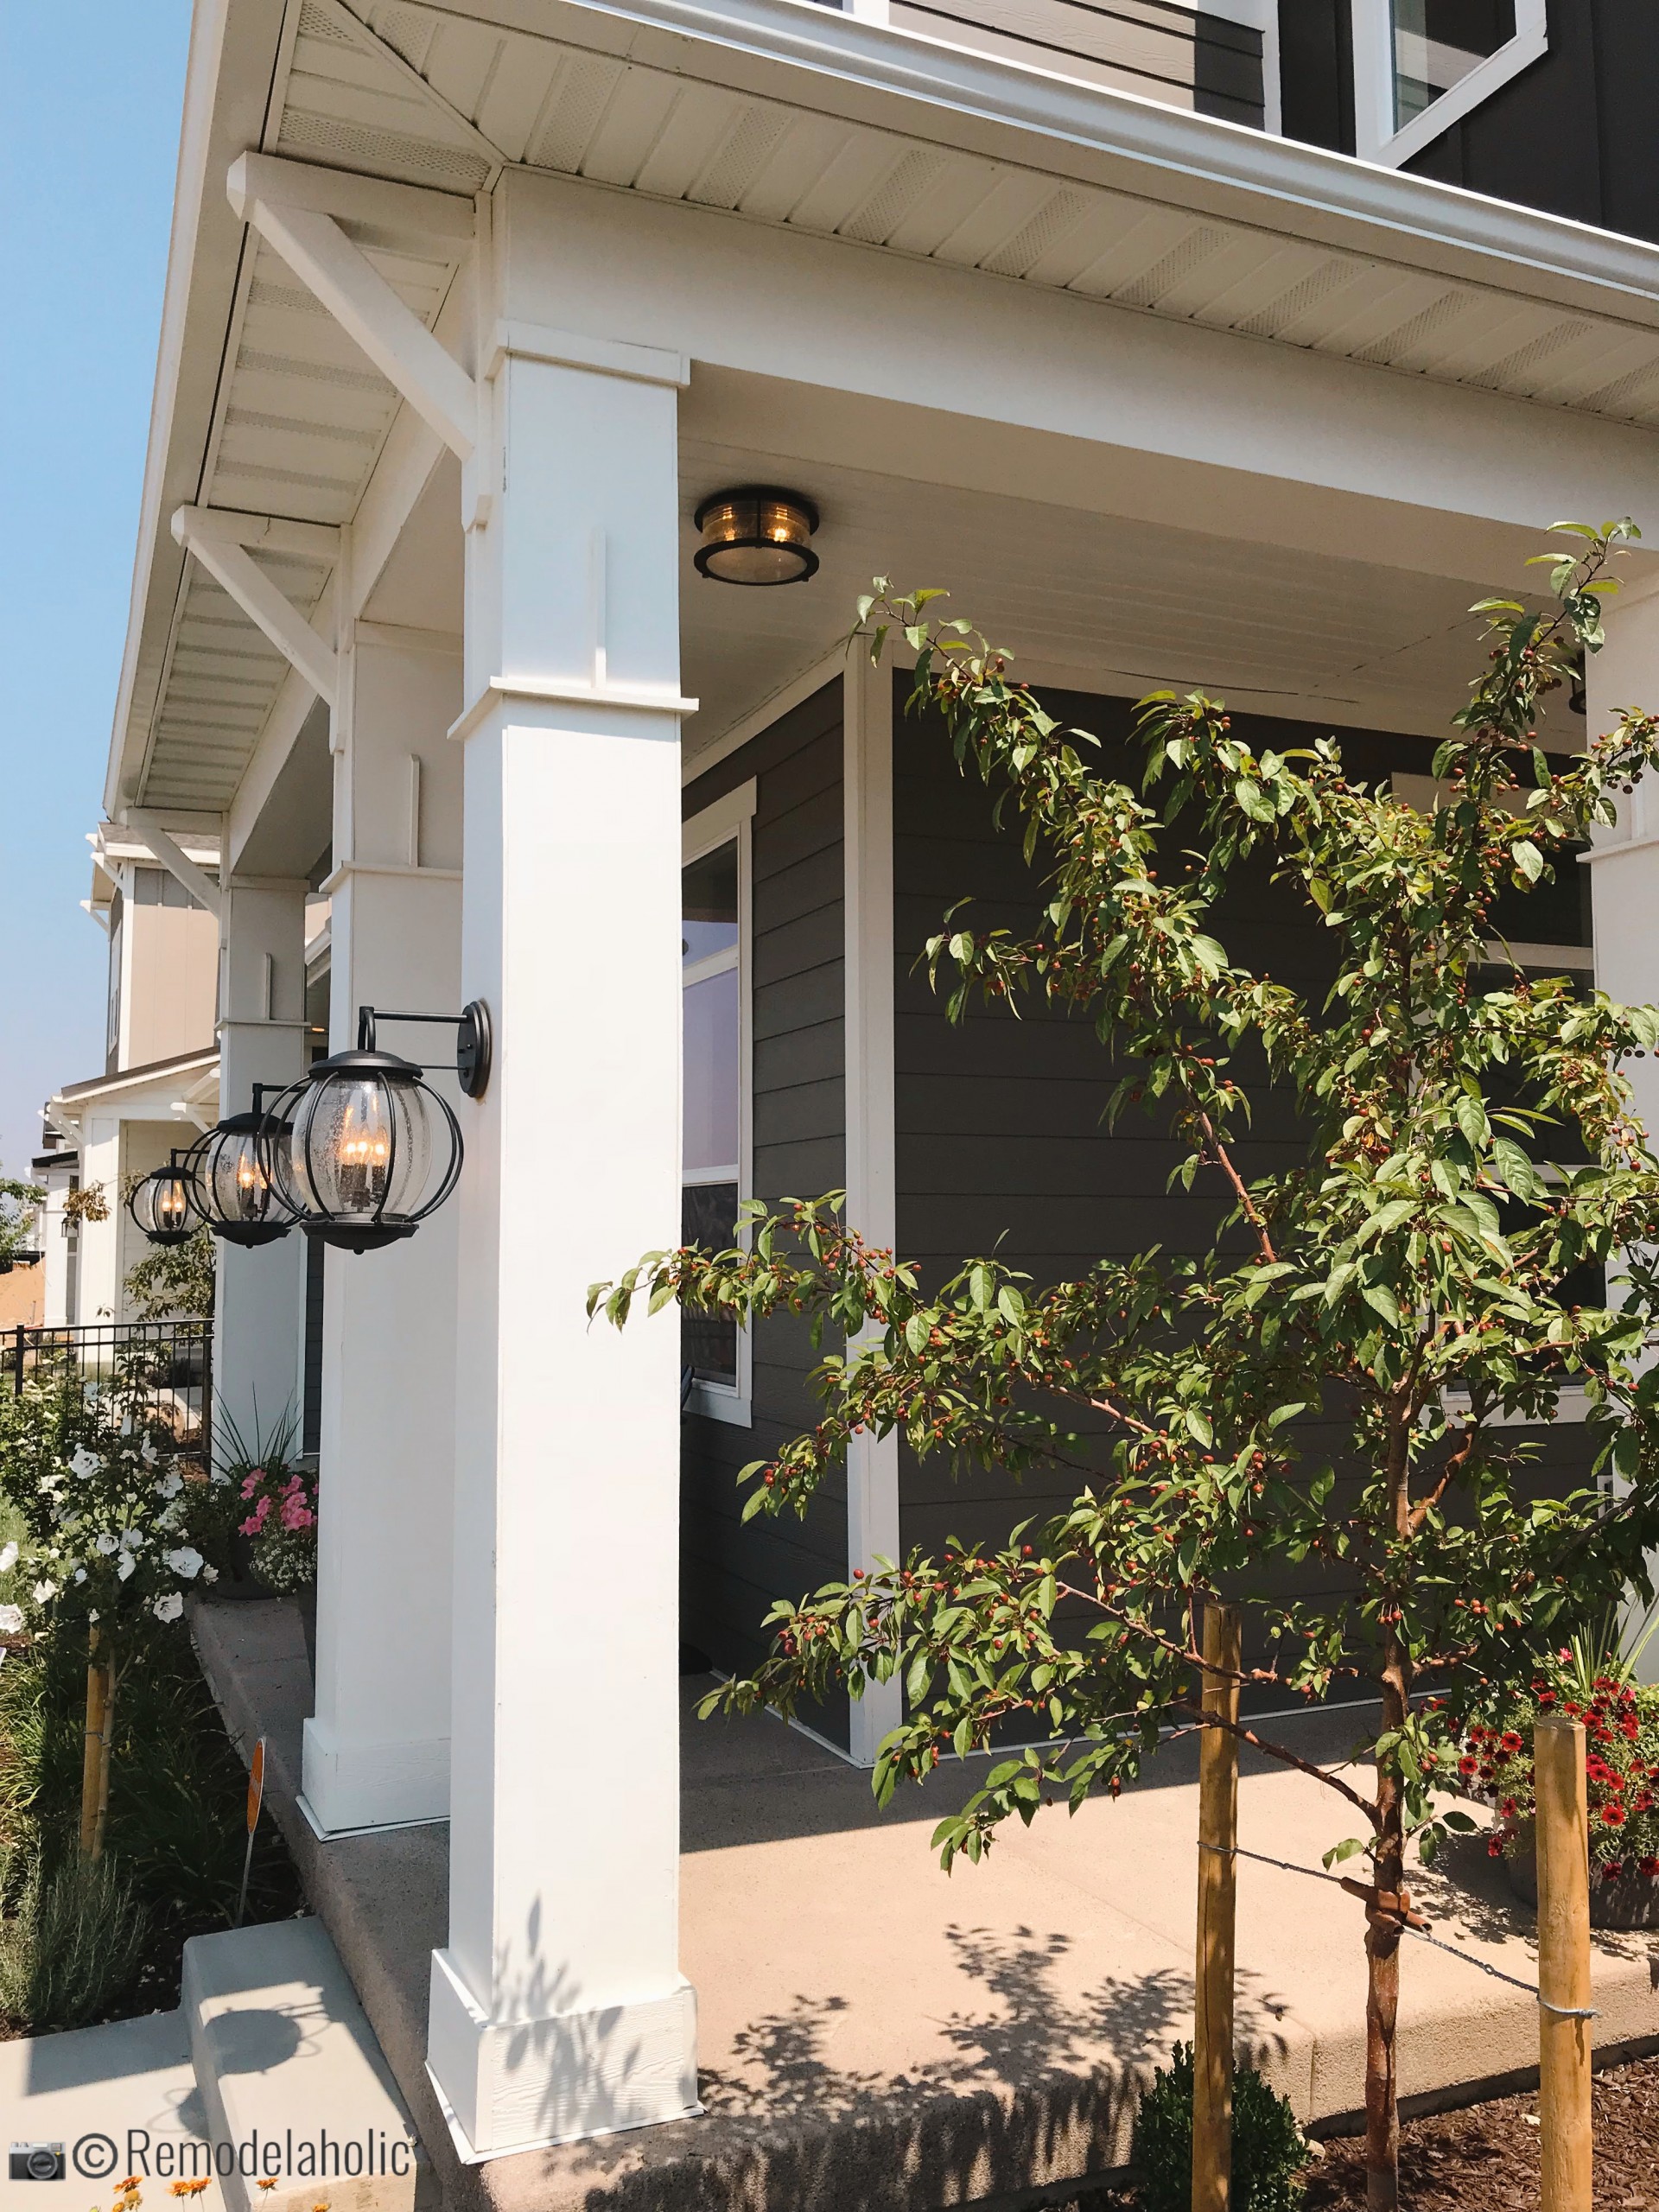
Traditional lanterns usually feature framed glass panels, visible bulbs, decorative finials, and finishes such as black, bronze, or aged brass. Their familiar shape works well with Colonial, Georgian, Cape Cod, and other classically influenced homes.
For a convincing period-inspired appearance, choose clear glass and candle-style bulbs. Seeded or lightly textured glass creates a softer, more forgiving glow while adding a handcrafted quality. It also disguises pollen and fingerprints slightly better, which is a small but noble public service.
Farmhouse and Gooseneck Lights
Farmhouse outdoor sconces typically use a broad metal shade attached to a straight or curved arm. The shade directs illumination downward, making this style practical over garage doors, side entrances, work areas, and covered porches.
Black, galvanized steel, white enamel, and weathered bronze are common finishes. A simple gooseneck fixture can reinforce rustic architecture, but it also looks sharp on a modern exterior when paired with clean siding and restrained colors.
Modern Up-and-Down Sconces
Modern outdoor wall lights often use rectangular housings or cylindrical bodies that project light above and below the fixture. The resulting beams can create attractive patterns on stucco, brick, concrete, or wood siding.
These sconces suit contemporary, industrial, and minimalist architecture. Their visual effect depends heavily on placement: evenly spaced fixtures create rhythm, while one carefully positioned light can emphasize a column or textured wall. Because upward light can contribute to glare and sky glow, select tightly controlled optics and avoid fixtures that throw unnecessary light beyond the building.
Craftsman and Mission-Style Sconces
Craftsman sconces are recognizable by sturdy geometric frames, broad rooflike tops, warm metal finishes, and art-glass-inspired panels. They pair naturally with exposed beams, stone columns, wood shingles, and deep porch overhangs.
These fixtures should feel substantial. A tiny lantern beside a broad Craftsman door can look as if it wandered over from a dollhouse, so pay particular attention to scale.
Coastal Outdoor Sconces
Coastal fixtures borrow details from nautical lighting, including cage guards, rounded glass, bulkhead shapes, and weathered metallic finishes. Style is only half the assignment in coastal environments, however. Salt air can be relentlessly hard on ordinary steel and low-quality coatings.
Marine-grade materials, solid brass, copper, durable aluminum, and corrosion-resistant finishes are generally better candidates for exposed coastal properties. Always review the manufacturer’s environmental and warranty limitations before buying.
Midcentury and Transitional Designs
Midcentury sconces may feature cones, globes, tapered shades, and simple angled arms. Transitional models combine traditional proportions with cleaner lines, making them useful when a home does not belong to one obvious architectural category.
Transitional lighting is especially helpful during exterior updates. It can connect an older brick facade with a newer door, modern house numbers, or simplified landscaping without making the entrance look like several design decades are arguing on the porch.
How to Match Sconces to a Home’s Architecture
Begin with the permanent elements of the property: roofline, windows, masonry, siding, columns, and door design. The fixture does not need to reproduce every architectural detail, but its shape should speak the same visual language.
- Choose framed lanterns for traditional or formal exteriors.
- Use broad shades and uncomplicated arms for farmhouse architecture.
- Consider geometric up-and-down lights for contemporary buildings.
- Select low-profile bulkhead fixtures for nautical or industrial settings.
- Use substantial geometric lanterns with warm finishes on Craftsman homes.
Coordinate the finish with nearby hardware, but do not become trapped in a match-everything marathon. A matte-black sconce can work beside aged-brass door hardware if both finishes relate to other exterior details. Repeating a finish two or three times often feels intentional; repeating it on every visible object can feel like the house ordered a uniform.
Choosing the Right Sconce Size
Exterior fixtures usually appear smaller from the street than they do in a showroom. As a practical starting point, select a wall light measuring approximately one-quarter to one-third of the door’s height. An 80-inch door, for example, often works with a fixture about 20 to 27 inches tall, provided the wall and trim offer enough clearance.
If two sconces flank an entrance, each fixture can sit toward the smaller end of that range. A single fixture may need to be larger to create equivalent visual weight. Oversized doors, tall entry recesses, and broad garage elevations can support more substantial lights.
Before ordering, check the complete dimensions:
- Fixture height and width
- Projection from the wall
- Backplate dimensions
- Distance from the mounting point to the top and bottom
- Clearance required for doors, shutters, trim, and gutters
A cardboard template is surprisingly effective. Cut out the fixture’s silhouette, tape it to the wall, and view it from the sidewalk and driveway. Cardboard is not glamorous, but neither is paying return shipping on three enormous lanterns.
Where and How High to Install Outdoor Sconces
For many front entries, placing the center of the fixture roughly 66 to 72 inches above the finished floor creates comfortable illumination near eye level. The ideal position can shift because of door height, steps, transoms, trim, or an unusually tall porch.
Leave enough horizontal space between the fixture and door casing for visual breathing room and safe operation. About six inches from the door frame is a useful starting point, but always account for shutters, storm doors, handrails, and the sconce’s projection.
Placement by Location
- Single front-door sconce: Place it on the handle side so the lock and arriving visitor are illuminated.
- Paired entry sconces: Align both fixtures at the same height and distance from the doorway.
- Garage lighting: Install sconces on the outer sides of the doors or use three evenly spaced fixtures across a wide two-car garage.
- Patio lighting: Position lights to illuminate circulation and activity areas without shining directly into seated guests’ eyes.
- Long exterior walls: Repeat fixtures at visually consistent intervals, checking the beam pattern at night before finalizing every location.
Brightness, Color Temperature, and Light Quality
Brightness should be selected according to the job, not according to the largest number printed on a package. A gentle entrance light may need far fewer lumens than a sconce serving a broad driveway. Multiple lower-output fixtures often create better visibility than one extremely bright source because they reduce harsh contrast and deep shadows.
For most residential exteriors, warm white light in the 2700K to 3000K range produces a welcoming appearance and complements wood, brick, stone, and warm-colored paint. Cooler light may be useful for certain tasks, but very blue-white illumination can feel commercial and increase perceived glare.
Also consider color rendering. A light source with good color accuracy helps visitors, landscaping, door finishes, and security-camera images look more natural. If a sconce uses a visible bulb, select one whose shape and filament arrangement complement the fixture instead of dominating it.
Weather Ratings and Durable Materials
An attractive indoor sconce is not automatically safe outdoors. Fixtures exposed to rain, snow, sprinklers, or wind-driven moisture should be listed for wet locations. Damp-rated fixtures are generally intended for protected areas where moisture or condensation may occur but direct water exposure is limited.
Look for a recognized safety listing and follow the manufacturer’s approved mounting orientation. Some wall lights are tested only for a specific position, so rotating a downward fixture upward may create a rather stylish rain collector.
Material selection should reflect the environment:
- Powder-coated aluminum is lightweight and widely available, though coating quality varies.
- Solid brass offers substantial corrosion resistance and may develop a natural patina.
- Copper ages distinctively and performs well when appropriately constructed.
- Stainless steel provides a crisp modern look but still requires suitable grades and maintenance in harsh environments.
- Composite materials can resist rust and may be practical near saltwater or heavy humidity.
LEDs, Controls, and Responsible Outdoor Lighting
Well-designed LED sconces use less electricity than older incandescent options and direct illumination efficiently. Replaceable LED bulbs make future servicing simple, while integrated LED fixtures can achieve slim forms and carefully engineered beam patterns. With integrated models, review the warranty and whether the driver or light engine can be serviced.
Dusk-to-dawn photocells, timers, dimmers, and motion sensors can reduce wasted light. A useful strategy is to maintain a low ambient level during active evening hours and use motion activation when brighter task or security lighting is needed.
Responsible outdoor lighting should be useful, targeted, low in intensity, controlled, and warm-colored. Choose shielded fixtures that keep illumination on doors, steps, and walking surfaces rather than sending it through bedroom windows or into the night sky. Local ordinances may also regulate fixture shielding, brightness, operating hours, and light trespass.
Installation and Maintenance
A hardwired outdoor sconce should be attached to a suitable exterior electrical box with weather-resistant connections and the required seals or gaskets. Turn off the correct circuit and verify that power is absent before touching wiring. If the box is damaged, wiring is unfamiliar, grounding is unclear, or local rules require licensed work, hire a qualified electrician.
After installation, inspect the fixture at night from several viewpoints. Stand at the door, walkway, driveway, neighboring property line, and common seating areas. A sconce can be perfectly level and still be spectacularly annoying.
Clean glass and shades periodically with methods approved for the finish. Remove insects and debris, check for loose fasteners, inspect gaskets, and replace cracked panels. Avoid abrasive cleaners that can damage protective coatings. In coastal locations, gentle routine cleaning can help remove salt deposits before they settle in for a long and corrosive vacation.
Common Outdoor Sconce Mistakes
- Choosing a fixture that looks appropriately large indoors but appears undersized on the facade
- Using a damp-rated product where direct rain or sprinkler exposure requires a wet rating
- Installing bright, unshielded bulbs at eye level
- Mixing incompatible color temperatures across the porch, garage, and landscape
- Ignoring door swing, shutters, trim, and wall projection
- Depending on decorative sconces to illuminate every step and pathway
- Leaving high-output exterior lights on all night without controls
- Buying an integrated LED fixture without reviewing its warranty or serviceability
Practical Experiences With Sconce Style Outdoor Lighting
The Front Entry That Looked Different After Dark
A common front-entry experience begins with a fixture chosen entirely in daylight. The homeowner selects a beautiful clear-glass lantern, installs a bright exposed bulb, and discovers that the evening result feels less like a warm welcome and more like a polite interrogation.
The practical lesson is to evaluate the fixture, bulb, and wall as one system. Clear glass reveals the lamp and maximizes sparkle, but it can produce glare when the bulb is too bright. Switching to a lower-output warm LED or a lightly diffused lamp often improves comfort without sacrificing visibility. In some cases, seeded glass or a shielded light source is the better choice from the beginning.
The Garage With Tiny “Sample-Size” Lanterns
Garage sconces frequently demonstrate how deceptive scale can be. Two 10-inch lanterns may look substantial on a store shelf, yet nearly disappear beside a wide double garage door. Replacing them with taller fixtures generally gives the elevation better balance and improves the light distribution near vehicles and walkways.
A cardboard mock-up would have revealed the issue before installation. Viewing the proposed fixture from the street is essential because that is where its proportions must make sense. It also helps determine whether two lights are sufficient or whether a third central fixture would create a more balanced composition.
The Patio That Had Plenty of Light but No Comfort
Another familiar situation involves a patio with technically adequate brightness but poor visual comfort. Wall sconces shine directly across the seating area, producing glare while leaving the ground surprisingly difficult to read. Guests can see the bulbs clearly, yet the edge of the step remains mysterious.
The successful correction usually involves layers. Shielded wall lights provide soft ambient illumination, while low-level step or path lights identify changes in elevation. A dimmer or lower-lumen lamp reduces glare around the table. The result may use less total light while making the patio feel safer and more spacious.
The Coastal Fixture That Aged Before the Welcome Mat
Near saltwater, a low-cost painted-steel fixture can begin bubbling, staining, or corroding much sooner than expected. The frustrating part is that the light may still work, but its finish starts broadcasting a “shipwreck chic” theme nobody requested.
This experience makes material selection more important than chasing the lowest initial price. Brass, copper, appropriate stainless steel, durable aluminum, and well-made composites can offer better long-term performance when matched to the environment. Manufacturer guidance matters, as does regular removal of salt residue. A coastal rating or warranty is more meaningful than a product description that merely includes a seashell in the photograph.
The Smart Light That Became Too Clever
Motion sensors and connected controls are useful until they are configured to react to every passing moth, branch, and neighborhood cat. Overly sensitive controls can produce constant cycling, annoy neighbors, and shorten the homeowner’s patience considerably.
A better commissioning experience includes adjusting detection range, sensitivity, brightness, and duration after dark. The sensor should cover the approach to the door rather than the entire street. If the fixture supports dim-to-bright operation, a low resting level followed by useful illumination during movement can feel more natural than abrupt darkness followed by a blast of light.
The Value of a Nighttime Test
The most transferable lesson is simple: outdoor lighting must be judged outdoors and after sunset. Temporarily mounting one fixture, testing several bulb outputs, or using a portable light to approximate the beam can expose glare, reflections, blind spots, and unwanted spill before the project is repeated across the property.
Walk every normal route during the test. Unlock the door, approach from the driveway, sit at the patio table, look through nearby windows, and check the view from the property line. This short trial often leads to small adjustmentswarmer lamps, lower brightness, better shielding, or slightly different placementthat make the final design feel deliberate rather than merely illuminated.
Conclusion
Sconce style outdoor lighting succeeds when appearance and performance are considered together. Start with the architecture, choose a fixture large enough for the facade, and confirm that its weather rating matches the installation site. Use warm, controlled illumination, place it where people actually need to see, and test the result at night.
The right exterior wall sconces can strengthen curb appeal, clarify entrances, make outdoor rooms more comfortable, and improve nighttime navigation. They should help the home look welcomingnot challenge the moon to a brightness contest.