Before you toss that empty tuna can into the recycling bin, pause for one glorious second. That humble little metal circlethe one that just held your sandwich filling, salad topper, or emergency “I forgot to grocery shop” dinnerhas secret decorative potential. With a quick rinse, a little creativity, and the right lighting approach, a tuna can can become a surprisingly elegant accent light for your patio, dining table, bookshelf, or cozy reading corner.
Yes, we are talking about DIY tuna can lighting. And no, your home does not have to smell like a deli counter to pull it off. The trick is cleaning the cans thoroughly, smoothing any sharp edges, and pairing them with safe lighting options such as battery-powered LED tea lights or small LED puck lights. The result? A warm, modern, upcycled lighting idea that looks far more expensive than the “free because you already ate the tuna” price tag.
This project works because tuna cans have a shallow, sturdy shape that naturally resembles a mini wall sconce, candle cup, or decorative light dish. Arrange several together and they become a sculptural display. Paint them matte black for modern drama, soft gold for a glam glow, white for coastal charm, or terracotta for a handmade Mediterranean mood. Suddenly, your recycling bin is looking less like trash and more like an interior design intern with ambition.
Why Tuna Cans Make Surprisingly Beautiful DIY Lights
The best upcycled home decor projects usually have one thing in common: they make ordinary objects look intentional. Tuna cans already have a useful shape. They are round, shallow, lightweight, easy to paint, and strong enough to hold a small LED light. Their low profile makes them especially good for wall art lighting, table centerpieces, holiday displays, and outdoor dinner party decor.
Compared with taller soup cans or coffee cans, tuna cans create a softer, wider glow. Instead of looking like a rustic lantern, they can look like a row of tiny modern sconces. When mounted to a board, arranged in a cluster, or glued onto a decorative backing, they create a dimensional lighting feature that feels crafted rather than chaotic.
The other advantage is cost. Many DIY lighting projects require pricey hardware, glass shades, electrical components, or specialty tools. This one can be made with clean tuna cans, paint, adhesive, a backing board, and battery-powered LED lights. It is a budget-friendly lighting idea that still feels stylish enough for a dining room wall, porch nook, or apartment balcony.
Start by Rinsing the Tuna Cans Properly
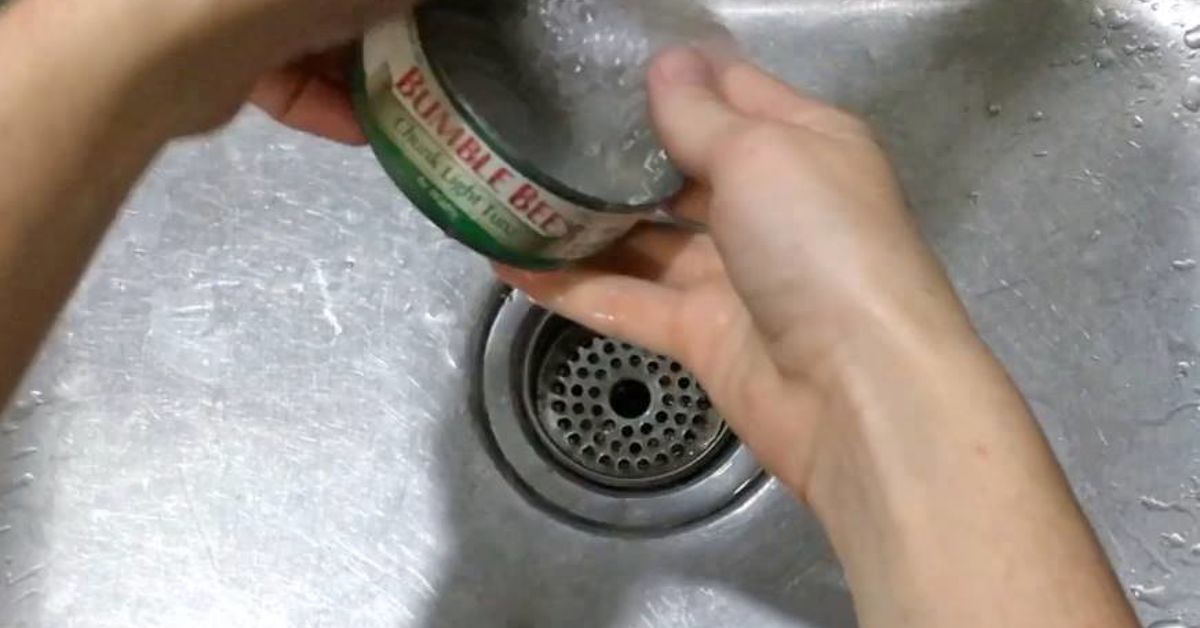
The first step is not glamorous, but it matters: rinse the tuna cans well. Any leftover oil, fish flakes, or salty residue can interfere with paint, attract odors, and generally make your craft table smell like a suspicious lunchbox. Wash each can with warm water and dish soap, then dry it completely before painting or decorating.
If the label is still attached, soak the can in warm water until the paper loosens. Remove the glue residue with a sponge or a small amount of rubbing alcohol. The cleaner the surface, the better your paint will adhere. A smooth, dry can is also easier to handle and safer to decorate.
Check the Edges Before You Craft
After opening any metal can, inspect the rim carefully. Some can openers leave a sharp edge, and tuna cans are not exactly known for being gentle little daisies. Use a safety can opener when possible, or cover the inner rim with decorative trim, strong tape, thin rope, or a bead of hot glue once the can is clean and dry. If you feel any rough spots, smooth them with fine-grit sandpaper while wearing gloves.
This step is especially important if the finished lights will be handled often, used on a table, or moved between indoor and outdoor spaces. A gorgeous lighting idea should not come with a surprise finger scratch. Beauty is welcome; tetanus-core decor is not.
The Best Lighting Option: Battery-Powered LEDs
For this project, battery-powered LED tea lights are the easiest and safest option. They give the warm flicker of candlelight without open flame, melted wax, smoke, or the need to hover nearby like a nervous fire marshal. Small LED puck lights also work well if you want a brighter glow, especially for wall-mounted displays.
LED lighting is a smart choice for DIY decor because it stays cooler than traditional incandescent bulbs and uses energy efficiently. It also makes the project more flexible. You can place your tuna can lights on shelves, hang them from a backing board, use them as table decor, or create a patio display without hiring an electrician or running cords across the room like a chaotic spiderweb.
If you prefer the look of real candles, use caution. Place candles only in sturdy, nonflammable holders, keep them away from curtains, paper, greenery, pets, and children, and never leave them unattended. For most homes, LED tea lights offer the same cozy mood with far less stress.
How to Make a Gorgeous Tuna Can Lighting Display
This upcycled tuna can lighting idea can be adapted in several ways, but the wall-mounted version is one of the most striking. It turns a handful of empty cans into a sculptural light feature that looks intentional, warm, and surprisingly upscale.
Supplies You Will Need
- 6 to 12 clean, dry tuna cans
- Battery-powered LED tea lights or mini puck lights
- Spray paint or acrylic craft paint
- Fine-grit sandpaper
- Gloves for handling metal edges
- Strong craft adhesive or small screws
- A wood board, canvas panel, or sturdy decorative backing
- Optional: rope, beads, peel-and-stick wallpaper, metallic leaf, or stencils
Step 1: Clean, Dry, and Prep the Cans
Wash each tuna can thoroughly and let it dry. Remove paper labels and adhesive residue. Sand the exterior lightly so paint can grip better. If the rim feels sharp, cover it with a thin rope border, decorative trim, or a smooth line of hot glue. The goal is to make each can look like a tiny intentional light cup, not a former tuna residence.
Step 2: Choose a Design Style
Before painting, decide on the mood. Matte black cans on a natural wood board create a modern farmhouse look. Gold or brass paint gives the project a boutique hotel feel. White paint with jute rope looks coastal and breezy. Deep green, navy, or burgundy can make the lighting display feel rich and moody.
If you want a patterned design, try painting the inside of each can a metallic shade and the outside a matte neutral. When the LED light turns on, the metallic interior reflects a warmer glow. It is a small detail, but it makes the finished project look less “I raided the recycling bin” and more “I saw this in a design magazine and pretended not to check the price.”
Step 3: Paint in Thin Layers
Apply paint in light, even coats rather than one thick layer. Spray paint works well for metal, but acrylic craft paint can also do the job if you use a metal-friendly primer first. Let the cans dry fully between coats. Paint both the inside and outside for a polished look, especially if the cans will be visible from different angles.
For extra texture, wrap the outside with twine, attach small wooden beads around the rim, or add a strip of peel-and-stick wallpaper to the outer wall of the can. You can also stencil small stars, leaves, or geometric shapes on the interior for a custom effect.
Step 4: Arrange the Cans Before Attaching
Lay your backing board flat and experiment with placement. A straight vertical row works well for a narrow wall. A grid feels clean and modern. A scattered cluster looks more artistic and organic. For a dining room or hallway, try arranging the cans in a gentle wave pattern so the lights appear to move across the wall.
Leave enough space between cans so the design feels airy. Crowding them too tightly can make the piece look heavy. Think of each tuna can as a tiny stage for light. Even tiny stages need personal space.
Step 5: Attach the Cans Securely
Use strong adhesive designed for metal and wood, or attach the cans with small screws through the back of the board. If you are using screws, drill pilot holes carefully and wear eye protection. For a renter-friendly version, skip the wall-mounted board and place the painted cans on a tray, mantel, or outdoor table instead.
Once the cans are attached, place one LED tea light or puck light inside each can. Turn them on, dim the room, and admire the fact that you just turned lunch leftovers into mood lighting. That is the kind of personal growth no one warns you about.
Creative Variations for Different Spaces
The beauty of DIY tuna can lanterns is how easily they adapt to your home’s style. You can make the project rustic, modern, romantic, playful, or holiday-specific with only a few changes.
Modern Wall Sconce Look
Paint the cans matte black or satin bronze and mount them on a stained wood board. Use warm white LED puck lights for a soft glow. This version looks great in an entryway, home office, or hallway where you want decorative lighting without bulky fixtures.
Boho Patio Lights
Wrap the outside of each can with jute rope or raffia, then place LED tea lights inside. Arrange them along a patio table, balcony ledge, or garden shelf. Add small stones or sand inside the cans to weigh them down if they will be used outdoors.
Holiday Centerpiece
Paint the cans in seasonal colors and group them down the center of a table. For fall, use copper, cream, and terracotta. For winter, try white, silver, and evergreen. For summer, go with coral, turquoise, and sunny yellow. Add greenery around the cans, but keep any real flame far away from flammable materials. Better yet, use LEDs and relax.
Kids’ Craft Room Glow-Up
For a family-friendly version, let kids decorate the outside of clean cans with stickers, washi tape, or paint markers while an adult handles any sharp edges and adhesive. Use only battery-powered lights. The finished display can brighten a homework station or reading nook without involving cords or glass.
Where to Display Tuna Can Lights
These lights work best as accent lighting. They are not meant to replace overhead lights or task lamps, but they are excellent for atmosphere. Place them where you want warmth, texture, and a little visual surprise.
- Dining table: Use a row of painted cans as a low centerpiece with LED tea lights.
- Bookshelf: Tuck one or two cans among books and plants for a soft evening glow.
- Patio: Arrange several on an outdoor tray for dinner-party ambiance.
- Entryway: Mount a cluster on a board to create a welcoming wall feature.
- Bathroom shelf: Use LED lights only and keep them away from towels or paper products.
- Bedroom: Create a cozy, flameless nightstand accent with warm LEDs.
Safety Tips That Keep the Project Pretty and Practical
Upcycled lighting should be beautiful, but it should also be sensible. Metal cans can have sharp rims, paint needs proper ventilation while drying, and candles require serious caution. The safest version of this project uses battery-powered LEDs, especially if the lights will be near fabric, greenery, paper decorations, kids, or pets.
If you use spray paint, work outdoors or in a well-ventilated area and follow the paint label instructions. Let the cans cure fully before placing lights inside. Avoid using plug-in bulbs unless you understand proper electrical safety and are using components designed for that purpose. This project is best as decorative LED lighting, not homemade electrical wiring.
For outdoor use, bring the cans inside during heavy rain unless every material you used is weather-resistant. Tuna cans can rust over time, especially if scratched or exposed to moisture. A clear protective sealant can help, but even sealed metal decor lasts longer when stored properly.
Why This Upcycled Lighting Idea Works So Well
There is something satisfying about turning a disposable object into something charming. A tuna can is small, plain, and easy to overlook, but once it is cleaned, painted, and lit from within, it becomes a tiny architectural detail. The circular shape frames the light beautifully, while the metal surface reflects a soft glow.
This project also fits neatly into the bigger trend of sustainable decorating. Upcycled home decor encourages people to reuse materials before buying new ones. It saves money, reduces waste, and adds personality to a space. Unlike mass-produced decor, handmade lighting has small variations that make it feel warm and human.
And honestly, there is bragging potential. When someone says, “Where did you get those cute lights?” you get to say, “Oh, these? Tuna cans.” Then you can watch their face do a full emotional journey from confusion to admiration. That alone may be worth the craft glue.
Common Mistakes to Avoid
Skipping the Cleaning Step
A quick rinse is not enough if the can held oil-packed tuna. Wash it with soap, rinse thoroughly, and dry completely. Any residue can cause odors and make paint peel.
Using Real Candles Too Casually
Real candles may look lovely, but they need supervision. Never place open flames near paper, dried flowers, curtains, or wood surfaces without proper protection. LED candles are the better everyday choice.
Painting Too Thickly
Heavy paint coats can drip, chip, or stay tacky. Use multiple thin coats for a smoother finish.
Ignoring Sharp Rims
Always inspect the cut edge. Smooth or cover any sharp areas before decorating or displaying the cans.
Overcrowding the Design
Give each light breathing room. Negative space makes the finished display look more polished and less like a drawer full of emergency fish containers.
Experience Notes: What This Project Feels Like in Real Life
The first time you make lights from tuna cans, you may feel a little ridiculous. That is normal. Most great DIY projects pass through a brief “what have I done?” phase. At the beginning, you are standing at the sink scrubbing a fish can and wondering if this is decor genius or a cry for help. Then the paint goes on, the LEDs click into place, and suddenly the whole project makes sense.
One of the best things about this idea is how forgiving it is. If one can gets dented, place it toward the back of a tabletop arrangement or use it as the “rustic character” piece. If the paint is not perfect, add twine, ribbon, or a second color. If your arrangement looks odd, move the cans around before attaching them permanently. Unlike expensive lighting projects, this one gives you room to experiment without feeling like every mistake costs $47 and a trip back to the hardware store.
For a cozy dinner setup, a group of five or seven painted tuna cans down the center of a table creates a warm, low glow that does not block conversation. That is a major win, because nobody wants to spend dinner talking around a centerpiece the size of a shrub. Add a linen runner, a few small sprigs of greenery, and warm LED tea lights, and the whole table starts to look styled rather than assembled five minutes before guests arrived.
For outdoor spaces, the project feels especially useful. Apartment balconies, small patios, and porch steps often need atmosphere more than brightness. Tuna can lights are low-profile, easy to move, and inexpensive enough that you can make a full set. If the wind is an issue, add a layer of small pebbles, sand, or glass beads inside each can before placing the LED light on top. This gives the cans weight and makes them feel more finished.
Wall-mounted versions create the biggest “wow” moment. A simple wood board with nine painted cans arranged in a loose grid can look like modern art when the lights are on. The secret is consistency. Use the same paint finish, the same type of LED light, and a balanced arrangement. Even though the materials are humble, repetition makes the display feel designed.
This project is also a great reminder that DIY does not have to mean complicated. You do not need to build a chandelier, rewire a lamp, or learn five new tools before breakfast. Sometimes the best home projects come from noticing the shape of something ordinary and asking, “Could this be prettier?” In this case, the answer is yes. Very much yes. Rinse the tuna can, give it a glow-up, and let it shine like it has been waiting its whole pantry life for this exact moment.
Conclusion
Rinsing out tuna cans for a gorgeous lighting idea is one of those clever DIY projects that proves style does not have to be expensive. With clean cans, safe LED lights, paint, and a little imagination, you can create upcycled lighting that works for dining tables, patios, shelves, entryways, and cozy corners. The project is budget-friendly, customizable, and surprisingly chic when finished with care.
The key is to treat the cans like real decor materials. Clean them thoroughly, smooth the edges, choose a color palette, use safe lighting, and arrange them thoughtfully. Do that, and your empty tuna cans can become warm, glowing accents with personality. Not bad for something that almost became recycling-bin background noise.