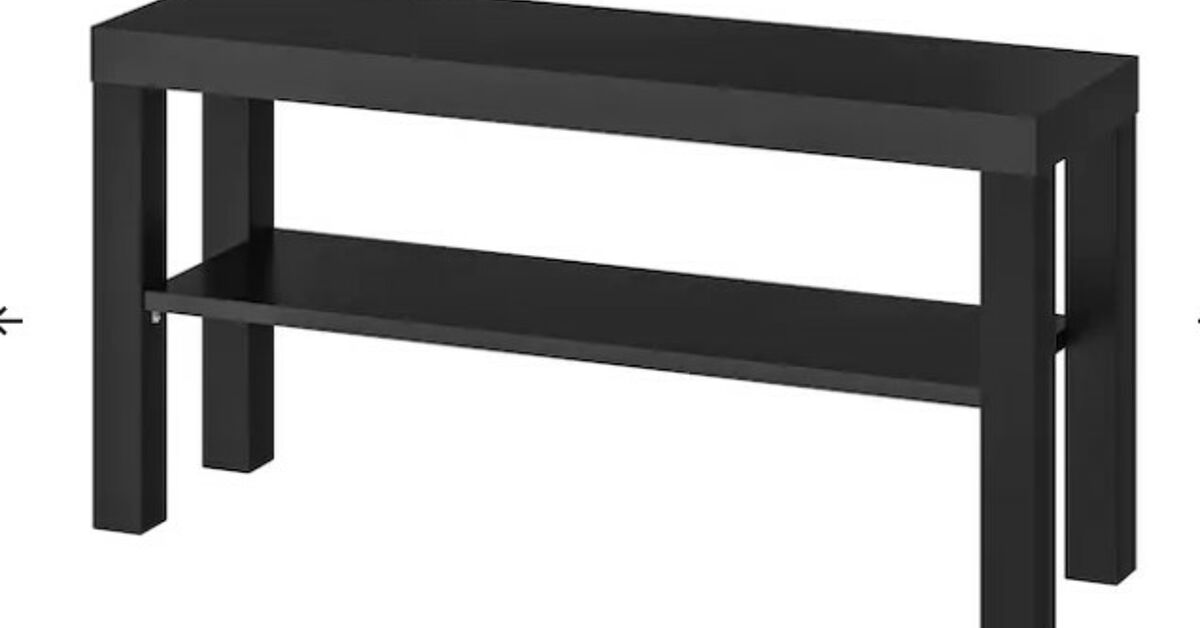
The IKEA Lack TV bench is the plain white T-shirt of living-room furniture: affordable, useful, and practically begging for accessories. In its original form, it provides a low-profile surface, an open shelf, and a convenient route for cables. With a thoughtful DIY upgrade, however, it can look more like a custom media console than something you carried home in a flat box.
This guide explains how to upgrade an IKEA Lack TV bench with a more durable finish, better storage, cleaner cable management, and decorative details. The project is flexible enough for renters, first-time furniture hackers, and experienced DIYers who already own enough clamps to make the garage nervous.
Understand Your IKEA Lack TV Bench Before Modifying It
Before reaching for a drill, it helps to know what is underneath the smooth exterior. The current 47 1/4-inch Lack TV unit sold in the United States measures approximately 47 1/4 inches wide, 13 3/4 inches deep, and 14 1/8 inches high. IKEA lists a maximum TV weight of 35 pounds and a shelf load of 33 pounds for this version. A 63-inch-wide version is also available with higher listed limits of 55 pounds for both the television and shelf. Always check the article number and instructions for your specific unit because Lack dimensions and ratings vary.
The panels are not ordinary solid lumber. IKEA describes the top and bottom panels as a combination of particleboard, fiberboard, plastic edging, and honeycomb paper filling. This lightweight construction is one reason the bench is easy to move, but it also means you should not drive random screws into a panel and expect them to hold like screws in solid oak. The screw may enter confidently and then discover that its new job is holding air.
Choose Upgrades That Work With the Construction
The safest and most practical upgrades are surface treatments and removable additions. Paint, adhesive vinyl, decorative trim, baskets, freestanding shelf inserts, cable clips, and lightweight doors can transform the unit without compromising its internal structure.
Installing tall replacement legs or heavy solid-wood panels requires more planning. Any new legs should connect to a properly built plywood sub-base or another structurally sound support rather than relying on screws placed only in the hollow portions of the Lack panels.
Plan the Look of Your DIY TV Bench Upgrade
Start by deciding what problem the makeover should solve. A television bench that merely looks boring requires a different plan from one currently hosting a game console, six controllers, a router, three mystery remotes, and a cable that apparently belongs to nothing.
Popular Design Directions
- Modern minimalist: Warm white, charcoal, or muted green paint with clean storage boxes.
- Mid-century inspired: Walnut-look vinyl, tapered legs mounted to a reinforced base, and brass-colored accents.
- Scandinavian natural: Light oak tones, woven baskets, pale neutral paint, and simple wood slats.
- Industrial: Matte black paint, dark wood-look surfaces, and discreet metal details.
- Coastal: Soft blue or off-white paint with cane-front inserts and natural baskets.
Create a quick sketch and measure every device that will live inside the bench. Electronics need enough room for plugs, cables, and airflow. A game console should not be squeezed into a decorative cubby like the last sweater in an overpacked suitcase.
Tools and Materials
You do not need every item below. Select materials based on the upgrades you plan to complete.
- Gentle degreasing cleaner and clean cloths
- 220-grit sanding sponge or sandpaper
- Vacuum and microfiber cloth
- Bonding primer formulated for laminate
- Durable furniture or cabinet enamel
- Small fine-finish roller and quality angled brush
- Drop cloth, painter’s tape, gloves, and eye protection
- Wood filler for minor chips or dents
- Peel-and-stick furniture vinyl or decorative film
- Thin wood molding, flexible trim, or lightweight slats
- Storage baskets or custom freestanding cubbies
- Cord clips, hook-and-loop cable ties, and cable labels
- Anti-tip hardware appropriate for your wall type
- Optional plywood sub-base for safely adding furniture legs
Step 1: Empty, Inspect, and Disassemble the Bench
Disconnect the television and every electronic device. Take a photograph of the wiring before removing anything, especially when the back of your entertainment system resembles an electrical bowl of spaghetti.
If practical, remove the shelf and detachable components. Label hardware in small bags so that every fastener has a known home when reassembly day arrives. Inspect the surface for peeling edging, dents, swollen areas, or loose joints.
Small chips can be repaired with a compatible paintable wood filler. Slightly overfill the damaged area, allow it to dry, and sand it level. For deeper repairs, filler manufacturers commonly recommend building the material in layers rather than applying one giant lump that remains soft in the center.
Panels that are badly swollen from water damage should usually be replaced rather than cosmetically disguised. Particleboard does not forget a flood simply because someone painted it sage green.
Step 2: Clean and Scuff the Laminate Surface
Paint adhesion depends more on preparation than dramatic brushwork. Clean all surfaces with a mild degreasing solution to remove dust, fingerprints, polish, and oily residue. Avoid saturating seams or exposed particleboard. Wipe away cleaner residue and let the bench dry completely.
Lightly scuff glossy areas with 220-grit sandpaper. The goal is to dull the finish, not excavate through it. Benjamin Moore’s laminate-furniture guidance recommends cleaning, sanding with fine paper, removing the dust, applying a bonding primer, and then painting with a durable finish.
Vacuum the bench carefully and wipe it with a clean microfiber cloth. Dust left beneath paint becomes a permanent collection of tiny bumps, each one proudly announcing that preparation ended five minutes too early.
Step 3: Apply a Bonding Primer
A general-purpose wall primer may not adhere reliably to slick furniture finishes. Use a bonding primer specifically labeled for laminate, glossy surfaces, or previously finished furniture.
Apply a thin, even coat with a fine-finish roller. Use a brush only for corners, seams, and narrow edges. Heavy coats dry slowly and are more likely to produce ridges or drips. Allow the primer to dry according to its label, and lightly sand rough spots before removing the dust again.
Sherwin-Williams similarly recommends a high-adhesion primer, light sanding after the primer has hardened, and adequate ventilation during laminate-furniture projects. Product drying times vary, so the instructions on the container should outrank any impatient weekend schedule.
Step 4: Paint the IKEA Lack TV Bench
For a durable finish, choose cabinet enamel, furniture paint, or quality acrylic enamel. Satin is a forgiving choice because it is easier to clean than flat paint but does not spotlight every surface imperfection the way high gloss can.
Roll the large flat sections in thin coats. Maintain a wet edge and finish each section with light passes in the same direction. Paint the edges and corners with a brush, checking frequently for drips beneath the panels.
Two finish coats are usually more attractive than one heavy coat. Allow each coat to dry fully before applying the next. Even when paint feels dry to the touch, it may still be soft underneath. Give the final finish several days of gentle treatment before placing electronics, baskets, or decorative objects on it.
Should You Add a Clear Protective Coat?
A clear topcoat is optional when you use a high-quality furniture or cabinet enamel. It can be useful on heavily handled surfaces, but the product must be compatible with the paint underneath. Water-based clear finishes are available for furniture and can provide additional resistance to scuffs and scratches.
Test the combination on an inconspicuous area first. Some clear products can alter sheen or color, particularly over very dark paint.
Step 5: Add a Wood-Look Top Without Major Construction
A contrasting top creates one of the biggest visual changes. The easiest renter-friendly method is furniture-grade peel-and-stick vinyl in an oak, walnut, stone, or solid-color finish.
- Measure the top precisely.
- Cut the vinyl with a small amount of excess material.
- Clean the surface and let it dry.
- Peel back only a few inches of backing paper.
- Apply the film gradually while smoothing from the center outward.
- Trim the edges with a sharp craft knife.
Use a felt-covered squeegee or a clean cloth to avoid scratching the film. Do not stretch the material aggressively around corners because stretched vinyl may shrink back later.
A thin plywood top is another option, but remember that its weight counts toward the bench’s total load. Keep it lightweight, seal all faces to reduce warping, and avoid treating the decorative panel as additional structural support.
Step 6: Create Better Storage
The open shelf makes equipment accessible, but it also puts every game case, controller, and charging cable on public display. The easiest solution is a pair of baskets or fabric bins sized to leave a little breathing room around the edges.
Build Removable Shelf Inserts
For a custom appearance, build one or two lightweight boxes from thin plywood or MDF and slide them into the shelf opening. Because the inserts are freestanding, they do not depend on screws holding inside a hollow panel.
Add a simple door to each insert using concealed hinges, small surface hinges, or magnetic catches. Door fronts can be finished with:
- Cane webbing
- Fluted molding
- Thin vertical wood slats
- Painted perforated hardboard
- Fabric stretched over a lightweight frame
Use perforated or open-front storage for electronic equipment. Closed boxes are better for discs, manuals, spare controllers, and the instruction booklet you will definitely need only after throwing it away.
Step 7: Upgrade the Legs Safely
Replacement legs can dramatically change the style and viewing height, but they are also the modification most likely to go wrong. Do not assume the bottom panel is solid enough to support leg-mounting screws anywhere you choose.
The Low-Risk Option
Keep the original structural legs and improve their appearance. Paint them, wrap them in wood-look vinyl, add lightweight decorative trim, or build a shallow plinth that conceals them. This preserves the original load path while creating a more substantial custom-console look.
The Reinforced Base Option
For true replacement legs, construct a plywood sub-base that supports the entire bench. Attach the new legs to the plywood using hardware designed for furniture construction. Threaded inserts and T-nuts allow bolts to secure furniture legs while making later removal possible.
The sub-base should distribute weight rather than concentrating it at four questionable screw holes. Secure the bench to the reinforced base only at verified solid structural areas, following the hardware manufacturer’s instructions. When the internal construction is uncertain, consult an experienced woodworker or keep the original legs.
Step 8: Organize the Cables
The Lack TV bench already includes a rear opening for gathering wires, but the installation looks far cleaner when cables are grouped and routed deliberately.
- Label both ends of every cable.
- Separate power cords from excess signal-cable loops where practical.
- Bundle related wires with reusable hook-and-loop ties.
- Attach removable cord clips along the rear edge.
- Mount or place the surge protector where it remains ventilated and accessible.
- Leave enough slack to pull devices forward for maintenance.
Adhesive cord organizers are designed for entertainment areas and can keep wires elevated and out of sight without adding screw holes. Confirm that the adhesive is suitable for the newly painted surface and allow the paint to cure before applying it.
Do not run power cords beneath rugs or furniture, staple them to walls, or crush them behind the bench. Electronics also need enough open space for ventilation.
Step 9: Reassemble and Complete the Safety Check
Reassemble the bench only after the finish has cured sufficiently. Tighten the original hardware carefully without overtightening it. Place heavier equipment low and centered, and confirm that the television base fits completely on the top surface.
Do not exceed the load rating for your specific model. Added shelves, wood tops, doors, decorations, and sound equipment all contribute to the total weight.
IKEA warns that current Lack TV units must be securely anchored with hardware suitable for the wall. The U.S. Consumer Product Safety Commission also recommends securing televisions and furniture to prevent tip-over incidents. A television that is not wall mounted should be restrained appropriately, and remote controls or toys should not be stored where children may be tempted to climb.
Common IKEA Lack TV Bench DIY Mistakes
Skipping the Bonding Primer
Regular paint may initially appear successful on laminate, then peel when bumped or scratched. Cleaning, scuffing, and bonding primer are not glamorous, but neither is watching a coaster remove a circle of paint.
Installing Legs Directly Into Hollow Areas
A screw needs solid material around it. Use the original legs, verified structural zones, or a properly designed sub-base.
Blocking Electronic Ventilation
Decorative doors should include open weave, perforations, gaps, or another route for airflow. Keep manufacturer-required clearances around consoles, receivers, and other heat-producing devices.
Loading the Bench by Appearance
A wide top can look capable of holding almost anything, but visual confidence is not an engineering specification. Follow the listed weight limit for the exact model.
Rushing the Cure Time
Paint can feel dry while remaining vulnerable to pressure marks. Wait before placing rubber feet, electronics, or heavy decorations on the new finish.
Real-World DIY Experience: Lessons From Typical Lack Makeovers
The most successful IKEA Lack TV bench upgrades tend to begin with restraint. It is tempting to combine paint, wallpaper, legs, brass trim, cane doors, LED lighting, a soundbar shelf, and approximately half the decorative aisle of a craft store. In practice, two or three coordinated improvements usually create a cleaner result than turning the bench into a furniture résumé.
A common lesson is that surface preparation takes longer than expected. Cleaning seems simple until the cloth reveals years of dust, fingerprints, and mysterious marks left by devices that have not moved since the previous streaming era. Sanding is quick, but dust removal requires patience. DIYers who stop and inspect the surface under side lighting generally get a smoother finish than those who begin priming while dust is still floating through the room.
Another frequent discovery is that painting assembled furniture creates awkward corners. Flipping the bench and removing detachable parts makes it easier to coat edges without leaving thick lines around joints. However, freshly painted pieces should not be stacked together. Paint that seems dry can bond to another painted surface and produce an impressive but unwanted demonstration of adhesion.
Storage inserts often outperform permanently installed doors. A removable cubby can be built and finished separately, adjusted until it fits correctly, and replaced later without damaging the original bench. It also allows renters to reverse the project. If one insert becomes a game-equipment cabinet and the other becomes a basket compartment, the bench gains organization without losing flexibility.
Cable management usually delivers a larger visual improvement than expected. Once wires are labeled, shortened with reusable ties, and routed behind the bench, the entire setup appears more intentional. Leaving a service loop is important, though. Cables pulled painfully tight may look neat until a device needs to move three inches and every plug attempts a coordinated escape.
Leg upgrades teach the most expensive lessons. Furniture legs with small mounting plates may look easy to install, but lightweight composite panels are not interchangeable with solid lumber. A reinforced plywood base takes more effort, yet it distributes the load and provides reliable material for bolts or inserts. Many DIYers ultimately decide that painting the original legs or hiding them behind a plinth offers nearly the same visual improvement with much less structural uncertainty.
Color choice also changes after the first coat more often than people admit. Deep green, navy, and charcoal can make the bench look substantial, while warm white blends into a light room. Wood-look vinyl works best when the grain direction is consistent and seams are placed away from the main viewing angle. Before committing, testing paint and vinyl samples in the actual room helps account for daylight, lamps, flooring, and wall color.
The final lesson is to stop when the project looks finished. A clean paint job, organized shelf, contrasting top, and controlled cables may be all the bench needs. Custom furniture does not have to announce how much work it required. Ideally, guests should notice that the media console looks goodnot ask whether it survived an argument with a hot-glue gun.
Conclusion
An IKEA Lack TV bench DIY upgrade can be affordable, practical, and surprisingly polished. The key is to work with the lightweight composite construction rather than treating it like solid hardwood. Prepare laminate carefully, use compatible finishes, favor removable storage, manage cables safely, and reinforce any structural modification.
A successful makeover does not require advanced woodworking. Paint, a contrasting surface, neatly fitted baskets, and thoughtful cable routing can completely change the appearance. Add proper anchoring and careful load management, and the finished bench will be safer as well as better looking.