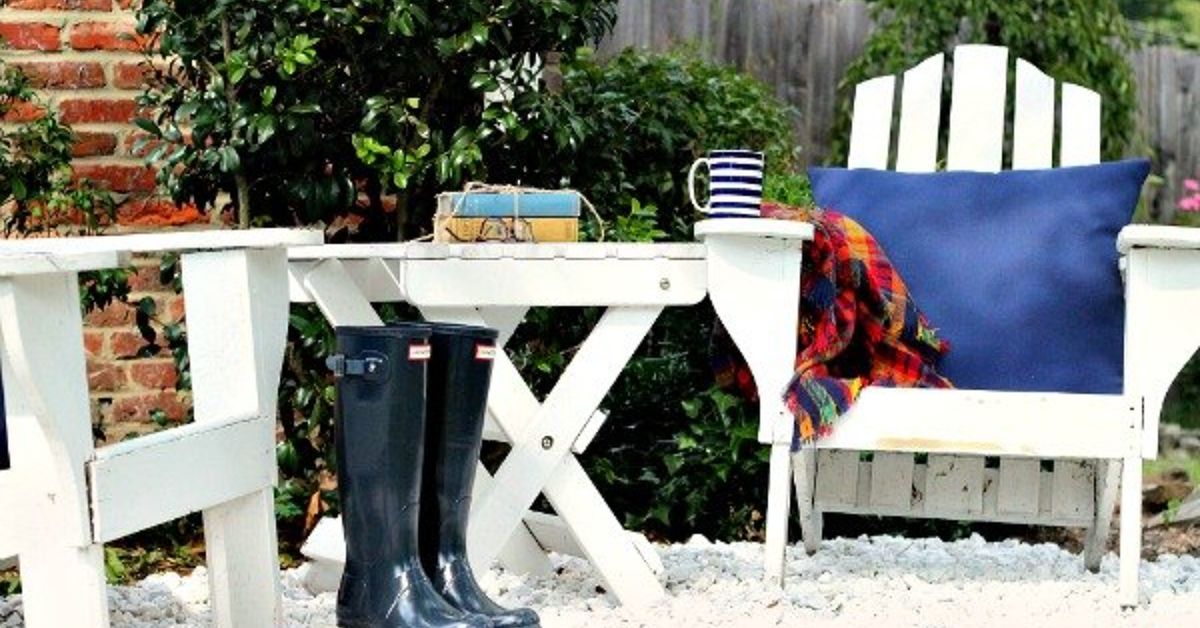
An empty dirt patch has a peculiar talent: it collects weeds, muddy footprints, and promises that you will “deal with it next weekend.” Instead of letting that neglected space continue its career as the backyard’s least attractive feature, turn it into a comfortable conversation cornera small outdoor room designed for coffee, cocktails, family stories, and debates about who forgot to bring the seat cushions inside.
You do not need a sprawling yard or a luxury-landscape budget. A stable surface, thoughtfully arranged seating, a little privacy, suitable plants, and warm lighting can transform even an awkward corner into an inviting backyard retreat. The secret is to design from the ground up, paying attention to drainage, traffic flow, climate, maintenance, and how people naturally interact.
Start by Understanding the Dirt Patch
Before ordering furniture or falling in love with a fire pit, spend a few days observing the site. Outdoor spaces succeed when they respond to their surroundings instead of fighting them.
Watch the sun, wind, and water
Check the area in the morning, afternoon, and evening. A corner that feels pleasantly sunny at breakfast may become a human-sized toaster by 4 p.m. Notice prevailing winds, reflected heat from walls, and whether nearby trees drop leaves, fruit, or enthusiastic quantities of bird-related material.
Observe the patch during or immediately after rain. Water should move away from the house rather than collecting against the foundation. Persistent puddles may indicate compacted soil, heavy clay, or a low spot. If water remains for a day or longer, address the drainage problem before installing a patio. Furniture does not improve when placed in a seasonal pond.
Measure the usable area
Mark the proposed conversation corner with stakes, string, a garden hose, or landscape spray paint. Then place temporary chairs inside the outline. Sit down, move around, and imagine other people joining you. This simple rehearsal exposes undersized layouts before they become expensive, beautifully paved undersized layouts.
A compact corner for two may fit within a 6-by-8-foot area. Four to six chairs usually feel more comfortable on a surface approximately 10 to 12 feet across, depending on furniture size. Preserve a clear route to the house and leave enough space for chairs to slide back without landing in a flower bed.
Check utilities, codes, and restrictions
Contact 811 several days before digging so underground utilities can be marked. This applies even when you are “only” driving edging stakes or digging planting holes. Also check local permit rules, property setbacks, homeowner association requirements, and fire restrictions. Permanent electrical work, retaining walls, gas lines, and large overhead structures may require professional installation or approval.
Choose the Right Foundation
The floor visually defines the outdoor room and prevents chairs from sinking into the soil. It must be level enough for furniture but gently pitched so rainwater can escape. Direct runoff toward a planted area or other approved drainage location, never toward the foundation or a neighbor’s property.
| Surface | Best Qualities | Important Considerations |
|---|---|---|
| Compacted gravel | Affordable, permeable, informal, and DIY-friendly | Needs edging and periodic raking; use angular gravel that locks together |
| Concrete pavers | Durable, repairable, and available in many styles | Base preparation determines whether the surface stays level |
| Brick | Warm, traditional appearance with reusable units | May become uneven if the base settles or roots intrude |
| Flagstone | Natural character and distinctive color variations | Irregular joints can complicate furniture placement and accessibility |
| Poured concrete | Smooth, stable, and relatively easy to maintain | Less forgiving to repair and often best installed professionally |
| Wood or composite platform | Useful over uneven ground and visually warm | Requires structural planning, ventilation, and code compliance |
Build a compacted gravel floor
For a practical DIY conversation corner, compacted gravel is hard to beat. Remove weeds, roots, and loose organic material. Excavate to the depth required for the base and finish material, remembering that local soil and freeze-thaw conditions affect construction requirements.
Compact the subgrade, add sturdy edging, and install layers of crushed aggregate in shallow lifts. Compact each layer before adding the next. Finish with small angular gravel or decomposed granite suitable for patios. Rounded pea gravel looks charming, but furniture legs and wheels tend to swim through it like tiny, confused oars.
Install pavers correctly
Pavers need more than a quick scattering of sand. A typical pedestrian patio includes a compacted subgrade, a substantial crushed-stone base, a thin bedding layer, pavers, edge restraints, and joint material. The precise base depth depends on soil, rainfall, frost, and manufacturer instructions.
Compact the base carefully and maintain a gentle slope away from structures. Skipping this work may save an afternoon, but it can produce rocking pavers and puddles later. In landscaping, gravity always reviews your craftsmanship.
Design for easier access
A conversation corner becomes more welcoming when people with different mobility needs can use it. Aim for a firm, stable, slip-resistant route at least 36 inches wide. Avoid abrupt level changes, loose deep gravel, narrow gates, and closely spaced furniture. A generous turning area also helps wheelchair users, people with walkers, parents carrying babies, and anyone balancing three drinks and a plate of nachos.
Arrange Seating for Actual Conversation
Outdoor furniture should support face-to-face interaction rather than resemble a waiting room. Arrange seats in a circle, semicircle, or loose U-shape. Angle chairs slightly inward and keep them close enough that guests can speak normally.
Use four comfortable chairs instead of cramming in eight undersized ones. Leave roughly 18 inches between a seat and a low table where practical, plus clear circulation behind occupied chairs. Test every arrangement before committing to heavy furniture or a permanent fire feature.
Create a useful focal point
A focal point gives the seating arrangement a visual center. It might be a coffee table, large planter, sculptural boulder, small fountain, fire table, or bowl filled with seasonal greenery. Choose one primary attraction; seven competing focal points turn a restful corner into an outdoor furniture showroom experiencing an identity crisis.
Flexible pieces make the area more useful. Lightweight chairs can follow the shade, stools can become side tables, and a storage bench can hold cushions while providing extra seating. Select weather-resistant furniture sized for the space rather than buying an enormous sectional simply because it looked reasonable beneath a warehouse ceiling.
Add Privacy Without Building a Fortress
A sense of enclosure makes an outdoor conversation area feel intimate. It does not require sealing the space behind a solid eight-foot wall. Partial screening often creates privacy while preserving airflow and attractive views.
Possible “walls” include:
- A slatted wood or metal privacy panel
- A trellis planted with a regionally appropriate vine
- A staggered row of shrubs
- Tall ornamental grasses suited to the local climate
- Large containers filled with upright plants
- An outdoor curtain mounted on a properly secured structure
Screen the least appealing sightline firstperhaps the trash cans, driveway, or neighbor’s trampolinewhile leaving open views toward trees and garden beds. Staggered plantings usually look more natural than a rigid green wall and can provide better depth, seasonal color, and wildlife value.
Plan Shade and Weather Protection
Shade often determines whether a conversation corner gets used for five minutes or an entire afternoon. Existing mature trees may provide the most comfortable canopy, but avoid damaging major roots during excavation. Never pile soil or paving material deeply over a tree’s root zone without professional guidance.
For quicker shade, consider a market umbrella, cantilever umbrella, shade sail, pergola, or freestanding gazebo. Secure every structure for expected wind loads and follow manufacturer instructions. A poorly anchored umbrella is less a shade device and more a weather-powered javelin.
In cooler climates, position the seating to capture gentle morning or shoulder-season sunlight. In hotter regions, prioritize afternoon shade and air movement. Deciduous vines or trees can offer summer protection while allowing more winter light.
Soften the Hardscape with Climate-Smart Plants
Plants provide the color, texture, fragrance, and movement that keep a patio from feeling like a parking space for chairs. Begin with a soil test before amending planting areas. The results can reveal pH and nutrient conditions, helping you avoid unnecessary fertilizer or unsuitable plants.
Use a layered planting design
Place taller shrubs, ornamental grasses, or trellised vines toward the back. Add medium-height perennials in front, followed by low ground covers or compact edging plants. Repeat a few plants around the corner to create unity rather than buying one of everything at the garden center.
Select species for the site’s actual sunlight, soil, mature size, and regional climate. Native and well-adapted plants often need less supplemental water once established and can provide food or habitat for birds and pollinators. Choose plants that bloom at different times to extend seasonal interest.
Avoid thorny shrubs beside chairs, highly toxic plants where children or pets play, and aggressive vines near siding or overhead structures. Strongly scented flowers can be lovely, but one fragrant variety is usually enough. Guests should notice the garden, not feel as though they have been tackled by perfume.
Manage water and weeds
Group plants with similar water needs. Drip or microirrigation can deliver moisture directly to root zones while reducing overspray on chairs and paving. Water new plants consistently during establishment, even if they are labeled drought-tolerant.
Cover exposed planting soil with approximately two to three inches of suitable organic mulch, keeping it away from trunks and plant crowns. Mulch moderates soil temperature, limits evaporation, and suppresses many weeds. It does not eliminate weeds forever, and landscape fabric beneath organic mulch can eventually become tangled with roots while new weeds grow above it.
Make the Corner Comfortable After Sunset
Use several low, warm light sources instead of one glaring fixture. Downward-facing path lights improve visibility, while lanterns, shielded sconces, and carefully hung string lights create atmosphere. Illuminate steps and changes in level first. Then add just enough ambient light to recognize faces and locate the snack bowl.
Choose outdoor-rated fixtures, cords, and connections. Keep wires away from walkways and wet areas, and hire a qualified electrician for permanent power. Aim lights downward and switch them off when the area is not in use to reduce glare, energy waste, and disturbance to nocturnal wildlife.
Use fire features cautiously
Before adding a fire pit, check local ordinances, burn bans, fuel restrictions, manufacturer clearances, and insurance requirements. National fire-safety guidance recommends keeping contained fire pits at least 10 feet from anything that can burn, but local rules or product instructions may require more space.
Place the feature on an appropriate noncombustible surface, clear away dry vegetation, supervise children and pets, and keep water or another suitable extinguishing method nearby. Never use gasoline to start the fire, and do not burn treated wood, plastic, yard chemicals, or construction debris. If the corner is too small for safe clearances, use an attractive table, lantern arrangement, or electric feature instead. Ambience should not require introducing the shed to the fire department.
Build the Conversation Corner in Affordable Phases
You can spread the project across several weekends or seasons:
- Phase one: Correct drainage, clear the site, install edging, and build the patio surface.
- Phase two: Add comfortable seating and one practical table.
- Phase three: Introduce containers, shrubs, mulch, and efficient irrigation.
- Phase four: Add shade, privacy screening, lighting, and decorative details.
Save money by using divided plants from elsewhere in the yard, refinishing structurally sound furniture, sourcing locally available gravel, and choosing standard paver sizes. Spend more on the elements that affect safety and longevity: drainage, base preparation, sturdy seating, anchors, and properly installed electricity.
Common Mistakes to Avoid
- Ignoring drainage: A decorative rug cannot negotiate with standing water.
- Making the patio too small: Furniture needs elbow room and circulation space.
- Choosing plants by appearance alone: Mature size and site conditions matter.
- Using loose material without edging: Gravel will migrate into beds and walkways.
- Overlighting the area: Bright glare destroys the relaxed atmosphere.
- Blocking every breeze: Complete enclosure may trap summer heat.
- Adding fire without checking clearances: Safety must shape the design from the beginning.
- Finishing everything at once: Living with the basic layout can reveal useful improvements.
Experience Notes: What a Weekend Transformation Often Teaches You
Consider a representative suburban project: an approximately 11-by-13-foot dirt patch sits between a rear fence and the corner of a house. It receives morning shade, harsh afternoon sun, and runoff from a nearby downspout. The owners initially imagine six chairs, a fire pit, a pergola, two trees, and enough flowers to qualify as a botanical garden. Once the area is outlined with a hose, reality politely removes half the shopping list.
The first useful lesson comes from temporary furniture. Four dining chairs are placed in a circle around an upside-down storage tub acting as a table. With all four chairs occupied, the route from the back door becomes cramped. Moving the circle two feet toward the fence creates better circulation and leaves space for a narrow planting bed. This ten-minute experiment prevents the permanent patio from being built in the wrong location.
The second lesson arrives after rain. Water crosses the proposed seating area because the downspout empties nearby. Instead of covering the problem with gravel, the project redirects runoff through an approved extension toward a planted drainage area away from the foundation. The patio is graded gently in the same direction. Drainage consumes part of the budget, but it protects every improvement that follows.
For the floor, the owners choose compacted crushed stone with metal edging. Excavation takes longer than expected because compacted construction soil hides beneath the surface. The base is installed in layers and compacted repeatedly. It is not the glamorous part of the projectnobody invites friends over to admire aggregate densitybut the finished chairs sit firmly, and rain no longer produces mud.
A large sectional had originally been planned. Cardboard templates reveal that it would dominate the corner and limit flexibility, so the final arrangement uses four weather-resistant lounge chairs and two small tables. The chairs can face inward for conversation, turn toward the garden, or move aside when more open space is needed. The tables are light enough to relocate but stable enough to survive an enthusiastic elbow.
Privacy comes from one slatted panel positioned to block the clearest view from a neighboring window. Shrubs are added beside it rather than across the entire boundary. This combination makes the space feel sheltered without stopping airflow. A cantilever umbrella supplies afternoon shade, and its base is sized and secured according to the manufacturer’s instructions.
The planting plan stays deliberately simple: three repeating groups of locally appropriate perennials, two compact shrubs, and containers holding herbs near the chairs. Repetition makes the small area look organized, while the herbs add fragrance and occasional cocktail assistance. Drip tubing waters the beds without spraying the seating surface, and wood-chip mulch reduces exposed soil.
The most noticeable improvement is not the furniture or plants. It is the lighting. Two shielded path lights mark the entrance, while a warm outdoor-rated string is secured overhead. Because the fixtures are subtle, the corner feels welcoming rather than interrogational. A rechargeable lantern on the table handles evenings when softer light is preferred.
Finally, the owners wait before adding a fire feature. After using the corner for a month, they realize that nearby fencing, plants, and the umbrella complicate safe clearances. They choose a large planter as the focal point instead. The decision costs nothing and avoids forcing a risky element into a small area.
The broader experience is straightforward: successful outdoor spaces evolve through observation. Temporary layouts reveal circulation problems. Rain reveals grading problems. A few hot afternoons reveal where shade belongs. Beginning with the foundation and adding comfort in layers produces a conversation corner that looks intentional and remains practical long after the first round of photographs.
Conclusion
Turning an empty dirt patch into a conversation corner is less about filling space and more about giving it a clear purpose. Begin with site observation, safe digging, and drainage. Build a stable floor, arrange furniture around human interaction, and use plants or screens to establish gentle boundaries. Shade, warm lighting, and a few flexible accessories will make the corner comfortable across more hours and seasons.
Resist the urge to crowd the area with every outdoor-living trend. A well-built surface, four good seats, healthy plants, and one compelling focal point can outperform a backyard full of fashionable clutter. Once the corner is finished, invite someone outside, pour a drink, and enjoy the satisfying sight of a dirt patch that finally has plans for the weekend.