Learning how clock has numbers, little marks, and hands that seem to point wherever they please. Fortunately, those hands are not improvising. Each one has a specific job, and once you understand the pattern, reading a clock becomes much easier.
This beginner-friendly guide explains the parts of an analog clock, how to read hours and minutes, what phrases such as “quarter past” mean, and how to avoid common mistakes. You will also find practical examples, exercises, and real-life learning experiences that make telling time feel less like a math test and more like a useful everyday skill.
What Is an Analog Clock?
An analog clock shows time with moving hands on a circular face. Most analog clocks display the numbers 1 through 12. The numbers represent hours, but they also help you calculate minutes.
A digital clock gives you the answer directly, such as 7:45. An analog clock asks you to interpret the position of its hands. It requires a little more thinking, but it also provides a visual picture of how much of an hour has passed and how much remains.
The main parts of a clock
- Clock face: The round surface containing the numbers and minute marks.
- Hour hand: The shorter hand that shows the current hour.
- Minute hand: The longer hand that shows how many minutes have passed.
- Second hand: The thin, fast-moving hand found on some clocks.
- Minute marks: The small lines around the edge of the clock face.
The easiest memory trick is simple: the short hand shows the hour, while the long hand shows the minutes. Think of the minute hand as needing extra length because it has to reach all 60 minute marks. Apparently, it has more territory to supervise.
How Time Is Divided
Before reading a clock, remember these basic time relationships:
- 60 seconds make 1 minute.
- 60 minutes make 1 hour.
- 24 hours make 1 day.
- An analog clock face represents 12 hours.
Because a full day has 24 hours, the hour hand travels around the clock twice each day. One trip covers the first 12 hours, and the second trip covers the next 12.
How to Tell Time on a Clock Step by Step
Step 1: Find the hour hand
Begin with the shorter hand. If it points directly to a number, that number is usually the hour.
For example, when the short hand points to 4 and the long hand points to 12, the time is 4:00, or “four o’clock.”
When the hour hand sits between two numbers, use the number it has already passed. If it is between 6 and 7, the hour is still 6. It will not become 7 until the hour hand reaches 7.
Step 2: Find the minute hand
Next, look at the longer hand. Each large number represents a group of five minutes for the minute hand.
| Minute Hand Points To | Minutes After the Hour |
|---|---|
| 12 | 00 minutes |
| 1 | 05 minutes |
| 2 | 10 minutes |
| 3 | 15 minutes |
| 4 | 20 minutes |
| 5 | 25 minutes |
| 6 | 30 minutes |
| 7 | 35 minutes |
| 8 | 40 minutes |
| 9 | 45 minutes |
| 10 | 50 minutes |
| 11 | 55 minutes |
You can calculate the minutes by multiplying the number by five. If the minute hand points to 8, calculate 8 × 5. The answer is 40, so 40 minutes have passed.
Step 3: Put the hour and minutes together
Write the hour first, add a colon, and then write the minutes.
Suppose the short hand is slightly past 2 and the long hand points to 4:
- The short hand has passed 2, so the hour is 2.
- The long hand points to 4, and 4 × 5 equals 20.
- The time is 2:20.
Always read the hour before the minutes. This consistent order reduces confusion and prevents the clock from winning the argument.
Start With Easy Times
Telling time to the hour
Whole-hour times are the best place for beginners to start. At an exact hour, the minute hand points to 12, meaning zero minutes have passed.
Examples include:
- Hour hand at 3 and minute hand at 12: 3:00
- Hour hand at 7 and minute hand at 12: 7:00
- Hour hand at 11 and minute hand at 12: 11:00
The expression “o’clock” is used only when the minutes are exactly 00. You can say “nine o’clock” for 9:00, but calling 9:17 “nine o’clock” is a little too relaxed.
Telling time to the half hour
When the minute hand points to 6, 30 minutes have passed. The time is described as “half past” the hour because half of the 60-minute hour is complete.
At 5:30, the minute hand points to 6, while the hour hand sits halfway between 5 and 6. The time is “five thirty” or “half past five.”
A common beginner mistake is reading the hour as 6 because the hour hand is moving toward it. Remember that the hour is the number the short hand has already passed. At 5:30, it has passed 5 but has not reached 6.
Telling time to the quarter hour
A clock face can be divided into four equal sections, or quarters. Each quarter represents 15 minutes.
- Minute hand at 3: 15 minutes past the hour
- Minute hand at 6: 30 minutes past the hour
- Minute hand at 9: 45 minutes past the hour
- Minute hand at 12: A new hour begins
The time 8:15 can be called “eight fifteen” or “quarter past eight.” The time 8:45 can be called “eight forty-five” or “quarter to nine” because only 15 minutes remain before 9:00.
How to Read Exact Minutes
Once you can tell time in five-minute steps, begin using the smaller marks between the numbers. Most clocks have four small minute marks between each pair of large numbers.
Start with the five-minute value of the nearest large number and count the additional marks one at a time.
Imagine that the minute hand is two small marks past 7:
- The number 7 represents 35 minutes.
- Count two additional marks: 36, 37.
- The minute value is 37.
If the hour hand has passed 10, the time is 10:37.
For minutes below 10, include a zero when writing digital time. Five minutes after 4 is written as 4:05, not 4:5.
Understanding “Past,” “After,” “To,” and “Till”
People do not always read time as a set of digits. They may describe the time in relation to the current or upcoming hour.
- Ten past three means 3:10.
- Twenty after six means 6:20.
- Ten to nine means 8:50.
- Five till four means 3:55.
Use “past” or “after” during the first 30 minutes of an hour. Use “to” or “till” when counting how many minutes remain before the next hour.
For example, at 2:50, 50 minutes have passed since 2:00, but only 10 minutes remain until 3:00. Therefore, the time can be described as “ten to three.”
What Do A.M. and P.M. Mean?
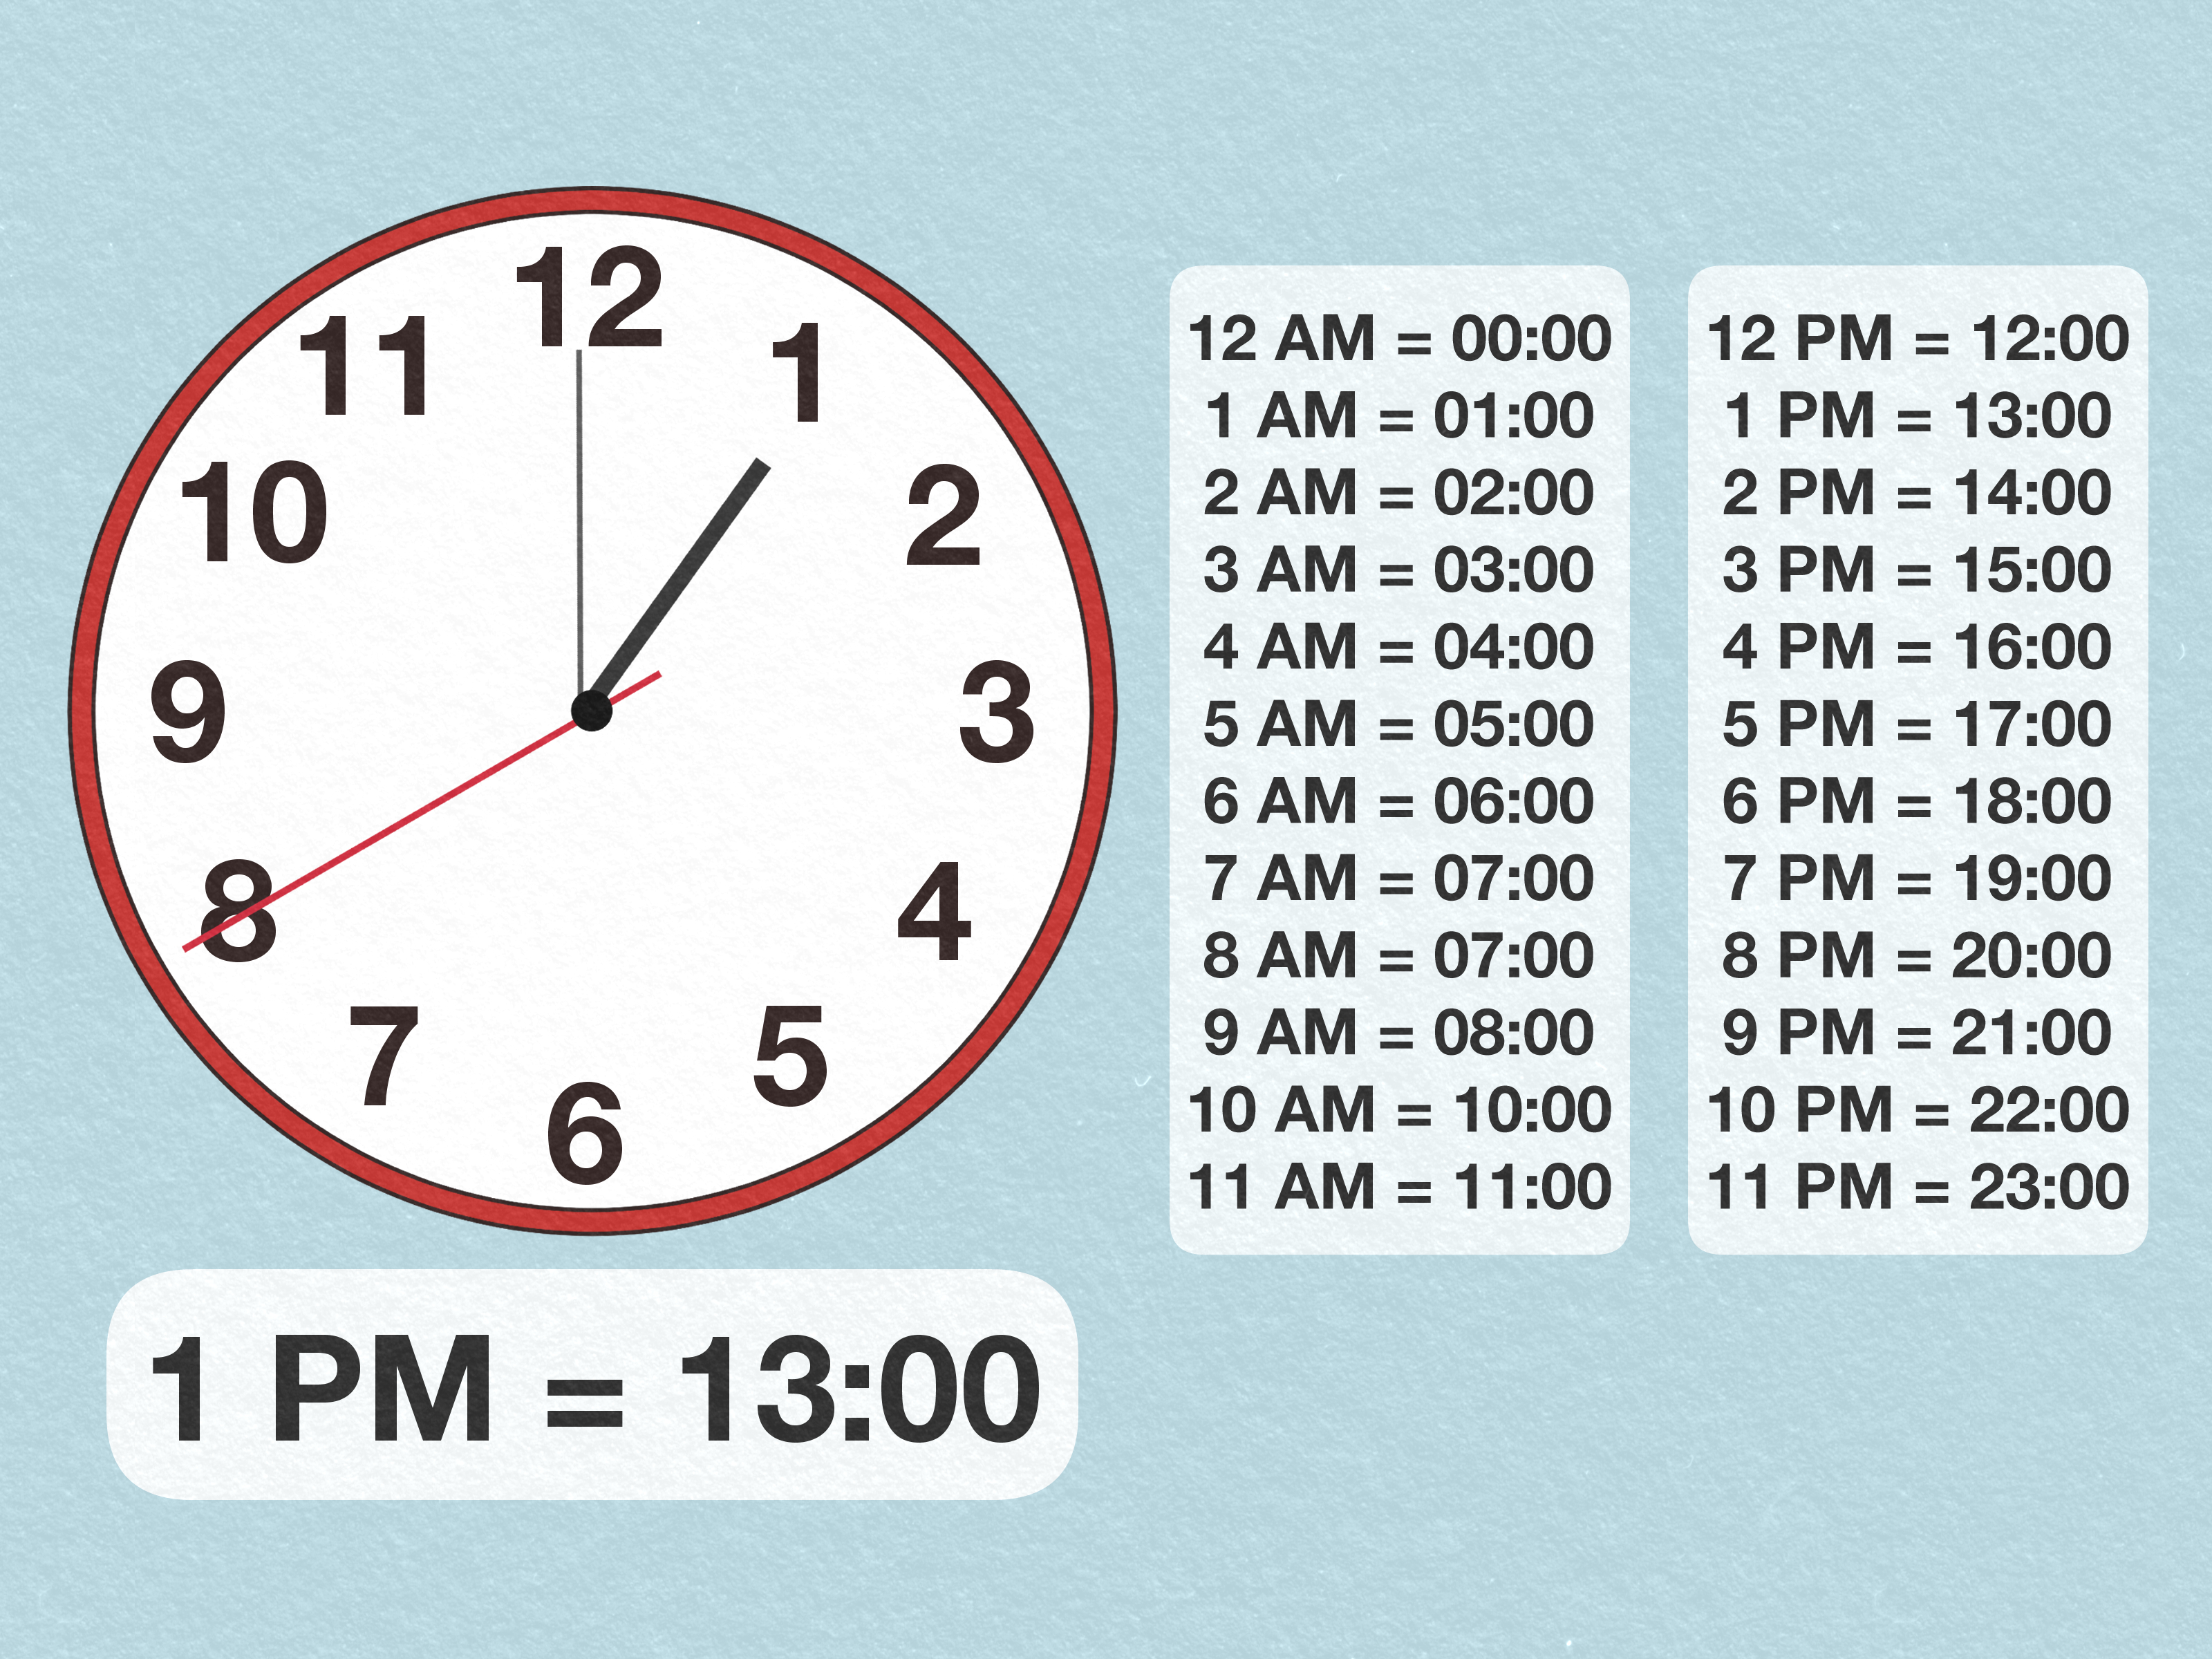
An analog clock shows a 12-hour cycle, but a complete day has 24 hours. A.M. and P.M. clarify which half of the day you mean.
- A.M. covers the period from midnight through the morning.
- P.M. covers the period from noon through the evening.
For example, 7:00 a.m. is usually morning, while 7:00 p.m. is evening. The clock hands may appear identical, so context matters. Breakfast at 7:00 is probably a.m.; a bedtime story at 7:00 is probably p.m. A breakfast at 7:00 p.m. is still possible, but your schedule may have taken an adventurous turn.
Remember that 12:00 a.m. is midnight and 12:00 p.m. is noon. These two labels often confuse beginners, so connecting them with daily events can help.
How the Hour Hand Moves
The hour hand does not jump from one number to the next. It moves gradually as the minutes pass.
At 3:00, the hour hand points directly to 3. At 3:15, it has moved slightly toward 4. At 3:30, it is halfway between 3 and 4. At 3:45, it is close to 4 but still represents the third hour.
This gradual movement is important. When reading a clock, do not simply choose the number closest to the short hand. Determine which number the hand has already passed.
Common Mistakes When Learning to Tell Time
Mixing up the clock hands
Beginners often read the long hand as the hour hand. Labeling practice clocks with “hour” and “minute” can help. You can also remember that “hour” is a shorter word than “minute,” just as the hour hand is usually shorter.
Reading the upcoming hour too early
At 6:50, the hour hand is close to 7, but the hour is still 6. Use the last number passed by the hour hand.
Counting the clock numbers as single minutes
When the minute hand points to 4, it means 20 minutes, not four minutes. Skip-count around the clock by fives: 5, 10, 15, 20, and so on.
Forgetting the zero in digital time
Write 8:05 instead of 8:5. The two-digit minute format makes the time clear and follows standard digital-clock notation.
Moving only one hand on a practice clock
As the minute hand moves, the hour hand should move gradually too. A geared learning clock demonstrates this relationship more accurately than a model with completely independent hands.
Easy Ways to Practice Telling Time
Make a paper clock
Draw a circle on cardstock or a paper plate. Add the numbers 1 through 12, then attach one short hand and one long hand with a paper fastener. Use noticeably different hand lengths.
Match analog and digital times
Create one set of cards showing analog clocks and another set showing digital times. Mix them and match each clock face with its digital equivalent.
Use daily routines
Connect time with familiar activities:
- Breakfast begins at 7:30 a.m.
- School starts at 8:15 a.m.
- Lunch is at 12:00 p.m.
- Soccer practice begins at 4:45 p.m.
- Bedtime is at 8:30 p.m.
Real events give the numbers meaning. A learner is more likely to remember 8:30 when it represents bedtime rather than a lonely clock floating on a worksheet.
Practice estimating elapsed time
Elapsed time is the amount of time between two events. If a movie starts at 2:00 and ends at 3:30, it lasts 1 hour and 30 minutes.
Beginners can move the minute hand forward while counting five-minute jumps. More advanced learners can use a number line or break the interval into manageable parts.
For example, calculate the time from 2:45 to 3:20:
- From 2:45 to 3:00 is 15 minutes.
- From 3:00 to 3:20 is 20 minutes.
- 15 + 20 equals 35 minutes.
Real-Life Experiences That Make Telling Time Easier
One of the most useful experiences for beginners is comparing an analog clock with a digital clock. Place the two clocks next to each other and observe them throughout the day. At 9:00, the digital display shows 9:00 while the minute hand points to 12. At 9:30, the display changes to 9:30 while the minute hand points to 6 and the hour hand moves halfway toward 10. This side-by-side comparison turns an abstract lesson into something visible.
A kitchen timer also creates a memorable learning experience. Set it for five minutes while completing a small activity, such as organizing pencils or building a block tower. Watch the analog clock before and after the timer rings. Beginners quickly discover that five minutes is not just the number beside the 1 on a clock face; it is an amount of time they can actually feel.
Another effective experience is planning a short afternoon schedule. Suppose a learner gets home at 3:15, eats a snack for 15 minutes, reads for 20 minutes, and begins playing outside at 3:50. Moving the hands on a practice clock after each activity helps connect clock reading with sequencing and elapsed time.
Travel provides plenty of natural practice. While waiting for a bus or train, look at the station clock and ask how many minutes remain before departure. If the clock shows 10:35 and the bus leaves at 10:50, count forward by five-minute steps: 10:40, 10:45, and 10:50. The wait is 15 minutes. Suddenly, telling time has a purpose beyond filling in blanks.
Cooking can be equally helpful. A recipe might require baking something for 25 minutes. If the food goes into the oven at 4:10, move the minute hand five spaces around the clock to reach 4:35. Naturally, an adult should supervise kitchen activities; learning to tell time should not end with a smoke alarm providing the final exam.
Many learners also benefit from becoming the household “time announcer” for a day. Every hour or half hour, they read the nearest analog clock aloud. At first, they may need to count around the face by fives. With repetition, common positions such as :00, :15, :30, and :45 become automatic.
Mistakes are part of these experiences. A learner may call 5:45 “6:45” because the hour hand is close to 6. Instead of immediately giving the answer, ask, “Has the short hand reached 6 yet?” That question encourages observation and helps the learner correct the mistake independently.
Progress usually happens in stages. Whole hours become comfortable first, followed by half hours, quarter hours, five-minute intervals, and exact minutes. Short daily practice sessions are often more productive than one long session. Five focused minutes with a movable clock can teach more than an hour of staring suspiciously at a worksheet.
Conclusion
Learning how to tell time on a clock becomes manageable when you follow a clear order. Identify the short hour hand, read the long minute hand, count the minute positions by fives, and combine the two values. After mastering whole and half hours, move on to quarter hours, exact minutes, a.m. and p.m., and elapsed time.
Practice with clocks found at home, school, stores, and transportation stations. Use daily routines and real schedules so that time has a practical meaning. Before long, the moving hands will stop looking mysterious and start providing useful informationwhich, to be fair, was their plan all along.
Note: Learners develop time-telling skills at different rates. Use clear clock faces, movable hands, repeated real-world practice, and patient explanations rather than rushing through every skill in one lesson.