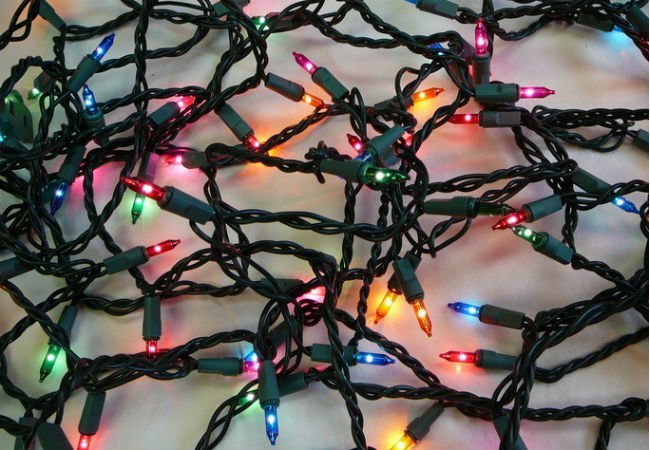
Taking down Christmas decorations is the holiday equivalent of washing dishes after a feast: nobody posts glamorous photos of it, but somebody has to face the mess. Christmas lights are usually the worst offender. A strand that looked elegant around the tree can become a bowl of electrical spaghetti the moment it enters a storage bin.
Fortunately, you do not need an expensive organizing system or a degree in knot theory. Three simple methodscardboard, a figure-eight bundle, and a sturdy clothes hangercan keep light strings separated, protected, and ready for next year. The best choice depends on the strand’s length, bulb size, and storage location.
Why Proper Christmas Light Storage Matters
Good storage prevents more than tangles. Tight knots, crushed plugs, sharply bent wires, and bulbs pressed together can damage a strand. An organized system also helps you distinguish indoor lights from outdoor-rated sets and locate the right color or length without opening every holiday bin in the house.
Inspect, Clean, and Dry the Lights First
Unplug each strand and examine the cord from end to end. Check for frayed insulation, exposed wire, cracked sockets, loose or missing bulbs, damaged plugs, and signs of overheating. Replace bulbs or fuses only as allowed by the manufacturer, and retire a strand with serious cord damage rather than saving the problem for next December. Established home-improvement guidance recommends testing strands during takedown and discarding unsafe sets.
Outdoor lights should be clean and completely dry. Wipe away dirt gently and let damp strands air-dry before sealing them in a container. Trapped moisture may contribute to corrosion and unpleasant odors.
Useful Supplies
Gather sturdy cardboard, scissors, reusable hook-and-loop straps, labels, a marker, clothes hangers, zip-top bags, and a lidded tote. Avoid wrapping lights with brittle rubber bands or pulling ties so tight that they pinch the wire.
Way 1: Wrap Christmas Lights Around Cardboard
The cardboard method is inexpensive, compact, and easy to customize. It works especially well for mini lights, fairy lights, and standard indoor strands. Reuse a clean shipping box or another piece of corrugated cardboard firm enough to resist bending.
Cut and Prepare the Holder
Cut a rectangle approximately 10 to 14 inches long and 6 to 10 inches wide, adjusting the size to fit your storage tote. Make a shallow notch near each short end. The notches hold the beginning and end of the cord so the loops do not slide off. For heavier C7 or C9 lights, tape two cardboard layers together; thin cereal-box cardboard may fold under the weight like a holiday card.
Wind the Strand Loosely
Catch the plug in one notch and wrap the strand around the cardboard in even rows. Keep the wire relaxed rather than pulling it tight. Guide the bulbs so sockets do not stack directly on top of one another. Secure the final section in the opposite notch or with a reusable strap.
Label and Store
Write the location, color, length, and use on the holderfor example, “living-room tree, warm white, 100 count.” Place the finished organizer upright in a sturdy tote. Cardboard holders are commonly recommended because they separate strands, fit neatly in bins, and cost almost nothing.
Best for: Short and medium strands, small budgets, and compact storage. Main drawback: Cardboard can soften in a damp garage or basement, so protect it inside a moisture-resistant container.
Way 2: Make a Figure-Eight Light Bundle
A figure-eight bundle controls a long strand without a permanent holder. The alternating pattern reduces twisting and usually unwinds more smoothly than a simple circular coil.
Create Two Winding Posts
Turn a sturdy chair or stool upside down and use two legs as temporary posts. You can also use two wall hooks, workbench pegs, or your forearm and elbow. Keep the posts far enough apart to form a broad oval rather than a tight loop.
Wrap, Remove, and Secure
Pass the strand around one post, cross through the center, and loop it around the second post. Continue alternating sides while guiding the bulbs with your free hand. Leave 12 to 18 inches of cord at the end, slide the bundle off, and wrap the remaining cord loosely around the middle. Secure it with a reusable strapnot a hard knot, which is simply a tangle wearing formal clothes.
Place each bundle in its own bag or bin compartment and add a label. Similar organizing advice recommends forming long ovals or figure-eight bundles and securing them gently before storage.
Best for: Long LED strings and outdoor strands. Main drawback: A soft bundle offers little protection from crushing, so keep it near the top of the tote.
Way 3: Store Christmas Lights on a Clothes Hanger
A sturdy clothes hanger becomes a reusable light organizer that can move directly from a storage closet to the decorating area. It is useful when you want strands visible and easy to identify.
Choose a Strong Hanger
Use a thick plastic or wood hanger with broad shoulders. Avoid flimsy wire hangers, which can bend and create tight pressure points. A nonslip bar or small accessory hooks make it easier to hold the plug and tail end.
Wrap From Side to Side
Catch the plug near the hanger’s neck and wind the strand around the outside, moving evenly from one side to the other. Keep the loops loose and alternate large bulbs so they are not pressed together. Secure the final inches near the hook with a reusable strap. For battery-powered fairy lights, remove the batteries before long-term storage to reduce the chance of leakage.
Hang or Place in a Bin
Hang the organizer on a closet rod, garment rack, wall hook, or sturdy peg. Color-coded hangers can identify categories: white for indoor lights, green for outdoor lights, and red for multicolor strands. Professional organizers frequently suggest hangers, reels, or dedicated holders because they keep strands separated and easier to transport.
Best for: Apartments, closets, and room-by-room lighting sets. Main drawback: A large collection can occupy more closet space than expected.
How to Choose the Best Method
Choose cardboard for the most economical and space-efficient option. Choose a figure-eight bundle when you need a fast method for long strands. Choose hangers when visibility and easy access matter more than conserving every inch. Large displays often benefit from a combination: cardboard for short indoor sets, figure eights or reels for roofline strands, and hangers for specialty lights.
Match the Method to the Light Type
Mini LED strings work well on compact holders. Larger glass bulbs need extra clearance and gentle padding. Fold net lights in broad layers with tissue paper between them instead of winding them tightly. Keep icicle-light drops aligned so they do not braid together. Thick rope lights and commercial strands are better suited to large-diameter reels that avoid sharp bends.
Choose a Safe Storage Location
Use a clean, dry place away from leaks, pests, direct sunlight, extreme heat, and heavy objects. A climate-stable interior closet is generally kinder to decorations than an unconditioned attic or shed. In garages and basements, use sturdy, stackable, moisture-resistant containers rather than open boxes.
Labeling Tips That Save Time Next Christmas
Include the room or outdoor zone, light color, strand length, bulb style, and indoor or outdoor rating. Number connected sections in order, such as “roofline 1 of 4.” Keep replacement bulbs, fuses, clips, timers, straps, and a light tester in one labeled accessory box.
Photograph each completed display before taking it down. Save the images in a holiday album and match the organizer labels to the areas shown. Labeling strands by location and separating indoor from outdoor decorations are widely recommended because they simplify setup and takedown.
Common Christmas Light Storage Mistakes
Stuffing Loose Lights Into a Bag
A bag does not control the cord. Wrap or bundle the strand first, then use the bag as an outer layer.
Winding Too Tightly
Tension stresses wires and presses sockets together. Gentle loops are safer than tight coils.
Storing Damp Outdoor Lights
Let lights dry completely before closing the container. A sealed tote can trap moisture already present.
Skipping Testing and Labels
Test before storage and before installation. Clearly identify every strand. A mega-bin of mystery lights may look efficient in January, but in December it becomes an escape-room challenge with no prize.
A Simple End-of-Season Routine
- Unplug and remove each strand without pulling on the wire.
- Test the lights and inspect cords, sockets, bulbs, and plugs.
- Clean outdoor strands and let them dry fully.
- Choose cardboard, a figure-eight bundle, a hanger, or a reel.
- Wrap loosely and secure the end with a reusable strap.
- Label the location, color, length, and rating.
- Place the lights in a sturdy holiday-light container.
- Store the container in a dry area where it will not be crushed.
Experience-Based Lessons From Real-World Holiday Cleanup
The most useful lesson from repeated holiday packups is that the “best” method is the one simple enough to use when you are tired of looking at garland. An elaborate organizer may seem brilliant in a catalog, but it fails if packing one strand requires six clips, two instruction sheets, and the patience of a museum conservator. A piece of sturdy cardboard with two notches often wins because it is obvious, quick, and nearly free.
A common first attempt is to coil lights around an elbow and hand, just as someone might coil an extension cord. The bundle looks neat for approximately seven minutes. Then it enters a bin, loosens, catches another strand, and spends eleven months practicing advanced knot formation. Switching to a figure-eight pattern makes a noticeable difference because the crossing motion balances the twists. One reusable strap at the center keeps the bundle intact without squeezing it.
Takedown order matters, too. When several outdoor strands are connected across a roofline, pulling everything down into one lawn pile feels fast. Confusion follows when two green-wire strands look identical but have different lengths. Disconnecting and labeling one section at a time takes a little longer in January but can save an hour during the next installation. “Garage peak, left side” is much more useful than “outdoor lights.”
Storage location can quietly undo careful wrapping. A cardboard holder placed beneath a heavy tree stand may emerge bent and crushed. A light-wrapped hanger can warp if wedged under a crowded stack. Reserve the top layer of a tote for lights or use a separate shallow container. Store it on a shelf when possible, away from floor leaks, pests, and accidental kicks.
Different products require different handling. With C7 or C9 strands, alternating bulb direction prevents a rigid, lumpy stack, while tissue paper reduces rubbing. Net lights are easier to fold into wide, flat sections than to wind around a narrow holder. Icicle lights need their drops aligned. Treating every product like a basic mini-light strand is a reliable route to bent wire, cracked plastic, and creative seasonal vocabulary.
The biggest improvement often comes from pairing labels with photos. Before removing the display, take wide and close-up pictures showing plug locations and strand transitions. Match the labels on the organizers to the photographed areas. Next season, decorating becomes a repeatable process rather than a fresh engineering project.
One more practical lesson is to avoid overfilling the tote. A lid that closes only after someone sits on it is not a storage achievement; it is a warning. Bulbs need breathing room, plugs should lie flat, and organizers should lift out without snagging. Leaving a little empty space also makes it easier to add a replacement strand later without rebuilding the entire bin like a three-dimensional puzzle.
Finally, keep a small repair kit inside the light bin. Include approved replacement bulbs and fuses, clips, reusable straps, labels, a marker, and a light tester. This prevents the classic December search for the tiny bag of spare bulbs you were absolutely certain you saved. Good storage is not only about avoiding tangles; it makes the entire next season easier.
Conclusion
Learning how to store Christmas lights is a small project with a large payoff. Cardboard organizers are compact and cheap, figure-eight bundles are fast and flexible, and clothes hangers keep strands visible and ready to carry. Whatever method you use, inspect the lights, wrap them loosely, label them clearly, and protect them from moisture and crushing.
Spend a few extra minutes organizing at the end of the season, and next Christmas you can focus on decorating instead of arguing with a knot that appears to have developed its own legal representation.