Few gardening experiences are more humbling than admiring a freshly planted fapparently launched a side business growing crabgrass. Weeds are opportunists. Give them exposed soil, regular irrigation, and a little sunshine, and they will move in faster than relatives who hear you have a swimming pool.
The good news is that preventing weeds in flower beds does not require constant spraying or a heroic weekly battle with a hand trowel. Successful weed control comes from combining several practical strategies: preparing the bed correctly, covering bare soil, choosing competitive plants, watering only where needed, and removing young weeds before they reproduce.
No method will produce a permanently weed-free garden. Wind, birds, animals, compost, mulch, and neighboring lawns can all introduce new seeds. However, a well-designed prevention plan can reduce weed growth so dramatically that maintenance becomes a quick routine instead of an outdoor endurance event.
Why Weeds Keep Appearing in Flower Beds
Most garden soil contains a hidden collection of weed seeds known as a soil seed bank. Some remain dormant until they are brought close to the surface, where light, moisture, and suitable temperatures trigger germination. Digging, aggressive tilling, and repeatedly turning the soil can expose buried seeds and create a fresh crop of unwanted plants.
Weeds also enter flower beds through windblown seeds, creeping roots, underground stems, contaminated soil amendments, lawn clippings, animal activity, and nearby turf. Annual weeds usually reproduce by seed, while perennial weeds such as bindweed, quackgrass, nutsedge, and Canada thistle may return from roots, rhizomes, or tubers even after their leaves have been removed.
This distinction matters. A layer of mulch can prevent many annual weed seedlings, but it may not stop an established perennial weed with an underground root system that has been quietly plotting its return.
Start With a Clean Flower Bed
The most effective time to control weeds is before planting flowers. Trying to build a beautiful bed directly over established weeds is like painting a wall without fixing the leak behind it. The result may look good briefly, but trouble is already on the schedule.
Remove Existing Weeds Completely
Pull or dig weeds when the soil is slightly moist. Damp soil releases roots more easily than hard, dry ground, reducing the chance that pieces will remain behind. Hold the plant near its base and pull steadily rather than snapping off the top.
Taproot weeds, including dandelions, should be removed with as much of the root as possible. For creeping perennial weeds, carefully loosen the soil and trace the roots or rhizomes. Avoid chopping them into dozens of pieces because some species can regenerate from small fragments. Accidentally turning one weed into a family reunion is not the objective.
Smother Difficult Areas Before Planting
When creating a new flower bed over turf or a heavily infested area, sheet mulching can reduce the initial weed population. Mow existing vegetation low, place overlapping pieces of unwaxed cardboard over the ground, wet them thoroughly, and cover them with compost and organic mulch.
The cardboard blocks light and gradually decomposes. This approach works best when given time to suppress vegetation before intensive planting. Aggressive perennial weeds may still require repeated removal, so inspect the area rather than assuming the cardboard has signed a permanent peace treaty.
Solarization is another option for preparing an empty bed in a sunny location. Moist soil is covered tightly with clear plastic during hot weather so trapped solar energy raises soil temperatures. Results depend heavily on climate, season, duration, and proper installation.
Minimize Soil Disturbance
Once a flower bed has been prepared, avoid unnecessary digging. Every time soil is deeply cultivated, dormant weed seeds may be moved into conditions where they can germinate.
Use a narrow trowel when installing plants, and disturb only the area needed for each root ball. When removing small weeds, use shallow hoeing or surface scraping instead of turning over the entire bed. A sharp stirrup hoe can slice seedlings just below the soil line while leaving deeper soil relatively undisturbed.
No-dig maintenance does not mean gardeners can never amend the soil. Compost can be applied as a surface top-dressing and allowed to work downward through natural biological activity. The goal is simply to avoid treating the flower bed like an archaeological excavation every spring.
Apply the Right Mulch at the Right Depth
Mulching is one of the most reliable ways to prevent weeds in flower beds. Mulch limits the light required by many weed seeds, creates a physical barrier to emerging seedlings, conserves soil moisture, reduces erosion, and moderates soil temperature.
For most established ornamental beds, approximately 2 to 3 inches of shredded bark or wood chips provides effective coverage. Some situations may call for a layer closer to 4 inches, depending on mulch particle size, climate, weed pressure, and the plants being grown. Finer material generally forms a denser barrier, while large chunks may leave gaps that allow light to reach the soil.
Remove Weeds Before Adding Mulch
Mulch is a preventive layer, not a magical eraser. Spreading it over mature weeds often allows those plants to grow straight through. Remove visible weeds first, water the desired plants if the soil is dry, and then apply mulch evenly.
Do not mix fresh wood mulch deeply into the soil, especially in beds replanted with annual flowers. Keep it on the surface, where it can perform its intended job without interfering with future planting.
Keep Mulch Away From Stems and Crowns
Leave a small open space around the crowns of perennials and the stems of shrubs. Mulch piled directly against plants can trap excessive moisture and create favorable conditions for decay, insects, or disease.
Avoid “mulch volcanoes” around trees and shrubs. Besides looking as though the landscape has developed tiny brown mountains, deep piles against trunks can damage bark and roots. Mulch should resemble a broad, level blanket rather than a cone.
Top Up Mulch Instead of Starting Over
Organic mulch gradually decomposes and settles. Check its depth once or twice a year and add only enough material to restore the desired layer. Do not automatically dump several new inches on top each spring. Existing mulch may already be deep enough.
Rake compacted mulch lightly before topping it up. During the process, remove any young weeds that have rooted in decomposed material on the surface.
Choose Clean Mulch, Compost, and Soil
Low-quality materials can introduce weed seeds or herbicide residues into a flower bed. Purchase mulch, compost, and topsoil from reputable suppliers, and ask how the products were processed.
Be cautious when using hay because it may contain mature grass or weed seeds. Straw is generally less likely to contain seeds than hay, although no material is automatically weed-free. Homemade compost should reach appropriate temperatures if it contains weeds that have already produced seed.
Never use grass clippings from a recently treated lawn unless the herbicide label specifically confirms that the clippings are safe for the intended use. Persistent herbicide residues in clippings, manure, compost, or other amendments can injure ornamental plants.
Fill Open Space With Desirable Plants
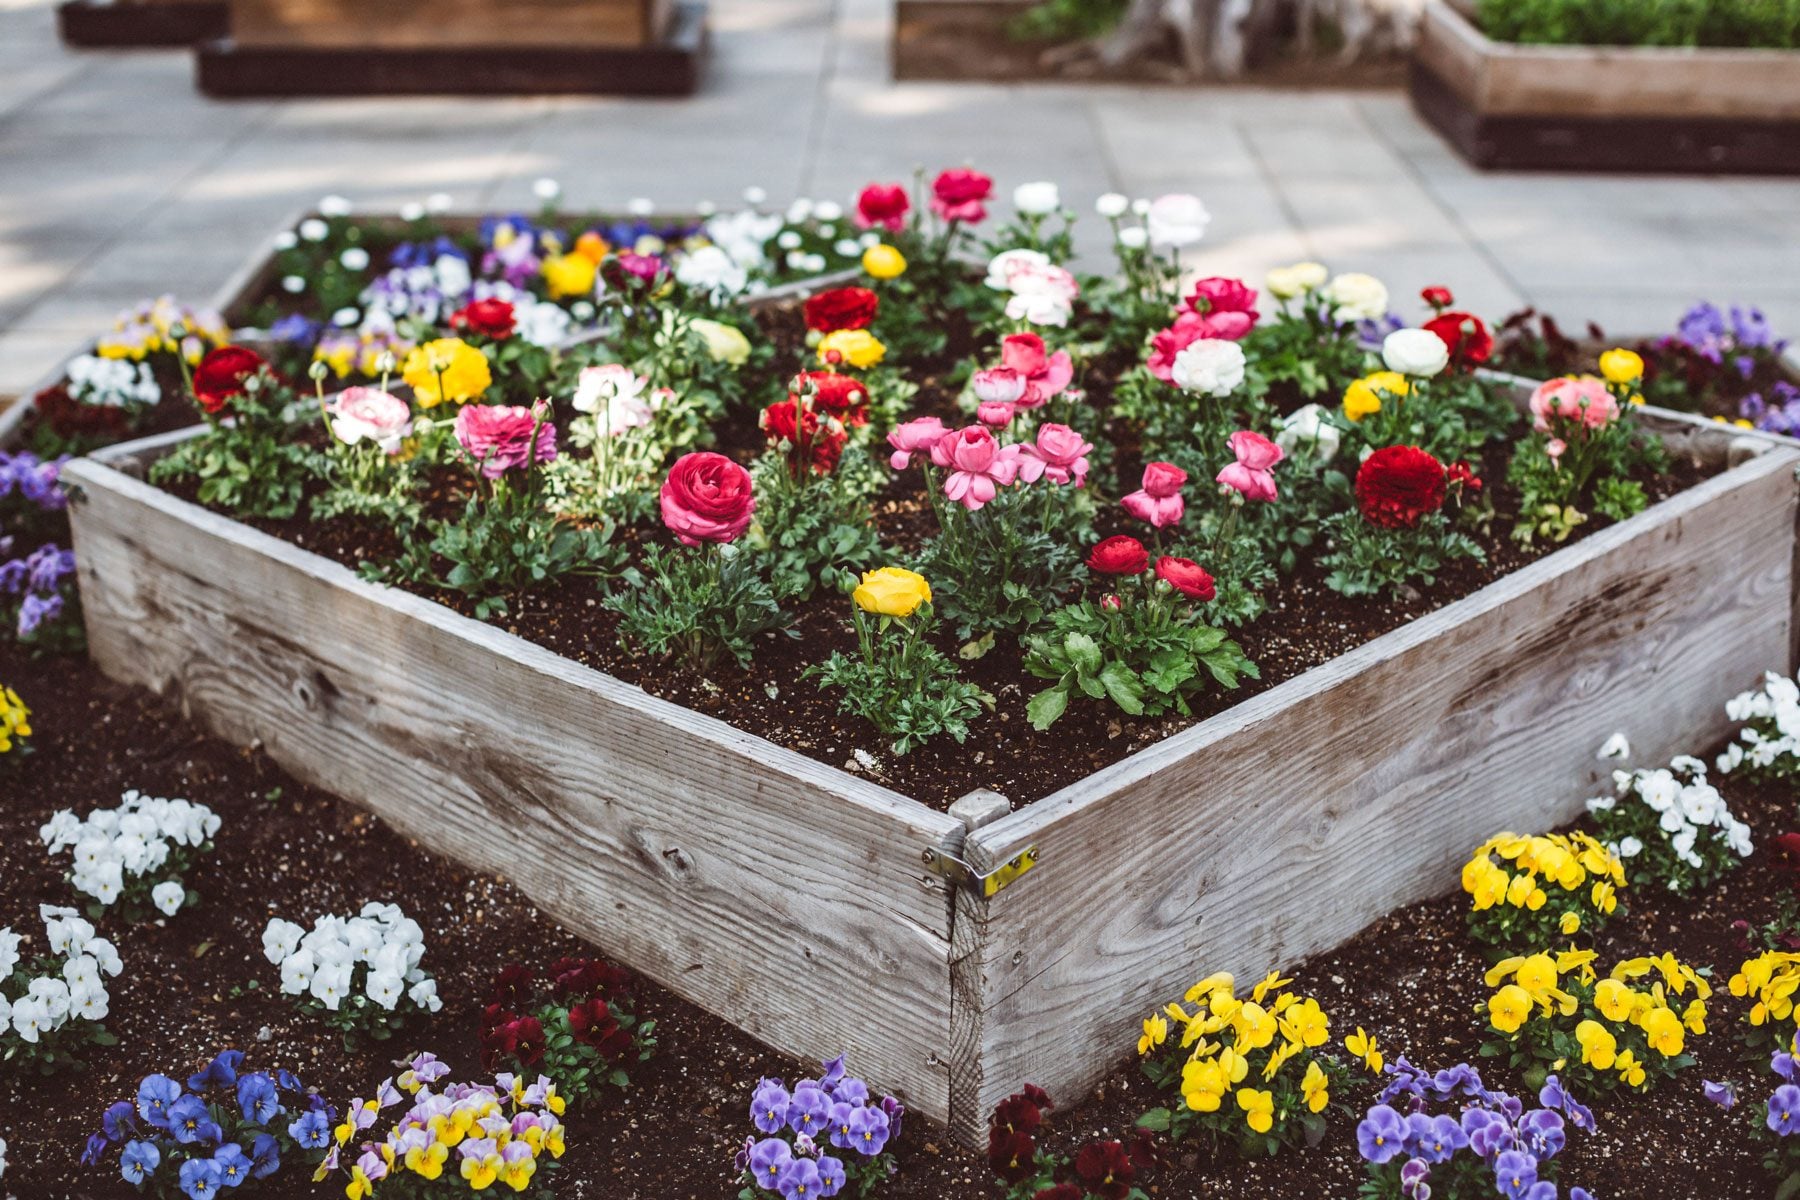
Bare soil is an open invitation to weeds. A densely planted flower bed reduces the light and growing space available to unwanted seedlings.
Select flowers according to their mature width, not the size of the small plant at the garden center. Space them closely enough to create a connected canopy after establishment, but not so tightly that poor airflow encourages disease.
Layering plants also improves coverage. Taller structural plants can be combined with medium-height flowering perennials, low edging plants, and groundcovers. Suitable groundcovers may suppress weeds by shading the soil and competing for resources while adding texture, seasonal flowers, and erosion control.
Choose noninvasive species suited to the site’s sunlight, soil, moisture, and USDA hardiness zone. A groundcover that behaves politely in one region may become an enthusiastic neighborhood conqueror in another.
Use Drip Irrigation or Soaker Hoses
Overhead sprinklers water flowers, empty soil, paths, bed edges, and every weed seed within range. Drip irrigation and soaker hoses deliver moisture closer to the roots of desirable plants, leaving much of the surrounding soil comparatively dry.
Place irrigation lines under the mulch when practical. Check emitters regularly, adjust them as plants grow, and water deeply enough to support healthy root development. Strong, properly watered flowers compete more successfully with weeds than stressed plants.
Targeted irrigation will not eliminate weeds, especially during rainy weather, but it removes one of the advantages gardeners often provide accidentally: free water everywhere.
Create a Strong Border Around the Bed
Grass and creeping weeds frequently enter flower beds from adjoining lawns. A defined edge creates a physical break and makes invading plants easier to spot.
Use metal, brick, stone, concrete, or heavy-duty landscape edging installed deeply enough to block shallow runners. A clean trench edge can also work, but it requires periodic recutting as soil erodes and grass advances.
Inspect the perimeter every few weeks during the growing season. Remove runners before they establish roots inside the bed. Maintaining a narrow, weed-free boundary is much easier than untangling grass rhizomes from the roots of mature perennials.
Pull Weeds While They Are Young
Even a carefully prepared and mulched flower bed will produce occasional weeds. The secret is to remove them while they are small.
Young seedlings have limited root systems and can often be pulled in seconds. Mature weeds may develop deep roots, spread underground, shade flowers, and produce hundreds or thousands of seeds. One minute of work today can prevent many minutes of muttering later.
Walk through the garden once a week during active growth. Pull weeds after rain or irrigation, when the soil is moist but not muddy. Carry a small bucket so flowering weeds and plants with mature seeds can be removed from the area rather than dropped on the soil.
Weeds without seeds or persistent roots may be composted. Plants carrying mature seeds, invasive roots, or disease should be handled according to local yard-waste recommendations.
Never Let Weeds Produce Seed
Preventing seed production is one of the most important long-term weed-control practices. If a weed cannot be completely removed immediately, cut off its flowers and seed heads.
Some pulled weeds can continue maturing seeds after removal, particularly when flowers are already developed. Bagging seed-bearing material may be safer than leaving it in a pile beside the bed.
This strategy requires persistence because the existing soil seed bank may remain active for years. Each season without new seed production gradually reduces future weed pressure. Think of it as closing the weed factory even while old inventory is still sitting in the warehouse.
Use Landscape Fabric Selectively
Landscape fabric can provide additional weed suppression under gravel, pathways, or long-term shrub plantings. It allows some movement of air and water while separating soil from the surface material.
However, fabric is not ideal for every flower bed. Organic mulch eventually decomposes above it, creating a new layer in which windblown weed seeds can germinate. Plant roots may grow into or through the fabric, making future renovation difficult. Fabric can also become exposed as mulch shifts.
In frequently replanted annual beds or mixed perennial borders, a deep organic mulch without permanent fabric is often easier to maintain. If fabric is used, install it over weed-free soil, overlap the seams, secure the edges, make small planting openings, and cover it completely.
Consider Pre-Emergent Herbicides Carefully
Pre-emergent herbicides prevent certain weed seeds from developing successfully. They may be useful in established ornamental beds with recurring annual weeds, but product selection and timing are critical.
These products do not distinguish between an unwanted weed seed and a desired flower seed. Do not apply them where annual flowers, wildflowers, or other plants will be started from seed unless the label explicitly permits that use.
Identify the target weed first, select a product labeled for that weed and the ornamental plants in the bed, and follow every instruction concerning timing, application rate, protective equipment, watering, and reapplication. Pesticide labels are legal directions, not decorative literature included to make the container look important.
Post-emergent herbicides require similar caution. Many products can injure flowers through direct contact, drift, runoff, or root uptake. Hand removal, shallow cultivation, mulching, and better bed design should remain the foundation of the prevention program.
Match the Method to the Weed
Correct identification prevents wasted effort. Annual weeds are often controlled effectively by removing seedlings and preventing seed production. Biennial weeds usually form leaves during their first season and flower during the second, making early removal especially useful.
Perennial weeds require a more persistent strategy. Repeatedly removing leaves can gradually exhaust underground energy reserves, but aggressive species may require careful digging, smothering, or a correctly selected herbicide.
Nutgrass-like plants may grow from underground tubers. Creeping grasses spread through rhizomes. Bindweed can regenerate from an extensive root system. Simply tearing off visible foliage may provide emotional satisfaction, but the weed may interpret it as a haircut.
A Seasonal Weed-Prevention Schedule
Late Winter or Early Spring
Inspect the bed before rapid growth begins. Remove winter annual weeds, repair edging, clear aggressive perennial roots, and check the existing mulch depth. Apply a pre-emergent only when it is appropriate for the established plants and planned flower seeds.
Late Spring
Plant flowers at spacing based on mature size. Install or test drip irrigation, apply mulch after removing emerging weeds, and inspect the border for grass runners.
Summer
Walk through beds weekly. Pull seedlings after rain, prevent flowering weeds from producing seed, and maintain targeted irrigation. Add a small amount of mulch only where coverage has become thin.
Fall
Remove seed-bearing weeds and manage invasive roots before winter. Divide or reposition perennials to close persistent gaps. Replenish mulch where needed, but avoid burying plant crowns.
Winter
Review which weeds caused the most trouble and identify them before the next season. Plan denser planting, improved edging, or irrigation changes. Garden planning counts as gardening, especially when accompanied by coffee.
Common Weed-Prevention Mistakes
Using Too Little Mulch
A thin dusting may look tidy but often allows enough light for seeds to germinate. Maintain a consistent layer appropriate for the mulch type and plants.
Using Too Much Mulch
Excessive depth can restrict water and oxygen movement, bury plant crowns, and keep stems too wet. Measure before adding more instead of assuming that every spring requires another full load.
Mulching Over Established Weeds
Large weeds and persistent perennials frequently grow through mulch. Clear the area first and address underground roots when necessary.
Leaving Soil Bare Between Plants
Use mulch while plants establish, then allow suitable flowers and groundcovers to shade the open space.
Watering the Entire Bed Surface
Broad irrigation encourages weed germination. Deliver water to the plants that belong there.
Ignoring One Flowering Weed
A single mature weed can undo months of prevention by replenishing the soil seed bank. Remove or cut seed heads promptly.
Practical Experience: What Gardeners Learn After Several Seasons
The most important experience-based lesson is that weed prevention works best when it becomes a routine rather than a rescue mission. A flower bed that receives ten attentive minutes each week is usually easier to manage than one that receives three frantic hours every six weeks.
Consider a typical perennial border planted with coneflowers, daylilies, ornamental grasses, salvia, and creeping phlox. During its first year, large spaces remain between the young plants. Those gaps provide ideal conditions for crabgrass and broadleaf seedlings. Applying a consistent layer of shredded bark and checking the bed weekly keeps the weeds manageable while the flowers mature.
By the third growing season, the perennials form a fuller canopy. Weed germination drops because less light reaches the soil. Maintenance shifts from pulling dozens of seedlings to removing a few opportunists near the edges. The mulch is still useful, but plant coverage is now doing much of the work.
Gardeners also learn that timing matters more than strength. Pulling a two-inch weed from moist soil takes seconds. Waiting until it is two feet tall may require gloves, digging, disposal, and language unsuitable for a peaceful garden tour.
Another common lesson involves mulch depth. A homeowner may add three inches of new mulch every spring without checking what remains from previous years. After several seasons, the layer becomes excessively deep, plant crowns disappear, and water struggles to reach the soil evenly. The better practice is to measure, loosen compacted material, and add only what is missing.
Bed edges deserve similar attention. In many gardens, the worst “weeds” are actually lawn grasses creeping under loose plastic edging. Replacing a shallow border with properly installed metal edging or a regularly maintained trench can eliminate much of the recurring work. The weeds were not arriving from the sky; they were commuting from next door.
Targeted watering often produces another noticeable improvement. A bed irrigated with an overhead sprinkler may develop weeds across every open patch of soil. After switching to drip tubing beneath the mulch, germination decreases between plants, water loss is reduced, and flower foliage stays drier. Rain will still awaken some seeds, but the gardener is no longer personally providing room service to them.
Experienced gardeners also stop expecting one product to solve every weed problem. Mulch controls many seedlings but may not defeat bindweed. Hand pulling works well for young annuals but may spread a rhizomatous grass if roots are chopped and scattered. Landscape fabric may help beneath a gravel path but become frustrating in a perennial bed that needs regular dividing.
The best results come from observing how each weed grows and adjusting the strategy. Seed-producing annuals must be removed before flowering. Creeping weeds require clean borders and complete root removal. Persistent perennials may need repeated cutting to exhaust their root reserves. Prevention becomes easier when the gardener stops treating every unwanted plant as the same enemy wearing a different leaf.
Finally, perfection is not required. A few weeds do not mean the prevention plan has failed. The realistic goal is to keep weeds from competing heavily with flowers, spreading through the bed, or producing the next generation. A healthy garden is a living system, not a hotel lobby carpet. Occasional surprises are part of the arrangement.
Conclusion
Learning how to prevent weeds in flower beds is less about finding a miracle product and more about creating conditions that favor flowers instead of weeds. Begin with a clean bed, disturb the soil as little as possible, maintain an appropriate mulch layer, use dense plantings, direct water to desirable roots, and remove new weeds before they mature.
The system becomes more effective over time. Every weed removed before seeding reduces future pressure. Every gap filled by a well-chosen plant blocks another opportunity. Every weekly inspection prevents a small problem from becoming a weekend project.
You may never eliminate every weed, but you can make your flower beds far less welcoming to them. In gardening, as in hosting houseguests, the trick is to be generous with the invited visitors and noticeably less accommodating to everyone else.