Note: This article is written for web publishing and synthesizes established DIY decoupage, terra cotta painting, sealing, and container-gardening best practices from reputable U.S. craft, home, and gardening resources.
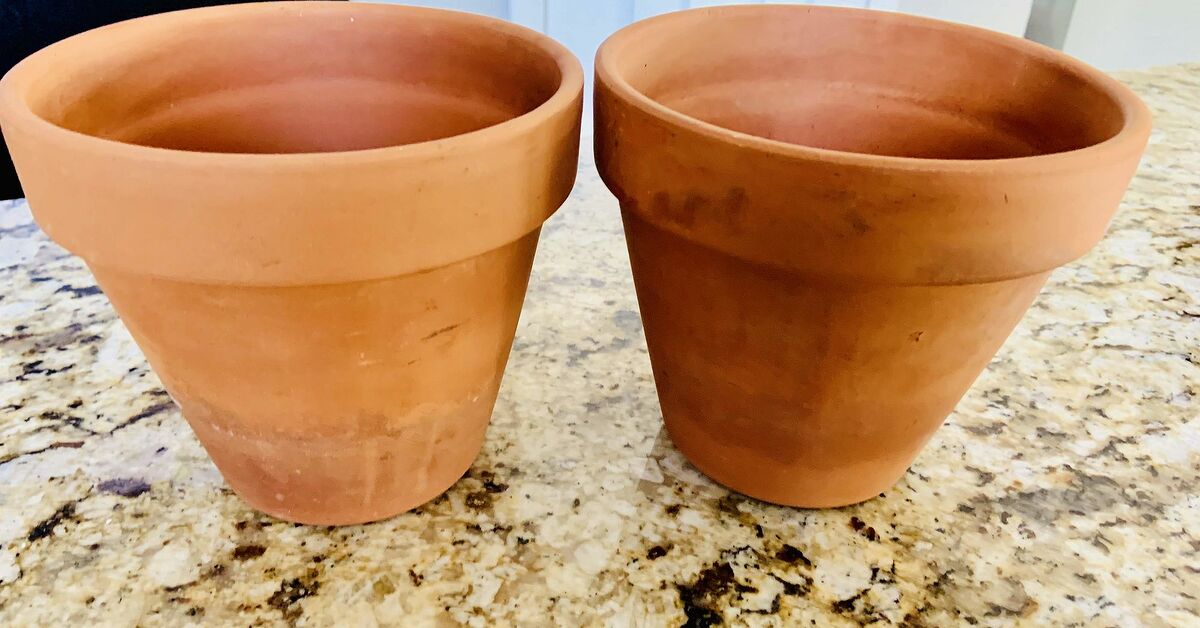
A plain terra cotta pot is a little like a blank canvas wearing garden clogs. It is humble, useful, affordable, and just waiting for someone with a paper napkin and a tiny bit of creative courage to give it a makeover. That is where the magic of a DIY decoupaged napkin terra cotta pot comes in.
With a few pretty napkins, decoupage medium, paint, and sealant, you can turn an ordinary clay planter into a charming piece of handmade home decor. It can hold herbs on a sunny kitchen windowsill, brighten a porch table, dress up a Mother’s Day gift, or make your pothos look like it moved into a boutique apartment.
This guide explains how to make a DIY decopauged napkin terra cotta pot step by step, including what supplies to use, how to prep the pot, how to avoid wrinkles, how to seal your design, and what to do if your napkin starts acting like wet tissue paper at a drama audition. By the end, you will have a beautiful custom planter that looks expensive but costs very little to make.
What Is a Decoupaged Napkin Terra Cotta Pot?
A decoupaged napkin terra cotta pot is a clay flower pot decorated with thin printed paper napkins and sealed with a decoupage glue or medium. The napkin design becomes part of the pot’s surface, creating a painted-on look without requiring advanced painting skills.
Decoupage is a classic craft technique that involves gluing paper or fabric to a surface and sealing it with protective coats. Paper napkins are especially popular because they are thin, flexible, and available in endless designs: florals, lemons, bees, birds, vintage patterns, coastal prints, holiday motifs, and everything in between. Basically, if someone can print it on a napkin, you can probably turn it into planter art.
Terra cotta pots are ideal for this project because they are inexpensive, easy to find, and naturally rustic. However, terra cotta is porous, meaning it absorbs moisture. That is wonderful for many plants, but not so wonderful for delicate paper decoration unless the pot is properly cleaned, painted, and sealed.
Why This DIY Project Is Worth Making
There are many reasons to make a DIY decoupaged napkin terra cotta pot, but the biggest one is simple: it gives a basic planter a custom look without a custom price tag. A designer-style decorative pot can cost much more than a plain clay one, especially if you need several for herbs, succulents, flowers, or party centerpieces.
This craft also works beautifully for beginners. You do not need to draw, paint flowers by hand, or own an art degree from the School of Extremely Steady Hands. The napkin provides the artwork, while you provide the placement, patience, and occasional “please don’t wrinkle” whisper.
It is also a smart upcycling project. You can refresh old terra cotta pots, thrifted planters, or leftover garden containers instead of buying new decor. The finished pots make lovely handmade gifts for birthdays, housewarmings, teacher appreciation, spring gatherings, bridal showers, or anyone who has ever said, “I’m just going to buy one more plant.”
Supplies You Will Need
Before starting, gather your materials. Having everything nearby helps prevent that classic craft moment where one hand is covered in glue and the thing you need is somehow across the room.
Basic Materials
- Terra cotta pot and matching saucer
- Decorative paper napkins
- White acrylic craft paint or chalk paint
- Decoupage medium such as Mod Podge
- Outdoor or dishwasher-safe decoupage formula if the pot may face moisture
- Clear acrylic sealer, clay pot sealer, or outdoor varnish
- Foam brush or soft flat brush
- Small detail brush
- Scissors
- Plastic wrap, parchment paper, or a dry soft cloth for smoothing
- Fine-grit sandpaper
- Damp cloth
- Painter’s tape
- Drop cloth, newspaper, or cardboard
Optional Extras
- Primer for terra cotta or multi-surface primer
- Gold leaf paint or metallic acrylic paint
- Ribbon, twine, or raffia
- Paint pens for details
- Disposable gloves
- Small plastic liner pot for live plants
For best results, choose napkins with clear designs and a light background. Floral napkins are especially forgiving because small overlaps and tiny wrinkles disappear into the pattern. Large geometric prints can look amazing too, but they require more careful placement.
Step 1: Clean and Dry the Terra Cotta Pot
Start with a clean, dry terra cotta pot. If the pot is new, wipe away dust with a damp cloth. If it is old, scrub off dirt, mineral deposits, and loose flakes. Let the pot dry completely before painting or sealing. Terra cotta holds moisture, so “mostly dry” is not good enough here. Give it time.
If there are rough spots, lightly sand them with fine-grit sandpaper. You do not need to make the pot perfectly smooth, but sharp bumps can tear napkin paper later. Wipe the pot again after sanding to remove dust.
Step 2: Seal the Inside of the Pot
This step is easy to skip, but it matters. Terra cotta is porous and can pull moisture from soil through the clay wall. If water reaches the paper and glue from behind, your beautiful napkin design may bubble, peel, crack, or look like it spent the night in a rainstorm.
Apply a clear clay pot sealer, acrylic sealer, or outdoor-safe varnish to the inside of the pot and the inner rim. Let it dry according to the product directions. Some crafters also seal the outside before painting, especially if the pot will be used outdoors or with live plants.
If you want to preserve some of terra cotta’s natural breathability for plants, consider placing a nursery pot inside the decorated terra cotta pot instead of planting directly into it. This “cachepot” method keeps water and soil away from the decoupaged surface while still giving you the pretty look.
Step 3: Paint the Outside White
Most printed napkins are thin and slightly translucent. If you apply them directly to orange clay, the terra cotta color may dull the pattern. A white base coat makes the napkin design look brighter, cleaner, and more professional.
Use white acrylic craft paint, chalk paint, or a primer-and-paint combination. Apply one thin coat, let it dry, and add a second coat if needed. Thin coats are better than one thick coat because thick paint can drip, peel, or leave brush marks. Paint the outer surface and the top rim. You can also paint about one inch down inside the pot for a finished look.
Let the paint dry fully before moving on. If the surface feels tacky, the napkin will grab too quickly, and you may not be able to adjust it without tearing.
Step 4: Separate the Napkin Layers
Most decorative paper napkins have two or three layers. You only want the top printed layer. Carefully peel away the plain white backing layers until you are left with one thin printed sheet.
This is the part where patience earns its snacks. If the layers are hard to separate, gently rub a corner between your fingers or place a small piece of tape on the back layer and pull it away. Be careful not to stretch or tear the printed layer.
Once separated, cut or tear the design. Cutting gives crisp edges, while tearing creates soft edges that blend more naturally into the painted background. For floral designs, tearing around flowers and leaves often creates a lovely hand-painted effect.
Step 5: Plan the Design Before Gluing
Before opening the decoupage medium, arrange your napkin pieces on the pot. Decide whether you want full coverage, scattered motifs, a border around the rim, or one large feature design on the front.
For beginners, smaller pieces are easier than wrapping one full napkin around the entire pot. Terra cotta pots curve outward, so large flat paper can wrinkle as it bends around the shape. Smaller pieces allow you to overlap gently and control the pattern.
If your napkin has a repeating design, cut several matching elements and place them evenly around the pot. For a vintage garden look, use torn floral pieces and let the white background show through. For a bold look, cover the whole pot with a dense pattern, then add a painted rim for contrast.
Step 6: Apply Decoupage Medium in Small Sections
Brush a thin layer of decoupage medium onto a small area of the pot. Do not coat the whole pot at once unless you enjoy racing against drying glue. Work in sections about the size of one napkin piece.
Place the napkin piece onto the wet medium and gently press it down. Use your fingers, plastic wrap, parchment paper, or a soft dry cloth to smooth from the center outward. The goal is to remove air bubbles without rubbing so hard that the napkin tears.
Paper napkins are delicate when wet, so treat them like tiny royalty. No scrubbing. No tugging. No angry brushing. If a wrinkle appears, gently tap it down and move on. A few soft wrinkles can actually add charm and texture.
Step 7: Let the First Layer Dry Before Topcoating
After placing the napkin pieces, let the pot dry completely before applying a topcoat. This helps prevent smearing, tearing, and dragging the paper. Depending on humidity and product type, drying may take about one hour or longer.
Once dry, apply a thin coat of decoupage medium over the napkin design. Use light brush strokes and cover all paper edges. Let the coat dry, then add another. Two to four thin topcoats usually create a smoother, more durable finish.
If you want a softer matte look, choose a matte decoupage formula. For a brighter, wipeable finish, use gloss. Satin is a nice middle ground: polished, but not shiny enough to signal low-flying aircraft.
Step 8: Seal the Pot for Durability
Decoupage medium protects the paper, but if the pot will be near water, soil, humidity, or outdoor conditions, add a final protective sealer. Use a clear acrylic spray, outdoor varnish, or clay pot sealer. Apply thin coats in a well-ventilated area and follow the product’s drying instructions.
For outdoor use, remember that “water-resistant” does not always mean “waterproof.” A decoupaged terra cotta pot will last longer on a covered porch, patio table, or indoor windowsill than in heavy rain. If you want it outdoors, seal it carefully, avoid leaving it sitting in water, and bring it inside during freezing weather.
Step 9: Add Finishing Touches
Once the pot is fully dry, you can personalize it further. Paint the rim in a coordinating color, add a thin metallic line, tie twine around the top, or use a paint pen to write the name of an herb. A lemon napkin pot labeled “Basil” looks cheerful in a kitchen. A lavender napkin pot with a raffia bow makes a sweet gift. A bee-patterned pot practically demands to sit beside a jar of honey and feel important.
You can also decorate the saucer to match. Paint it white, decoupage a small napkin motif in the center, or seal it in a solid accent color. Just make sure the saucer is also protected if it will catch water.
Best Plants for a DIY Decoupaged Terra Cotta Pot
Because decorated pots need a little extra care around moisture, choose plants thoughtfully. Succulents, cacti, lavender, rosemary, thyme, and other plants that prefer drier conditions can work well in terra cotta. Herbs such as basil, mint, and parsley may need more frequent watering, so a plastic nursery liner is helpful.
If you are using the pot mainly for decor, faux greenery is a wonderful option. Today’s faux plants can look surprisingly realistic, and they do not leak water onto your masterpiece. This is especially useful for centerpieces, party favors, shelf styling, and seasonal displays.
For live plants, always keep drainage in mind. A pot should have a drainage hole so excess water can escape. Waterlogged soil can harm roots, and standing water can also damage the decorated finish over time.
Common Mistakes to Avoid
Using the Whole Napkin Without Separating Layers
If you use all napkin layers, the paper will be thicker, harder to smooth, and less likely to blend into the pot. Always use only the top printed ply.
Applying Too Much Glue
A heavy layer of decoupage medium can oversaturate the napkin, causing tears and wrinkles. Use thin coats. You can always add more later.
Skipping the White Base Coat
Napkin designs look much brighter over white paint. Without it, colors may appear muddy against the orange clay.
Forgetting to Seal Against Moisture
Terra cotta absorbs water. If the pot is not sealed, moisture can move through the clay and damage your design.
Planting Too Soon
Let all paint, glue, and sealer cure thoroughly before adding soil or plants. Dry-to-the-touch does not always mean fully cured.
Creative Design Ideas for Napkin Terra Cotta Pots
One of the best parts of this project is how easily you can change the style. For a farmhouse look, use blue-and-white floral napkins, a matte finish, and a twine bow. For a cottage garden style, choose roses, hydrangeas, butterflies, or vintage botanical prints. For a modern kitchen herb garden, use lemon, olive branch, or black-and-white patterned napkins.
Seasonal pots are also fun. Use pastel florals for spring, patriotic prints for summer, pumpkins and leaves for fall, or evergreen and berry napkins for winter. Small terra cotta pots can become party favors, table place cards, or handmade gifts when filled with herbs, seed packets, candy, or mini succulents.
If you want a high-end look, keep the palette controlled. Choose one napkin pattern, one paint color, and one finish. If you want a playful look, mix patterns carefully by repeating at least one color throughout the design. The secret is making it look intentional, not like your craft drawer sneezed.
How to Care for Your Finished Pot
To clean your DIY decoupaged napkin terra cotta pot, wipe it gently with a dry or slightly damp cloth. Avoid soaking it, scrubbing it, or putting it in the dishwasher. Even with sealer, handmade paper crafts prefer gentle care.
If the pot is outdoors, place it in a covered area when possible. Avoid freezing temperatures because moisture inside terra cotta can expand and cause cracking. If the finish begins to dull after a season, clean the pot and apply another light coat of outdoor sealer.
When watering live plants, try not to splash the outside of the pot. Remove the inner nursery pot for watering if you are using the cachepot method. Let it drain fully before placing it back inside the decorated pot.
Personal Experience: What I Learned Making DIY Decoupaged Napkin Terra Cotta Pots
The first time I made a decoupaged napkin terra cotta pot, I had the confidence of a professional crafter and the technique of someone opening a bag of chips too aggressively. I chose a gorgeous floral napkin, painted the pot white, slapped on a generous amount of decoupage medium, and immediately learned that paper napkins become very dramatic when wet.
My first big lesson was this: use less glue than you think. A thin coat works better than a glossy puddle. When the surface is too wet, the napkin stretches, tears, and wrinkles almost instantly. Once I switched to small sections and lighter coats, the whole process became calmer. The napkin settled onto the pot instead of dissolving into craft soup.
The second lesson was to tear some edges instead of cutting every piece. Scissors are great for clean borders, but torn floral pieces blend beautifully into a painted background. On a white pot, the torn white napkin edges almost disappear after sealing. This creates a soft, vintage effect that looks much more expensive than it is.
I also learned that the pot shape matters. Straight-sided pots are easier for beginners, while curved pots require smaller napkin pieces. When I tried to wrap one large napkin around a tapered pot, it wrinkled near the bottom because the paper had nowhere to go. Smaller pieces solved the problem and gave the design a more natural collage style.
Another helpful trick is to use plastic wrap for smoothing. After placing the napkin on the glued surface, lay a small piece of plastic wrap over it and gently smooth with your fingertips. The plastic helps prevent your fingers from sticking to the wet paper. It also spreads pressure more evenly, which reduces tearing.
Sealing the pot was the step that made the finished project feel complete. Before sealing, the surface looked pretty but a little fragile. After two thin topcoats and a clear protective finish, the design looked richer and more polished. It still felt handmade, but in a charming way rather than a “made during a power outage” way.
I prefer using these pots indoors or on a covered porch. Even when sealed, paper-based crafts do not love constant rain. For live plants, I usually keep the plant in its plastic nursery pot and slip it inside the decorated terra cotta pot. This makes watering easier and protects the decoupage from moisture. It also means I can swap plants seasonally without disturbing the design.
One of my favorite versions used a lemon-print napkin on a small terra cotta pot for kitchen basil. The white background made the yellow lemons pop, and a thin green painted rim tied the whole thing together. Another favorite used blue floral napkins and a matte finish for a soft cottage-style planter. That one looked like it belonged on a windowsill next to a cup of tea and a book with a mildly suspicious inheritance plot.
If you are making this project as a gift, I recommend pairing the pot with something useful: a packet of herb seeds, gardening gloves, a small succulent, or a handwritten plant care tag. Handmade gifts feel extra special when they are beautiful and practical.
The biggest takeaway is that perfection is not required. Tiny wrinkles, uneven edges, and soft overlaps are part of the handmade charm. Decoupage is forgiving once you stop trying to control every millimeter. Choose a napkin you love, work slowly, seal everything well, and let the pot have a little personality. After all, plants are already a bit wild. Their pots can be too.
Conclusion
Making a DIY decopauged napkin terra cotta pot is an easy, affordable way to turn a basic clay planter into custom home decor. With proper prep, a white base coat, carefully separated napkin layers, thin decoupage coats, and good sealing, you can create a charming pot that looks thoughtful, stylish, and completely unique.
This project is perfect for beginners, plant lovers, gift makers, and anyone who wants a satisfying craft that does not require expensive supplies. Whether you choose romantic florals, bright lemons, vintage birds, or seasonal patterns, a decoupaged terra cotta pot adds color and personality to any room, porch, windowsill, or garden table.