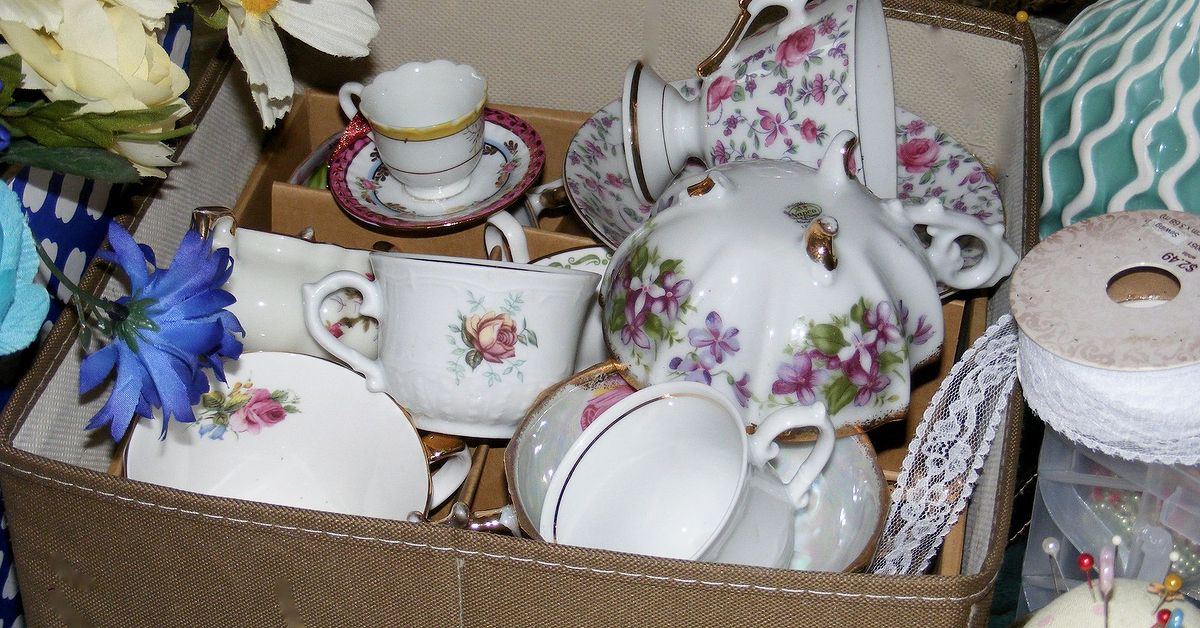
A teacup and saucer wreath is what happens when vintage charm, thrift-store luck, and a glue gun walk into the same craft room. It is romantic, quirky, surprisingly dramatic, and just fancy enough to make your front door look like it hosts afternoon tea with a minor royal. Best of all, this DIY teacup wreath gives chipped china, mismatched saucers, orphaned cups, and flea-market finds a second life as beautiful wall decor.
This project is ideal for cottagecore decorating, spring wreath ideas, Mother’s Day decor, tea party decorations, shabby chic home accents, or anyone who has ever looked at a tiny floral cup and thought, “You are too pretty to hold only chamomile.” With the right wreath base, strong adhesive, balanced placement, and a little patience, you can create a handmade teacup and saucer wreath that looks boutique-worthy without costing boutique money.
Below is a complete step-by-step guide covering materials, layout, gluing techniques, design tips, hanging safety, troubleshooting, and creative variations. Put the kettle on. The wreath is about to get adorable.
Why Make a Teacup and Saucer Wreath?
A teacup wreath is more than a craft project. It is a rescue mission for beautiful china that has lost the rest of its set. Instead of letting mismatched teacups hide in a cabinet, you can turn them into a statement piece for a kitchen, breakfast nook, craft room, tea room, covered porch, garden shed, or party backdrop.
The best part is that the project looks complicated, but the process is mostly about arranging, testing, gluing, and waiting. The waiting is the hard part. Crafters are brave in many ways, but leaving fresh glue alone for 24 hours requires the discipline of a monk guarding a cheesecake.
This wreath also works for many decorating styles. Floral china creates a soft vintage look. White cups and gold-trimmed saucers feel elegant. Bright mismatched cups make the wreath playful and eclectic. Blue-and-white china gives it a classic cottage feel. You can even add faux flowers, ribbon, pearls, lace, moss, miniature spoons, tea bags, or tiny signs to personalize the design.
Materials You’ll Need
Before you begin, gather everything so you are not holding a teacup in one hand and searching for scissors with the other. That is how craft rooms become archaeological sites.
Main Supplies
- 6 to 10 teacups, depending on wreath size and cup diameter
- 6 to 10 matching or mismatched saucers
- One sturdy wreath base, such as a wooden round, grapevine wreath, plywood ring, or flat MDF wreath form
- Strong permanent adhesive suitable for ceramic, glass, and wood
- Hot glue gun and glue sticks for temporary grip or lightweight accents
- Ribbon, wired bow, lace, twine, or fabric strips
- Faux flowers, greenery, moss, berries, pearls, or small decorative spoons
- Rubbing alcohol and a clean cloth
- Pencil or painter’s tape for marking placement
- Hanging hardware, heavy-duty wire, D-ring hangers, or a strong sawtooth hanger
Helpful Tools
- Wire cutters
- Craft knife or scissors
- Measuring tape
- Protective gloves
- Cardboard or craft mat to protect the table
- Small clamps, painter’s tape, or folded towels to hold pieces while curing
Choosing the Right Teacups and Saucers
For a DIY teacup and saucer wreath, thrift stores, estate sales, flea markets, garage sales, and church rummage sales are gold mines. You do not need perfect china. In fact, tiny chips near the rim can often be hidden by flowers, ribbon, or clever placement. Avoid cracked handles, badly fractured cups, or pieces with sharp broken edges. Decorative is good. Dangerously crunchy is not.
Try to choose cups that are similar in weight. A wreath made with one feather-light porcelain cup and one chunky diner mug may hang crooked unless you balance the layout carefully. Saucers should be wide enough to support the cups visually and physically. If the saucers are too small, the cup may look like it is balancing on a coaster during an earthquake.
For a 14- to 16-inch wreath base, seven or eight teacups usually create a full look. For a larger plywood round or charger-style base, you may use 10 to 16 cups. Always arrange everything before gluing. China is charming, but once glued, it becomes stubborn charming.
Choosing the Best Wreath Base
The base is the backbone of the project. A lightweight foam wreath may work for flowers, ribbon, or paper crafts, but ceramic teacups are heavy. For a long-lasting teacup wreath DIY, choose a strong base that can handle weight.
Wooden Round or Plywood Ring
A wooden round is one of the safest choices because it gives the cups and saucers a flat surface for bonding. You can paint it white, cream, gold, sage green, blush pink, or any color that complements your china. If parts of the base show between saucers, the painted finish will look intentional rather than like a craft project that ran out of confidence.
Grapevine Wreath
A grapevine wreath creates a rustic garden style, especially when paired with florals and greenery. However, because the surface is uneven, it is better for attaching saucers, lightweight cups, or decorative teacups that are also wired in place. If you use grapevine, reinforce heavy pieces with floral wire where possible.
Metal or Wire Wreath Form
Wire wreath forms are better for mesh, ribbon, and greenery than for ceramic cups. If you love the open look, attach a wood or metal support behind the china areas. The goal is beauty, not a front-door avalanche.
Step-by-Step: How to Make a Teacup & Saucer Wreath DIY
Step 1: Clean Every Surface
Wash the teacups and saucers with warm soapy water, then dry them completely. Wipe the bonding areas with rubbing alcohol to remove dust, oil, sticker residue, and mysterious thrift-store fingerprints from 1987. Also wipe the wreath base where each saucer or cup will attach.
This step matters because glue bonds best to clean, dry surfaces. Skipping it can lead to weak spots, especially on glossy ceramic or glass.
Step 2: Paint or Cover the Wreath Base
If using a wooden base, paint the front, sides, and any visible edges. Let it dry fully. A neutral background helps floral china stand out, while metallic paint adds a vintage tea-room mood. For a softer look, wrap the base with burlap ribbon, lace, or fabric before attaching the saucers.
If using a grapevine wreath, trim loose twigs and test how the saucers sit. You may want to add a little moss or greenery between pieces later to fill gaps.
Step 3: Arrange the Saucers First
Lay the wreath flat on your work surface. Place the saucers in a circle, spacing them evenly. Rotate patterns until the colors feel balanced. If one saucer is bold red and the others are pale pink, do not put the red one in a random spot unless you want the entire wreath to look like it has a lead singer.
Leave one small gap for a bow or floral cluster. This gives the wreath a natural focal point and prevents the arrangement from looking too crowded. Once you like the layout, mark the position of each saucer with a pencil or small pieces of painter’s tape.
Step 4: Dry-Fit the Teacups
Place each cup on or beside its saucer before gluing. Many designs look best when the cups rest on their sides with handles facing different directions. Alternating handle placement gives the wreath movement and keeps it from looking overly stiff.
You can also place some cups upright, especially if you plan to tuck faux flowers inside. Upright cups are adorable, but they add depth and weight, so make sure the wreath will still hang flat enough for your chosen location.
Step 5: Glue the Saucers to the Base
Apply a strong permanent adhesive to the back of each saucer where it touches the base. Press it firmly in place. Use painter’s tape, folded towels, or small supports to prevent sliding while the adhesive begins to set.
Hot glue can help hold a lightweight piece temporarily, but it should not be the only adhesive for ceramic saucers on a wreath. Hot glue is fast, but permanent craft adhesive or construction-strength adhesive gives better long-term security for heavier pieces.
Step 6: Attach the Teacups
Once the saucers have started to hold, attach the teacups. Add adhesive to the points where the cup touches the saucer and, if the cup is tilted, where the handle or rim meets another stable surface. For extra security, use a small amount of hot glue for quick grab, then add permanent adhesive at the main contact points.
Do not overload the glue. Too much adhesive can ooze out and create shiny blobs that look like your teacup sneezed. Use enough for contact, then wipe excess carefully according to the adhesive instructions.
Step 7: Let the Wreath Cure Flat
This is the step that separates a sturdy wreath from a ceramic crime scene. Leave the wreath flat and undisturbed for the full curing time recommended by your adhesive. Many heavy-duty adhesives need at least 24 hours, and some perform best after 48 to 72 hours.
Do not hang it early “just to see.” That phrase has broken more craft projects than toddlers and gravity combined.
Step 8: Add Flowers, Greenery, and Decorative Details
After the cups and saucers are secure, fill gaps with faux flowers, small leaves, preserved moss, ribbon loops, mini roses, baby’s breath, faux lavender, or tiny pearls. A few decorative spoons can be tucked between cups for a tea-party theme. If you want a garden look, add trailing ivy or eucalyptus. If you want a vintage wedding look, use ivory roses, lace, and satin ribbon.
Hot glue works well for lightweight embellishments, but wire is helpful for stems and heavier accents. Keep the additions balanced. The teacups should remain the star, not disappear under a botanical explosion.
Step 9: Add a Bow or Hanger
A wired ribbon bow can hide the gap between saucers and create a finished focal point. Place the bow at the top, bottom, or side depending on your layout. Side bows feel relaxed and designer-like; top bows feel traditional; bottom bows feel full and romantic.
Attach hanging hardware to the back of the base. For a heavy teacup wreath, use strong D-rings, picture-hanging wire, or a secure sawtooth hanger rated for more than the wreath’s weight. If using ribbon as the visible hanger, make sure the actual support behind it is strong.
Step 10: Hang It Safely
Before hanging, gently lift the wreath and test for loose pieces. Hold it over a soft surface, not your tile floor. Check the balance. If one side dips, add small accents to the opposite side or adjust the hanger placement on the back.
Hang the wreath indoors or on a covered door protected from rain, harsh sun, and strong wind. Ceramic, glue, and weather are not always best friends. A kitchen wall, dining room, tea station, breakfast nook, pantry door, or covered porch is usually safer than an exposed exterior door.
Design Ideas for Different Styles
Shabby Chic Teacup Wreath
Use pastel floral cups, white saucers, lace ribbon, pearls, and pale pink roses. Paint the base cream or champagne gold. This style is perfect for spring decor, bridal showers, Mother’s Day, or a feminine craft room.
Cottage Garden Wreath
Choose mismatched floral china and tuck faux lavender, ivy, daisies, and moss between the cups. A grapevine base works especially well for this look. It should feel like the wreath wandered in from a secret garden and politely asked for tea.
Elegant Tea Party Wreath
Use white cups, gold-rimmed saucers, satin ribbon, and a few small metallic accents. Keep the embellishments minimal so the china looks refined. This version works beautifully as tea party decor or dining room wall art.
Colorful Vintage Wreath
Mix bright cups in yellow, turquoise, red, green, and pink. Add playful ribbon and tiny faux cupcakes, macarons, or spoons for a whimsical kitchen display. This is the wreath equivalent of wearing red lipstick to the grocery store: unnecessary, delightful, and absolutely allowed.
Common Mistakes to Avoid
Using a Weak Base
Ceramic is heavier than it looks. A flimsy foam ring can bend, crack, or fail under the weight. Choose wood, plywood, MDF, or a reinforced base whenever possible.
Skipping the Dry Layout
Always arrange the cups and saucers before gluing. Dry-fitting helps you balance color, weight, handle direction, and spacing. It also prevents the classic crafting tragedy known as “I glued it three inches too far left.”
Hanging Too Soon
Adhesive needs time to cure. If the label says wait, wait. Your wreath may feel secure after an hour, but gravity is patient and petty.
Using Only Hot Glue for Heavy China
Hot glue is useful, but it is not ideal as the only bond for ceramic pieces that hang vertically. Use a strong adhesive designed for hard surfaces, and allow proper curing time.
Ignoring Weight Balance
If all the large cups sit on one side, the wreath may hang crooked. Spread heavier pieces evenly around the circle and keep the hanger centered based on the final balance, not just the geometric top.
How to Care for Your Teacup Wreath
Dust the wreath gently with a soft paintbrush, microfiber cloth, or cool air from a hair dryer held at a safe distance. Avoid soaking it or spraying it heavily with cleaner. If it hangs in a kitchen, keep it away from greasy cooking areas unless you enjoy cleaning tiny roses with the focus of a brain surgeon.
Store the wreath flat or upright in a padded box. Wrap the cups loosely with tissue paper or bubble wrap, especially if moving. Do not stack heavy items on top of it. Label the box clearly so nobody mistakes it for ordinary decor and tosses it into storage like a bag of scarves.
Budget Tips for a Beautiful DIY Teacup Wreath
You do not need expensive china for this project. In fact, the best teacup wreaths often come from mismatched bargain pieces. Look for saucers sold without cups, cups missing saucers, and slightly imperfect sets. Many thrift stores price incomplete china cheaply because most shoppers want matching sets. Their loss is your wreath’s glow-up.
Use leftover ribbon from gift wrapping, faux flowers from old arrangements, greenery from seasonal decor, or lace from fabric scraps. A broken necklace can become pearl trim. A single lonely spoon can become an accent. The more you reuse, the more character the wreath gains.
If you are buying supplies new, spend money on the base and adhesive first. Those are the structural pieces. Decorative extras can be improvised, but a weak bond will not be saved by a beautiful bow, no matter how aggressively it fluffs.
Creative Ways to Use a Teacup and Saucer Wreath
A teacup wreath is not limited to the front door. Use it as a centerpiece by laying it flat around a candle hurricane or vase. Hang it above a coffee bar or tea station. Display it in a china cabinet with the door open. Use it as a bridal shower backdrop, a garden party decoration, or a Mother’s Day brunch accent.
You can also make mini versions with demitasse cups for cabinet doors, gallery walls, or gift decor. A smaller wreath is easier to store and less intimidating for beginners. It also gives you an excuse to buy tiny cups, which is not a problem. It is a lifestyle.
Personal Experience: What Making a Teacup Wreath Teaches You
The first thing you learn while making a teacup and saucer wreath is that “mismatched” does not mean messy. At the beginning, a pile of thrifted cups can look chaotic. One has roses, one has violets, one has a gold rim, and one looks like it belonged to an aunt who called everyone “dear” while secretly winning every card game. But once you start arranging them in a circle, the pieces begin to talk to each other. Colors repeat. Handles create rhythm. Patterns that seemed unrelated suddenly feel collected rather than random.
The second lesson is patience. This is not a rush craft. It is tempting to glue everything quickly, hold it up, admire it, and immediately hang it on the wall. Do not do that. A teacup wreath needs curing time, and curing time feels longer when you are excited. I have learned to build projects like this in stages: clean and paint one day, arrange and glue the next, decorate after the adhesive has cured, then hang it when I can test the weight with confidence. It is slower, but the finished wreath feels stronger and more professional.
Another useful experience is learning to embrace imperfect pieces. Tiny chips can be hidden behind flowers. A saucer with a faded pattern can sit partly under a cup. A handle facing the “wrong” way can make the design more lively. DIY decor becomes more personal when it is not too perfect. Store-bought wreaths often look polished, but handmade ones have personality. A teacup wreath carries the charm of the hunt: the estate sale where you found two floral saucers, the thrift shop where one cup cost less than a candy bar, the forgotten dish in your cabinet that finally got promoted to wall art.
There is also a practical confidence that comes from working with heavier materials. Many wreath projects involve ribbon, greenery, or lightweight ornaments. Ceramic requires more planning. You become more aware of weight, balance, surface contact, adhesive strength, and hanging hardware. Those skills carry over into other DIY home decor projects. After making one sturdy china wreath, you start looking at trays, plates, frames, and old kitchenware differently. Suddenly everything has potential, which is wonderful and slightly dangerous if your storage closet is already negotiating for more space.
Finally, making this wreath reminds you that decorating does not have to be serious to be beautiful. A circle of teacups on a wall is playful. It makes people smile. It invites comments. It suggests hospitality, nostalgia, and maybe a little harmless eccentricity. In a world full of plain doors and predictable wall art, a teacup and saucer wreath says, “Yes, we do things with flair here.” That is the real magic of the project. You are not just gluing cups to a wreath base. You are making a conversation piece, a memory holder, and a cheerful little monument to second chances.
Conclusion
A DIY teacup and saucer wreath is a beautiful way to turn thrifted china into meaningful home decor. With a sturdy base, clean surfaces, strong adhesive, thoughtful spacing, and enough curing time, you can create a wreath that feels vintage, elegant, whimsical, and completely one of a kind. Whether you design it for spring, a tea party, a kitchen wall, or a covered front door, the finished piece brings instant charm and personality.
The secret is balance: balance the weight, balance the colors, balance the cup angles, and balance the urge to use every flower in your craft drawer. Start simple, let the china shine, and build details slowly. By the time the bow is tied and the wreath is hanging, those forgotten teacups will have gone from dusty shelf extras to the prettiest guests at the party.