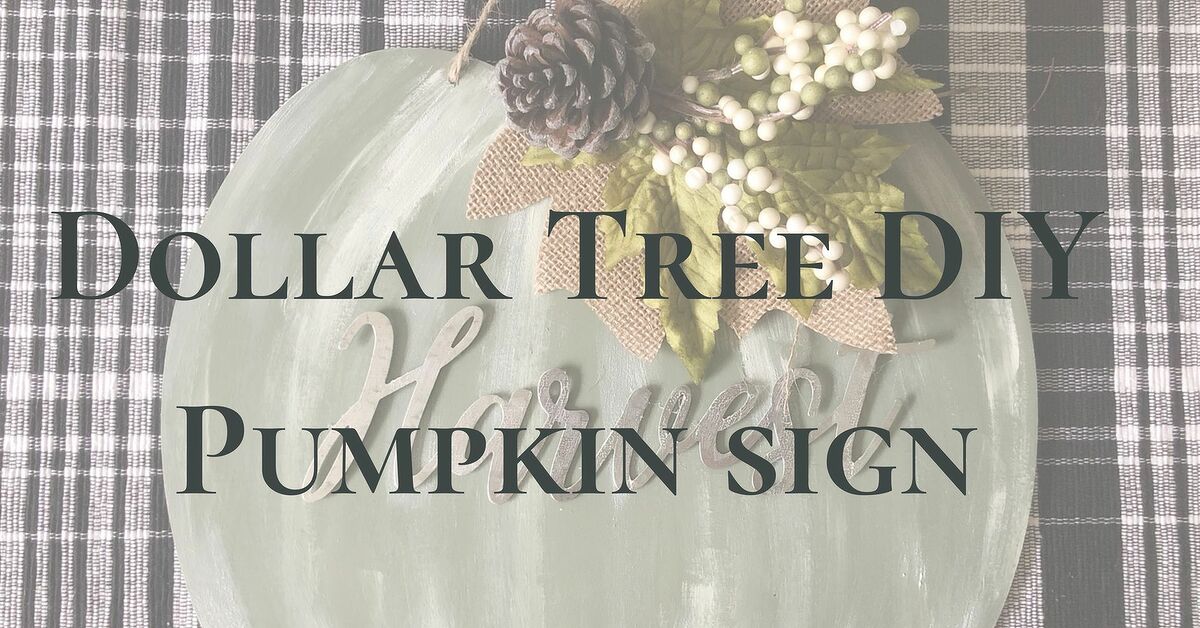
Fall decorating has a magical way of convincing us that we need seventeen throw blankets, a porch full of pumpkins, and a candle that smells like a bakery moved into a forest. Luckily, creating cozy seasonal decor does not require a designer budget or a garage full of power tools. A Dollar Tree pumpkin sign DIY is one of those cheerful projects that can look surprisingly polished with a few basic supplies, a little paint, and the willingness to trust the process when your first brushstroke looks slightly questionable.
This easy DIY fall decor project transforms inexpensive wood shapes, seasonal signs, faux florals, paint, ribbon, and lettering into a custom pumpkin sign for your front porch, entryway, mantel, kitchen, or fall party table. The best part is that there is no single correct version. You can make it farmhouse-rustic, modern and minimal, bright and playful, spooky for Halloween, or warm enough to leave out through Thanksgiving.
Below is a practical, beginner-friendly guide to making a pumpkin sign that looks intentional rather than like it survived a craft-store tornado. Grab your supplies, clear a corner of the table, and prepare to become the person who says, “I made that,” every time someone compliments your fall decor.
Note: Seasonal inventory, colors, and sign shapes can vary by location, so use this supply list as a flexible treasure map rather than a strict shopping contract.
What You Need for a Dollar Tree Pumpkin Sign DIY
The charm of this project is that you can adapt it to whatever you find. A pre-made pumpkin sign is convenient, but a flat wooden plaque, small canvas, framed sign, cutting-board-shaped blank, or even sturdy foam board can become a great base.
Basic Supplies
- Wooden sign blank, seasonal pumpkin cutout, or flat plaque
- Acrylic craft paint in orange, cream, white, brown, black, sage green, or muted fall colors
- Paintbrushes or foam brushes
- Fine-grit sandpaper or sanding sponge
- Painter’s tape
- Hot glue gun and glue sticks, or strong craft adhesive
- Twine, ribbon, raffia, burlap, or fabric scraps
- Faux leaves, mini florals, berries, moss, or small faux pumpkins
- Letter stickers, vinyl letters, a stencil, paint marker, or printed text
- Clear sealer for a covered porch or protected outdoor display
For younger crafters, a low-temperature glue gun is a safer option, and adult help is smart when using hot glue, sharp scissors, or strong adhesives. The goal is cozy fall decor, not an emergency room side quest.
Choose Your Pumpkin Sign Style Before You Start
Before painting anything, decide what feeling you want your sign to create. This small step prevents the classic DIY problem of combining farmhouse plaid, neon glitter, dried flowers, black-and-white stripes, and three different fonts because everything looked cute in the aisle.
Farmhouse Pumpkin Sign
For a farmhouse pumpkin sign, start with a cream, white, warm gray, or weathered brown background. Add an orange or muted white pumpkin, a brown stem, green leaves, twine, and a phrase such as Hello Pumpkin, Harvest Blessings, or Give Thanks. Light distressing around the edges makes the sign feel rustic without making it look like it spent the summer in a barn.
Modern Fall Sign
A modern version works beautifully with white, black, terracotta, beige, olive green, or soft pink. Try a simple pumpkin outline, one oversized word, or color-blocked sections. Keep the embellishments limited so the design feels clean and graphic. A matte black background with a cream pumpkin and gold lettering can look especially sharp near a front door.
Whimsical Halloween Pumpkin Sign
For Halloween, go bold with black-and-orange stripes, a smiling jack-o’-lantern face, bats, tiny spiders, or a phrase like Pick Your Pumpkin or Trick or Treat. You can still make it cute rather than creepy. Think friendly neighborhood pumpkin patch, not abandoned haunted carnival at midnight.
Step 1: Prep the Sign Base
Even inexpensive craft surfaces deserve a tiny bit of prep. Wipe away dust or glitter, remove any loose tags, and lightly sand rough wood areas. You do not need to sand like you are restoring an antique dining table. A quick pass with fine-grit sandpaper is enough to smooth uneven spots and help paint grip the surface.
If your sign has a glossy printed design that you plan to cover, lightly scuff the surface and wipe away the dust with a dry cloth. Use a primer only when the old design is very dark, slick, or likely to show through. For most small fall signs, two thin coats of craft paint will do the job nicely.
Step 2: Paint the Background
Choose a background color that helps your pumpkin stand out. White, cream, tan, muted gray, deep charcoal, and warm brown all work well. Apply paint in thin, even layers instead of one thick coat. Thick paint can dry unevenly, hide wood texture, and create the kind of lumpy finish that makes a pumpkin look like it has been through a difficult emotional season.
Let the first layer dry before adding the second. A foam brush can create a smooth finish on flat surfaces, while a regular brush gives you subtle texture. For a weathered farmhouse effect, brush on a base coat, let it dry, then lightly drag a nearly dry brush in a contrasting color across the surface.
Step 3: Create the Pumpkin Shape
You can use a pre-cut pumpkin, draw your own shape, or build a pumpkin from layered circles. The layered-circle method is wonderfully forgiving because pumpkins are naturally a little lumpy. In other words, they are the golden retrievers of the vegetable world: round, lovable, and not overly concerned with symmetry.
Easy Painted Pumpkin Method
- Draw a large oval in the center of the sign with a pencil.
- Add two smaller rounded sections on each side to create pumpkin ridges.
- Paint the pumpkin with orange, white, sage, blue-gray, or a color that suits your decor.
- Add subtle darker lines between the sections for dimension.
- Paint a short brown stem at the top.
- Add leaves, curly twine, or a small bow near the stem.
To make the pumpkin look less flat, use a slightly darker shade along the outer edges and a lighter shade in the middle. You do not need advanced painting skills. A little soft blending with a dry brush or sponge can add enough depth to make the pumpkin feel dimensional.
Step 4: Add Lettering Without Stressing Yourself Out
Lettering is often the part that makes people pause dramatically and reconsider every life choice that led them to holding a paint marker. Fortunately, you have several easy options.
Use Letter Stickers or Vinyl
Letter stickers are quick, neat, and beginner-friendly. Choose a phrase that fits your sign size. Short phrases usually look better than an entire paragraph about autumn. Try Hello Fall, Welcome, Thankful, Pumpkin Patch, or Harvest Time.
Use a Stencil
Secure a stencil with painter’s tape. Dab paint lightly with a stencil brush or makeup sponge instead of brushing back and forth. Too much paint can sneak under the stencil and turn your beautiful lettering into a blurry fall mystery.
Transfer Printed Letters
Print a phrase in a font you like, shade the back of the paper with pencil graphite, tape it to the sign, and trace the letters. The outline will transfer onto the surface so you can fill it in with paint or a marker. This method is excellent for people who want custom lettering but are not interested in freehand calligraphy auditions.
Step 5: Add Texture and Fall Embellishments
This is where a basic pumpkin sign becomes a real statement piece. Glue a small cluster of faux leaves, berries, moss, wheat stems, mini pumpkins, or flowers around one corner. A simple burlap bow or twine loop near the stem can make the pumpkin feel more finished.
Do not cover every empty space. A little negative space gives the design room to breathe. Think of embellishments like pumpkin pie spice: delightful in the right amount, overwhelming when it takes over the entire kitchen.
Easy Embellishment Combinations
- Sage leaves, cream berries, and natural twine for a neutral farmhouse look
- Orange leaves, sunflower picks, and plaid ribbon for traditional fall decor
- Black ribbon, tiny bats, and a white pumpkin for Halloween
- Pink flowers, gold accents, and a white pumpkin for a softer modern style
- Buffalo-check ribbon, cotton stems, and eucalyptus for a cozy front-porch sign
Step 6: Finish and Protect Your Pumpkin Porch Sign
If the sign will stay indoors, you can stop once the glue and paint are fully dry. For a covered porch, use a clear matte or satin sealer to help protect the finish from humidity and minor splashes. Avoid placing lightweight craft signs where they will get direct rain, strong sun, or dramatic wind. A tiny sign can become a very confident flying object when the weather changes its mind.
Add a twine hanger, ribbon loop, command-style hanging strip, or small picture hanger depending on the weight of your sign. If you are displaying it on a shelf or mantel, lean it against the wall and add a few faux pumpkins, battery-operated candles, or a small garland nearby.
Simple Dollar Tree Pumpkin Sign Ideas to Try
“Hello Pumpkin” Layered Sign
Paint a rectangular sign cream, add a large orange pumpkin in the middle, and use black lettering above it. Finish with a plaid bow and a few faux leaves at one corner. This design is classic, cheerful, and works from September through Thanksgiving.
Stacked Pumpkin Topiary Sign
Paint three pumpkins in different colors and stack them vertically. Add a stem, leaves, and a small welcome phrase. Use white, sage, and orange for a calm farmhouse style, or use bright orange, black, and purple for Halloween.
Neutral Pumpkin Patch Sign
Use tan, ivory, brown, and muted green. Paint three pumpkins in different sizes, then add a simple phrase such as Autumn Market or Fresh Picked. This style looks especially pretty in a kitchen, entryway, or dining room.
Mini Pumpkin Door Hanger
Use a pumpkin-shaped base, paint it in one bold color, and add a large bow at the top. Keep the wording short or skip it entirely. A single oversized embellishment can make a small sign look more expensive than it is.
Common DIY Pumpkin Sign Mistakes and Easy Fixes
Paint looks streaky: Add a second thin coat after the first coat dries. Foam brushes are especially useful on broad, flat areas.
Letters look crooked: Place a strip of painter’s tape across the sign as a temporary baseline. Remove it after applying your letters.
The design feels too busy: Remove one type of embellishment. Usually, less ribbon, fewer florals, or a shorter phrase makes the sign look instantly more polished.
Glue strings are everywhere: Let the glue cool, then pull away the strings gently. A low setting on a hair dryer can also help loosen stubborn glue threads.
The sign looks flat: Add one darker paint shade around the pumpkin edges, then highlight the center with a lighter shade. Small shadows create big improvement.
Experience Notes: What You Learn While Making Dollar Tree Pumpkin Signs
The first lesson people usually learn from a Dollar Tree pumpkin sign DIY is that the shopping trip is part of the craft. You may walk in planning to buy one orange pumpkin cutout and leave with a bundle of faux eucalyptus, three ribbon rolls, a wood plaque, six tiny scarecrows, and a strong belief that you can definitely use all of them. This is normal. Seasonal craft aisles are designed to make ordinary people feel like creative directors with a cart.
The second lesson is that inexpensive supplies do not automatically look inexpensive. What matters most is how you combine them. A plain wood sign can look much more finished after two clean paint coats, one readable phrase, and a carefully placed bow. On the other hand, a sign can look cluttered even with expensive supplies if every surface is covered. The most successful projects usually have one main feature, one supporting detail, and a little open space.
Another useful experience is discovering that paint colors rarely look exactly the way they appear in the bottle. A bright orange may dry darker, cream may lean yellow, and sage green may suddenly look gray beside a brown ribbon. Testing colors on the back of the sign or a scrap piece of cardboard saves a lot of frustration. It also gives you permission to adjust. DIY projects are not final exams. You are allowed to repaint a pumpkin that looks more like a tomato wearing a hat.
Many crafters also find that the best signs are made in layers and breaks. Paint the background first. Let it dry while you sort leaves or choose a phrase. Add the pumpkin after that. Take another pause before gluing decorations. This rhythm helps prevent rushed choices, especially when glue is hot, ribbon is uncooperative, and a tiny faux berry has somehow disappeared under the table.
Placement teaches another important lesson. A sign that looks perfect on a kitchen table may disappear against a dark front door. Before attaching the final hanger, hold the sign where it will live. Check whether the lettering is readable from a few feet away and whether the pumpkin color contrasts with the wall. Sometimes a simple cream outline, darker bow, or extra leaf is all it takes to make the design visible.
Finally, this project tends to remind people that seasonal decorating does not have to be perfect to feel special. A slightly uneven pumpkin, a handmade bow, or imperfect lettering can make the piece feel warmer and more personal. The charm comes from creating something that suits your home, your style, and your budget. When the finished sign makes you smile as you walk through the room, it has done its job beautifully.
Final Thoughts
A Dollar Tree pumpkin sign DIY is proof that cozy fall decorating can be affordable, creative, and genuinely fun. Start with a simple base, use a small color palette, paint in thin layers, and add only the details that support your design. Whether your sign ends up rustic, modern, bright, spooky, or delightfully over-the-top, it will bring handmade personality to your autumn decor.