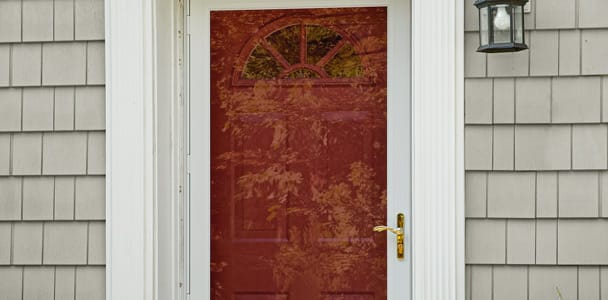
An aluminum storm door protects the main entry door, adds ventilation when fitted with a screen, and gives the entrance a clean, finished look. Modern kits make the job approag and more on accurate measuring, a plumb hinge rail, and patient adjustment.
Plan on an afternoon, basic tools, and a helper for lifting. If the opening is badly out of square, the trim is rotten, or the door is an oversized full-view model, professional help may be the smarterand less glass-shatteringchoice.
Before You Begin
Read the installation manual supplied with your exact model. Manufacturers use different rail systems, handle templates, fasteners, clearances, and closer locations. Terms also vary: the hinge rail may be called a hinge-side Z-bar, while the top rail may be labeled a drip cap or rain cap. Follow the product manual whenever it differs from this general guide.
Confirm that the primary entry-door manufacturer permits a storm door. Strong sunlight can trap heat between glazed doors, especially over a dark entry door. Follow warranty and seasonal ventilation guidance; in hot weather, a screen may be preferable to a closed glass panel.
Choose the Hinge Side
Storm doors commonly hinge on the same side as the main door, placing both handles within easy reach. Before committing, check porch steps, railings, walls, wind exposure, lights, doorbells, and handle clearance. Make sure the new door can swing outward without striking anything.
Tools and Materials
- Correctly sized aluminum storm door kit
- Tape measure, pencil, level, and step ladder
- Drill/driver, screwdrivers, and specified drill bits
- Center punch or awl
- Hacksaw or approved nonferrous-metal saw blade, if rails require cutting
- Fine file, two padded sawhorses, gloves, and safety glasses
- Compatible exterior sealant and repair materials for damaged trim
Keep a helper nearby. A full-view aluminum door may be manageable in weight, but the glass makes it awkward, fragile, and remarkably talented at catching wind.
Step 1: Measure the Opening
Measure between the inside edges of the exterior trim or brickmould. Take width measurements at the top, middle, and bottom; record the narrowest. Measure height at the left, center, and right from the underside of the top trim to the threshold; record the shortest. Compare both figures with the manufacturer’s sizing chart. Standard sizes are common, but older homes often require build-out trim, an extender, or a custom door. ide surfaces for plumb, the top for level, and the threshold for slope. Measure the diagonals to judge whether the opening is square. Also confirm that the flat mounting surface is wide and solid enough for the rails and screws.
Step 2: Prepare the Doorway
Remove the old door, closer, chain, rails, screws, and loose caulk. Support the door while taking out hinge-side fasteners. Clean the mounting surfaces and probe wood trim with a screwdriver. Replace soft or rotten material and correct leaks before installing anything new.
Tighten loose brickmould and verify that the primary door opens and latches normally. Its handle must not collide with the planned storm-door lockset.
Step 3: Organize and Preassemble the Door
Lay the door interior-side up on padded sawhorses. Identify the hinge rail, latch rail, drip cap, bottom expander, sweep, handle, closer, extenders, and screw covers. Check the carton folds before discarding the packaging; small parts enjoy hiding there.
If instructed, attach the hinge rail to the door using the locator holes. Start with the end screws, confirm alignment, drill the remaining pilot holes with the specified bit, and remove metal shavings. Install the sweep in the bottom expander, but delay final height adjustment.
Step 4: Hang the Aluminum Storm Door
Hold the hinge rail against the chosen side of the trim. Align it at the top, check it for plumb, and mark the upper mounting hole. Drill a pilot hole and install the placement screw with its head slightly proudoften about 1/8 inch, depending on the kit.
With your helper supporting the door, hook the hinge rail over that screw. Snug it, install a lower stabilizing screw, and test the swing. When the rail is plumb and the door clears the sill and head, install the remaining inner and outer fasteners in the specified order. Do not overtighten; crushed rails and stripped trim are not signs of enthusiasm. ction>
Step 5: Install the Drip Cap and Latch Rail
Fit the Drip Cap
Align the drip cap with the hinge rail and close the door to check the top reveal. Keep the gap even, drill pilot holes, and fasten the cap. Where recommendedparticularly without a protective overhangapply compatible sealant above the cap without blocking drainage paths.
Fit the Latch Rail
Place the latch rail on the opposite trim and lower its extender to the threshold. Adjust it until the side reveal is consistent and the door closes without catching. Fasten from top to bottom, testing the swing as you go.
Step 6: Adjust the Bottom Expander
Lower the expander until the sweep lightly touches the threshold across its width. It should reduce drafts without folding, dragging, or preventing the latch from engaging. Test the complete swing, mark the slots, and drill only to the depth specified. Tape on the drill bit makes a useful depth stop.
Step 7: Install the Handle and Strike
Use the supplied template and confirm once more that the new handle clears the entry-door hardware. Center-punch the hole locations so the bit does not skate across the aluminum. When directed, drill from each face toward the middle instead of boring through from one side.
Assemble the handle, spindle, latch, and lock without forcing them. Close the door, mark the latch position, and install the strike. Adjust it in small increments: too far inward makes latching difficult; too far outward creates a loose, rattling seal.
Step 8: Install and Tune the Closer
Mount the jamb and door brackets exactly where the closer instructions specify, then connect the tube with the supplied pins. Test the door from the same opening angle after each adjustment. Many pneumatic closers slow when the adjustment screw is turned clockwise, but verify the direction for your model.
The door should close smoothly and latch without slamming. If it stops short, first inspect the sweep, weatherstrip, strike, and frame alignment. Do not use excessive closer force to disguise friction. Install the supplied wind chain or limiter so gusts cannot overextend the hinges.
Step 9: Seal and Inspect the Installation
Install weatherstripping, extender seals, screw covers, and decorative caps. Caulk only where the manual directs; randomly sealing the bottom can trap water. Check for even reveals and daylight around the perimeter.
Close the door on a strip of paper at several locations. The weatherstrip should grip it without making the door hard to latch. On a calm day, smoke from an incense stick can reveal moving air near seams; keep it away from combustible materials and alarms. klist
- Hinge rail is plumb and firmly fastened.
- Top and side gaps are even.
- Door swings without scraping.
- Sweep lightly contacts the sill.
- Latch engages without lifting or pushing the door.
- Closer shuts the door smoothly.
- Glass or screen panel is fully secured.
Common Installation Problems
Door Sags at the Latch Side
Recheck the hinge rail for plumb, confirm the top mounting point has not slipped, and tighten fasteners only into solid trim.
Door Will Not Latch
Determine whether the latch misses vertically or horizontally, then reposition the strike slightly. Also check for a low sweep, compressed weatherstrip, or bowed latch rail.
Door Slams or Stops Short
Make small closer adjustments. If the door stops before latching, remove sources of drag before increasing speed. Glass and screen configurations may require different seasonal settings.
Water Appears Between the Doors
Inspect the drip cap, approved sealant joints, sweep direction, and drainage openings. Persistent water or soft trim can indicate a larger flashing problem.
When to Hire a Professional
Call an installer when the opening has rot, severe out-of-square framing, masonry fastening requirements, narrow mounting trim, unusual siding details, historic dimensions, or an oversized glass panel. A storm door cannot repair a structurally weak opening, no matter how confidently the screws are driven.
Installation Experience: Lessons That Make the Job Easier
The most important real-world lesson is that storm door installation is an alignment project disguised as a screw-driving project. Beginners often feel productive when the drill is running, but the quiet momentsmeasuring, checking the reveal, testing the swing, and deciding whether a rail is truly plumbdetermine whether the finished door feels professional. A single screw placed after careful alignment is more valuable than six screws driven while the frame is slightly twisted.
Dry-fitting every major part saves time. Before drilling the latch rail, hold it in place and close the door repeatedly. Before drilling the handle, tape the template on, close both doors, and look at the hardware from inside and outside. Before locking the bottom expander, test the threshold at several opening angles. These rehearsals feel slow until they prevent a misplaced hole. Aluminum remembers drilling mistakes with impressive loyalty.
A helper is especially useful during hanging, but the helper should understand the goal. Ask that person to support the weight without pushing the door sideways or lifting it unpredictably. The installer should control the hinge-rail position and call for tiny movements: “up an eighth,” “hold there,” or “stop leaning on it like it owes you money.” Clear communication keeps the placement screw from becoming a pivot for accidental door aerobics.
Separate structural adjustment from cosmetic finishing. Do not snap in screw covers, trim excess weatherstrip, or apply final caulk until the door opens, closes, and latches correctly. Decorative covers hide fasteners beautifully and are often much less enthusiastic about being removed. Finish them last, when no rail is likely to move.
Thresholds create many small surprises. A sweep that looks perfect while the door is closed may drag as the door opens because the sill rises, falls, or twists. Lower the expander gradually and test the complete swing. The sweep should kiss the threshold, not begin a committed relationship with it.
Closer adjustment also rewards patience. Make quarter-turn changes and let the door close from the same angle each time. Wind can ruin the test, so tune it on a calm day when possible. If the latch fails, resist making the door faster immediately. A tight sweep, misaligned strike, or bowed rail may be the real cause. Correct friction first; adjust speed second.
Finally, save the manual, model number, registration details, leftover fasteners, panel clips, and adjustment instructions in a labeled bag. Months later, when the screen replaces the glass or the closer needs seasonal tuning, that small archive is far more useful than an online search conducted while holding a mysterious plastic part. A successful installation is not merely a door that works on day one; it is an entry system that remains adjustable, weather-resistant, and pleasantly uneventful for years.
Conclusion
To install an aluminum storm door successfully, measure at several points, repair weak trim, follow the model-specific manual, and keep the hinge rail plumb. Maintain even clearances, fit the drip cap and latch rail without forcing them, and adjust the sweep and closer only after the frame is secure.
Work carefully around glass, wear eye protection when drilling or cutting aluminum, and use a helper while hanging the panel. The reward is a door that swings freely, latches with a quiet click, and protects the entry without becoming a weekly adjustment hobby.