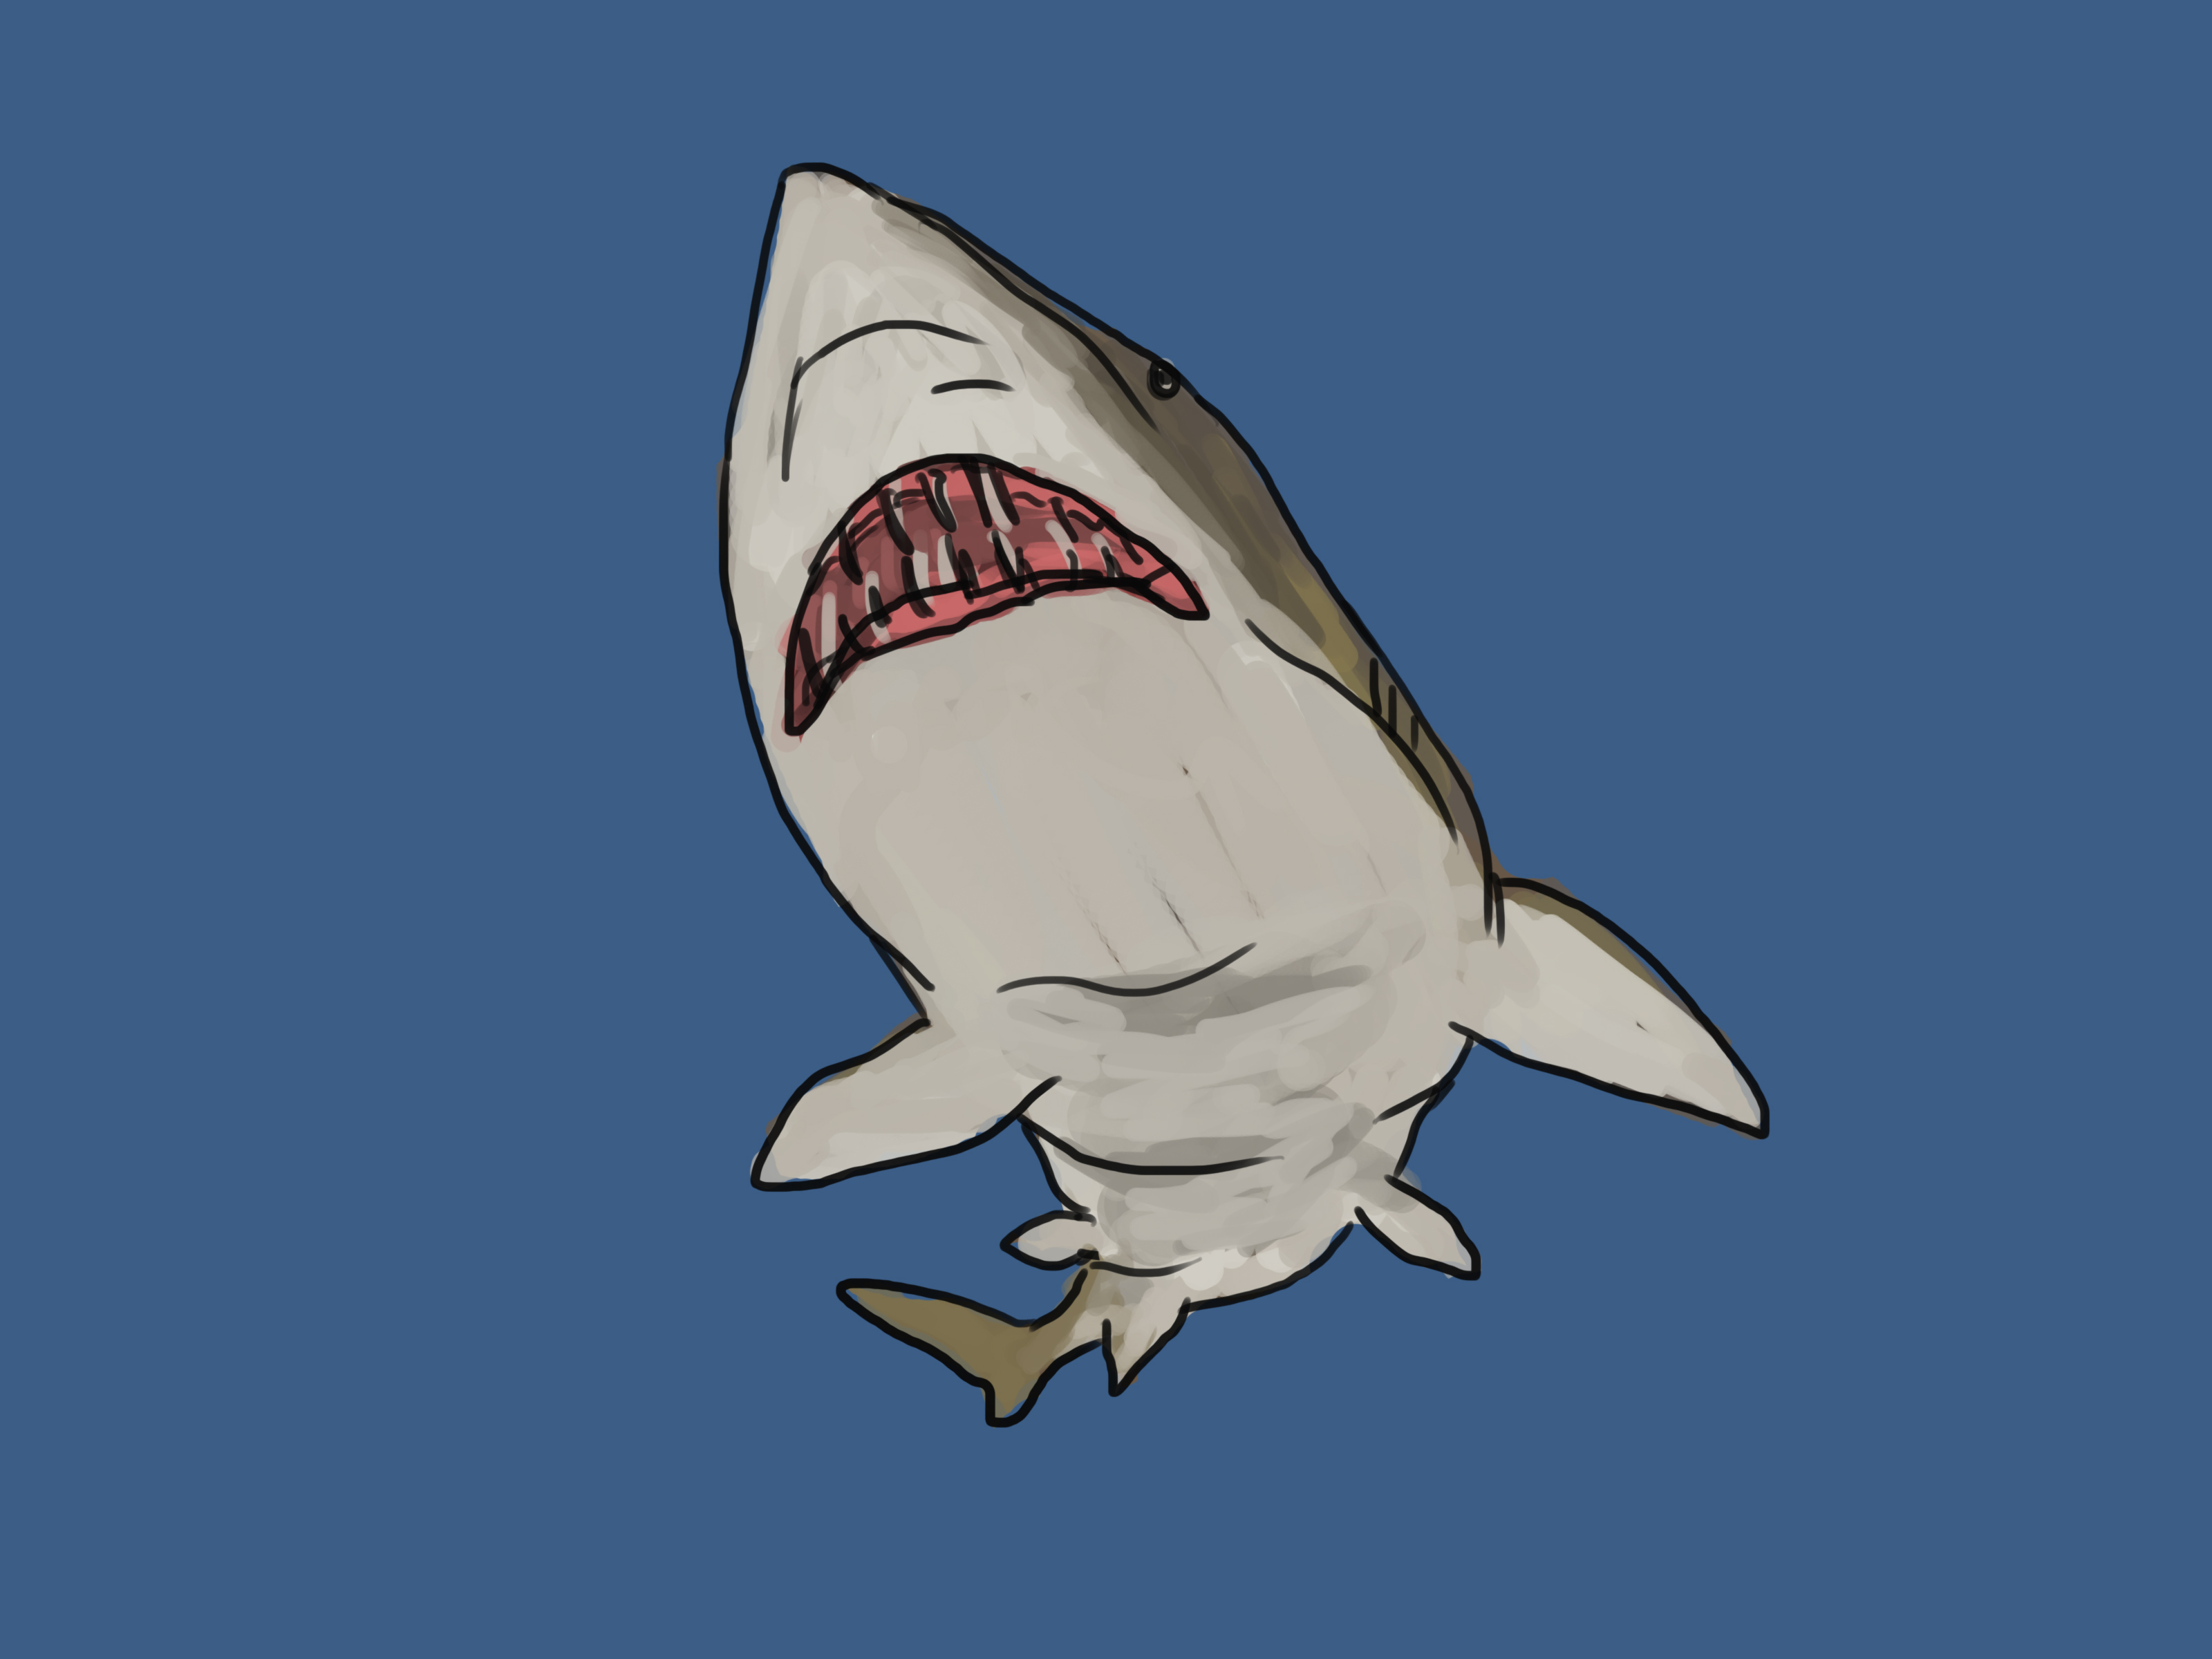
Learning how to draw a shark sounds dramatic, doesn’t it? One minute you are holding a pencil, and the next you are trying to capture one of the ocean’s most famous predators without making it look like a banana with teeth. The good news: shark drawing is much easier when you stop thinking about “a scary sea creature” and start seeing simple shapesa long oval body, a pointed snout, triangle fins, a curved tail, and a few confident detail lines.
This guide gives you four step-by-step shark drawing methods: an easy shark for beginners, a cartoon shark for kids, a realistic great white shark, and a dynamic swimming shark with shading. You can use pencil, pen, marker, colored pencils, or a digital drawing app. No submarine required.
Before we dive in, remember one basic art rule: draw lightly first. Sharks may be fast, but your sketch should begin slowly. Use soft guidelines, adjust the body shape, then darken the final outline only after the proportions look right.
Why Sharks Are Surprisingly Easy to Draw
A shark’s body is built for smooth movement through water, which makes it friendly for artists. Most sharks have a streamlined, torpedo-like body, a pointed or rounded snout, pectoral fins near the front, dorsal fins on top, and a powerful caudal fin, also called the tail fin. Once you understand those parts, drawing a shark becomes a shape-building exercise instead of a mystery from the deep.
Here are the key features to notice:
- Body: Long, rounded, and slightly tapered at both ends.
- Snout: Pointed for a great white shark, softer and rounder for a cartoon shark.
- Dorsal fin: The classic triangle fin on top.
- Pectoral fins: Side fins that look a little like wings.
- Gill slits: Short curved lines behind the head.
- Tail fin: A two-lobed fin that gives the shark motion.
- Color pattern: Many sharks are darker on top and lighter underneath, a look called countershading.
Supplies You Need for Shark Drawing
You do not need an expensive art kit to draw a shark. A basic pencil and eraser are enough. However, if you want a cleaner finished illustration, use these supplies:
- HB or 2B pencil for sketching
- Eraser for removing construction lines
- Black pen or fineliner for outlining
- Gray colored pencil or marker for shading
- Blue pencil or watercolor for the ocean background
- White gel pen for highlights, bubbles, and shine
Now let’s draw. Four shark styles are waiting, and none of them will bite unless your pencil is extremely dramatic.
Guide 1: How to Draw an Easy Shark for Beginners
This simple shark drawing is perfect for beginners, classrooms, quick doodles, and anyone who wants a clean shark outline without wrestling with complicated anatomy.
Step 1: Draw the Main Body
Start with a long, slightly curved oval. Think of a football that has been stretched. Make the left side a little rounder for the head and the right side narrower for the tail area. Keep your pencil lines light because this is only the foundation.
Step 2: Add the Snout and Tail Base
At the front of the oval, extend a small pointed snout. At the back, draw two short lines that narrow toward the tail. This creates the shark’s body flow. If the shape looks too chunky, gently erase and slim it down. Sharks are built like underwater rockets, not floating potatoes.
Step 3: Draw the Tail Fin
Add a two-part tail at the back. Draw the upper lobe slightly larger than the lower lobe. The tail should look like a curved crescent or sideways leaf shape. This simple detail makes your shark look more believable immediately.
Step 4: Add the Fins
Draw one triangle-shaped dorsal fin on top of the body. Then add a pectoral fin on the lower side, near the front. You can add a smaller fin on the far side if you want depth. Round the fin tips slightly so they feel natural instead of looking like cardboard triangles taped onto a fish.
Step 5: Add the Face and Gills
Place a small eye near the front of the head. Add a short curved mouth line below it. Behind the mouth, draw three to five short vertical or curved gill slits. Keep them simple. These tiny marks say, “Yes, this is a shark,” without needing a full marine biology lecture.
Step 6: Outline and Color
Trace the final lines with a pen or darker pencil. Erase the extra sketch lines. Shade the top of the shark gray and keep the belly lighter. Add blue water lines, bubbles, or waves for a finished scene.
Guide 2: How to Draw a Cute Cartoon Shark
A cartoon shark is great for kids, stickers, birthday cards, school projects, and anyone who prefers adorable ocean chaos over realistic teeth. The trick is to exaggerate the head, enlarge the eye, and soften the body shape.
Step 1: Draw a Rounded Body
Draw a large oval that leans slightly upward. Make it plump but not perfectly round. A cute cartoon shark should look friendly, like it is about to ask for snacks, not chase a fishing boat.
Step 2: Create a Big Smile
Draw a curved smile on the front half of the body. For a playful look, make the smile wide and slightly open. Add a few small triangle teeth, but do not overdo it. Too many teeth and your cute shark suddenly becomes a tiny tax attorney with anger issues.
Step 3: Add a Large Eye
Place one big round eye above the smile. Add a smaller circle inside for a highlight. This instantly gives the shark personality. If you want a sillier expression, raise the eyebrow area with a tiny curved line.
Step 4: Draw Friendly Fins
Add a rounded dorsal fin on top, a curved pectoral fin on the side, and a soft tail fin at the back. Avoid sharp angles. Cartoon drawings work best when the shapes are bouncy and forgiving.
Step 5: Add Belly Line and Details
Draw a curved line from the mouth area toward the tail to separate the gray top from the white belly. Add three small gill lines. Then include fun extras like bubbles, a tiny fish friend, sunglasses, or a party hat if your shark is clearly living its best life.
Step 6: Color Brightly
Use light gray, blue-gray, or even teal for the body. Keep the belly white or pale blue. Cartoon sharks do not need strict realism, so feel free to make the design cheerful and bold.
Guide 3: How to Draw a Realistic Great White Shark
The great white shark is the classic choice for artists who want a dramatic and recognizable shark drawing. Its pointed snout, triangular dorsal fin, crescent tail, and strong body shape make it ideal for a realistic sketch.
Step 1: Sketch the Body as a Long Oval
Begin with a narrow oval. The body should be thickest near the middle and taper toward the head and tail. Draw a light center guideline from snout to tail to help control the angle of the shark.
Step 2: Shape the Head
At the front, draw a pointed snout. The head should not look too round. A great white has a strong, streamlined profile. Add a slightly curved line for the mouth, placing it under the snout rather than directly at the front.
Step 3: Add the Tail Structure
Draw the caudal fin as a crescent shape with two lobes. The upper lobe can be slightly larger. Add a narrow tail base before the fin so the body transitions naturally into the tail.
Step 4: Place the Dorsal and Pectoral Fins
Add a triangular dorsal fin on top of the shark, roughly around the middle of the body. Draw the pectoral fin on the lower side near the head. This fin should angle backward like a wing. Add a second, smaller pectoral fin on the far side if visible.
Step 5: Draw the Eye, Nose, and Gill Slits
Add a small dark eye above the mouth. Draw a tiny nostril mark near the snout. Behind the head, sketch five short gill slits. Keep them close together and slightly curved to follow the shape of the body.
Step 6: Refine the Outline
Now darken the final body line. Smooth out bumps and erase unnecessary guidelines. Realistic shark drawing depends on clean curves. If the back line is too wobbly, redraw it in one slow motion from snout to tail.
Step 7: Add Countershading
Draw a soft dividing line along the side of the shark. Shade the top darker gray and leave the underside pale. This light-and-dark pattern helps the shark blend into the ocean from above and below, and it also gives your drawing depth.
Step 8: Shade for Volume
Use gentle pencil strokes along the top, under the fins, and near the tail base. Leave a light highlight along the upper body to suggest reflected water. Blend lightly with a tissue or blending stump if you want a smoother look.
Guide 4: How to Draw a Shark Swimming in Motion
This final guide adds energy. Instead of drawing a shark in a flat side pose, you will curve the body so it looks like the shark is gliding through water.
Step 1: Draw a Curved Action Line
Start with a gentle S-shaped line. This is the movement of the shark. The head will face one direction while the tail curves slightly the other way. Action lines help your drawing feel alive.
Step 2: Build the Body Around the Line
Draw a streamlined body around the action line. Make the head larger, the middle strong, and the tail narrow. The curve should be subtle. Too much curve and your shark may look like it is doing underwater yoga.
Step 3: Angle the Fins
Place the dorsal fin along the curve of the back. Angle the pectoral fins slightly downward or backward. When fins follow the body movement, the whole shark looks like it is swimming instead of posing for a yearbook photo.
Step 4: Curve the Tail
Draw the tail fin bending opposite the body curve. This creates the feeling of propulsion. Make one side of the tail more visible than the other to show perspective.
Step 5: Add Water Effects
Draw small curved lines near the tail to suggest motion. Add bubbles behind the shark, but keep them varied in size. Too many identical bubbles can look like polka dots escaping from the ocean.
Step 6: Shade the Body Directionally
Shade along the curve of the body, not straight across it. Darken the top and the underside of the fins. Add a few soft highlights to the nose, back, and tail. Directional shading helps show the shark’s rounded form.
Common Shark Drawing Mistakes and How to Fix Them
Mistake 1: The Body Looks Too Short
Sharks usually look better when the body is longer than you first expect. If your shark looks stubby, extend the body before adding the tail.
Mistake 2: The Fins Are Too Sharp
Fins can be triangular, but they should not look like perfect geometry-class triangles. Round the edges slightly and connect them smoothly to the body.
Mistake 3: The Eye Is Too Big on a Realistic Shark
Large eyes work for cartoons, but realistic sharks usually need small eyes. If your great white looks surprised, shrink the eye and darken it.
Mistake 4: The Tail Looks Flat
A shark tail should have two lobes and a narrow base. Add a small inward curve where the lobes meet to make it more natural.
Mistake 5: The Mouth Is in the Wrong Place
Many beginners draw the mouth at the very front of the snout. For a more realistic shark, place the mouth lower and slightly behind the tip of the snout.
Tips to Make Your Shark Drawing Look Better
Use reference images whenever possible. Look at the angle of the dorsal fin, the shape of the tail, and where the gills sit behind the head. You do not need to copy a reference perfectly, but it will help you avoid strange proportions.
Try drawing the shark in layers. First, use basic shapes. Second, refine the anatomy. Third, add details. Fourth, shade and color. This process keeps the drawing manageable and prevents the dreaded “I pressed too hard and now my shark has permanent pencil bones” problem.
For realistic drawings, pay close attention to value. The top of the shark should be darker, the belly lighter, and the fins slightly shaded underneath. For cartoon drawings, focus more on expression, clean outlines, and playful details.
Creative Shark Drawing Ideas
- Draw a baby shark with oversized eyes and tiny fins.
- Create a dramatic great white shark emerging from deep blue water.
- Draw a hammerhead shark using a wide head shape.
- Make a shark character wearing goggles, a crown, or a bow tie.
- Draw a shark silhouette at sunset.
- Create an ocean poster with sharks, fish, coral, and bubbles.
- Turn your shark into a comic character with speech bubbles.
Experience Notes: What I Learned While Practicing Shark Drawing
The biggest lesson from practicing how to draw a shark is that confidence matters more than perfection. My first shark sketch looked less like an ocean predator and more like a confused submarine with dental problems. The body was too short, the tail looked like a fork, and the dorsal fin was so tall it could probably pick up radio signals. But after breaking the shark into simple shapes, the drawing improved quickly.
One helpful experience is starting with the body line before drawing any details. When I drew the eye, teeth, and fins too early, I became attached to the wrong parts of the sketch. Then, when the body shape looked odd, I did not want to erase anything. Starting with a light oval and action line solved that problem. It gave the shark structure before personality.
Another useful discovery is that the tail controls the feeling of movement. A straight tail makes the shark look calm and still. A curved tail makes it look like it is swimming. If the shark feels stiff, adjust the tail and fins before changing the whole body. Small angles can create a lot of motion.
Shading also makes a huge difference. A plain outline can look flat, but adding a darker top and lighter belly immediately creates depth. The first time I added countershading, the shark finally looked like it belonged underwater. I also learned not to shade every area equally. The darkest shadows should sit under the body, behind fins, inside the mouth, and near the tail base.
For kids or beginners, the cartoon shark is the most enjoyable version because mistakes often become style choices. A slightly oversized head? Cute. A giant smile? Funny. A crooked fin? Congratulations, your shark has character. For realistic drawings, however, patience is key. A realistic great white needs cleaner proportions, a smaller eye, and a smoother body curve.
One practice method that works well is drawing the same shark four times on one page. The first sketch is rough. The second focuses on better fins. The third improves the tail and gills. The fourth becomes the polished version. This repetition is faster than trying to make one perfect drawing from the start.
It also helps to say the shark parts out loud while drawing: body, snout, dorsal fin, pectoral fin, gills, tail, belly line. It sounds silly, but it trains your eyes to build the animal logically. Drawing is not magic; it is observation plus practice, with occasional erasing and mild dramatic sighing.
After several attempts, shark drawing becomes relaxing. The long curves are satisfying, the fins are simple, and the ocean background gives you room to play. Whether you want an easy shark doodle, a cute cartoon shark, or a realistic great white shark, the process always returns to the same idea: start with simple shapes, refine slowly, and let the details swim in last.
Conclusion
Learning how to draw a shark is less intimidating when you divide the process into clear steps. Start with a long body shape, add the snout and tail, place the fins correctly, then finish with the eye, gills, mouth, shading, and color. Beginners can keep the design simple, kids can make it cute and funny, and advanced artists can study real shark anatomy for a more dramatic great white shark drawing.
The best part is that every shark you draw teaches you something: smoother curves, stronger proportions, better shading, and more confident lines. So grab your pencil, sketch lightly, and enjoy the process. Your first shark does not have to be perfect. It just has to swim onto the page.