Cutting a perfect circle out of cardboard sounds easy right up until you try it. Then suddenly your “circle” looks like a potato with ambition. The good news is that you do not need a laser cutter, a secret workshop, or the hands of a watchmaker to get a clean, round result. You just need the right marking method, the right cutting tool, and a little patience.
If you are making wall decor, costume props, gift tags, cake dummies, signs, school projects, or craft bases, learning how to cut a perfect circle out of cardboard is one of those oddly useful skills that keeps paying rent. Once you understand how to mark the circle accurately and cut it in controlled passes, the whole job becomes much easier. No drama. No shredded edges. No cardboard confetti storm.
In this guide, you will learn several easy methods for making a cardboard circle, the best tools for different sizes, common mistakes to avoid, and practical tips for getting smooth edges that actually look intentional. Let’s make some circles that would make geometry proud.
Why Cardboard Circles Go Wrong So Easily
Before we get into the how-to, it helps to understand why cardboard can be so annoying. Cardboard is stiff, layered, and sometimes corrugated, which means it does not behave like paper. If you rush the cut, use a dull blade, or freehand the shape without a guide, the edges can tear, flatten, or wander off course.
The most common reasons a cardboard circle turns out badly are simple: the center point was off, the radius changed while drawing, the cutting tool was dull, or the cutter tried to force the blade through in one pass. Cardboard does not reward impatience. It rewards steady hands, a clear guide, and the willingness to let the blade do the work.
What You Need Before You Start
You do not need every tool in the craft aisle. For most projects, you only need a few basics:
- Cardboard or corrugated cardboard
- Pencil
- Ruler or measuring tape
- Scissors for thin cardboard, or a craft knife/utility knife for thicker cardboard
- Cutting mat, scrap wood, or thick protective surface
- A round object, string, compass, or homemade trammel for drawing the circle
- Fine sandpaper or emery board for edge cleanup, if needed
If you are using a craft knife, work slowly and cut on a protected surface. Younger crafters should have an adult handle blade work. That is not me being dramatic. That is me wanting your cardboard project to have fewer plot twists.
Method 1: Trace a Round Object for Fast, Simple Circles
This is the easiest way to cut a perfect circle out of cardboard when you need a small or medium-size circle. Find an object with the exact diameter you want, place it on the cardboard, and trace around it with a pencil.
Best items to trace
- Bowls
- Plates
- Lids
- Cans
- Tape rolls
- Coffee tins
This method is perfect when convenience matters more than custom sizing. It is especially helpful for kids’ crafts, ornaments, school displays, and quick prototypes.
How to do it well
Set the object on a flat section of cardboard. Hold it firmly so it does not slide. Trace lightly first, then go back and darken the line if needed. If the object has a raised rim, keep your pencil upright so the circle does not come out wider than expected.
Once the line is drawn, remove the object and inspect the circle. If it looks faint or wobbly in a few spots, clean it up before you cut. A better line leads to a better cut. This is the cardboard version of “measure twice, cry less.”
Method 2: Use a String Compass for Custom Sizes
If you need a larger circle or a specific diameter, a string compass is one of the best low-cost tricks. It is simple, reliable, and surprisingly accurate when done carefully.
How to make a string compass
- Decide on the diameter of your circle.
- Divide that number by two to get the radius.
- Cut a piece of string to that exact radius.
- Tie one end to a pushpin, tack, or nail.
- Tie the other end to a pencil.
Mark the center point on your cardboard. Press the tack into the center, pull the string taut, and rotate the pencil around the center to draw the circle. Keep the string tight the entire time. If it slackens, your circle will become a mystery shape with confidence issues.
When this method works best
The string method is great for large craft circles, shields, signs, wreath bases, and oversized decorations. It is also helpful when you do not own a large compass and do not want to buy one just to make one cardboard moon for a school project.
Method 3: Make a Homemade Trammel for Better Precision
If you want cleaner, more repeatable circles, make a homemade trammel. A trammel is basically a giant compass made from a strip of wood, cardboard, or even a yardstick. It is especially useful when you need multiple circles of the same size.
How to make one
Take a strip of thin wood, stiff cardboard, or a yardstick that is longer than your circle’s radius. Mark two points exactly one radius apart. One point becomes the pivot, and the other becomes the pencil point. Punch or drill small holes at those spots.
Place the pivot hole over the center point of the cardboard, secure it with a nail, brad, or pushpin, then insert your pencil into the other hole and swing it around to draw the circle. Because the spacing stays fixed, this method is usually more accurate than string alone.
Why it is worth using
A trammel gives you more control. It does not stretch like string, and it helps you repeat the same circle size again and again. If you are cutting cardboard rounds for coasters, decor layers, wheels, costume parts, or templates, this method is fantastic.
Method 4: Use a Circle Cutter for the Cleanest Craft Results
If you make circles often, a circle cutter can save time and improve consistency. This tool works like a compass with a blade attached. You set the radius, anchor the center, and rotate the cutter around it.
Circle cutters are excellent for lightweight to medium cardboard, chipboard, poster board, and other craft materials. They are especially useful when you want a smooth edge and do not want to manually guide a knife around a pencil line.
Tips for using a circle cutter
- Test on scrap cardboard first
- Check that the center point does not slip
- Use a cutting mat under the cardboard
- Make more than one rotation if the cardboard is thick
- Keep steady downward pressure without forcing the blade
This is one of the easiest ways to cut a perfect circle out of cardboard when you want crisp, repeatable results. It also makes you feel impressively official, which is never a bad bonus.
How to Actually Cut the Circle Cleanly
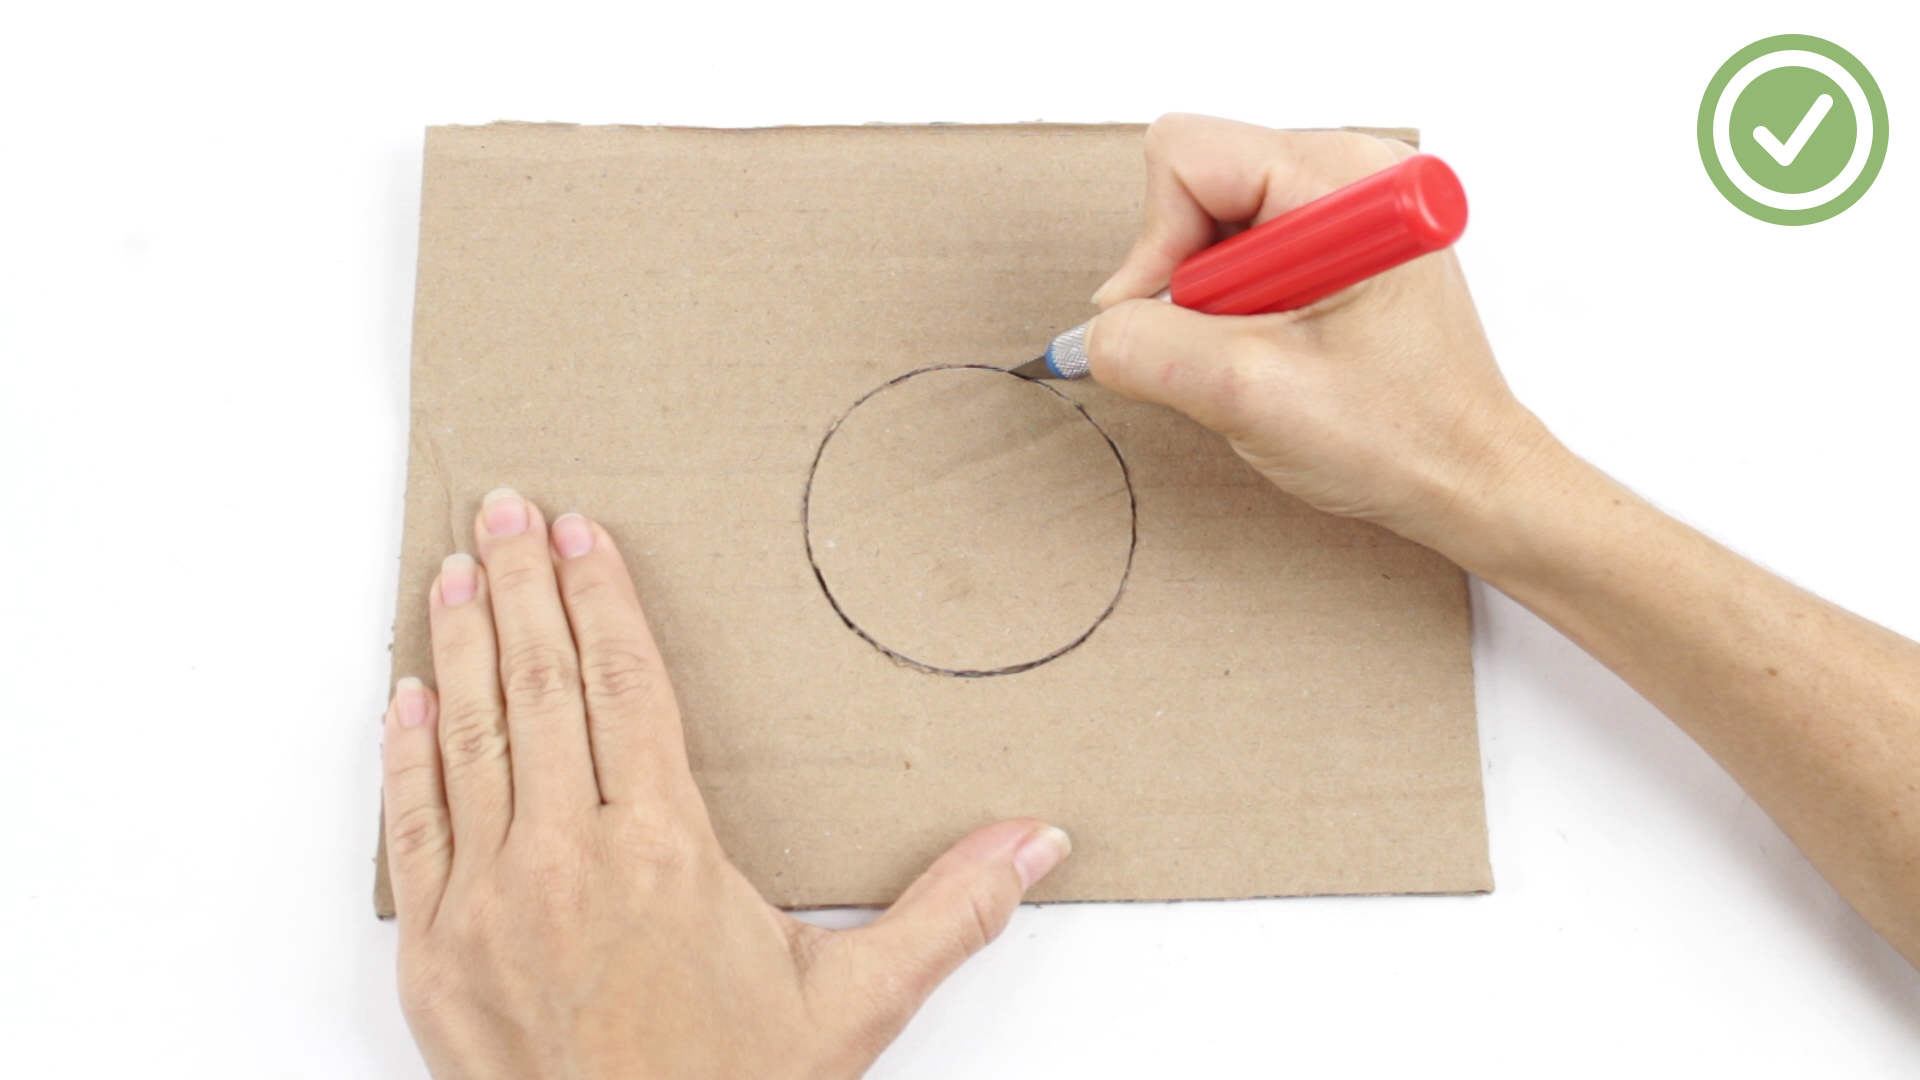
Drawing the circle is only half the job. The cut itself is where many projects go off the rails. Here is the technique that produces the best results on most cardboard:
1. Use the right cutter
For thin cardboard, sharp scissors can work. For thicker cardboard or corrugated cardboard, use a craft knife or utility knife. A dull blade drags and tears instead of slicing cleanly.
2. Cut on a protected surface
A self-healing cutting mat is ideal. If you do not have one, use thick scrap cardboard, a cutting board reserved for crafts, or a piece of wood. Never cut directly on a table you enjoy owning.
3. Make light passes
This is the golden rule. Do not try to cut all the way through in one heroic stab. Follow the circle with a shallow first pass, then go around again and deepen the cut. Two to four passes usually work much better than one deep cut.
4. Rotate the cardboard as you go
Instead of twisting your wrist into a pretzel, rotate the cardboard to keep your cutting angle comfortable. This helps the blade stay on the line and reduces jagged spots.
5. Slow down on corrugated cardboard
Corrugated cardboard has inner flutes that can deflect the blade. Use especially light, controlled passes and let the knife follow the marked line gradually. Rushing is how circles become hexagons with regrets.
Best Tool for Different Types of Cardboard
For cereal-box cardboard or thin chipboard
Use scissors or a hobby knife. Thin material is flexible and usually easy to cut with simple tools.
For standard shipping-box cardboard
Use a craft knife or utility knife. This is the sweet spot for most DIY circles.
For very thick cardboard or layered cardboard
Use a sharp utility knife and several passes. A metal ruler will not help much on a curve, but a steady hand and a clearly marked line will.
For repeated circles of the same size
Use a circle cutter or make a reusable cardboard template first, then trace it as often as needed.
How to Smooth the Edges After Cutting
Even a well-cut cardboard circle may have tiny rough spots. That is normal. The easiest fix is light edge cleanup.
- Trim fuzzy bits with small detail scissors
- Use a fine sanding block or emery board very gently
- Wrap the edge with paper, tape, or fabric if the project is decorative
- Seal the edge with a little glue if you need it to look firmer and more polished
If the circle is going to be painted, smoothing first makes a big difference. Paint has a funny habit of highlighting every tiny mistake you hoped nobody would notice.
Common Mistakes to Avoid
Guessing the center
If the center point is off, the whole circle is off. Measure carefully before you draw.
Using a dull blade
Dull blades snag cardboard fibers and make rough edges. Fresh blades are your friend.
Trying to cut too fast
Fast does not mean clean. Slow, controlled passes produce a more accurate circle.
Skipping the template
If you need more than one circle, make a template. Your future self will be deeply grateful and slightly smug.
Ignoring surface protection
Cutting on the wrong surface can damage your furniture and make the blade harder to control. Use a cutting mat whenever possible.
Step-by-Step Example: Making a 12-Inch Cardboard Circle
- Measure and mark the center of your cardboard piece.
- Cut a 6-inch length of string for the radius.
- Tie one end to a pushpin and the other to a pencil.
- Insert the pushpin into the center point.
- Pull the string tight and draw the circle slowly.
- Place the cardboard on a cutting mat.
- Use a sharp craft knife to score the line lightly on the first pass.
- Rotate the cardboard and repeat the cut two or three times.
- Lift the circle free once the blade passes through fully.
- Trim or sand any rough edge spots.
That is it. No expensive machine. No wild guesswork. Just basic geometry meeting decent blade manners.
Real-World Experiences: What Actually Helps When Cutting Cardboard Circles
After enough cardboard projects, most people discover the same truth: the perfect circle is less about talent and more about process. The first few attempts often feel awkward. You trace carefully, cut confidently, then hold up the finished piece and wonder how your “circle” ended up looking like it went through a minor emotional crisis. That is normal. Cardboard has a way of teaching patience very quickly.
One of the most useful real-world lessons is that marking matters more than people think. When crafters rush the measuring step, they usually pay for it later. A tiny center-point error becomes a lopsided circle. A loose string becomes a wavy outline. A bowl that shifts while tracing can throw off the whole shape. Taking one extra minute to set the center, confirm the radius, and redraw a messy line saves far more time than it costs.
Another common experience is realizing that scissors are not always the hero of the story. Many people reach for scissors first because they feel familiar, but thick cardboard often fights back. The blades compress the material, bend the edge, and leave small flat spots around the curve. Scissors can work beautifully on thin chipboard, cereal boxes, and lightweight craft board, but for shipping-box cardboard, a knife usually gives better control. That moment when you switch to a fresh craft blade and the cut suddenly gets smoother feels a little magical.
People also learn quickly that forcing the blade is a terrible idea. The temptation is understandable. You want the cut done. You lean harder. The cardboard resists. The blade slips slightly, and now the edge has a strange detour that was definitely not part of the plan. The better approach is boring in the best possible way: light pass, second pass, third pass. It is slower, but it keeps the line cleaner and the hand steadier. Cardboard rewards calm behavior, which is honestly rude but true.
Large circles bring their own lessons. A traced bowl works for small projects, but once you need a big sign, wreath base, or shield, the string method becomes a favorite. It feels almost too simple to work, yet it does. Many DIYers end up using pushpins, nails, yardsticks, strips of scrap wood, or homemade trammels because those tools let them make custom circles without spending much money. There is a satisfying moment when a homemade jig made from leftovers works better than an expensive-looking shortcut.
Another practical experience is that cardboard quality changes everything. Clean, flat cardboard cuts better than warped, crushed, or overly soft pieces. Recycled boxes are great for budget-friendly crafts, but not all boxes are equal. Some have smoother outer layers, tighter fluting, and cleaner edges after cutting. If a project needs to look polished, many makers quietly become cardboard snobs and start saving the “good boxes.” This is a completely reasonable life choice.
Finally, people learn that edge finishing can rescue a project. Even when the cut is not absolutely flawless, a few smart cleanup steps can make the circle look finished and intentional. Gentle sanding, wrapping the edge, painting it, or covering it with fabric can turn a decent cut into a great-looking result. In real crafting life, perfection is often less about the raw cut and more about the final presentation.
So if your first cardboard circle is not museum-worthy, do not panic. Most perfect circles are built on top of two or three imperfect ones. That is not failure. That is the cardboard apprenticeship program.
Conclusion
If you want to cut a perfect circle out of cardboard, start with an accurate guide, choose the right tool, and cut in light, controlled passes. For quick projects, trace a round object. For custom sizes, use a string compass. For repeatable precision, make a trammel or use a circle cutter. Add a cutting mat, a sharp blade, and a little patience, and suddenly cardboard stops acting like an enemy and starts behaving like a craft supply.
The best part is that once you master this skill, you can use it everywhere: home decor, holiday crafts, costume pieces, classroom projects, packaging inserts, signage, and more. In other words, the humble cardboard circle is much more useful than it looks. Like duct tape, but rounder.