Mac users love Pages because it is clean, friendly, and rarely makes your laptop sound like it is preparing for takeoff. But the moment someone asks, “Can you send this as a JPEG?” the peaceful Apple orchard suddenly grows a few thorns. A .pages file is designed for editing text, layouts, images, charts, and page design inside Apple Pages. A JPEG, on the other hand, is a flat image file that can be opened almost anywhere: Windows PCs, Android phones, websites, email apps, social media platforms, and even that one printer software from 2011 that still looks like it has feelings.
The good news: you can absolutely convert a Mac .Pages document into JPEG format. The slightly funny news: Pages does not always behave like a simple “File > Export > JPEG” machine, depending on the version, document type, and number of pages. The most reliable method is usually to export or print the Pages document as a PDF first, then convert that PDF into JPEG using Preview, which is already installed on your Mac. No mysterious downloads. No software with twelve toolbar buttons you never asked for. Just Pages, Preview, and a little patience.
In this guide, you will learn how to convert Mac .Pages format into JPEG in 7 steps, plus backup methods for iCloud, online converters, screenshots, multi-page documents, and quality settings. Whether you are turning a flyer into a web image, saving a resume preview, uploading a worksheet, or making a document easy to share, these steps will help you get a clean JPG without turning your desktop into a digital junk drawer.
What Is a .Pages File?
A .pages file is a document created with Apple Pages, the word processor and page-layout app included with many Apple devices. It can hold text, images, tables, shapes, charts, headers, footers, and designed page layouts. In simple terms, a Pages file is editable; a JPEG is not. That difference matters.
When you convert Pages to JPEG, you are turning the document into an image. The result is great for viewing, sharing, posting, or embedding on a website, but it is not great for editing text afterward. If you need to revise the wording later, keep the original .pages file. Think of the JPEG as a photograph of your document. It looks nice, travels well, and refuses to let anyone casually mess with your margins. Honestly, that is sometimes a blessing.
Why Convert a Pages Document to JPEG?
There are plenty of practical reasons to convert a Pages document to JPEG. Maybe you designed an invitation, flyer, classroom handout, restaurant menu, quote graphic, cover page, business announcement, or printable sign. JPEG files are widely supported, easy to upload, and simple to preview in almost any app.
JPEG is especially useful when you want your layout to stay visually consistent. Fonts, spacing, image placement, and colors can shift when a document is opened on another device without the same fonts or software. A JPEG locks the appearance into a single image file, so the viewer sees what you intended. No surprise font substitutions. No runaway bullet points. No “why is page two now living on page seven?” drama.
However, JPEG is not the best format for every job. If the document contains tiny text, transparent graphics, or line art, PNG may look sharper. If the receiver needs to print at high quality, PDF may be better. If they need to edit text, use Word, PDF, or Pages format instead. For easy sharing, website previews, image uploads, and social posts, JPEG is often perfect.
How to Convert Mac .Pages Format Into Jpeg: 7 Steps
Step 1: Open the .Pages File on Your Mac
Start by opening your document in Apple Pages. Double-click the .pages file, or open Pages first and choose File > Open. Before converting, take a moment to check the document layout. Look at page breaks, image placement, font size, and margins. This small review can save you from exporting a beautiful JPEG that accidentally cuts off your phone number, logo, or the last line of your poetic office memo about refrigerator etiquette.
If the document uses custom fonts, make sure they appear correctly on your Mac. If you received the Pages file from someone else and the formatting looks strange, ask for the original fonts or export from the device where the file was created. Conversion does not magically fix messy formatting; it simply captures what is currently on screen or in the exported file.
Step 2: Save a Backup Copy
Before you convert anything, save a backup of the original Pages document. Choose File > Duplicate or File > Save As, depending on your Pages version and settings. Name it something clear, such as Project-Flyer-original.pages. This is not just cautious; it is smart. Once you export to JPEG, the text becomes part of an image. You cannot edit it the same way you edit a Pages document.
A backup also helps if you need multiple versions. For example, you might create one JPEG for Instagram, one for email, one for a website thumbnail, and one high-resolution version for printing. Keeping the original Pages file gives you a clean starting point every time.
Step 3: Export the Pages Document as a PDF
The most dependable path from Pages to JPEG is usually Pages to PDF to JPEG. In Pages, go to File > Export To > PDF. Choose your PDF quality settings if prompted. For a simple text document, standard quality is usually fine. For a flyer, brochure, poster, menu, or design-heavy document, choose a better image quality setting so the final JPEG looks crisp.
Save the PDF somewhere easy to find, such as the Desktop or a dedicated project folder. Give it a clear name, such as menu-export.pdf or newsletter-page1.pdf. Avoid vague names like final-final-v3-real-final.pdf, unless you enjoy archaeology.
Why PDF first? Because PDF preserves the layout well and works smoothly with Preview, Adobe Acrobat, and many online converters. It acts like a bridge between the editable Pages document and the flat JPEG image. For many users, this bridge is the simplest, safest, and least dramatic route.
Step 4: Open the PDF in Preview
Next, locate the PDF you exported and open it in Preview, the built-in macOS app for viewing and editing PDFs and images. Usually, double-clicking the PDF opens it in Preview automatically. If not, right-click the file, choose Open With, and select Preview.
If your Pages document has multiple pages, Preview will display page thumbnails in the sidebar. Click the page you want to convert. This is important because Preview commonly exports the selected page as an image. If you need every page as a JPEG, you may need to export pages one by one or use a batch conversion method, which we will cover later.
Step 5: Export the PDF Page as JPEG
With the PDF open in Preview, choose File > Export. In the export window, look for the Format menu and select JPEG. If you do not see JPEG right away, hold the Option key while opening the Format menu; macOS sometimes reveals extra file types this way. Apple likes clean menus, but occasionally the useful option is hiding like a cat under the couch.
After choosing JPEG, set the file name and destination. You may also see a quality slider. Higher quality creates a larger file with better visual detail. Lower quality creates a smaller file but can introduce compression artifacts, especially around text and sharp lines. For documents with text, logos, or fine details, use medium-high or high quality. Your future self, squinting at the image, will be grateful.
Step 6: Choose the Right Resolution and Quality
Resolution matters. If your JPEG looks blurry, the issue is often not the Pages file itself but the export resolution. In Preview, some versions allow you to set resolution during export. For web use, 144 to 200 pixels per inch can be enough. For sharper results or printing, 300 pixels per inch is a safer choice. Larger numbers produce bigger files, so do not set everything to “maximum” unless you are trying to email a file so large it develops its own weather system.
For a resume preview, website image, or social post, balance quality and file size. For print materials, export a high-quality PDF from Pages and then create a high-resolution JPEG. If the document contains a lot of small text, consider whether PDF or PNG would be better. JPEG compresses images in a way that can soften text edges. It is excellent for photos and mixed layouts, but not always ideal for tiny type.
Step 7: Review, Rename, and Share the JPEG
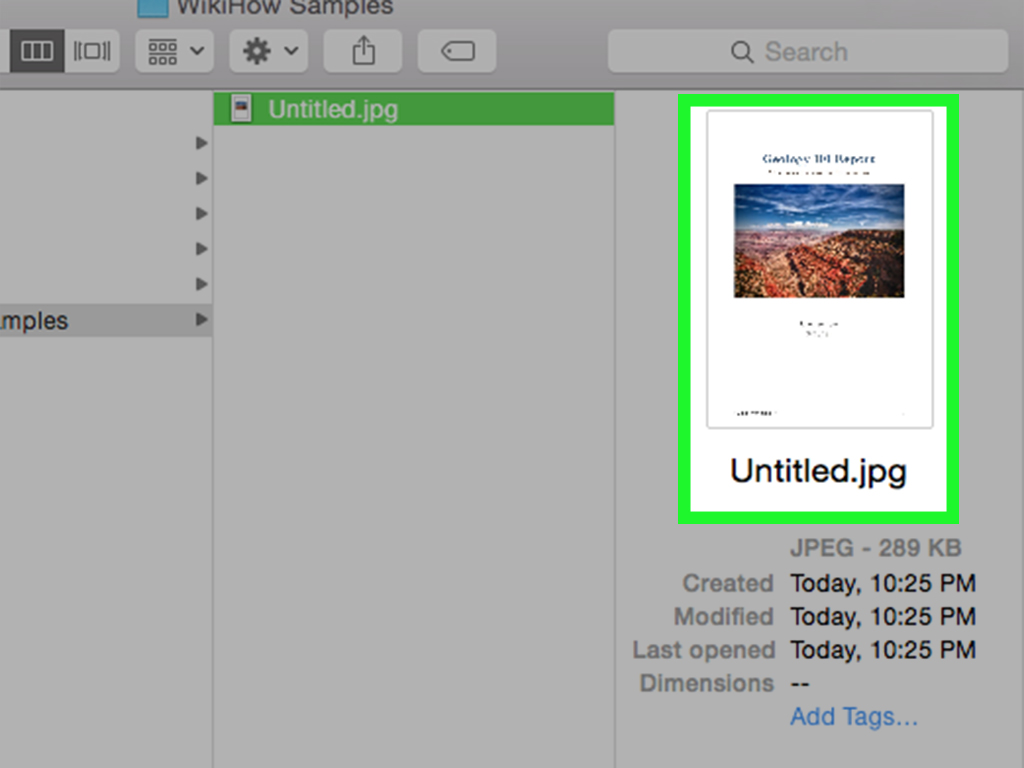
Open the finished JPEG to check it before sending or uploading. Look for cropped edges, fuzzy text, missing images, color shifts, or incorrect page selection. Rename the file clearly, such as spring-sale-flyer.jpeg or cover-letter-preview.jpg. Clear file names are good for organization and can also help with SEO when images are uploaded to a website.
If you are publishing the JPEG online, compress it if necessary. Large images slow down web pages, and slow pages make both visitors and search engines grumpy. Use descriptive image alt text when uploading, such as “Mac Pages flyer converted to JPEG” or “business menu exported from Pages as JPG.” This helps accessibility and gives search engines useful context.
Alternative Method: Use Screenshot for a Quick One-Page JPEG
If you only need a quick image of one page or a specific area, a screenshot can work. Open the Pages document, zoom to the desired size, and press Shift + Command + 4. Drag to select the area you want. By default, macOS screenshots may save as PNG, but you can convert the screenshot to JPEG in Preview by opening it and choosing File > Export > JPEG.
This method is fast, but it is not always the sharpest option. It captures what appears on your screen, so resolution depends on zoom level and display quality. For casual sharing, it is fine. For professional work, PDF export followed by JPEG conversion is usually cleaner.
Alternative Method: Convert Pages to JPEG with iCloud
If you do not have Pages installed on your Mac, try Pages for iCloud. Upload the .pages document to iCloud, open it in the browser version of Pages, then download or print it as a PDF. Once you have the PDF, convert it to JPEG using Preview, Adobe Acrobat, or a trusted online PDF-to-JPG converter.
This method is handy for users switching between Mac and Windows. It is also helpful when someone sends you a Pages file and your Mac is not available. Just remember that cloud tools may require an Apple Account, an internet connection, and a little patience if the document includes large images.
Alternative Method: Use an Online Pages-to-JPG Converter
Several online file conversion services can convert Pages documents or PDFs into JPEG files. Tools such as CloudConvert, Zamzar, Adobe Acrobat online tools, and similar services are often convenient when you need a quick result. Usually, the process is simple: upload the Pages or PDF file, choose JPEG as the output, start conversion, and download the image.
However, be thoughtful before uploading sensitive files. If the document includes private contracts, medical details, tax forms, client data, unpublished business plans, passwords, or confidential designs, use local conversion on your Mac instead. Online converters are useful, but privacy matters. Your cousin’s birthday invitation? Fine. Your company’s acquisition strategy? Maybe keep that off random upload boxes.
How to Convert Multiple Pages into Multiple JPEG Files
Multi-page Pages documents require a little extra planning. When you export a Pages document as a PDF, each page becomes part of the PDF. In Preview, you can select individual pages and export them as JPEG files. For a short document, this is manageable. For a 40-page booklet, it becomes a character-building exercise.
For longer documents, consider using Adobe Acrobat, Automator, Shortcuts, or a reliable online PDF-to-JPG converter that can turn each PDF page into a separate JPEG. Many PDF-to-JPG tools will create a folder or ZIP file containing one image per page. This is normal. It may feel odd at first, but it is actually helpful because it keeps all page images organized.
Use consistent names for the exported images, such as catalog-page-01.jpg, catalog-page-02.jpg, and so on. Numbering with two digits keeps files in the correct order. Without numbering, page 10 may appear before page 2, because computers are brilliant machines that still sometimes alphabetize like mischievous raccoons.
Best Settings for a Clean Pages-to-JPEG Conversion
Use PDF as the Middle Step
PDF is the safest middle format because it preserves layout, fonts, images, and page size better than many other options. If the JPEG is blurry, return to the Pages document and export the PDF at a higher quality.
Choose JPEG for Photos and Mixed Layouts
JPEG works well for documents with photos, colorful backgrounds, and mixed design elements. It creates manageable file sizes and is widely compatible.
Choose PNG for Text-Heavy Graphics
If your document is mostly text, icons, screenshots, or line art, PNG may look sharper than JPEG. You can still create a JPEG if required, but PNG is often better for crisp edges.
Keep the Original File
Never delete the .pages file after converting. The JPEG is the shareable copy; the Pages file is the editable master. Treat it like the recipe card, not just the finished cake.
Common Problems and Easy Fixes
The JPEG Looks Blurry
Export the Pages document as a higher-quality PDF, then convert again. Increase the resolution in Preview if available. For small text, consider using PNG or PDF instead of JPEG.
The File Is Too Large
Lower the JPEG quality slightly, reduce resolution, or resize the image after export. For website use, compress the image before uploading. A good web image should look clear without being unnecessarily massive.
Only One Page Converted
Preview often exports one selected page at a time. Select another page and repeat, or use a batch PDF-to-JPG tool to convert every page automatically.
The Colors Look Different
Some color shifts can happen during export, especially with bright designs or images using different color profiles. Export from Pages to a high-quality PDF first, then convert using Preview or Acrobat. If color accuracy is critical, PDF may be a safer delivery format.
The Text Is No Longer Editable
That is normal. JPEG is an image format. To edit text, return to the original Pages document, make changes, and export again.
Pages to JPEG for SEO and Website Publishing
If you are converting a Pages document to JPEG for a website, do not simply upload a file named image1.jpg. Rename it with descriptive words, such as mac-pages-to-jpeg-guide.jpg or restaurant-menu-pages-jpeg.jpg. Use lowercase letters and hyphens for readability. Add meaningful alt text when uploading the image to your content management system.
Also, watch the file size. A giant JPEG can slow down page loading, especially on mobile devices. Search engines value fast, user-friendly pages. Visitors do too. Nobody wants to wait eight seconds for a flyer image to load unless that flyer reveals the location of buried treasure.
For important text content, avoid relying only on the JPEG. Search engines cannot understand image text as reliably as regular HTML text. If the document contains important information, include the text on the page as well. Use the JPEG as a visual support, not the only source of meaning.
Security Tips Before Using Online Converters
Online conversion tools are convenient, but always think about the content of your document. For public flyers, menus, worksheets, and basic graphics, online converters can be practical. For private or sensitive documents, local Mac tools are safer. Preview and Pages can handle the main workflow without uploading your file to a third-party server.
If you do use an online converter, choose a reputable service, check file limits, review privacy information, and delete uploaded files from the service if that option is available. Avoid unknown sites that bury the download button under a carnival of ads. If the page looks like it might install three toolbars and a horoscope extension, retreat bravely.
Real-World Experience: What Actually Works Best
In day-to-day use, the smoothest method is almost always the PDF bridge: open the .pages document, export it as PDF, open the PDF in Preview, and export the page as JPEG. It sounds like one extra step, but it prevents many of the problems people run into when trying to force Pages to behave like an image editor. Pages is excellent for creating documents, but Preview is better at turning PDFs into image files. Let each app do its job, like a tiny office team where nobody steals anyone else’s stapler.
For a one-page flyer, this workflow is fast. You can usually finish in under a minute once you know where the export menus are. The biggest mistake is choosing a low-quality export and then wondering why the final image looks like it was photographed through a sandwich bag. When the document has small text, logos, or decorative lines, choose higher quality and check the JPEG at 100% zoom before sending it.
For multi-page documents, organization becomes the real hero. If you convert a five-page brochure into five JPEGs, create a folder first. Name each output file in order: brochure-01.jpg, brochure-02.jpg, brochure-03.jpg. This simple habit prevents confusion later, especially when uploading images to a website, attaching them to email, or sending them to a designer. File names are boring until they save your afternoon.
Another practical lesson: do not use screenshots for final professional documents unless speed matters more than sharpness. Screenshots are great for quick previews, text messages, and “Does this look okay?” approvals. They are not ideal for print-ready images or polished website graphics. A screenshot captures your display, not the full quality of the document. If the Pages file is a poster, menu, sign, certificate, worksheet, or anything with branding, use PDF export instead.
When working with clients or coworkers, it helps to send both the JPEG and the PDF. The JPEG is easy to preview in a message thread. The PDF is better for printing, zooming, and preserving detail. This combination prevents the classic reply: “Can you send it in another format?” which is the office-document version of a sequel nobody asked for.
Finally, keep the original Pages file in a safe place. After conversion, you may notice a typo, need a different size, or want to update a date. Editing the JPEG directly is possible only in a limited way, and it is rarely fun. The editable .pages file is your master copy. The PDF is your reliable exchange format. The JPEG is your easy-to-share image. Once you understand that three-part system, converting Mac Pages format into JPEG becomes simple, predictable, and far less likely to make you question your relationship with technology.
Conclusion
Converting a Mac .Pages file into JPEG is not difficult once you know the best route. The most reliable 7-step process is to open the Pages file, save a backup, export it as PDF, open the PDF in Preview, export as JPEG, adjust quality and resolution, then review the finished image before sharing. This method protects your layout, gives you better image quality, and uses tools already available on most Macs.
For quick previews, screenshots can work. For browser-based access, iCloud Pages is useful. For batch conversion, Adobe Acrobat or reputable online converters may save time. But for most everyday needs, Pages plus Preview is the cleanest solution. Keep the original .pages document, use PDF as the bridge, and treat JPEG as the final shareable image. That way, your document looks polished, your recipient can open it easily, and your Mac gets to feel clever without making a whole production out of it.