If the phrase at-home facial makes you picture a candle, a fluffy headband, and the kind of confidence normally reserved for reality TV judges, good news: you do not need a spa license or a bathroom that looks like a marble showroom to give your skin a solid refresh. You just need a smart plan, a gentle hand, and the discipline to avoid turning “self-care” into “why is my face suddenly furious?”
A good facial at home is less about doing the most and more about doing the right things in the right order. The goal is simple: cleanse away grime, lightly exfoliate dull buildup, add hydration, and finish with products that support your skin instead of picking a fight with it. In other words, this is not a chemistry experiment. It is a calm, strategic tune-up for your face.
Below, you will find a practical, skin-friendly guide to performing a facial at home, including how to tailor it to your skin type, what to avoid, and how to get that fresh, rested look without over-scrubbing your face into next Tuesday.
What is an at-home facial, really?
An at-home facial is a simplified skin treatment you can do yourself using basic skincare steps: cleansing, gentle exfoliation, optional steaming or a warm compress, a treatment mask, moisturizer, and daytime sun protection. The point is not perfection. The point is helping your skin look smoother, feel cleaner, and stay comfortable.
A proper home facial should leave your skin feeling soft, balanced, and refreshed. It should not leave you red, stinging, peeling like a croissant, or regretting every life choice that led you to use a walnut scrub with the enthusiasm of a floor polisher.
Why people love doing facials at home
Home facials are popular because they can be affordable, relaxing, and surprisingly effective when done well. They also help people slow down and pay attention to what their skin actually needs. Sometimes your face is not asking for twelve steps and a motivational speech. Sometimes it just wants a gentle cleanse, some hydration, and peace.
When done consistently and carefully, at-home facials may help improve the look of dryness, rough texture, temporary dullness, and congestion. They can also fit easily into a realistic skincare routine. That matters, because the best skincare plan is usually the one you can stick with without needing a spreadsheet.
What you need before you start
You do not need a giant cart full of products. In fact, simpler is often better. Here is a smart, basic setup:
- A gentle facial cleanser
- A soft towel
- A mild exfoliant or enzyme-based product
- A hydrating or clarifying face mask
- A serum, if you already use one and know your skin tolerates it
- A moisturizer suited to your skin type
- Sunscreen for daytime
- An optional headband, because hair has a remarkable ability to join the party uninvited
Before using anything new, patch test it first. That one tiny step can save you from discovering that your skin treats “soothing botanical blend” as a personal insult.
How to perform a facial at home: step by step
Step 1: Start with clean hands and a clean face
Wash your hands first. Then cleanse your face with lukewarm water and a gentle cleanser. Use your fingertips, not a rough washcloth or scrubby gadget. Massage the cleanser in lightly, rinse well, and pat dry.
This first cleanse removes oil, sunscreen, makeup, sweat, and the general evidence of being a human in the world. If you wear heavier makeup or water-resistant sunscreen, you can do a double cleanse with a remover or micellar water first, followed by your regular gentle cleanser.
Step 2: Use a warm compress or brief steam if your skin likes it
This step is optional, not sacred. A warm compress or brief, comfortable steam can help soften surface buildup and make the facial feel more spa-like. Keep it gentle. Your goal is to relax the skin, not reenact a dumpling basket situation.
If you have rosacea, very sensitive skin, or you flush easily, skip steam. Heat can be irritating for some skin types, and there is no medal for “most dramatic bathroom fog.”
Step 3: Exfoliate gently
Exfoliation helps remove dead skin cells that can leave your skin looking dull. It may also improve texture and help your other products apply more smoothly. The key word here is gently.
You have a few options:
- Chemical exfoliants such as lactic acid, glycolic acid, or salicylic acid can be effective when used carefully.
- Enzyme exfoliants are often a nice option for sensitive skin.
- Very mild physical exfoliants can work for some people, but harsh scrubs are usually a bad idea.
Apply according to the product directions and keep your expectations civilized. More product does not equal more glow. It often equals more irritation. If you already use retinoids, acne treatments, or strong active ingredients, keep exfoliation extra light or skip it during your facial.
Step 4: Do not squeeze, pick, or perform heroic pore missions
This deserves its own section because temptation is real. When people do facials at home, they often feel inspired to attack blackheads, squeeze pimples, or “just fix this one thing.” That usually ends badly.
Picking and squeezing can worsen inflammation, push debris deeper, increase the chance of infection, and raise the risk of dark marks or scarring. A home facial should make your skin calmer, not angrier. If you have stubborn congestion or acne, it is smarter to use targeted products consistently or see a licensed professional.
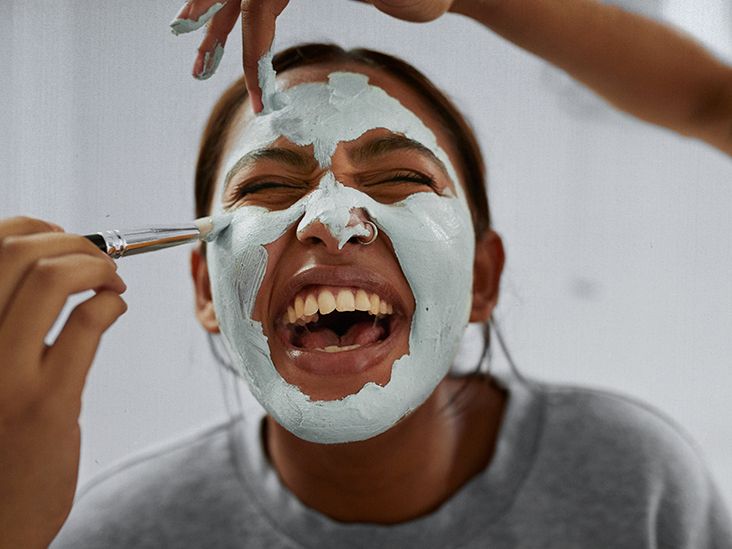
Step 5: Apply a face mask that matches your skin’s mood
Now for the part that feels fancy. Choose a mask based on what your skin needs today, not what the internet convinced you would “change your life.”
- Dry or dehydrated skin: Use a hydrating mask with ingredients like hyaluronic acid, glycerin, or soothing emollients.
- Oily or acne-prone skin: A clay or charcoal mask may help absorb excess oil, but keep it short and avoid overly drying formulas.
- Sensitive skin: Look for calming, fragrance-free masks with a simple ingredient list.
- Dull skin: A gentle brightening mask with mild acids or enzymes can help, if your skin tolerates them.
Leave the mask on only as directed. A clay mask does not need to become a concrete countertop before you rinse it off. Over-drying the skin can backfire.
Step 6: Add treatment products carefully
After rinsing off your mask, this is the time for a serum or treatment product if you already know your skin tolerates it. A hydrating serum can be a great choice. Vitamin C is often used in morning routines, while retinoids are generally reserved for nighttime use.
The golden rule is not to stack too many strong actives at once. If you exfoliated, keep the rest of your routine simple. Your skin does not need a surprise obstacle course.
Step 7: Moisturize like you mean it
Moisturizer is not the boring ending. It is the part that helps seal in hydration and support the skin barrier. Apply it while your skin is still slightly damp for an extra boost.
If your skin is dry, choose a richer cream. If you are acne-prone or oily, use a lightweight, non-comedogenic moisturizer. If your skin is sensitive, fragrance-free is usually your best friend.
Step 8: Finish with sunscreen if it is daytime
If you perform your facial in the morning or early afternoon, finish with broad-spectrum sunscreen. This is especially important if you exfoliated or used active ingredients. Freshly pampered skin and unprotected sun exposure are not a dream team.
If your facial is in the evening, sunscreen can wait until the next morning, but do not skip it then. Smooth, glowing skin still needs protection.
How to customize an at-home facial for your skin type
For dry skin
Keep cleansing gentle, skip harsh exfoliants, and focus on hydration. Cream cleansers, hydrating masks, and richer moisturizers are your best allies. A dry skin facial should feel comforting, not squeaky.
For oily skin
Use a gentle cleanser and choose a clay mask or a mild exfoliant that helps with excess oil. Avoid stripping your skin completely. When skin gets too dry, it can sometimes respond by producing even more oil, which is deeply rude.
For acne-prone skin
Stick to non-comedogenic products, use mild chemical exfoliation if tolerated, and resist the urge to pick at breakouts. Consistency beats aggression almost every time.
For sensitive skin
Keep your routine short. Use fragrance-free products, skip heat if it bothers you, and choose calming ingredients over trendy ones. Sensitive skin appreciates restraint. It does not enjoy surprises.
For combination skin
You can multitask a little. Use a balancing cleanser, a gentle exfoliant, and consider multi-masking if you know your skin responds well. For example, clay on the T-zone and hydration on the cheeks can be a smart move.
Common at-home facial mistakes to avoid
- Using very hot water
- Scrubbing too hard
- Combining multiple strong acids, peels, and retinoids in one session
- Picking blackheads and pimples
- Trying DIY kitchen remedies that sound clever but irritate the skin
- Ignoring patch testing
- Skipping moisturizer because your skin feels “clean enough already”
- Forgetting sunscreen after a daytime facial
A home facial should feel controlled and intentional. If your routine starts looking like a dare, simplify immediately.
How often should people do a facial at home?
For most people, once a week or once every other week is plenty. The exact frequency depends on your skin type, the products you use, and how sensitive your skin is. Hydrating, low-key facials can be done more often than exfoliating ones. If your skin gets tight, red, itchy, or flaky, that is your cue to scale back.
Remember, skin usually responds best to consistency, not chaos. A steady routine with occasional at-home facials tends to work better than one dramatic Sunday session followed by three weeks of product confusion.
What the at-home facial experience is really like
People often imagine that an at-home facial produces instant movie-star skin in exactly 14 minutes. Real life is a little more humble, but also more useful. The first time someone performs a facial at home, the biggest change is usually not “glass skin.” It is awareness. You start noticing whether your cleanser feels too stripping, whether your mask leaves your cheeks tight, and whether your skin loves hydration more than hype.
Many people describe the first good at-home facial as a reset. Their skin feels softer, looks a little brighter, and makeup goes on more smoothly the next day. For dry skin types, the best part is often comfort. That tight, papery feeling eases up, and the face looks less tired. For oily or combination skin, people often notice that their skin feels cleaner and more balanced rather than greasy by lunchtime. For acne-prone skin, the biggest win is usually calmer skin texture over time, not a magical overnight disappearance of every blemish.
There is also a learning curve. Someone with sensitive skin may discover that steam is not relaxing at all and that fragrance-free products make a huge difference. Someone else may realize that exfoliating less often actually improves their glow. This is the sneaky genius of home facials: they teach people to stop treating skincare like a contest and start treating it like maintenance.
Another common experience is that people initially overdo it. They use a scrub, then an acid, then a mask, then a serum, and finish with a product that promises “overnight resurfacing.” The next morning, their face sends a formal complaint. After that, most people become believers in a simpler method. Cleanse, treat lightly, moisturize well, protect daily. Glamorous? Maybe not. Effective? Very often, yes.
There is also the emotional side of the experience, which is easy to underestimate. Doing a facial at home can become a ritual that signals rest. You wash off the day, tie back your hair, put your phone down for a minute, and do something slow and deliberate. For busy people, that alone can make the process worthwhile. Your skin may appreciate the ingredients, but your nervous system also appreciates being left out of the group chat for half an hour.
Over a few weeks, people who do regular, gentle at-home facials often notice more realistic changes: smoother texture, less flaky dryness, fewer rough patches, and a more even-looking complexion. The glow is usually less “celebrity under studio lights” and more “I drank water, slept decently, and stopped attacking my face with random products.” Honestly, that kind of glow has excellent character.
The most helpful mindset is to think of an at-home facial as support, not rescue. It supports your skin barrier, supports hydration, supports a calmer routine, and supports better decisions when temptation whispers, “Maybe just squeeze that one blackhead.” A successful facial at home is not dramatic. It is repeatable. And in skincare, repeatable usually wins.
Final thoughts
So, how can people perform a facial at home? By keeping it simple, gentle, and tailored to their skin. Cleanse carefully, exfoliate lightly, choose a mask that makes sense, moisturize generously, and protect your results with sunscreen during the day. Avoid picking, over-layering active ingredients, and copying every dramatic trick you see online.
The best at-home facial is not the most expensive one or the most complicated one. It is the one that leaves your skin feeling healthy, comfortable, and supported. If your face feels calm and looks refreshed afterward, congratulations: you did not just perform a facial at home. You also avoided the classic skincare trap of doing way too much for the sake of “glow.” Your skin applauds politely.