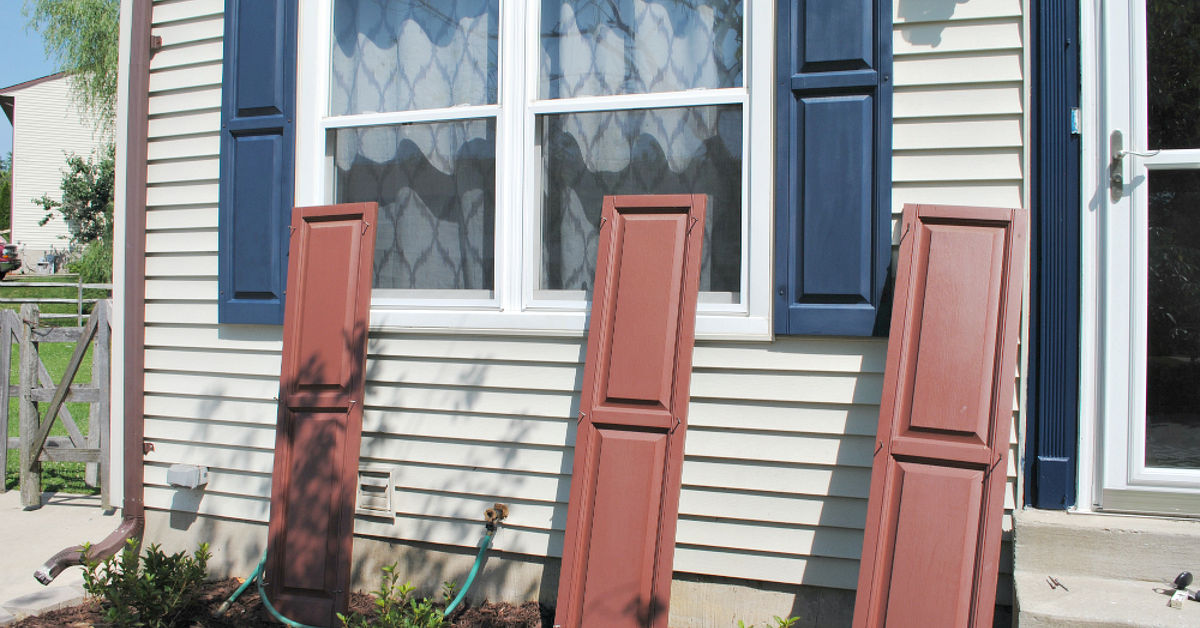
Exterior shutters occupy surprisingly little square footage, yet they can influence the appearance of an entire house. When they are faded, crooked, chalky, or surrounded by rusty hardware, the façade may look tired even if the roof, siding, and windows are in good condition. Fortunately, an easy shutter makeover can restore contrast, emphasize architectural details, and improve curb appeal without requiring a full exterior renovation.
The project is approachable for most homeowners, but the difference between “freshly updated” and “painted during a caffeine emergency” comes down to preparation. The shutter material, paint formula, color, weather, and installation method all matter. This guide explains how to handle each decision and achieve a finish that looks intentional from the sidewalk and respectable up close.
Why a Shutter Makeover Has Such a Big Visual Impact
Shutters frame the windows, creating repetition and balance across the front of a home. Because they usually contrast with the siding, the eye notices them quickly. Restoring that contrast can make windows appear more substantial and give a plain exterior greater depth.
Curb appeal also affects how well maintained a property appears. Real estate professionals routinely recommend exterior cleaning, paint touch-ups, landscaping, and entryway improvements before a home is listed. Repainting shutters is especially useful because it updates several prominent architectural features at once without the expense of painting the entire house.
A shutter refresh can accomplish several goals:
- Revive sun-faded or chalky color
- Coordinate shutters with the front door, trim, or roof
- Correct loose, crooked, or mismatched installation
- Protect wooden shutters from moisture and weathering
- Give listing photos a cleaner, more polished appearance
- Add personality without overwhelming the architecture
Decide Whether to Clean, Paint, Repair, or Replace
Not every unattractive shutter needs to be replaced. Begin by examining each one from the ground and then at close range. Dirt, oxidation, mildew, and pollen can make an otherwise sound shutter look much older than it is. A careful washing may reveal that the original finish still has a little life left.
When Cleaning May Be Enough
Try cleaning first if the shutters are securely mounted, uniformly colored, and free from cracks or peeling paint. Use mild detergent, water, and a soft-bristle brush. Rinse thoroughly and allow the surface to dry. Aggressive pressure washing can force water behind siding, damage wood fibers, or loosen brittle components, so more power is not automatically more helpful.
When Repainting Makes Sense
Painting is appropriate when the shutters remain structurally sound but have faded, developed minor scratches, or no longer complement the house. Wood shutters may also need a new protective coating when the existing paint begins to weather. Successful repainting depends on using a coating approved for the specific shutter material.
When Replacement Is the Better Choice
Replace shutters with extensive rot, deep cracks, badly warped panels, broken louvers, or failing attachment points. Thin vinyl shutters that have distorted from heat generally will not return to their original shape. Painting cannot repair structural damage; it merely gives the damage a better outfit.
Identify the Shutter Material Before Buying Paint
Exterior shutters are commonly made from wood, vinyl, composite material, PVC, fiberglass, or metal. The correct primer and paint vary by substrate, so do not choose a product based only on the attractive color chip taped to the lid.
Wood Shutters
Wood should be dry, clean, and stable. Scrape loose paint carefully, feather rough edges, repair minor defects with an exterior-rated filler, and sand as needed. Bare wood and repaired areas generally benefit from a compatible exterior primer. Paint all accessible faces and edges, including the top and bottom, because exposed end grain can absorb moisture.
Vinyl and Plastic Shutters
Vinyl requires a coating specifically approved for vinyl or plastic surfaces. Conventional wisdom once treated dark paint on vinyl as an invitation to warping because darker colors absorb more solar heat. Modern manufacturers offer specially formulated vinyl-safe color collections, but the product instructions remain the final authority. Do not assume that any exterior paint or any dark shade is suitable.
Composite, Fiberglass, and Metal Shutters
Composite formulations differ, so consult the shutter manufacturer whenever possible. Metal shutters must be cleaned, stripped of loose corrosion, and primed with a suitable rust-inhibiting or bonding primer. Galvanized metal may have additional preparation requirements. Compatibility is more important than brand loyalty.
Choose a Shutter Color That Belongs on the House
The best shutter color does not exist in isolation. It relates to the siding, masonry, trim, roof, front door, gutters, and permanent landscaping. Instead of beginning with a favorite color, identify the home’s fixed elements and their undertones.
Reliable Color Combinations
- White or cream siding: navy, charcoal, forest green, muted blue, or warm black
- Red brick: deep green, smoky blue, charcoal, cream, or restrained black
- Gray siding: navy, burgundy, black, soft white, or a darker gray
- Tan or beige siding: olive, dark brown, muted blue, or warm charcoal
- Blue siding: crisp white, charcoal, gray-green, or a deeper tonal blue
A safe approach is to repeat an existing exterior color, such as the front door or roof tone. For a more layered result, select a related shade rather than an exact match. Matching every accent perfectly can make a façade look flat, while wildly unrelated colors can make it resemble a paint store’s lost-and-found department.
Always test color outdoors. Paint sample boards and view them beside the windows in morning light, midday sun, shade, and evening light. Exterior colors often look lighter and more intense than they appear on a small indoor swatch. Stand across the street before making the final decision; curb appeal is, quite literally, judged from the curb.
Tools and Materials for an Easy Shutter Makeover
- Drill or screwdriver with appropriate bits
- Numbered labels, masking tape, and a marker
- Mild detergent and a soft-bristle brush
- Garden hose, buckets, and clean cloths
- Drop cloths or plastic sheeting
- Safety glasses, gloves, and suitable respiratory protection
- Paint scraper and sanding sponges, if appropriate
- Exterior filler or repair compound for the shutter material
- Compatible primer and exterior paint
- High-quality angled brush, small roller, or paint sprayer
- Replacement screws or shutter fasteners as needed
Check every coating label for approved surfaces, temperature range, drying time, ventilation requirements, and recoating instructions. Product directions outrank general advice because formulas vary.
How to Paint Exterior Shutters Step by Step
1. Photograph and Label Everything
Take a wide photo of each wall before removing anything. Label the back of every shutter according to its location, such as “front upper left.” Shutters that appear identical may have slightly different hole positions or dimensions. A numbering system prevents the final installation from becoming a frustrating architectural puzzle.
2. Remove the Shutters Carefully
Painting shutters on a flat work surface usually produces cleaner coverage and reduces the chance of getting paint on the siding. Use a stable ladder and a helper where necessary. Do not lean far to one side or work from unsafe heights simply to save a few minutes.
Some decorative vinyl shutters use one-piece fasteners that may need to be cut and replaced. Screw-mounted shutters are easier to remove and reinstall. Save reusable hardware in labeled containers and check the wall for damaged anchors.
3. Wash and Dry Thoroughly
Rinse loose debris, scrub with mild detergent, and clean inside the louvers and around decorative details. Paint applied over dust, oxidation, insects, or greasy residue will have poor adhesion. Rinse away all cleaner and let the shutters dry completely before sanding, priming, or painting.
4. Repair and Prepare the Surface
For painted wood, remove only loose or failing material and smooth the transition between sound paint and exposed areas. Excessive sanding can damage details and create unnecessary dust. Treat rot, moisture problems, and open joints before coating the surface.
Homes built before 1978 may contain lead-based paint. Sanding or scraping can release hazardous dust. Determine whether lead is present and follow current EPA lead-safe practices; hiring a lead-safe certified professional is often the wisest choice. A charming shutter is not worth turning the yard into a chemistry experiment.
Many sound vinyl shutters need cleaning and an approved coating rather than aggressive sanding. Follow both the paint and shutter manufacturers’ guidance. If light scuffing is recommended, remove all residue before proceeding.
5. Prime Where Required
Primer improves adhesion, seals porous repairs, and can help a dramatic color change cover evenly. Bare wood, filler, stains, corrosion, and difficult plastic surfaces may require specialized primers. Some modern exterior paints are self-priming over approved surfaces, but “paint and primer in one” does not eliminate every preparation requirement.
6. Apply Thin, Even Coats
A quality angled brush offers excellent control on louvers and detailed woodwork. Begin with recessed areas and slats, then paint the rails, stiles, edges, and broad faces. Watch for pooling in corners and brush out drips before they set.
A sprayer can deliver a smooth finish on multiple shutters, but it requires masking, proper protective equipment, and good technique. Keep the nozzle parallel to the surface, maintain a consistent distance, overlap passes, and keep moving while spraying. Several light passes are safer than one heroic blast that produces runs.
Apply the recommended number of coats and respect the stated recoat time. A surface may feel dry before the coating has cured enough to handle. If the shutters have operable louvers, move them gently during the drying process when the product instructions permit, preventing painted parts from bonding together.
7. Reinstall Without Distorting the Shutters
Wait until the coating is sufficiently cured before installation. Reattach each labeled shutter in its original location, checking that it is level and evenly spaced from the window. Avoid overtightening fasteners on vinyl shutters because compression can create dimples or warping. Touch up compatible screw heads only after installation is complete.
Make the Shutters Look Architecturally Correct
Color attracts attention, but proportion determines whether shutters look convincing. Traditional functional shutters were designed to swing over the window opening. Decorative shutters generally look most authentic when each one appears wide enough to cover roughly half its window and is aligned with the window’s height and shape.
Tiny shutters beside a wide picture window can look like decorative bookmarks. If the existing shutters are badly undersized, replacement may improve the house more than repainting them. Similarly, shutters should complement the architectural style. Raised-panel designs often suit traditional homes, board-and-batten shutters work well with rustic or Craftsman influences, and streamlined louvered styles can support Colonial and cottage exteriors.
Optional hardware can add dimension, but decorative hinges and holdbacks should be installed consistently. Use exterior-rated, corrosion-resistant materials and fasteners appropriate for wood, brick, stucco, or siding. Drilling into masonry requires the correct bit and anchor system.
Coordinate the Rest of the Front Exterior
Once refreshed shutters look crisp, neglected neighboring details may become more obvious. Finish the makeover with a short exterior checklist:
- Wash the windows and screens
- Clean or repaint the front door
- Replace a worn doormat
- Polish or update the house numbers
- Remove cobwebs around porch lights
- Trim plants blocking windows or shutters
- Add restrained planters or a window box
- Touch up visible trim where appropriate
The goal is coordination, not an outdoor shopping spree. Two healthy planters and clean hardware usually create a stronger impression than twelve unrelated decorations competing for attention.
Common Shutter Makeover Mistakes
Skipping the Cleaning Stage
Exterior dirt can be stubborn and nearly invisible after it dries. Painting over it weakens adhesion and traps an uneven texture under the finish.
Using Interior Paint Outdoors
Interior coatings are not designed for the ultraviolet exposure, moisture, and temperature changes experienced by shutters. Use an exterior product approved for both the substrate and application.
Ignoring the Weather
Avoid rain, excessive wind, direct scorching sun, and temperatures outside the coating manufacturer’s stated range. Strong sun can make paint dry too quickly, while cool or humid conditions may slow curing. Calm, moderate weather provides better working time and fewer airborne souvenirs embedded in the finish.
Applying Paint Too Thickly
Heavy coats collect inside louvers, sag along edges, and take longer to cure. Thin, controlled coats produce a more professional result.
Choosing a Trend Without Testing It
A dramatic color seen online may behave differently beside local brick, landscaping, and natural light. Test before committing to a houseful of shutters.
Real-World Experiences From an Easy Shutter Makeover
The first lesson many homeowners learn is that preparation takes longer than painting. On a typical one-story façade, removing and labeling the shutters may feel almost comically slow. Then the cleaning water turns gray, the original color reappears, and the reason for all that scrubbing becomes obvious. The actual painting can be the quickest and most satisfying part of the day.
A particularly useful experience is laying all the shutters out in installation order before beginning. Numbering them only on the back is smart, but drawing a simple window diagram is even smarter. When several shutters have nearly identical dimensions, the diagram saves repeated trips up the ladder and prevents old mounting holes from being unnecessarily enlarged.
Color testing also produces surprises. A charcoal sample that looks restrained under porch shade may appear almost black in full afternoon sun. A navy that seems bright on a store card can read as a sophisticated neutral from the street. Viewing painted sample boards against the siding is far more reliable than holding up tiny paper chips and hoping imagination will handle the rest.
Another practical discovery concerns the workspace. Shutters need room around them so the painter can reach the edges without stepping over wet surfaces. Placing them too close together saves floor space but encourages overspray, accidental contact, and awkward brush angles. Supporting the shutters on stable blocks or sawhorses also makes edge coverage easier and saves the painter’s back from filing an official complaint.
Spraying sounds faster, and for a large group of simple shutters it often is. However, setup and cleanup should be included in the calculation. Masking nearby objects, testing the spray pattern, protecting against wind, and cleaning equipment can erase the time savings on a very small project. A high-quality brush may be the calmer choice for two or four detailed wooden shutters. For ten or twelve louvered vinyl shutters, a properly used sprayer can earn its keep.
Drying time is another area where enthusiasm causes trouble. A shutter can feel dry while the paint remains soft enough to mark under a screw head or stick to a drop cloth. Reinstalling too early may turn an otherwise excellent finish into a collection of fingerprints and pressure marks. Allowing extra curing time feels inconvenient until compared with repainting damaged areas.
The most noticeable result often appears only after the shutters return to the house. Individually, the color change may seem modest. Repeated across every front window, it creates rhythm and definition. A faded brown can become a crisp charcoal; a tired black can shift to deep green; dated burgundy can give way to navy. Suddenly the windows look larger, the siding looks cleaner, and the front door appears connected to the rest of the exterior.
The final experience is a reminder that curb appeal depends on restraint. Once the shutters are freshly painted, it is tempting to repaint the door, replace every light, install new planters, and begin negotiating with the mailbox. Pause and view the house from across the street. Often, clean windows, trimmed shrubs, and one repeated accent color are enough to complete the transformation.
An easy shutter makeover succeeds because it focuses effort where the eye naturally lands. With correct surface preparation, compatible exterior paint, thoughtful color selection, and patient drying, a small DIY project can make the entire home feel better cared for. The shutters do not need to shout. They simply need to stop looking as though they have been quietly surrendering to the weather since the previous century.