A fall table does not need to look as though a pumpkin truck overturned in the dining room. With a bundle s, you can create a centerpiece that feels warm, polished, and unmistakably autumnal without burying the table under orange glitter. Magnolia foliage does most of the heavy lifting: the glossy green tops look fresh and elegant, while the velvety cinnamon-brown undersides supply instant fall color.
This DIY fall magnolia leaves centerpiece is easy enough for a quiet weekend craft session yet refined enough for Thanksgiving dinner, an autumn wedding shower, or a cozy harvest supper. Better still, the design is flexible. Make it lush with fruit and flowers, minimalist with candles and leaves, or rustic with pinecones, seed heads, and tiny gourds.
Why Magnolia Leaves Work So Well for Fall Decor
Southern magnolia leaves are naturally substantial. Their leathery texture, broad shape, glossy upper surface, and rusty-brown underside give an arrangement contrast without requiring paint, glitter, or complicated floral mechanics. Horticultural sources also recognize evergreen magnolia foliage as useful for cut and dried arrangements, while fresh-greenery guidance notes that the leaves hold up well even when they are not constantly supplied with water. t durability makes magnolia a forgiving material for beginners. A delicate fern may wilt dramatically before you locate the floral tape. Magnolia usually behaves like the calm friend who brought snacks and remembered the parking validation.
A Natural Two-Color Palette
Flipping some leaves green-side up and others brown-side up creates depth immediately. Designers frequently use this front-and-back contrast in fall tables, garlands, and harvest arrangements because it produces variation while keeping the palette cohesive. Seasonal examples pair magnolia with pomegranates, crab apples, chestnuts, berries, dried flowers, gourds, and grasses. uitable for Several Decorating Styles
Magnolia leaves can look traditional, farmhouse-inspired, modern, Southern, woodland, or quietly luxurious. The difference comes from the container and supporting materials. A dough bowl and mini pumpkins feel rustic. A matte black tray with cream candles feels modern. A silver compote with pears and burgundy flowers leans formal. The foliage stays the same; the personality changes around it.
Materials for a DIY Fall Magnolia Leaves Centerpiece
You do not need every item below. Start with magnolia leaves and a vessel, then choose accents that fit your table and budget.
- 20 to 35 fresh, dried, preserved, or high-quality faux magnolia leaves
- A low bowl, wood tray, dough bowl, shallow basket, compote, or narrow rectangular container
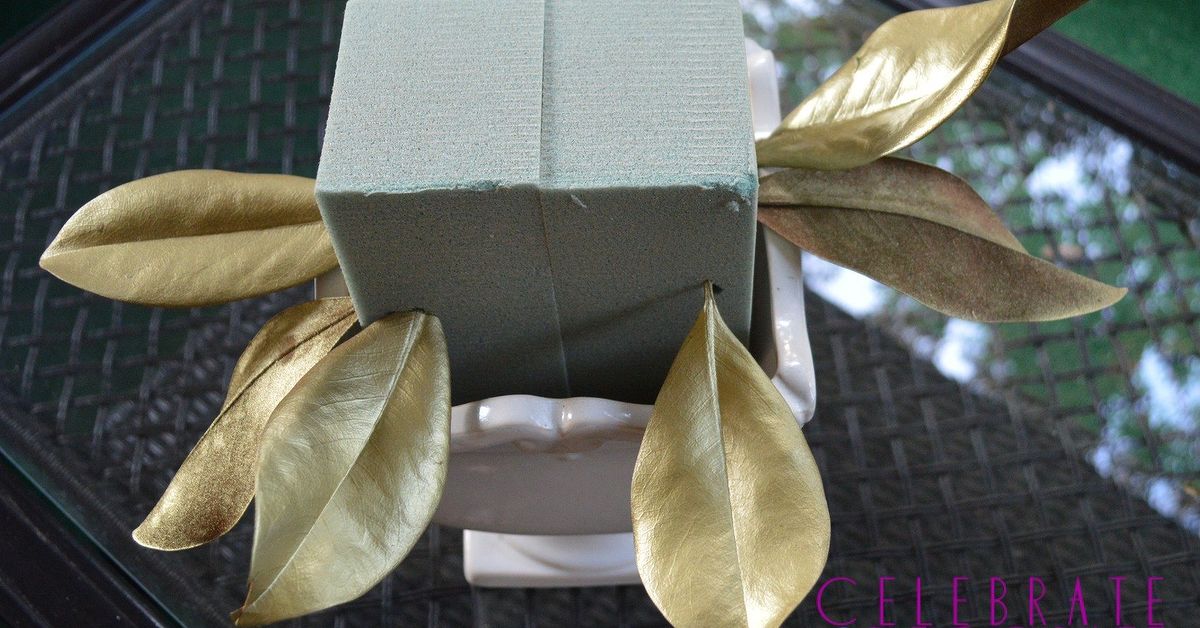
- Floral foam, chicken wire, a reusable flower frog, or crumpled paper for support
- Floral tape, paddle wire, or short wooden picks
- Pruning shears or sturdy scissors
- Optional mini pumpkins, gourds, pears, apples, pomegranates, or clementines
- Optional dried hydrangeas, mums, dahlias, amaranth, eucalyptus, millet, wheat, or berry stems
- Optional pinecones, acorns, chestnuts, cinnamon sticks, moss, or ribbon
- Battery-operated votive or taper candles
- A table runner or protective liner
When cutting leaves from a tree, get the property owner’s permission and prune lightly rather than stripping one visible branch. Select clean, mature leaves without heavy spotting, insect damage, or torn edges. Wipe them gently with a barely damp cloth and let them dry before arranging.
Fresh, Preserved, or Faux Leaves?
Fresh leaves provide the richest color and most natural shape. They are ideal for an event taking place within the next several days. Preserved or naturally dried leaves offer a softer, antique appearance and can remain decorative longer, although they become more brittle. Faux leaves are practical for reusable decor, homes without access to magnolia trees, or arrangements that must be prepared well in advance.
When using faux foliage, bend stems individually and mix the leaf angles. Perfectly flat, evenly spaced leaves are the fastest route to a centerpiece that resembles a craft-store shelf display rather than something gathered and designed.
How to Make the Centerpiece Step by Step
Step 1: Measure the Table Before You Build
Place the empty vessel on the table and set out the plates, glasses, and serving pieces you expect to use. For a dining table, keep the arrangement low enough that guests can see one another comfortably. Centerpiece guidance often favors low, elongated designs because they preserve conversation space and leave room for food. seful target is approximately 10 to 14 inches high for a seated dinner arrangement, although the exact height depends on your chairs and table. When the centerpiece passes the “Can I see Aunt Linda while she tells the same pie story?” test, it is probably safe.
Step 2: Prepare a Stable Base
Line a basket or wooden container if moisture could stain it. Add floral foam for fresh flowers, chicken wire for a reusable mechanics system, or crumpled kraft paper when the design uses only leaves and dry materials. Secure the support so it does not slide when the arrangement is moved.
For a no-vessel garland, lay magnolia leaves directly along a runner in a loose, winding line. Slight irregularity looks more natural than a ruler-straight strip. Leave intentional gaps for serving bowls, candlesticks, or place settings.
Step 3: Build the Magnolia Framework
Begin with the largest leaves. Insert or place them so they extend slightly beyond the rim, creating a broad horizontal silhouette. Alternate the leaf faces: some glossy green, some brown underneath, and a few angled so both surfaces are visible.
Add a second layer of leaves closer to the center. Overlap them like roof shingles to hide floral mechanics and create fullness. Avoid arranging every leaf at the same height or pointing every tip outward. Nature has never once used the “duplicate and align” command.
Step 4: Add One or Two Focal Elements
Choose a restrained focal group rather than throwing in every fall object you own. Three mini pumpkins in related colors, a cluster of pomegranates, or five cream pillar candles can anchor the arrangement. Odd-numbered groups often feel relaxed and balanced.
For a traditional harvest centerpiece, nestle pears, apples, clementines, or small gourds among the leaves. Magnolia-based table garlands are commonly styled with fruit, nuts, berries, dried flowers, and autumn foliage because the varied shapes create abundance without requiring a towering floral display. tep 5: Fill Gaps With Fine Texture
Use smaller materials to bridge the visual space between broad leaves and larger focal pieces. Tuck in dried amaranth, wheat, bunny-tail grass, seeded eucalyptus, or hydrangea. Add pinecones, acorns, chestnuts, or bundled cinnamon sticks near the base.
Limit yourself to two or three supporting textures. Magnolia leaves are bold; they do not need a backup band, a marching band, and a surprise banjo solo.
Step 6: Check the Arrangement From Every Seat
Sit in several chairs and look for bare mechanics, awkward gaps, or objects blocking sightlines. Rotate fruit so its most attractive side faces outward. Remove any leaf that looks cramped. A polished centerpiece often improves when one or two unnecessary pieces are taken away.
Step 7: Add Safe Lighting
Battery-operated candles create warmth without exposing dry leaves, preserved foliage, ribbon, or paper to an open flame. When using real candles, place them in sturdy glass hurricanes and keep all plant material well away from the flame. Never leave burning candles unattended.
Three Styling Variations
1. Rustic Harvest Magnolia Centerpiece
Use a wooden dough bowl, brown-side-up magnolia leaves, white and sage mini pumpkins, pinecones, wheat, and a few pears. Add a narrow linen runner underneath. This version works especially well on a farmhouse table because the leaves echo the warm tones of the wood.
2. Modern Neutral Magnolia Centerpiece
Choose a long matte black tray. Arrange mostly green-side-up leaves in a restrained line, then add cream battery candles and two or three pale gourds. Use fewer materials and repeat shapes. The result feels seasonal without shouting, “Thanksgiving has entered the chat.”
3. Elegant Fruit-and-Flower Centerpiece
Place wet floral foam in a low footed bowl. Build a collar of magnolia leaves, then add burgundy dahlias or mums, dried hydrangeas, pomegranates, and trailing amaranth. Garden and floral-design sources regularly pair magnolia with richly colored flowers, berries, seed heads, and fall fruit for formal seasonal arrangements. n>
How to Keep Magnolia Leaves Looking Good
For fresh stems, recut the ends at an angle and place them in clean water before arranging. When the design contains a water source, check it daily. Keep the centerpiece away from heating vents, fireplaces, strong direct sunlight, and bowls of ripening fruit, all of which can speed dehydration or aging.
For a dry garland, expect the leaves to gradually curl and deepen in color. That change can be attractive rather than problematic. Magnolia and similar leafy elements can dry decoratively and continue providing texture for weeks. t reusable faux or preserved leaves with a soft brush. Store the arrangement in a breathable box rather than crushing it in a plastic bag. Remove fruit and fresh flowers before storage, unless you would like to discover an entirely new ecosystem next October.
Common Mistakes to Avoid
- Building too tall: A centerpiece should support conversation, not referee it.
- Using only one side of the leaves: The brown undersides are a major part of magnolia’s fall appeal.
- Overloading the palette: Choose two main colors plus greenery for a more intentional design.
- Ignoring scale: Tiny accents disappear beside large magnolia leaves, so group small items together.
- Leaving mechanics exposed: Overlap leaves, moss, or fruit to hide wire and foam.
- Putting dry foliage near flames: Use flameless candles or protected candleholders.
- Adding perishable fruit too early: Place fresh produce shortly before the event and inspect it daily.
Budget-Friendly Substitutions
No magnolia tree nearby? Use salal, camellia, oak, sweet gum, pear, plum, or sturdy faux foliage with a similar broad shape. Garden-design guidance notes that oak and magnolia leaves can be replaced with other substantial leaves depending on the form and texture desired. lace expensive flowers with dried hydrangeas from the yard, grocery-store mums, ornamental grass plumes, or clipped evergreen tips. Seasonal projects combine magnolia with seeded eucalyptus, winterberry, grasses, cinnamon sticks, and dried orange slices, showing how ordinary materials can create layered texture. urpose a casserole dish, breadboard, shallow basket, galvanized tray, or thrifted bowl as the base. Strong magnolia foliage can carry a centerpiece without an expensive specialty container. n>
Conclusion
A DIY fall magnolia leaves centerpiece succeeds because it combines drama with simplicity. The leaves are large enough to establish shape quickly, durable enough to tolerate handling, and naturally colored for autumn. Once the foliage framework is in place, the rest is a matter of editing: a few pumpkins, a cluster of fruit, several candles, or a handful of dried flowers.
The best version is not necessarily the fullest. It is the one that fits your table, leaves room for dinner, and looks like it belongs in your home. Let the green-and-russet leaves provide the seasonal foundation, repeat a small group of accents, and stop before the centerpiece needs its own ZIP code.
Experience Notes: What Usually Happens During This Project
The following is a practical composite of common maker experiences and troubleshooting patterns, included to help readers anticipate real-world results.
The project usually begins with overconfidence. A pile of magnolia branches looks so generous that it seems capable of decorating the dining table, mantel, front door, and possibly the neighbor’s mailbox. Then the first leaves go into the vessel and reveal the truth: large foliage consumes space quickly, and ten well-positioned leaves can accomplish more than thirty crowded ones.
The most useful early lesson is to sort the leaves before building. Separating them into large, medium, and small groups makes the process faster. The broadest leaves create the outline, medium leaves cover the mechanics, and smaller leaves repair gaps. Without sorting, it is easy to use all the perfect leaves at the beginning and finish the back of the arrangement with the botanical equivalent of spare parts.
Another common discovery is that the brown underside deserves more attention than expected. At first, many makers instinctively place every glossy green surface upward because it looks fresh. The centerpiece may appear handsome but oddly summery. Flipping roughly one-third to one-half of the leaves introduces the warm copper-brown tone that immediately shifts the design toward fall. The arrangement suddenly looks intentional, even before pumpkins or flowers arrive.
Fruit can be both beautiful and mildly rebellious. Round apples and pomegranates roll toward the lowest point of a tray, usually when no one is watching. Floral picks, small wire loops, or hidden rings of moss keep them in place. Heavy fruit should sit low rather than balancing on leaves. Tiny pumpkins behave better, although their stems can catch surrounding foliage and rearrange it without permission.
The greatest improvement often comes during the editing stage. A first draft may contain leaves, pumpkins, pears, pinecones, ribbon, berries, wheat, candles, hydrangeas, and enough cinnamon to suggest a bakery emergency. Removing three categories usually makes the centerpiece stronger. A dependable formula is one dominant material, one focal element, and one fine texture: magnolia leaves, pale pumpkins, and wheat, for example.
Lighting changes the arrangement more than expected. In daylight, green leaves may dominate. Under warm evening bulbs, the brown undersides, wood tones, and gold fruit become richer. Testing the centerpiece at the time of day it will be used helps prevent surprises. Battery candles are especially effective when tucked at varied heights, but they should remain visible enough to operate without dismantling half the arrangement.
Transport presents another lesson. A centerpiece that feels stable on the table may shift in a car. Carry fruit separately, secure the mechanics, and add loose accents after arrival. Photographing the finished arrangement before moving it provides a quick reconstruction guide when a pumpkin stages an escape in the parking lot.
Finally, the project tends to age gracefully. Fresh magnolia leaves may curl, darken, or reveal more brown over time. Instead of fighting every change, many makers lean into the dried look, removing spent flowers and replacing fresh fruit with pinecones or preserved pods. What began as an early-fall centerpiece can become a Thanksgiving arrangement with only a few adjustments. That adaptability is the real charm of magnolia foliage: it looks composed when fresh, characterful while drying, and convincing even when the maker is learning as they go.