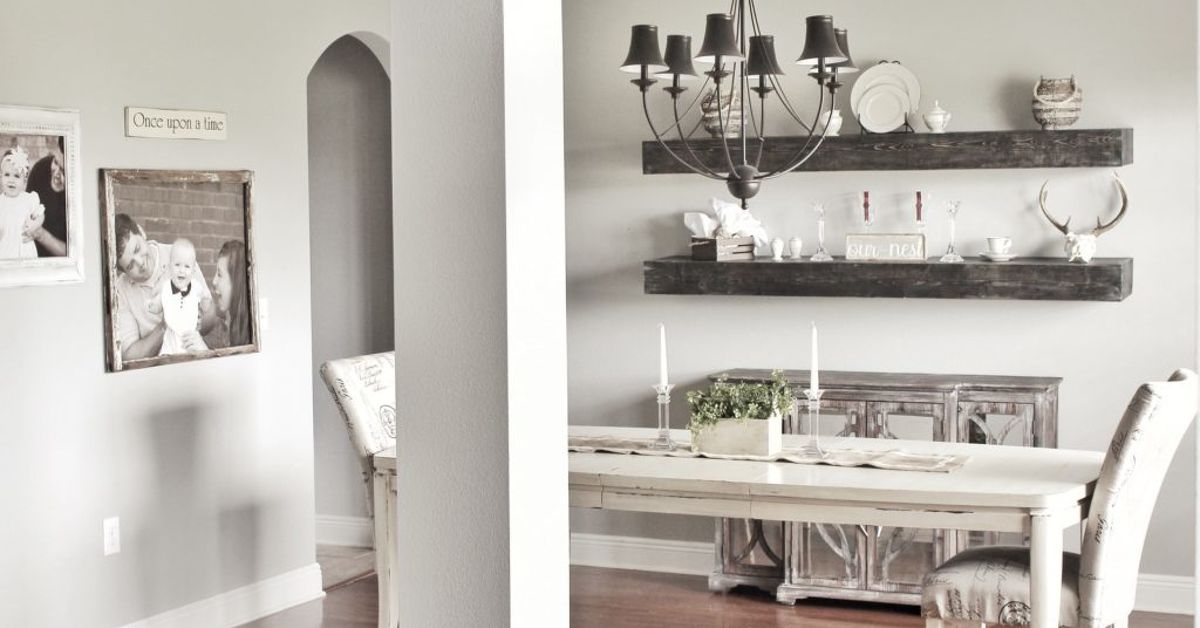
Dining rooms have a weird superpower: they’re either “used every day” or “reserved for when relatives arrive and judge your life choices.”
Either way, shelves can make the space work hardermore storage, more style, fewer “where do we put the extra platters?” debates.
And the best part? DIY dining room shelves are one of those projects that look expensive, but mostly cost you a Saturday, a level, and a little courage.
Why Shelves Belong in the Dining Room
Kitchens get all the glory when it comes to storage and organization, but dining rooms are the perfect place for:
- Serveware and entertaining gear: platters, bowls, pitchers, cake stands, cloth napkins, seasonal table runners.
- Bar essentials: bottles, glassware, cocktail tools, and that one fancy bitters you bought for “a new hobby.”
- Everyday convenience: a spot for chargers, a mail basket, or the world’s most honest “keys live here” zone.
- Decor that doesn’t feel like clutter: framed art, candles, plants, or a rotating seasonal display.
Plan First, Build Once (Your Wall Will Thank You)
Shelves are simpleuntil they aren’t. The difference between “Pinterest-worthy” and “why is this shelf leaning like it’s tired?” is planning.
Spend 20 minutes up front and you’ll save yourself two hours of patching holes later.
Step 1: Decide What the Shelves Will Hold
Before you pick a style, get honest about the job. A shelf for framed photos is very different from a shelf for stacks of dinner plates.
Heavy loads usually mean you’ll want to hit wall studs, use sturdy brackets/cleats, and keep spans reasonable.
Step 2: Choose the Best Wall
Prime shelf real estate in dining rooms includes:
- Above a sideboard/buffet: classic, balanced, and practical.
- On a blank “echo wall”: shelves can add warmth and reduce the “empty hallway vibe.”
- In a corner: great for smaller roomscorner shelves can make awkward space useful.
- In a niche or between windows: built-ins or shallow shelves look custom and intentional.
Step 3: Know Your Wall Type
Drywall over studs is most common, but you might be dealing with plaster, masonry, tile, or a surprise mix (older homes love surprises).
The right fasteners and technique depend on the wallso identify what you’re mounting into before you buy hardware.
Step 4: Think About Height and Spacing
A reliable rule for shelves above a sideboard: keep the lowest shelf comfortably reachable and visually connected to the furniture.
Many DIYers like the look of two shelves spaced evenly, rather than one lonely shelf floating in the middle of nowhere.
Practical spacing tips:
- Between shelves: 10–14 inches works well for most decor and dishes; taller items may need more.
- Shelf depth: 8–12 inches is a sweet spot for dining room use without feeling bulky.
- Keep it “breathing”: leave some open wall space so shelves don’t overwhelm the room.
Pick Your Shelf Style (And Your “I’m a DIY Person Now” Personality)
1) Floating Shelves
Floating shelves are the clean, modern look: no visible brackets, just a tidy plank that appears to defy physics.
They’re great above a buffet, for styling, and for medium-weight storage when mounted correctly.
Best for: decor, glassware, lightweight stacks, everyday items when secured to studs or solid anchors.
2) Bracket Shelves
The most beginner-friendly option. Brackets do the heavy lifting (literally) and can lean modern, farmhouse, traditional, or industrial.
If you want shelves to hold serious weight, brackets are often the simplest path to confidence.
Best for: plates, serving bowls, cookbooks, bar bottles, anything you don’t want crashing down during dinner.
3) Picture Ledges / Plate Rails
A shallow ledge (often 3–5 inches deep) is perfect for leaning framed art, displaying plates, or adding a long line of visual interest.
In a dining room, it’s a classy way to show off special dishes without committing to deep shelves.
Best for: display plates, framed art, small vases, seasonal decor.
4) Built-In Shelves and Hutch-Style Storage
If you want the “custom home” look, built-ins bring major wow-factor. Think: lower cabinets + open shelves above,
or a full wall of shelves framing a buffet. This is a bigger project, but the payoff is huge.
Best for: maximizing storage, making the dining room feel intentional, adding value and structure.
5) Corner Shelves
Corners are often wasted in dining rooms. A set of corner shelves can turn a dead zone into a coffee station, bar nook, or display area.
Materials That Make Sense (Not Just What Looks Cute in the Store)
You can build shelves from lots of materials, but here are common DIY-friendly choices:
- Solid wood boards (pine, poplar, oak): beautiful and strong; can be stained or painted.
- Plywood: stable, cost-effective, and great for “chunky” floating shelves when boxed in.
- MDF: smooth and paint-friendly; not ideal for heavy loads or moisture, but fine for decorative shelves.
- Live-edge slabs: stunning statement shelves, typically heavier and pricier.
Pro tip: If you want shelves to look thick without paying thick-board prices, build a hollow “box shelf”:
a lightweight frame + plywood skin = chunky look, less weight.
Tools and Supplies Checklist
- Stud finder (or another method to locate studs)
- Level (a longer one helps, but any level is better than vibes)
- Tape measure and pencil
- Drill/driver + drill bits
- Appropriate screws and wall anchors (rated for your load and wall type)
- Brackets, floating shelf hardware, or a cleat system
- Sanding supplies (sandpaper 120/180 grit)
- Finish: paint, stain, and a protective topcoat
- Optional: clamps, miter saw/circular saw, wood glue
DIY Project Option A: Easy Bracket Shelves Above a Buffet
This is the “first shelves” project that gives you maximum payoff with minimal drama.
Here’s a practical example you can adapt:
Example Plan
- Number of shelves: 2
- Shelf length: 60–72 inches (depending on buffet width and wall space)
- Shelf depth: 10 inches
- Spacing between shelves: ~12 inches
- Brackets: 3–4 per shelf (more if you plan heavy loads)
Step-by-Step
-
Mark the layout. Measure and lightly pencil your shelf lines on the wall.
Use a levelbecause your eyes will lie to you the moment you’re excited. -
Find studs. Mark stud locations along your shelf line. If you can anchor into studs, do it.
If not, use heavy-duty anchors rated for your expected load. -
Position brackets. Place brackets evenly across the shelf length, aiming for studs when possible.
A common approach is one bracket near each end and at least one in the middle. -
Pre-drill and mount. Drill pilot holes where needed, then screw the brackets in securely.
Check level again before tightening everything down. -
Cut and finish the boards. Cut shelves to length, sand smooth, then stain/paint.
Add a protective topcoat if you’ll be using the shelves for everyday items. -
Attach shelves to brackets. Set the shelf on brackets, align, and drive screws up into the shelf from underneath.
(Hidden screws = cleaner look.)
DIY Project Option B: Floating Shelves (Clean Look, More Precision)
Floating shelves usually use a hidden bracket or cleat system. The key is solid mounting and precise leveling.
Floating shelves look effortless, but they’re not fans of “close enough.”
Floating Shelf Success Tips
- Hit studs whenever possible. Floating shelves rely on hidden hardware; strong attachment matters.
- Transfer stud marks carefully. Measure twice before drilling into the shelf or bracket.
- Use a ledger board if needed. A temporary support strip can keep long shelves level during installation.
- Don’t overload shallow shelves. Keep heavy stacks closer to supports and nearer the wall.
DIY Project Option C: Dining Room Picture Ledge (Fast + Stylish)
Picture ledges are the “I want a big change in one afternoon” solution.
Build a shallow shelf with a front lip so frames or plates stay put.
Try one long ledge above a buffet, or stack two ledges vertically for a gallery-style dining room wall.
How to Make Shelves Strong (Without Turning Your Wall Into Swiss Cheese)
Shelves fail for three common reasons: weak fasteners, missed studs, and unrealistic expectations.
Here’s how to avoid all three.
1) Understand Studs, Anchors, and “What’s Actually Holding This Up”
In most homes, studs are spaced predictably, but not always perfectly. Finding studs is the safest way to support weight.
When studs aren’t available where you need them, anchors can workif you choose the right type and follow the rating guidelines.
- Toggle bolts: strong for drywall because they spread load behind the wall.
- Molly bolts: expand within drywall and can handle moderate loads.
- Self-drilling anchors: convenient for lighter loads; quality varies a lot.
Bottom line: if your shelves will hold heavy items (plates, bottles, stacks of serving pieces), prioritize studs or a cleat system.
2) Use a Cleat for Long Runs
A cleat is a horizontal strip anchored across multiple studs. It spreads weight and can make installation easier,
especially when studs don’t align perfectly with where you want brackets.
3) Keep the Load Close to the Wall
Shelves act like levers. The farther forward the weight sits, the more force it puts on the fasteners.
For heavy items, place them closer to the wall and nearer supports.
Finishing: Make DIY Shelves Look Like “Real Furniture”
The finish is what makes shelves feel custom instead of “I cut a board and the board is now on the wall.”
Take your time hereit’s the difference between “nice!” and “did you build those?”
Sand Like You Mean It
Start around 120 grit and move up to 180 grit for most interior shelves.
Round the sharp edges slightlyyour future elbows will appreciate it.
Paint vs. Stain
- Paint: best for a crisp, built-in look; great for matching trim or cabinetry.
- Stain: highlights wood grain; works beautifully with warm dining room tones.
Topcoat for Durability
If you’ll actually use the shelves (not just style them), add a protective topcoat.
Water-based finishes tend to dry fast and stay clear, while oil-based finishes tend to add warmth and can be very durable.
Either way, light sanding between coats helps the finish feel smooth and professional.
Styling Dining Room Shelves Without Making Them Look Messy
Open shelves are gorgeous… until they look like a yard sale. The goal is “collected,” not “chaotic.”
Use the 60/40 Rule
Aim for about 60% practical (dishes, glasses, baskets) and 40% decorative (art, greenery, candles).
Too much decor feels staged; too much utility can look cluttered.
Group Items Intentionally
- Stacks: plates, bowls, and linens look tidy when stacked neatly.
- Trays and baskets: corral small items (coasters, napkin rings, chargers).
- Vary heights: combine tall vases, medium frames, and small objects for balance.
- Leave some empty space: negative space is not a failure; it’s design.
Common Mistakes (So You Don’t Learn Them the Hard Way)
- Skipping the stud check: drywall alone isn’t a magic weight-bearing material.
- Not leveling each bracket: “It’ll be fine” is how shelves become ramps.
- Overloading day one: test gradually, especially if anchors are involved.
- Choosing shelves too deep: deep shelves can feel bulky and collect visual clutter fast.
- Forgetting clearance: watch outlets, switches, vents, and furniture height.
What This Project Typically Costs (And Where You Can Save)
Costs vary by style and materials, but DIY dining room shelves can be budget-friendly:
- Budget route: pine boards + simple brackets + paint.
- Mid-range: hardwood boards or thick “box” shelves + nicer hardware.
- Statement look: custom floating hardware + hardwood + premium finish.
To save money, consider building shelves from plywood and adding edge banding or a solid wood face to create a thicker look.
Wrap-Up: The Dining Room Upgrade That Actually Works
DIY dining room shelves are the rare project that checks every box: practical storage, major style boost, and a weekend-friendly timeline.
Whether you choose brackets, floating shelves, a picture ledge, or full built-ins, the winning formula is the same:
plan the layout, mount securely, and finish thoughtfully. Then style like a humannot a home goods store display.
Real-World Experiences DIYers Commonly Have With Dining Room Shelves (Extra )
The internet makes shelves look like a quick “before/after” montage, but real DIY shelf experiences have personality.
If you’re about to build dining room shelves, here are the kinds of moments DIYers routinely run intoand how to handle them without losing your weekend.
First, there’s the classic surprise: walls are rarely perfectly flat. Even in newer homes, drywall can have subtle waves.
In older homes, the wall may have more character than a sitcom cast. DIYers often discover this when a long shelf sits tight on one end
and leaves a tiny gap on the other. The fix isn’t panic; it’s patience. Many people use small shims behind brackets or hardware,
then touch up with paint so everything looks seamless.
Next comes the “stud scavenger hunt.” Plenty of DIYers start with confidence and a stud finder… and then meet the plot twist:
studs that don’t line up exactly where the shelf design wants them. That’s why shelf projects frequently evolve into clever solutions,
like using a cleat that spans multiple studs, or choosing bracket placement that keeps things symmetrical while still anchored securely.
The experience teaches a useful lesson: you’re not just building shelvesyou’re negotiating with your house.
Another common experience is decision fatigue around styling. After the shelves go up, there’s a moment of triumph…
followed by “Wait, what do we put on them?” DIYers often realize that open shelving looks best when it’s edited.
The easiest strategy is to start with functional pieces (plates, bowls, glasses), then add one or two decorative items per shelf:
a small plant, a framed photo, a candle. People also learn that matching everything can look stiff, while mixing textures (ceramic, glass, wood, woven baskets)
makes the shelves feel warm and lived-in.
Then there’s the finishing stageaka the part DIYers swear will be “quick” and then spend the most time on.
Sanding feels boring until you skip it and the shelf looks rough under dining room lighting.
Staining is exciting until you realize different boards can take stain differently (especially softer woods).
Many DIYers end up loving paint for this reason: it’s forgiving, it hides mismatched grain, and it can make shelves look built-in.
Others swear by a simple clear topcoat after stain because it protects the surface from water rings and scuffsvery helpful in a room where drinks,
serving platters, and the occasional “oops” are part of life.
One of the best real-world shelf moments is the “first load test.”
DIYers often start by placing something lightmaybe a small vase or a couple of booksthen gradually add heavier items.
It’s a smart habit and a confidence builder. And once shelves prove they can handle the job, people tend to use the dining room more:
serving becomes easier, entertaining feels less chaotic, and the room finally earns its square footage.
Finally, the most universal experience: once you build one set of shelves, you start seeing shelf opportunities everywhere.
Dining room shelves become the gateway project. Suddenly the hallway needs a ledge, the kitchen wants open shelving, and the living room “could really use”
a floating shelf moment. It’s not mission creep. It’s growth. (And also, you now own a level, so you might as well use it.)