A stylish Christmas tree does not have to arrive in a giant box with an equally giant price tag. With a few wood scraps, basic tools, leftover paint, and one determined afternoon, you can create a budget-friendly wooden tree that looks charming instead of suspiciously homemade.
A Holiday Makeover That Does Not Empty Your Wallet
Holiday decorating has a sneaky way of multiplying. First, you buy one ornament. Then you need matching ribbon, new lights, a tree collar, decorative picks, and perhaps a miniature wooden village with its own municipal budget. This DIY Christmas tree project on a budget offers a more sensible approach.
The design uses horizontal wooden slats attached to a vertical support, creating a simple triangular tree. It can be leaned against a wall, secured to a wall, or attached to a freestanding base. The finished tree works especially well in apartments, entryways, guest rooms, offices, and other places where a full artificial or natural tree would occupy valuable floor space.
Wooden holiday trees are also wonderfully adaptable. Major home-improvement resources feature everything from painted plywood trees to space-saving wall-mounted designs. This version combines those ideas into a beginner-friendly project that can be made largely from materials you already own.
The #30DayFlip Concept
The spirit of a #30DayFlip is simple: make visible progress without waiting for unlimited time, money, or motivation. Although this wooden Christmas tree can be completed in a weekend, spreading the work across several days makes it easier to use leftover materials and avoid rushed decisions.
On day one, choose the location and measure it. During the next few days, collect scrap wood, compare paint colors, and test decorations. Cut and assemble the tree during the second week, apply the finish during the third, and spend the final days styling it. The schedule leaves room for real life, including that mysterious afternoon when the tape measure disappears even though nobody has moved it.
Choose the Right Size
For a tabletop tree, aim for a height of 24 to 30 inches. A 4-foot tree works well in a hallway or small apartment, while a 5- to 6-foot version can replace a conventional Christmas tree. Leave space above the top slat for a star and below the lowest slat for gifts, baskets, or a small tree collar.
Measure the display area before cutting anything. Check nearby outlets, baseboards, door swings, vents, and walking paths. The tree should not obstruct an exit or sit beside a heater, fireplace, or candle. The U.S. Fire Administration recommends keeping Christmas trees at least three feet from heat sources.
Materials and Tools
Basic Materials
- One 1-by-2-inch board for the vertical spine
- Wood strips, pallet boards, furring strips, or leftover trim for the branches
- A scrap plywood square or short board for a freestanding base
- Wood glue
- 1- to 1 1/4-inch wood screws or small finishing nails
- 100- to 150-grit sandpaper
- Paint, stain, or clear finish
- LED string lights
- Small ornaments, ribbon, twine, or greenery
- Picture-hanging hardware if the tree will be mounted
Useful Tools
- Tape measure and pencil
- Carpenter’s square or straightedge
- Hand saw, circular saw, or miter saw
- Drill and drill bits
- Screwdriver
- Clamps
- Sanding block or orbital sander
- Safety glasses, hearing protection, and a suitable dust mask
Sample Budget
| Item | Budget Strategy | Estimated Cost |
|---|---|---|
| Wood | Use scraps or inexpensive furring strips | $8–$18 |
| Fasteners and glue | Use supplies already in the workshop | $0–$7 |
| Paint or stain | Use a leftover sample or partial can | $0–$10 |
| LED lights | Reuse a tested strand | $0–$10 |
| Decorations | Make paper ornaments or reuse old pieces | $0–$5 |
| Estimated total | Depending on materials already owned | $8–$50 |
How to Build the Budget DIY Christmas Tree
Step 1: Source Affordable Wood
Begin with the lumber you already have. Short pieces left from shelving, baseboards, fence repairs, or previous craft projects may be perfect for the horizontal branches. Slight differences in width can add character, particularly if you want a rustic or farmhouse-style tree.
If you need to purchase lumber, furring strips are usually more economical than premium finish boards. Inspect every piece for severe twists, splits, exposed nails, or damage. Reclaimed wood should be clean, dry, and appropriate for indoor use. Avoid unidentified painted wood because an old coating may contain hazardous materials.
Step 2: Plan the Branch Lengths
Cut the vertical support to your desired tree height. Next, decide how many horizontal slats you want. Nine to twelve pieces produce a clean, open design, while fifteen or more create a fuller silhouette.
For a 48-inch tree, the lowest slat might measure 34 inches. Reduce each higher slat by approximately 2 1/2 to 3 inches until the top piece is about 5 inches long. These measurements are flexible. Lay everything on the floor before cutting so you can adjust the proportions without negotiating with a board that is suddenly two inches too short.
Mark each cut with a square. Straight cuts are the easiest option, but angled ends can give the branches a more refined shape. Cut slowly, support the material properly, and follow the tool manufacturer’s operating instructions.
Step 3: Sand the Pieces
Sand the faces, cut ends, and sharp edges. Medium sandpaper in the 100- to 150-grit range is generally suitable for smoothing wood before painting, according to Popular Mechanics. If you plan to stain the tree, follow with a finer grit for a smoother appearance.
Do not ignore dust control because this is “only a holiday craft.” The National Institute for Occupational Safety and Health notes that orbital sanders can generate substantial wood dust. Work in a ventilated area, use dust collection when available, and wear appropriate eye and respiratory protection.
Step 4: Arrange the Tree
Place the vertical spine on a level work surface. Position the shortest branch near the top and the longest at the bottom. Use a tape measure to keep the spacing consistent, then center every slat on the spine.
Perfect spacing is optional. A rustic tree can have slightly irregular gaps, while a modern Scandinavian-style tree looks best with careful alignment. Step back and inspect the outline from several feet away. A layout can seem mathematically flawless at arm’s length and strangely lopsided from across the room.
Step 5: Attach the Branches
Mark the position of every slat before moving anything. Apply a thin layer of wood glue where each branch meets the spine. Clamp the pieces, drill pilot holes, and install screws from the back so the fasteners remain hidden.
If the wood is thin, choose screws that will not emerge through the front. Small finishing nails may also work, although screws make future repairs easier. Wipe away excess glue before it dries.
For a freestanding tree, attach the spine to a wide wooden base. Add triangular braces behind the spine if the tree is tall or will hold heavier ornaments. A wall-mounted version can use picture-hanging hardware rated for the completed weight. Secure tall decorations carefully in homes with children or pets.
Step 6: Apply the Finish
Dust the assembled tree thoroughly before applying paint or stain. Several finishes work well:
- Classic green: Use deep evergreen paint with lighter dry-brushed edges.
- Farmhouse white: Apply warm white paint and lightly sand selected areas after drying.
- Natural wood: Use clear matte finish or a light stain to highlight the grain.
- Modern black: Choose matte black paint with brass, white, or natural-wood ornaments.
- Colorful retro: Paint individual slats in muted red, pink, aqua, and green.
Using leftover paint reduces both the cost and the amount of material stored in the garage. If the paint is unusable, follow local disposal instructions. The Environmental Protection Agency advises that certain paints and related products require special handling rather than casual disposal.
Step 7: Add Lights and Decorations
Wrap a short strand of LED lights loosely around the branches, or attach it to the back for a soft glow around the silhouette. The U.S. Department of Energy reports that LED holiday lights consume substantially less energy and are more durable than traditional incandescent strands.
Inspect lights before use. Discard strands with cracked sockets, bare wires, frayed cords, or loose connections. Use lights and extension cords rated for the intended indoor or outdoor location, follow the manufacturer’s connection limits, and turn everything off before leaving home or going to bed. These practices align with guidance from the U.S. Consumer Product Safety Commission.
Finish the tree with lightweight ornaments. Paper stars, dried orange slices, ribbon bows, pinecones, bells, family photographs, and painted wood shapes all work beautifully. Layering different textures can make a sparse tree feel intentional and complete without requiring dozens of decorations.
Money-Saving Ideas That Still Look Polished
Shop the House First
Before buying anything, collect possible materials in one place. Look for ribbon from gift packaging, battery-powered lights, neutral ornaments, unused baskets, fabric remnants, and partial cans of paint. Limiting the project to a planned color palette helps unrelated objects look like a coordinated collection.
Make the Ornaments
Cardboard, old book pages, paper bags, air-dry clay, felt scraps, and leftover yarn can become inexpensive decorations. Handmade ornaments add depth because they are not all identical. They also provide an excellent explanation when someone notices that one star has six points and another seems to be reconsidering its career.
Use a Cardboard Tree Collar
Place a sturdy box around the base and cover it with kraft paper, fabric, removable wallpaper, or thin wood strips. A repurposed basket also works. The collar hides braces and electrical cords while giving the tree a finished appearance.
Design for Storage
If storage space is limited, attach the branches with removable screws instead of permanent glue. Label each piece on the back, disassemble the tree after the holidays, and bundle the slats together. A flat wooden tree is far easier to store than a bulky artificial one that expands whenever the closet door opens.
No-Saw Alternative for Renters and Beginners
You can create a similar silhouette without cutting lumber. Purchase precut craft boards in graduated lengths, or use fallen branches that are clean and completely dry. Tie the pieces together with strong twine, placing the shortest branch at the top and the longest at the bottom.
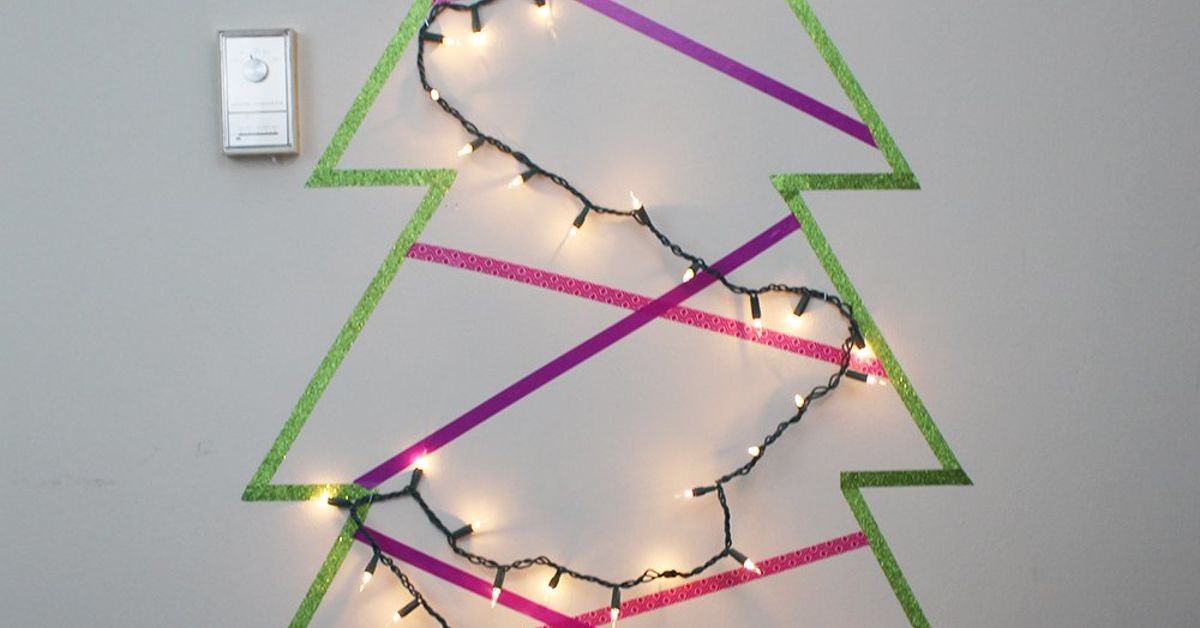
Hang the completed tree from a properly rated wall hook and add battery-operated LED lights. Another option is to outline a tree directly on the wall using removable hooks and string lights. Always confirm that adhesive products are suitable for the wall finish and that the hanging system can support the decoration’s weight.
Common Mistakes to Avoid
- Buying materials too soon: Complete the design and inventory household supplies before shopping.
- Skipping the floor layout: Arrange every branch before drilling holes.
- Using a narrow base: A tall tree needs adequate support to resist tipping.
- Ignoring sharp edges: Sand corners and cut ends, especially in family spaces.
- Applying one heavy paint coat: Several thin coats usually produce a smoother finish.
- Overdecorating: Leave enough open space for the wooden structure to remain visible.
- Using damaged lights: Budget decorating should never mean gambling with electrical safety.
My #30DayFlip Experience: What This Project Taught Me
The first lesson from making a DIY Christmas tree project on a budget was that the phrase “I probably have everything” is both optimistic and technically inaccurate. I had wood, paint, screws, and lights. What I did not have was a clear plan for turning them into one object that would stand upright and resemble a tree.
I began by placing scrap boards on the garage floor. The first version was too wide for the intended wall. The second resembled a ladder wearing a party hat. By the third arrangement, the proportions finally worked: a 48-inch spine, ten branches, consistent gaps, and enough clearance for a small star.
That dry layout saved more time than any power tool. It revealed where the branches needed trimming and allowed me to compare symmetrical spacing with a looser, rustic arrangement. I chose even spacing because the wall already had several decorative objects. A cleaner tree kept the room from looking as though Christmas had entered through a cannon.
The most effective budget decision was using leftover wall paint. The color was a soft, gray-green that looked unremarkable inside the can but surprisingly sophisticated on wood. I applied two thin coats and lightly sanded a few edges after the paint dried. The exposed grain added texture without making the tree look artificially distressed.
I also learned that small imperfections disappear once the project is styled. One branch sat slightly off-center, and a screw head remained visible near the bottom. Neither problem mattered after I added warm white lights, paper ornaments, and a woven basket around the base. DIY projects often look questionable halfway through. Paint and good lighting are extremely persuasive.
The decorating stage was where the budget concept became genuinely fun. Instead of buying a coordinated ornament set, I made stars from kraft paper and reused narrow ribbon from previous gifts. Small pinecones from an old centerpiece filled the larger gaps. I kept the color palette to brown, cream, green, and warm white, which made inexpensive materials feel cohesive.
Spacing the lights behind the branches produced a better result than wrapping them tightly around the front. The glow outlined the tree and concealed most of the cord. A small timer simplified daily use, although I still followed the basic rule of turning the lights off when the room was unattended.
The project also changed how I approached the full 30-day makeover. Rather than treating the tree as an isolated craft, I used it to guide the surrounding area. I removed two unrelated decorations, added a neutral throw to the nearby chair, and repeated the same ribbon on a small wreath. Those minor changes made the entire corner appear planned.
If I built the tree again, I would drill the ornament holes before painting. Adding them afterward worked, but it created small raw edges that needed touch-ups. I would also make the base removable so the tree could lie completely flat in storage.
The biggest takeaway was that a tight budget can improve a project. It encourages editing, reuse, and creative problem-solving. Instead of purchasing the first available decoration, I had to decide what the tree actually needed. The final result was simpler, more personal, and easier to store than the store-bought option I had originally considered.
Most importantly, the tree felt connected to the home because it was made from familiar materials. The wood came from an old shelving project, the paint matched the room, and the ornaments carried small family memories. It did not look like a catalog displayand that was precisely why it worked.
Conclusion: Small Budget, Big Christmas Character
A budget DIY Christmas tree proves that memorable holiday decor is not measured by the number of shopping bags involved. A simple wooden structure, a restrained color palette, and a handful of reused decorations can create a festive focal point for less than the cost of many premade alternatives.
Plan the proportions carefully, use safe materials, build a stable base, and let the finish connect the tree to the rest of the room. Whether you complete it in one weekend or make it part of a full #30DayFlip, the finished project can return year after yearwith no needles, no complicated assembly, and no annual argument about whether the tree is leaning.