After years of deadlines, group projects, early classes, late-night study sessions, and at least one printer that betrayed you at a critical moment, graduation day has finally arrived. Your diploma will document the achievement, but your graduation cap can tell the story behind it.
Decorating a mortarboard has become a popular way for graduates to celebrate their personalities, families, academic programs, cultural backgrounds, and plans for the future. A thoughtfully designed cap also makes it considerably easier for relatives to find you in a sea of identical gowns. Grandma may not recognize the university president from 200 feet away, but she will absolutely spot a cap covered in enormous yellow sunflowers.
The best graduation cap ideas are personal, readable, comfortable, and appropriate for the ceremony. Whether your style is elegant, funny, sentimental, artistic, or delightfully dramatic, the following inspiration will help you create a cap worth keeping long after the tassel has been turned.
Before Decorating Your Graduation Cap
Do not open the glitter jar just yet. Graduation cap policies vary significantly among schools. Some institutions welcome decorations, while others prohibit them or allow only flat, two-dimensional designs. Restrictions may cover hanging pieces, lights, large flowers, commercial advertisements, offensive messages, and objects that block another graduate’s view.
Confirm whether your cap is owned or rented, too. A rented cap may need to be returned without permanent alterations. In that situation, build your design on a removable square of cardstock, chipboard, or lightweight poster board rather than gluing decorations directly onto the fabric.
Measure and orient the cap correctly
A standard mortarboard looks wonderfully symmetrical until you realize, ten minutes before the ceremony, that your message faces backward. Put the cap on and mark the front lightly before attaching anything. The pointed section generally sits toward the forehead, while the elastic portion rests at the back.
Measure the top instead of assuming it is exactly 9.5 inches square. Create an opening for the center button, leaving enough room for the tassel loop to move freely. Test the design while wearing the cap to ensure it remains balanced and does not slowly migrate toward your eyebrows.
Choose lightweight, dependable materials
Cardstock, adhesive vinyl, removable vinyl, scrapbook paper, paint pens, flat-backed gems, ribbon, artificial flowers, fabric paint, and foam letters are common choices. Removable vinyl and detachable toppers work especially well for rented caps. Permanent vinyl offers a polished finish for a cap you plan to keep.
Hot glue can secure heavier embellishments, but it may damage synthetic fabric and should be used carefully. Double-sided mounting squares or hook-and-loop dots provide a less permanent alternative. Whatever adhesive you choose, test it on spare material first. Graduation morning is not the ideal time to discover that your glue considers gravity a persuasive argument.
Creative Graduation Cap Ideas for Every Personality
1. Tell your story with a short personal motto
A concise phrase can summarize years of determination without turning your cap into a tiny textbook. Try an original message such as “Built From Brave Choices,” “Learning Was the Plot Twist,” or “Proof That Persistence Works.” Use large lettering and strong contrast so the words remain readable in photographs.
2. Celebrate your academic major
Turn your degree into the design itself. A nursing graduate might create an ECG line that becomes a tassel. An engineering major could use blueprint-style graphics, while a literature graduate might design an open book with pages leading toward the horizon. Chemistry graduates have the periodic table available, which is essentially nature’s collection of decorative letter tiles.
Education majors can use pencils, apples, or colorful classroom lettering. Computer science graduates might display a playful line of code, and psychology majors can incorporate a brain illustration surrounded by flowers. Focus on one recognizable symbol rather than squeezing an entire course catalog onto the cap.
3. Honor the people who helped you succeed
Graduation rarely happens through individual effort alone. Dedicate your cap to parents, grandparents, siblings, teachers, mentors, friends, or children who supported the journey. Messages such as “Our Sacrifice, My Degree” or “Raised With Love, Graduating With Pride” can make the design deeply meaningful.
A small family photograph may be added to a removable topper, surrounded by names, initials, or birth flowers. Scan the original image rather than using an irreplaceable photograph. Ceremonies involve crowds, weather, flying caps, and frosting from nearby graduation cakesall natural predators of treasured family photos.
4. Feature your cultural heritage
Use colors, patterns, flowers, or symbols that honor your cultural identity. A graduate might incorporate a national flag, traditional textile-inspired border, meaningful phrase in a family language, or map connecting a hometown to the school.
Keep sacred symbols accurate and respectful, particularly when adapting traditional artwork. If a design belongs to a specific community, research its meaning instead of selecting it solely because the colors look good with gold glitter.
5. Create a floral graduation cap
Flowers can make a basic mortarboard look romantic, cheerful, or boldly artistic. Arrange small artificial blossoms around the outer edge, leaving the center open for the tassel. Sunflowers create a bright, optimistic look; roses feel classic; baby’s breath provides delicate texture; and greenery works beautifully with neutral lettering.
Trim bulky plastic stems before attaching the flowers. Arrange everything without glue first, take a reference photo, and then secure each element. For a flatter, ceremony-friendly version, use pressed-flower illustrations, floral stickers, or paper cutouts.
6. Design a minimalist cap
Creative does not have to mean crowded. A matte black background with one metallic phrase can be more striking than a dozen competing elements. Consider a thin gold border, your initials, and the graduation year. Another option is a single white line drawingperhaps a mountain, compass, open door, or rising sun.
Minimalist graduation cap designs photograph well because the message remains clear from a distance. They also require fewer supplies, less drying time, and fewer opportunities to accidentally glue a sleeve to the table.
7. Use humor that sounds like you
A funny graduation cap can acknowledge the strange reality of finishing school. Original phrases might include “Degree Unlocked; Instructions Missing,” “Professional Email Sender,” “Somehow, All the Tabs Paid Off,” or “Ask Me Again After a Nap.”
The strongest jokes are short enough to read quickly and specific enough to feel personal. You can reference your caffeine habit, commuter life, difficult major, endless internships, or relationship with online discussion boards. Keep the humor friendly and suitable for a formal public event.
8. Turn the cap into a tiny vision board
Show where you are going next with miniature symbols of your goals. Include a skyline representing a future city, an airplane for planned travel, a stethoscope for medical training, or a courthouse silhouette for law school. A winding road from the graduation year toward a career icon creates a clear visual story.
Choose three or four elements rather than covering every possible ambition. Your cap should communicate confidence, not resemble a browser with 47 career tabs open.
9. Make a celestial design
A moon-and-stars theme suits messages about dreams, possibility, and finding direction. Paint a navy or black removable topper with constellations, metallic stars, and a crescent moon. Add your graduation year as a constellation or connect stars to form your initials.
Glow-in-the-dark paint sounds exciting, but some schools prohibit illuminated or glowing decorations. Metallic vinyl can provide a similar visual effect without requiring batteries, wires, or an emergency conversation with the commencement coordinator.
10. Create a book or next-chapter theme
Turn the square surface into a book cover featuring your name as the author and graduation as the completed chapter. You might write “Chapter Complete” across the center, place the graduation year along the spine, or illustrate pages transforming into birds.
This idea is especially fitting for writers, librarians, English majors, and enthusiastic readers, but its message works for any graduate beginning a new stage of life.
11. Display school spirit without copying the seal
Use school colors, mascot-inspired patterns, or a recognizable campus landmark. A simplified skyline of the library, stadium, bell tower, or residence hall can evoke shared memories while keeping the design personal.
Official logos may be protected by institutional branding rules, so check your school’s guidance before reproducing them. A color palette and original illustration can express school pride without turning the cap into unofficial merchandise.
12. Build a photo-collage cap
A collage can capture favorite classmates, campus traditions, clubs, or important milestones. Print small copies of the images, arrange them around a central phrase, and protect them with a lightweight clear covering if the ceremony will be outdoors.
Limit the selection to photographs that remain recognizable at a small size. Six carefully chosen images usually create more impact than 36 tiny faces that require forensic analysis.
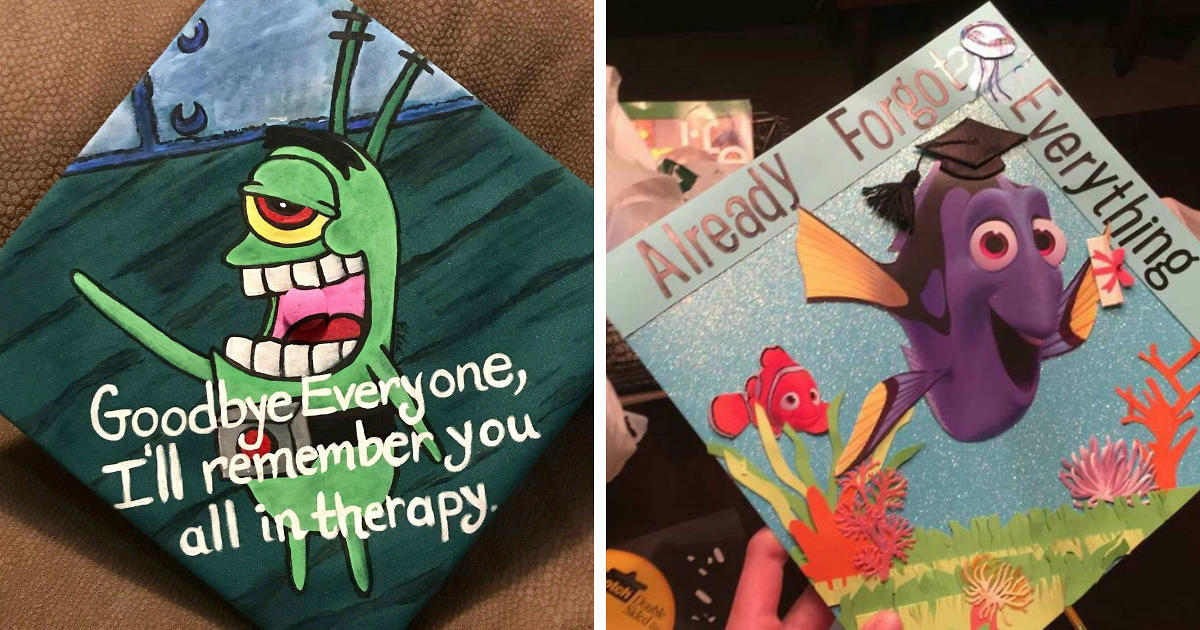
13. Add a pop-culture-inspired twist
Reference a favorite movie, television character, game, or music era through colors and imagery rather than copying a long quotation. Reimagine a familiar visual around your academic journeyfor example, a game progress bar reaching 100 percent or a movie-poster layout starring “The Graduate.”
Keep copyrighted lyrics and quotations brief, and add an original twist. The result should feel like your story wearing a pop-culture costume, not an advertisement for somebody else’s franchise.
14. Recognize a nontraditional journey
First-generation students, working parents, veterans, adult learners, transfer students, and graduates who returned after a long break have powerful stories to celebrate. Consider phrases such as “First, Not Last,” “Detour Completed,” or “The Dream Had No Deadline.”
Parents might include their children’s initials or hand-drawn hearts. Veterans can incorporate their branch colors if permitted. A timeline showing major milestones can turn the cap into a compact record of resilience.
15. Create an interactive-looking design without loose parts
A cap can appear dimensional while remaining flat. Use layered cardstock to create a faux window, envelope, camera frame, record player, or suitcase. Shadowed lettering and printed textures add depth without obstructing anyone’s view.
A “message in an envelope” design could reveal your next destination, while a mock boarding pass could list the departure point as school and the destination as your future career. Secure every layer carefully so the concept reaches the ceremony with the same number of pieces it had at home.
How to Turn an Idea Into a Finished Cap
Start with a simple sketch
Draw a square and mark the center button. Place the main phrase first, then add supporting images. Establishing a visual hierarchy prevents decorative details from overwhelming the message. If every element is shouting, the cap becomes a very small, sparkly committee meeting.
Use contrast and readable lettering
Light letters work best on dark backgrounds, and dark letters stand out on pale paper. Limit the design to two type styles: one decorative and one simple. Thick block letters are easier to read from the audience, while script should be reserved for short names or accents.
Before assembling the design, photograph your mock-up from several feet away. If the message disappears, increase the letter size or simplify the background.
Protect the tassel and preserve comfort
Do not cover the center button or create a design that traps the tassel. Keep large embellishments away from the side where it will hang. Try on the finished cap for at least ten minutes, gently turn your head, and practice moving the tassel.
Outdoor ceremonies introduce wind, heat, and humidity, so reinforce corners and test all adhesives in advance. Carry a few safety pins, adhesive dots, and a small strip of double-sided tape for last-minute repairs.
Graduation Cap Mistakes to Avoid
- Ignoring school rules: A beautiful prohibited cap may never enter the ceremony.
- Starting on graduation morning: Paint, glitter glue, and panic all need drying time.
- Making it too heavy: Large gems and thick decorations can pull the cap out of position.
- Using weak contrast: Pale gold lettering on beige may look elegant nearby and invisible in every photograph.
- Blocking the tassel: The center button needs enough space for the loop to rotate.
- Forgetting orientation: Test the cap on your head before attaching permanent lettering.
- Using an overly long quote: A cap is a visual headline, not a graduation speech.
- Leaving loose glitter: Glitter should remain on the cap, not migrate into the dean’s ceremonial robes.
What the Graduation Cap Decorating Experience Is Really Like
The first lesson of decorating a graduation cap is that a square surface is much smaller than it appears online. A phrase that looked wonderfully concise in a notes app can suddenly become a typographical traffic jam. Experienced decorators solve this by printing or cutting the most important words first and treating everything else as optional. When the message is clear without the extra decoration, the design has a strong foundation.
The second lesson is that planning saves both materials and emotional stability. Arrange flowers, letters, photographs, and borders without attaching them. Photograph several layouts and compare them. A centered composition tends to feel formal, while an asymmetrical arrangement often looks more modern. Moving a paper flower is easy; negotiating with a paper flower that has been hot-glued upside down is a less rewarding activity.
Group decorating sessions can be especially memorable. Friends can share supplies, exchange ideas, and check whether each cap faces the correct direction. Someone usually owns the cutting machine, someone has surprisingly advanced lettering skills, and someone arrives with snacks and becomes the undisputed project manager. More importantly, decorating together creates a quiet opportunity to reflect on the years everyone has shared.
Personal designs also tend to age better than designs chosen only because they were fashionable. A viral phrase may be funny for a season, but a message connected to your family, major, identity, or perseverance can remain meaningful for decades. Before committing, ask whether the design represents something you will want to remember when you find the cap in a storage box years from now.
Photographs reveal practical issues that are easy to miss at the craft table. Highly reflective materials may create glare, tiny letters may disappear, and elaborate backgrounds can compete with the main message. Take pictures indoors, outdoors, and from above before declaring the project finished. If relatives will be seated far away, one bright color or distinctive shape can help them identify you.
Finally, perfection is not the point. A slightly crooked letter or handmade flower does not diminish the achievement underneath it. The cap represents persistence, adaptation, and the ability to complete something difficultqualities that are also useful when the adhesive refuses to cooperate. Build it carefully, wear it comfortably, and let it express the part of your graduation story that a diploma cannot.
Conclusion
Creative graduation cap ideas work best when they combine personal meaning with practical design. Begin with your school’s rules, select a message that reflects your journey, and use lightweight materials that will survive the ceremony. A minimalist motto, floral border, family tribute, major-inspired illustration, cultural motif, or well-timed joke can transform a standard mortarboard into a memorable keepsake.
Your cap does not need to be the loudest one in the stadium. It only needs to feel unmistakably yours. After all, graduation celebrates more than reaching the finish lineit marks the moment you get to choose what comes next.
Note: Always review your school’s official commencement and cap-decoration policies before applying permanent materials or three-dimensional embellishments.