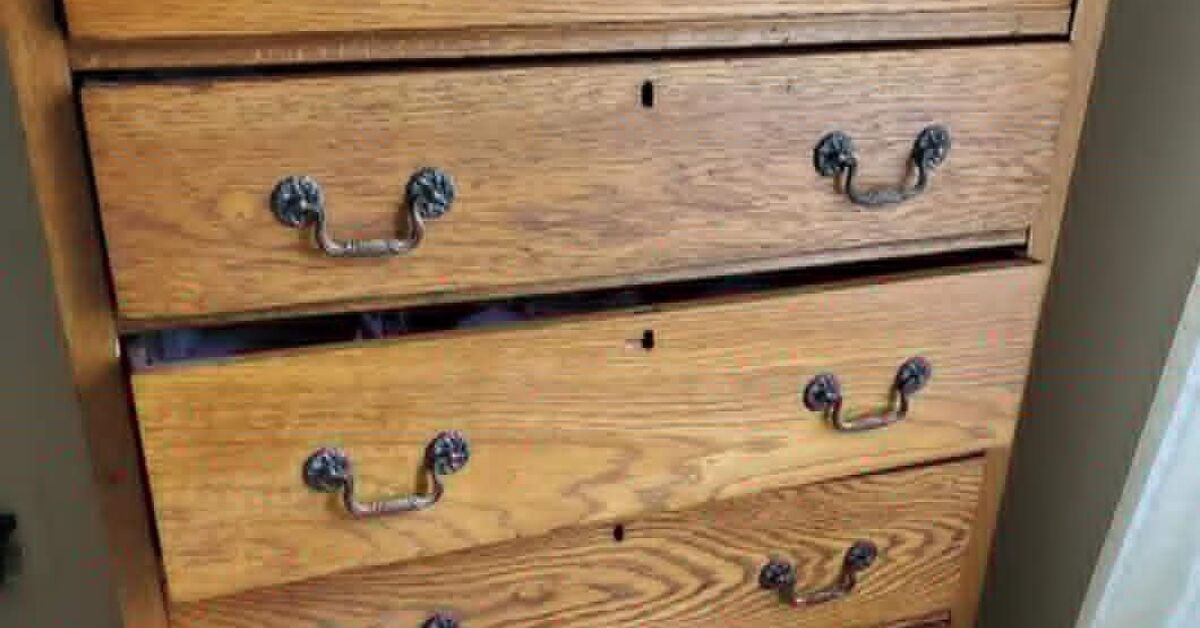
An antique chest of drawers has a special kind of personality. It may creak, wobble, smell faintly like old paper, and contain at least one mystery screw rolling around in the back. But beneath the tired finish, scratched top, cloudy varnish, and outdated hardware, there is often a beautiful piece of furniture waiting for its second act.
A DIY antique chest of drawers makeover is one of the most satisfying home projects because it combines creativity, restoration, and practical storage. Instead of buying a new dresser that looks like everyone else’s, you can transform an old chest into a custom statement piece for a bedroom, entryway, dining room, nursery, guest room, or home office. The best part? You do not need to be a professional furniture restorer. You need patience, good prep work, the right supplies, and the humility to accept that paint will somehow end up on your elbow.
This guide walks through a complete antique chest of drawers makeover idea, from evaluating the piece to cleaning, repairing, sanding, painting, staining, sealing, styling, and learning from real DIY experience. The goal is not to erase the charm of age. The goal is to refresh it, protect it, and make it useful again.
Why Make Over an Antique Chest of Drawers?
Antique and vintage furniture often has better construction than many modern flat-pack options. Solid wood frames, dovetail joints, carved details, turned legs, and original brass pulls can give an old chest of drawers character that is hard to fake. A makeover lets you keep those details while updating the color, finish, and function for your home.
It is also a sustainable choice. Reusing furniture keeps usable pieces out of the landfill and reduces the need for new materials. A chest of drawers can be repurposed as bedroom storage, a hallway console, a bathroom linen cabinet, a craft supply station, or even a coffee bar. That is the magic of old furniture: it has already survived several decades, so it is not frightened by your Pinterest board.
Before You Start: Decide Whether to Paint, Stain, or Preserve
Not every antique chest should be painted. If the piece has rare craftsmanship, high market value, original finish in good condition, fine veneer, or historical significance, consider preserving or professionally restoring it instead. A gentle cleaning, wax, or finish refresh may be better than a dramatic paint job.
However, if the chest is structurally sound but cosmetically rough, already painted, heavily scratched, missing veneer, or not especially valuable, a DIY makeover can give it a beautiful new life. The key is to make a thoughtful choice instead of attacking the furniture with a random quart of paint and the confidence of a home renovation show contestant on episode one.
Good Candidates for a DIY Makeover
A chest of drawers is a strong candidate if the drawers still slide, the frame is sturdy, the wood is not rotting, and the damage is mostly cosmetic. Scratches, dull finish, old hardware holes, water rings, chipped paint, and uneven color can usually be improved with basic DIY techniques.
Pieces That Need Extra Caution
Be careful with chests that have peeling old paint, cracked veneer, severe mold odor, active insect damage, deep structural cracks, or missing drawer runners. These issues can still be repaired, but they require more time and sometimes professional help.
Safety First: Lead Paint, Dust, and Tip-Over Prevention
Many antique and vintage furniture pieces were made or painted before modern safety standards. If your chest of drawers has old paint, especially if it may date from before 1978, treat it carefully. Old painted surfaces can contain lead, and sanding or scraping them can create hazardous dust. Use a lead test kit or consult a certified professional before disturbing the finish. If lead is present, follow lead-safe work practices, avoid dry sanding, contain dust, wear protective gear, and keep children and pets away from the work area.
Work in a well-ventilated space. Wear safety glasses, gloves, and a respirator or dust mask suitable for your materials. Chemical strippers, primers, stains, and sealers all have product-specific safety instructions, so read the label before use. Yes, the label is boring. Read it anyway. Future you, with functioning lungs, will be grateful.
After the makeover, anchor the chest of drawers to the wall, especially in homes with children. Dressers and chests can tip if drawers are opened or climbed. Use an anti-tip kit installed into a wall stud when possible, and keep heavy items in lower drawers.
Tools and Supplies for an Antique Chest of Drawers Makeover
Your exact supply list depends on the finish you want, but most projects use the same basics:
- Screwdriver or drill for removing hardware
- Drop cloth or cardboard
- Mild cleaner or degreaser
- Microfiber cloths and tack cloth
- Wood filler or epoxy wood repair product
- Putty knife
- Sandpaper in medium and fine grits
- Sanding block or orbital sander
- Painter’s tape
- Primer suitable for wood or previously finished furniture
- Furniture paint, enamel, chalk-style paint, stain, or gel stain
- Quality paintbrush and small foam or microfiber roller
- Clear topcoat, wax, polyurethane, or furniture sealer
- Replacement knobs or pulls, if desired
Do not skip quality brushes. Cheap brushes shed bristles into wet paint like a nervous cat on a black sweater. A smooth finish starts with good tools.
Step-by-Step Antique Chest of Drawers Makeover
Step 1: Inspect the Chest Carefully
Remove all drawers and examine the frame. Check for loose joints, cracked legs, warped drawer bottoms, missing stops, damaged runners, and old repairs. Wiggle the piece gently. A little age-related movement is normal, but a chest that rocks like a concert speaker needs attention before paint.
Look at the hardware. Original pulls may be worth saving, even if they look dark or dull. Brass, bronze, and wood knobs can often be cleaned and reused. If the hardware is mismatched or broken, measure the distance between screw holes before shopping for replacements.
Step 2: Clean Before You Sand
Cleaning is not glamorous, but it is the difference between a finish that lasts and a finish that peels off like a bad sunburn. Old furniture collects wax, polish, skin oils, smoke residue, dust, and mystery grime from generations of use.
Wipe the entire chest with a mild cleaner or degreaser. For delicate wood, use a gentle approach and avoid soaking the surface. Clean drawer interiors as well. If the piece smells musty, remove the drawers and let everything air out. Baking soda bowls, activated charcoal, or sunlight in short, controlled sessions can help reduce odors.
Step 3: Repair Damage
Fill dents, gouges, and unwanted hardware holes with wood filler. Slightly overfill the damaged area because filler can shrink as it dries. Once dry, sand it smooth. For loose joints, use wood glue and clamps. For damaged drawer bottoms, reinforce or replace thin panels if needed.
If veneer is lifting, apply wood glue beneath the loose area and clamp it flat. If veneer is missing, you can patch it, fill it, or choose a painted finish that hides the repair. Do not ignore structural problems. Paint is pretty, but it is not a chiropractor.
Step 4: Sand for Adhesion
Sanding does not always mean removing every bit of old finish. For a painted makeover, the goal is usually to scuff the surface so primer can grip. Use medium-grit sandpaper to dull glossy areas, then move to finer grit for a smoother feel. On flat surfaces, an orbital sander saves time. On carved details, use a sanding sponge or folded sandpaper.
If you are staining the wood, the process is more demanding. You may need to remove the old finish completely so the stain absorbs evenly. Be gentle with veneer because it is thin and easy to sand through. After sanding, vacuum the dust and wipe with a tack cloth or slightly damp cloth. Dust left behind will create bumps in the finish, also known as “DIY confetti.”
Step 5: Prime the Chest
Primer helps paint adhere, blocks stains, evens out color, and improves durability. This is especially important on antique furniture because old tannins, oils, and stains can bleed through light paint colors. Use a bonding primer for glossy or previously finished surfaces, and choose a stain-blocking primer if you notice dark wood, knots, or old water marks.
Apply primer in thin, even coats. Brush along edges and details, then use a small roller on flat drawer fronts and side panels. Let the primer dry according to the product instructions. Lightly sand after priming if the surface feels rough, then remove dust before painting.
Step 6: Choose Your Makeover Style
This is where the personality arrives. The finish should match your home, your patience level, and the condition of the chest.
Classic Painted Finish
A classic painted finish works beautifully for a bedroom or guest room. Soft white, warm cream, muted sage, dusty blue, charcoal, and deep navy are timeless choices. For a smooth modern look, use a durable furniture or cabinet enamel. Apply two thin coats rather than one thick coat. Thick paint leaves brush marks, drips, and regrets.
Two-Tone Wood and Paint
A two-tone makeover is ideal when the top is attractive solid wood but the body needs help. Sand and stain the top, then paint the base and drawers. This gives the piece warmth while still making it feel fresh. A walnut-stained top with a creamy white base is farmhouse classic. A natural oak top with a black body feels more modern and dramatic.
Chalk-Style Vintage Finish
Chalk-style paint creates a matte, soft look that suits antique shapes. It is popular for distressed, cottage, French country, and shabby-chic furniture. After painting, seal the surface with wax or a clear topcoat. Wax gives a gentle hand-rubbed look, while a water-based topcoat usually offers easier maintenance.
Stained Restoration
If the wood grain is beautiful, staining may be the best option. Strip or sand the old finish, apply wood conditioner if needed, stain evenly, and protect with polyurethane or another clear finish. Stained makeovers require more prep, but the result can look rich and authentic.
Bold Statement Piece
For a hallway, dining room, or creative office, consider a bold color. Emerald green, oxblood red, mustard yellow, or high-gloss black can turn a forgotten chest into the star of the room. Keep the hardware elegant so the final look feels intentional, not like the dresser lost a bet.
Paint Application Tips for a Professional Finish
Paint thin coats and let each coat dry fully. Sand lightly between coats with fine-grit sandpaper if you want an extra-smooth finish. Use long, steady strokes and avoid overworking paint once it starts to set. Remove drawers and paint them separately so edges do not stick to the frame.
For drawer fronts, paint the edges first, then the center panel. For carved details, use a brush to push paint into grooves, then smooth the surface before it dries. If using a roller, choose one designed for smooth surfaces. A thick nap roller can leave texture that looks less “antique charm” and more “orange peel with ambition.”
Hardware: Small Detail, Big Transformation
Hardware can completely change the personality of an antique chest of drawers. Clean original brass pulls for a traditional look, use matte black knobs for modern contrast, choose glass knobs for vintage sparkle, or install cup pulls for farmhouse style.
If replacing hardware, measure the center-to-center distance between screw holes. If the new pulls do not match, fill the old holes, sand them smooth, and drill new ones after painting. To avoid crooked hardware, make a simple cardboard template or use a cabinet hardware jig.
Creative Antique Chest of Drawers Makeover Ideas
1. The Elegant Guest Room Chest
Paint the body in warm ivory, keep the original brass pulls, and seal with a satin topcoat. Line the drawers with peel-and-stick wallpaper in a subtle floral pattern. The result feels clean, welcoming, and quietly expensive.
2. The Moody Entryway Statement
Use deep navy or charcoal paint with antique gold hardware. Add a mirror above it and a tray for keys. The chest becomes entryway storage for gloves, mail, dog leashes, and all the things that otherwise gather on the nearest chair.
3. The Natural Wood Revival
Strip the top and drawer fronts, stain them in a warm medium tone, and paint only the frame. This works especially well when the drawers have pretty grain or decorative veneer.
4. The Cottagecore Makeover
Choose soft sage green, pale blue, or creamy beige. Lightly distress the edges after painting, then seal with wax or matte topcoat. Add ceramic or aged brass knobs for a relaxed vintage look.
5. The Nursery Storage Chest
Paint the chest in a gentle neutral, replace sharp or loose hardware, and anchor it securely to the wall. Use top drawers for diapers and small clothes, lower drawers for blankets and toys. Safety matters more than style here, though luckily you can have both.
How to Seal and Protect the Finish
A chest of drawers gets touched often, so sealing matters. Painted pieces benefit from a durable clear topcoat, especially on the top surface and drawer fronts. Use water-based polyurethane or furniture topcoat for light colors because oil-based finishes can amber over time. For dark paint, either water-based or oil-based products may work depending on the look you want.
Apply thin coats and let each coat dry fully. Sand lightly between coats if the product recommends it. For chalk-style paint, wax can create a beautiful soft sheen, but it may need occasional maintenance. A clear topcoat is often better for high-use pieces.
Common DIY Mistakes to Avoid
Skipping the Cleaning Step
Paint does not stick well to furniture polish, grease, or dust. Clean first, even if the piece looks clean. Antique furniture is sneaky.
Painting Too Soon After Cleaning
Let the chest dry completely before sanding, priming, or painting. Moisture trapped under paint can cause adhesion problems.
Using One Heavy Coat
Two or three thin coats are smoother and stronger than one thick coat. Heavy coats drip, cure slowly, and can stay tacky.
Forgetting Drawer Fit
Paint adds thickness. Avoid heavy paint buildup on drawer sides and runners, or the drawers may stick.
Not Labeling Hardware
Put screws, knobs, and pulls in labeled bags. Antique furniture often has tiny variations, and guessing later can turn reassembly into a puzzle with emotional consequences.
Budget-Friendly Makeover Tips
You do not need to spend a fortune. Reuse original hardware if possible. Buy sample-size paint for small accent areas. Check your garage for sandpaper, brushes, and drop cloths before shopping. Use leftover wallpaper or fabric to line drawers. If the top is damaged, consider a stained wood-look finish, a painted topcoat, or even a removable marble-look contact paper for a low-commitment update.
The most valuable investment is time. Proper prep costs less than repairing a peeling paint job later.
Real DIY Experience: What This Project Teaches You
Every antique chest of drawers makeover begins with optimism. You look at the piece and imagine a flawless transformation: smooth paint, elegant hardware, drawers gliding like butter, and guests asking where you bought it. Then you remove the drawers and discover dust from the Truman administration, a missing screw, and one drawer that only opens if you whisper encouragement. This is normal. In fact, it is part of the charm.
The biggest lesson from refinishing old furniture is that preparation always takes longer than painting. Cleaning, repairing, sanding, and priming may feel slow, but they are the foundation of the final result. The actual painting is the fun part, but it cannot rescue a surface that was rushed. If the chest has old wax or furniture polish on it, paint may resist in strange patches. If sanding dust remains, the finish feels gritty. If primer is skipped, stains can bleed through and make your beautiful white dresser look like it has developed freckles overnight.
Another practical experience is learning to respect the drawers. Each drawer may fit best in its original slot, especially on older handmade or hand-adjusted furniture. Label the drawers with painter’s tape before removing them. Mark them as top left, middle right, bottom, or whatever system makes sense. This one small step can save you from repeatedly swapping drawers like you are solving an escape room designed by a cabinetmaker.
Hardware is also more important than beginners expect. Original hardware often looks unimpressive before cleaning, but a gentle polish can reveal warmth and detail. On one makeover, keeping the old brass pulls may make the entire piece feel authentic. On another, replacing dated wooden knobs with simple black or antique gold pulls can modernize the chest instantly. If you change the hardware layout, drill carefully. Measure twice, drill once, and do not trust your eyeballs unless your eyeballs come with a built-in laser level.
Color choice teaches patience too. A paint color that looks perfect on a tiny card may look completely different on a large dresser. Test a small area or paint a sample board and view it in the room where the piece will live. Natural light, warm bulbs, cool bulbs, wall color, and flooring can all change how paint reads. Soft green may become gray. Cream may become yellow. Black may look dramatic and elegant, or it may reveal every dust particle in the zip code.
The finishing stage is where many DIYers get impatient. After the final coat looks dry, it is tempting to shove the drawers back in and decorate the top immediately. Resist. Paint and topcoat need curing time. Dry to the touch does not always mean fully hardened. Give the piece time before heavy use, and avoid placing lamps, trays, books, or decor on the top too soon. Your future self will appreciate not having a vase permanently embossed into the finish.
Finally, an antique chest makeover teaches that perfection is not the point. Tiny dents, uneven grain, old nail holes, and faint age marks can remain part of the story. The goal is not to make the chest look factory-new. The goal is to make it clean, beautiful, stable, useful, and personal. A few imperfections remind you that the piece had a life before you and now gets another one with you. That is why DIY furniture makeovers are addictive: you are not just painting a dresser. You are rescuing storage with a backstory.
Conclusion
An antique chest of drawers makeover is a rewarding DIY project that blends creativity, restoration, safety, and practical design. Whether you choose a classic painted finish, a two-tone wood-and-paint look, a stained restoration, or a bold statement color, the best results come from careful prep. Clean thoroughly, repair damage, sand properly, prime when needed, apply thin coats, protect the finish, and anchor the chest securely after the makeover.
Old furniture does not need to be perfect to be beautiful. In fact, the scratches and quirks are often what make it worth saving. With a little patience and a sensible plan, that dusty antique chest of drawers can become one of the most charming and useful pieces in your home.