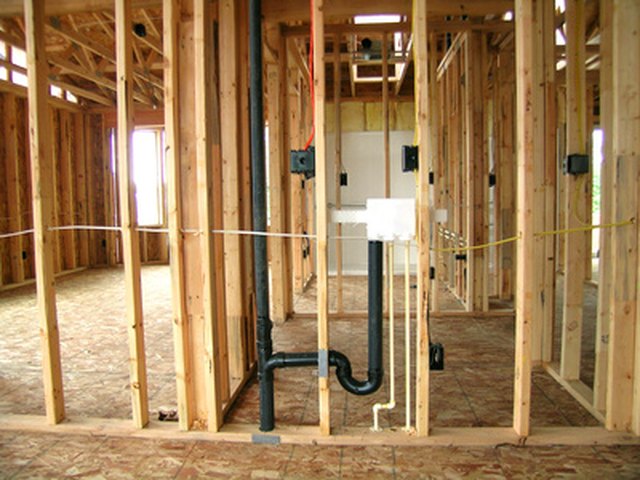
A sink that gulps, gurgles, drains slowly, or acts as though it is reconsidering every life choice mayr flow. Without enough air entering the drainage system, moving wastewater can create negative pressure that interferes with the water seal in a P-trap and contributes to noisy or sluggish drainage.
One practical solution in many remodeling situations is an auto vent, more formally called an air admittance valve or AAV. This compact, one-way plumbing valve opens when negative pressure develops in the drain system, allowing air to enter. It then closes when pressure equalizes, helping prevent sewer gases from escaping into the room. alling an auto vent in a drain can be a manageable DIY project for a straightforward sink configuration. The challenge is not simply screwing a mysterious plastic mushroom onto a pipe and hoping plumbing physics approves. The valve must be correctly sized, positioned, accessible, and permitted by local plumbing rules.
What Is an Auto Vent, and Why Does a Drain Need One?
Every plumbing fixture with a trap needs a way to manage pressure in the drainage system. When a sink releases a large amount of water, the flowing water can create suction behind it. Without adequate venting, that suction can disturb the trap seal, slow drainage, or produce the familiar glug-glug soundtrack that no homeowner has ever requested.
A conventional plumbing vent usually connects the drainage system to outdoor air through piping that terminates outside the building. An air admittance valve takes a different approach. It admits air locally when negative pressure occurs but remains closed under normal or positive pressure. Because an AAV admits air rather than releasing pressure from the system, model plumbing codes generally still require at least one qualifying vent stack or stack vent to extend outdoors for the plumbing system. mon Situations Where an AAV May Be Useful
Air admittance valves are commonly considered for kitchen sinks, bathroom vanities, laundry fixtures, island sinks, remote fixtures, and remodeling projects where extending a traditional vent pipe through walls and the roof would be difficult. They can be especially convenient when a cabinet provides accessible space above the fixture drain.
However, an auto vent is not a cure for every drainage problem. A clogged pipe, grease buildup, an improperly installed P-trap, a damaged sewer line, or a poorly designed drainage system will not suddenly become healthy because an AAV has joined the party.
Before You Install an Auto Vent
1. Check Local Plumbing Code Requirements
This is the step most likely to be skipped and the one most likely to create an unpleasant surprise during an inspection. Air admittance valves are recognized by major model plumbing codes, but individual states, cities, and local jurisdictions may adopt, amend, restrict, or interpret those rules differently.
Current International Plumbing Code provisions require individual and branch-type AAVs to be installed at least 4 inches above the horizontal branch drain or fixture drain being vented. The valve must also remain accessible and be located where air can enter it. A valve hidden permanently behind drywall without an approved access arrangement is not a clever secret passage for air; it is a maintenance problem waiting for a future homeowner. Confirm That Poor Venting Is Actually the Problem
Before cutting pipe, check for simpler causes of slow drainage. Remove and clean the P-trap if appropriate. Look for obvious buildup in the trap arm. If several fixtures drain slowly at once, the problem may involve a larger branch drain or main sewer line rather than the vent serving one sink.
A venting issue is more likely when the drain is otherwise clear but gurgles, drains inconsistently, or appears to pull water from a nearby trap. Diagnosing first can save you from completing a beautiful AAV installation that performs flawlessly while the actual clog continues sitting ten feet downstream, feeling smug.
3. Choose the Correct Air Admittance Valve
Select a valve approved for sanitary drainage and appropriately rated for the fixture or fixtures it will serve. Individual and branch-type AAVs are commonly manufactured to standards such as ASSE 1051, while stack-type valves fall under different requirements. Valve capacity may be expressed in drainage fixture units, or DFUs, so do not assume that every valve is suitable for every plumbing load. match the installation components to your piping system. PVC, ABS, and other materials require compatible fittings, primers, cements, or approved transition methods. Avoid creating an experimental chemistry exhibit under the kitchen sink by mixing materials and adhesives that were never designed to work together.
Tools and Materials You May Need
- An appropriately sized and approved air admittance valve
- A compatible threaded or manufacturer-supplied adapter
- A sanitary tee or other code-appropriate drainage fitting
- Matching PVC or ABS pipe
- Compatible primer and solvent cement, when required
- PTFE thread-seal tape, if specified by the valve manufacturer
- A tape measure and marker
- A pipe cutter, fine-tooth saw, or appropriate tubing tool
- A deburring tool, utility knife, or file
- Adjustable pliers for removable trap connections
- A bucket, towels, and safety glasses
The exact materials depend on the existing drain configuration. Dry-fit everything before applying solvent cement. Plumbing fittings are wonderfully cooperative until the glue goes on; then they suddenly become very interested in permanent decisions.
How to Install an Auto Vent in a Drain: Step by Step
Step 1: Stop Using the Fixture and Clear the Work Area
You usually do not need to shut off the home’s main water supply to modify a sink drain, but nobody should use the fixture while the drain is open. Remove stored items from the cabinet and place a bucket or towels beneath the P-trap. Even a drain that looks empty often contains just enough water to find the cleanest pair of shoes nearby.
Step 2: Inspect the Existing Drain Layout
Identify the P-trap, trap arm, branch drain, and the point where an upright vent connection can be created. In a common under-sink arrangement, the trap arm enters the side inlet of an upright sanitary tee. Wastewater continues downward through the drain, while the top of the tee supports a vertical riser leading to the AAV.
The exact fitting arrangement matters. Drainage fittings are directional, and the waste path should follow the fitting’s intended sweep. Maintain any required drain slope and do not create a vent connection that accidentally becomes a place for wastewater and debris to collect.
Step 3: Measure the Required Valve Height
Plan the vertical riser so the AAV will meet local code and manufacturer requirements. Under the 2024 International Plumbing Code, an individual or branch-type AAV must be at least 4 inches above the horizontal branch drain or fixture drain it serves. Manufacturer instructions may specify additional positioning requirements, including orientation and installation height. ractical under-sink installations, placing the valve higher in the cabinet often helps protect it from splashing and keeps it comfortably above the drainage connection. Do not jam it tightly against the countertop, however. Leave enough room to inspect, remove, and replace it.
Step 4: Cut and Prepare the Drainpipe
Mark the pipe carefully, accounting for how deeply the pipe will enter each fitting socket. Cut the pipe squarely. A crooked cut can make alignment harder and reduce the quality of a solvent-welded joint.
Remove burrs and rough edges from the cut pipe. Deburring is easy to dismiss as cosmetic, but a clean pipe end helps the fitting seat properly and avoids leaving ragged material inside the drainage path.
Step 5: Dry-Fit the Sanitary Tee and Vertical Riser
Assemble the new configuration without glue first. Confirm that the P-trap and trap arm line up without being forced sideways. The trap should sit naturally, not under tension from pipes that are trying to occupy different zip codes.
Position the sanitary tee or other required fitting in the correct drainage orientation. Add the vertical pipe section that will support the AAV adapter. Check the final height and make sure the completed valve will remain accessible.
Step 6: Solvent-Weld the Permanent Pipe Connections
Once the dry fit is correct, mark fitting alignment where helpful, disassemble the pieces, and join them according to the pipe and cement manufacturer’s directions. PVC and ABS systems have different product requirements, and local rules may govern the materials that can be used.
Work efficiently when using solvent cement because fittings can set quickly. Push the pipe fully into the fitting and hold it as directed to reduce the chance that it will creep back out.
Step 7: Install the AAV Adapter
Many AAV systems use an adapter that is solvent-welded to the vent riser, followed by a threaded valve connection. Install the adapter according to the manufacturer’s directions. Oatey’s published installation guidance, for example, describes preparing the pipe, solvent-welding the adapter, applying thread-seal tape where directed, and then threading the valve into the adapter. ot glue a removable threaded valve permanently into place unless the product instructions specifically call for that method. Air admittance valves are mechanical devices and may eventually require inspection or replacement.
Step 8: Thread the Auto Vent Into Position
Install the valve upright with the air inlet facing upward. Many common AAV products require a substantially vertical position and limit how far the valve may be tilted from plumb. Follow the exact instructions for your model rather than assuming that “mostly upward-ish” is a recognized plumbing specification. ten the valve securely without over-tightening plastic threads. If thread-seal tape is recommended, apply it in the correct direction so it does not unravel while the valve is screwed into the adapter.
Step 9: Make Sure the Valve Can Breathe
An AAV works only if air can reach it. A valve inside an ordinary sink cabinet can often remain accessible while receiving adequate air through normal cabinet openings. A valve installed in a wall cavity requires an approved access panel, grille, or recessed box arrangement that permits airflow and future servicing.
Model-code guidance requires access and ventilation around AAVs. Where valves are installed around insulation, additional clearance requirements can apply; the 2024 IPC specifies at least 6 inches above insulation material. p 10: Reassemble the Trap and Test the Drain
Reconnect any P-trap components you removed. Hand-tighten slip-joint nuts and then make only the additional adjustment needed for a watertight connection. Excessive force can distort washers or crack plastic fittings.
Run water slowly and inspect every joint. Then fill the sink with several inches of water and release it to create a larger discharge. Watch for leaks and listen to the drain. A properly functioning system should drain smoothly without excessive gurgling.
After testing, check again around the valve and fittings. Sewer odor after installation can indicate a failed connection, a dry or siphoned trap, an incorrectly installed valve, or another drainage-system problem. Do not simply spray air freshener and declare victory over the laws of sanitation.
Common Auto Vent Installation Mistakes
Installing the Valve Too Low
One of the most common errors is placing the valve immediately beside the horizontal drain. The required minimum height exists to keep the AAV in the venting portion of the system and away from normal wastewater flow. Measure before cutting.
Hiding the Valve Permanently
An AAV must remain accessible. Mechanical components can fail, stick, become contaminated, or need replacement. Do not bury the valve behind finished drywall without an approved means of access.
Using an Undersized Valve
A small valve intended for a single fixture should not automatically be expected to vent a large branch serving numerous fixtures. Select the AAV according to pipe size, fixture load, applicable code, and manufacturer ratings.
Using an AAV to Mask a Clogged Drain
If the drain remains slow after the trap and branch line are properly cleared, further diagnosis may be necessary. Venting problems and clogs can produce similar symptoms, but they require different repairs.
Installing the Valve Sideways
The valve mechanism depends on correct orientation. Install it vertically within the limits specified for the particular product.
Sealing the Valve in an Airtight Space
An air admittance valve needs air. Locking it inside an airtight enclosure is a little like installing a window and then bricking over the outside.
How to Know Whether the Installation Worked
After installation, the sink should drain without new leaks, severe gurgling, or trap-seal problems. Test the system more than once. Run a small stream, drain a full basin, and operate nearby fixtures when appropriate to observe whether the drainage behavior remains stable.
Do not expect an AAV to make every plumbing sound disappear. Water moving through pipes naturally makes some noise. The goal is a properly vented drainage system, not a sink that performs its duties with the silence of a museum security guard.
If the fixture still drains slowly, a trap loses its water seal, sewer odors develop, or several drains in the building behave poorly, stop treating the problem as a simple single-fixture vent issue. A licensed plumber can evaluate branch sizing, conventional venting, blockages, positive pressure, and other system-wide conditions.
Practical Experience: What Common Auto Vent Projects Teach You
A typical first-time auto vent installation often teaches a lesson before the first pipe is cut: space is more valuable than it looks. Under a sink, the garbage disposal, supply lines, shutoff valves, dishwasher hose, P-trap, cabinet drawers, and decades of mysterious cleaning products may all be competing for the same few square inches. An installation that looks simple in a diagram can become a three-dimensional puzzle in a real cabinet.
The best approach is usually to spend more time dry-fitting than seems necessary. Assemble the sanitary tee, riser, adapter, valve, and trap without cement. Close the cabinet doors. Check drawer movement. Confirm that the valve can still be unscrewed later. A five-minute dry fit can prevent a permanent installation that blocks a drawer by half an incha measurement universally known as “just enough to be extremely annoying.”
Another common experience is discovering that old plumbing rarely lines up perfectly with new fittings. An existing trap arm may be slightly too high, too short, or angled from years of improvised repairs. The temptation is to pull everything into position and tighten the nuts until the pipes surrender. That usually creates stress at the joints. A better installation allows the trap and drain fittings to align naturally. Sometimes replacing one additional section of pipe produces a cleaner, more reliable result than forcing old and new components together.
Height planning is another lesson that becomes obvious only after someone cuts the riser too short. The AAV needs to meet its minimum installation height while remaining serviceable. The practical habit is to calculate the entire stack-up before making the final cut: fitting socket depth, tee dimensions, riser length, adapter height, valve height, and available cabinet clearance. Measure twice, dry-fit once, cut once, and avoid inventing new vocabulary while staring at a pipe that is now one inch too short.
Testing also deserves more patience than many DIY projects receive. Running the faucet for five seconds is not a serious test. A better check is to inspect the dry joints visually, run a moderate stream, fill and release the sink, and then examine every connection again with a dry paper towel. Small leaks are easier to detect when the surrounding fittings are completely dry.
Many successful installations also reinforce an important diagnostic lesson: an AAV should improve a genuine venting problem, but it cannot compensate for bad drainage design or a blockage. If a sink drains poorly because the trap is packed with grease or the branch line is restricted, adding a valve may change the sound without fixing the underlying problem. Good DIY plumbing starts with diagnosis rather than parts shopping.
Finally, experienced installers tend to think about the next person who will work on the system. A valve placed where it can be inspected and replaced is better than one squeezed into the highest, darkest corner of a cabinet simply because it technically fits. Neat pipe alignment, accessible slip joints, appropriate fittings, and a removable AAV make future maintenance dramatically easier.
The most satisfying result is not merely a drain that works on installation day. It is a system that drains smoothly, stays dry at every joint, complies with applicable requirements, and can be serviced without dismantling half the kitchen. That is the difference between making plumbing work and making plumbing work well.
Conclusion
Learning how to install an auto vent in a drain is largely a matter of understanding what the valve is supposed to do and giving it the correct environment in which to do it. Verify that an AAV is permitted, choose a properly rated valve, use the correct drainage fittings, position the valve at the required height, keep it upright, provide airflow, and leave it accessible.
For a straightforward sink retrofit, the actual assembly may be relatively simple. The important work happens in the planning: diagnosing the problem correctly, checking code requirements, measuring the layout, and resisting the urge to turn a plumbing repair into an improvisational sculpture.
When installed correctly, an air admittance valve can be an efficient solution for venting certain fixtures where conventional vent piping is difficult to add. When the drainage layout is complicated, local rules are unclear, or multiple fixtures are affected, bringing in a licensed plumber is often the smartest tool in the box.